Springform Cake Pan Guide
Baking is more than mixing ingredients and turning on the oven. It’s about using the right tools to get perfect results. One tool that stands out for both beginners and experts is the springform cake pan. If you’ve ever baked a cheesecake or a delicate mousse cake, you know how tricky it can be to remove them from a regular pan without damage. That’s where the springform pan shines. This guide will help you understand everything about springform cake pans—how they work, why they’re special, how to choose the right one, and how to use them for beautiful, professional-looking cakes.
You’ll discover not only the basics but also practical tips, common mistakes, and smart ways to get the most from your springform pan. Whether you bake often or just for special events, you’ll find valuable insights here that go beyond the usual advice.
Get ready to unlock the secrets of baking with this essential kitchen tool.
What Is A Springform Cake Pan?
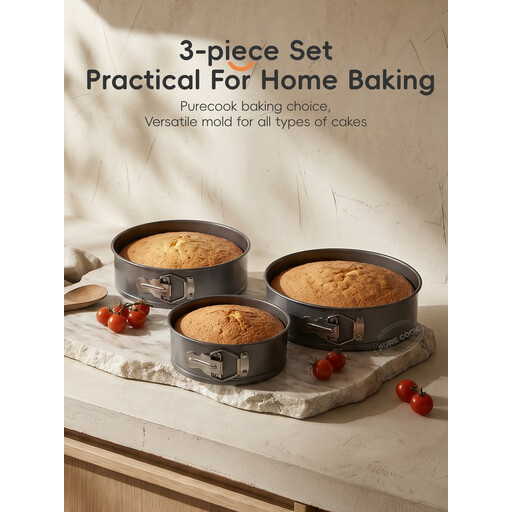
A springform cake pan is a round baking pan with sides that can be removed from the base. The pan has a latch or buckle (called the spring) on the side. When you release the latch, the sides loosen and lift away, leaving the cake sitting on the flat base. This design makes it easy to remove delicate cakes, like cheesecakes or tarts, without flipping them over or damaging their shape.
Springform pans usually come in sizes ranging from 6 inches to 12 inches in diameter. The most common size is 9 inches. They are made from different materials, including aluminum, stainless steel, and non-stick coated metal. Some pans also have a glass base for serving.
Key Features
- Removable sides: The main advantage. Cakes stay intact.
- Latch mechanism: Easy to open and close, even for beginners.
- Flat base: Allows you to serve the cake directly from the pan.
- Leak-proof design: Some pans are designed to prevent batter from leaking.
Why Is It Different?
Unlike regular cake pans, springform pans let you remove the cake without flipping or sliding. This is especially important for fragile desserts that can break or crumble easily. It’s also ideal for layered cakes that need a neat finish.
When To Use A Springform Pan
You don’t need a springform pan for every cake, but it’s essential for certain recipes. Here are situations where it makes a big difference:
- Cheesecakes: These cakes are soft and dense. They stick to regular pans and break easily when removed. Springform pans let you release the sides and keep the cake perfect.
- Ice Cream Cakes: Cold desserts like ice cream cakes need gentle handling. The pan’s sides help you lift them out without melting or damaging the layers.
- Tarts and Tortes: Many tarts have delicate crusts. The springform pan helps maintain the shape when serving.
- Layered Cakes: When you build cakes with multiple layers or fillings, removing them from a traditional pan can be tough. Springform pans keep everything in place.
- Mousse Cakes: Mousse is light and airy. It can collapse if handled roughly. The removable sides protect the structure.
Non-obvious Uses
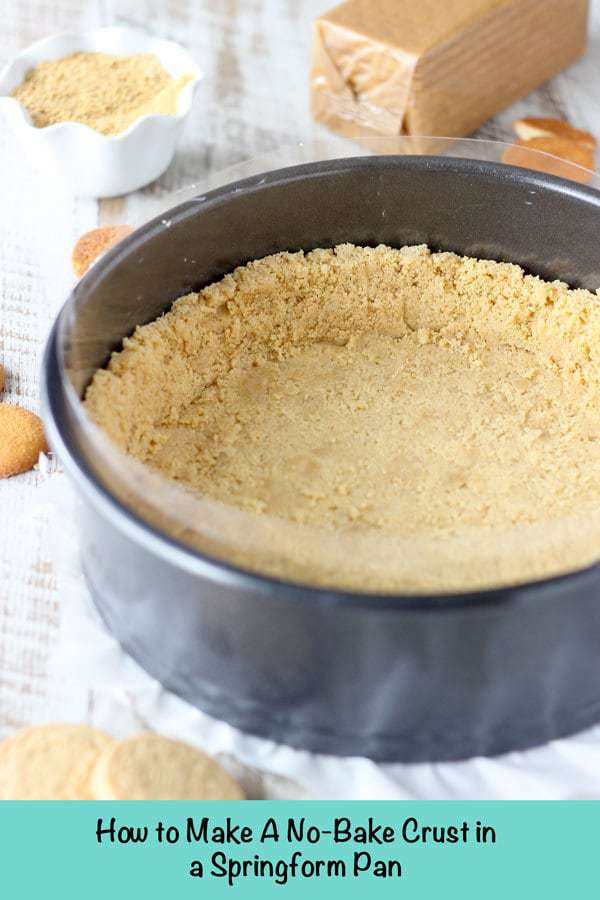
Some bakers use springform pans for savory dishes like deep-dish pizza or quiche. The sides help serve slices neatly. You can also use them for no-bake desserts that need chilling instead of baking.
Credit: beyondfrosting.com
Types Of Springform Cake Pans
There’s not just one kind of springform pan. Choosing the right one depends on your needs and budget. Here are the main types:
Material Choices
- Aluminum: Lightweight and good for even baking. Aluminum pans are affordable but can bend or scratch easily.
- Stainless Steel: Durable and resistant to rust. Stainless steel pans often cost more but last longer.
- Non-stick Coated: Makes cake removal easier. Non-stick pans are popular but the coating can wear off over time.
- Glass Base: Some pans come with a glass bottom for serving. They look nice but may not heat as evenly.
Shape Variations
- Round: The classic shape, ideal for cheesecakes and most cakes.
- Square: Good for brownies or bars. Less common but useful for special recipes.
- Heart-shaped: Popular for special occasions like Valentine’s Day.
- Mini Pans: For small, single-serving cakes or desserts.
Sizing Options
The most common sizes are 6-inch, 8-inch, 9-inch, and 10-inch. Some sets include multiple sizes for flexibility. Standard recipes often call for a 9-inch pan.
Here’s a comparison of popular springform pan sizes:
| Pan Size (Diameter) | Typical Uses | Servings |
|---|---|---|
| 6-inch | Mini cakes, small cheesecakes | 4-6 |
| 8-inch | Standard cakes, mousse | 8-10 |
| 9-inch | Cheesecakes, tarts | 10-12 |
| 10-inch | Large cakes, layered desserts | 12-16 |
Leak-proof Vs. Standard
Some springform pans are advertised as leak-proof. This means the base fits tightly into the sides, stopping batter from escaping. However, even “leak-proof” pans can leak thin batters. For most cakes, standard pans work fine. If you bake with liquid batters, you may want extra protection.
How To Choose The Best Springform Pan
With so many options, picking the right springform pan can be confusing. Here’s what matters most:
1. Material Quality
Choose a heavy-duty material like stainless steel or thick aluminum. It lasts longer and resists warping. Non-stick coating is helpful, but check reviews to see if it flakes off easily.
2. Size
Think about the recipes you use most. If you bake for a family, a 9-inch pan is standard. For small batches, a 6-inch or 8-inch works well.
3. Leak-proof Design
If you make cheesecakes or recipes with runny batter, look for a leak-proof base. Some pans have a silicone ring around the base for extra protection.
4. Easy-to-use Latch
A strong, smooth latch is key. Cheap pans may have latches that break or stick. Try to check the latch before buying, or read online reviews.
5. Cleaning
Non-stick pans are easier to clean, but the coating can wear off. Stainless steel pans can handle scrubbing but may need greasing. Glass bases look nice but can be slippery.
6. Price
Prices range from $10 to $50. Cheap pans work for simple baking, but higher-priced pans last longer and offer better performance.
Here’s a quick comparison of popular pan materials:
| Material | Durability | Ease of Cleaning | Typical Price |
|---|---|---|---|
| Aluminum | Medium | Easy | $10–$20 |
| Stainless Steel | High | Medium | $20–$40 |
| Non-stick Coated | Medium | Very Easy | $15–$30 |
| Glass Base | Medium | Easy | $25–$50 |
Common Buying Mistakes
- Choosing a pan that’s too big or too small for your favorite recipes.
- Buying a cheap pan with a weak latch or base that leaks.
- Ignoring reviews about non-stick coating flaking off.
- Picking a pan without checking if it’s dishwasher safe.
How To Use A Springform Pan
Even with the best pan, mistakes can ruin your cake. Follow these steps for perfect results:
Step 1: Prepare The Pan
- Grease the base and sides with butter or non-stick spray. Some recipes call for parchment paper on the base for extra protection.
- If making a cheesecake or mousse, wrap the outside with foil to prevent leaks, especially when using a water bath.
Step 2: Assemble The Pan
- Fit the base into the sides and close the latch tightly. Check that the pan feels solid and there are no gaps.
Step 3: Pour The Batter
- Pour the batter slowly. If the batter is thin, pour near the center to reduce leaks.
- For layered cakes, add each layer carefully and tap the pan gently to remove air bubbles.
Step 4: Bake
- Place the pan on a baking sheet. This catches any leaks and makes moving the pan easier.
- Follow your recipe’s baking time and temperature.
Step 5: Cooling
- Let the cake cool in the pan for at least 10–15 minutes.
- For chilled desserts, cool completely before removing the sides.
Step 6: Removing The Cake
- Run a thin knife around the edge to loosen the cake.
- Open the latch slowly and lift the sides away.
- Slide a spatula under the cake if needed, but be gentle.
Step 7: Serving
- Serve from the base or transfer to a plate. For delicate cakes, serving from the base is safer.
Practical Example
If you make a classic New York cheesecake, wrap the pan in two layers of foil. Pour the batter, bake in a water bath, cool, then release the sides. The cheesecake stays smooth and intact.
Non-obvious Insight
Don’t forget to check the latch before every use. Over time, it can loosen or bend, which leads to leaks. A quick inspection saves frustration.
Cleaning And Maintaining Your Springform Pan
Taking care of your springform pan keeps it working well for years. Here’s what you need to know:
Washing
- Wash with warm, soapy water after each use.
- Avoid harsh scrubbers on non-stick surfaces.
- Dry thoroughly to prevent rust.
Removing Stains
- For stubborn stains, soak in warm water with baking soda.
- Use a soft sponge to scrub gently.
Latch Maintenance
- Check the latch for food buildup. Clean carefully with a toothbrush if needed.
- Lubricate with a drop of cooking oil if it feels stiff.
Storage Tips
- Store with the latch open to prevent pressure on the spring.
- Keep away from heavy items that could bend the sides.
Dishwasher Safety
- Most stainless steel and glass pans are dishwasher safe.
- Non-stick pans may need hand washing to protect the coating.
Common Mistake
Many people assemble the pan before washing, but it’s easier to clean the base and sides separately. This prevents water from getting trapped in the latch.
Springform Pan Troubleshooting
Even good pans can cause problems. Here are solutions to common issues:
Batter Leaks
- Wrap the outside with aluminum foil before baking.
- Use thicker batter if possible.
- Place the pan on a rimmed baking sheet.
Stuck Cake
- Grease well and use parchment paper.
- Run a warm knife around the sides before releasing the latch.
Bent Sides
- Avoid dropping or stacking heavy items on the pan.
- If the sides bend, try to reshape gently by hand.
Broken Latch
- If the latch breaks, replacement parts may be available online.
- For cheap pans, it’s often better to buy a new one.
Uneven Baking
- Use a heavy-duty pan for even heat. Thin pans may cause hot spots.
- Rotate the pan halfway through baking for uniform results.
Example: Cheesecake Disaster
If your cheesecake leaks during baking, don’t panic. Let it finish. Often, the cake will still set, and the leak won’t ruin the flavor. Clean up after, and wrap the pan better next time.
Comparing Springform Pan Brands
Not all springform pans are made equal. Here’s a quick look at well-known brands:
| Brand | Material | Leak-Proof | Price Range | Special Features |
|---|---|---|---|---|
| Wilton | Non-stick | Yes | $15–$25 | Easy-release latch, dishwasher safe |
| Nordic Ware | Aluminum | No | $20–$30 | Heavy-duty, large sizes |
| Fat Daddio’s | Stainless steel | Yes | $25–$40 | Professional quality, glass base option |
| Kaiser | Non-stick | Yes | $20–$35 | German engineering, heart-shaped |
Non-obvious Insight
Professional bakers often recommend buying two pans of different sizes. This lets you adjust recipes or make layered cakes easily.

Credit: www.amazon.com
Springform Pan Alternatives
You might wonder if you need a springform pan at all. Here are alternatives and when to use them:
Regular Cake Pan
Works for simple cakes but not for delicate ones. Removing the cake can be tricky.
Silicone Pan
Flexible sides make it easy to release cakes. However, silicone pans don’t provide a crisp crust and can be wobbly.
Tart Pan With Removable Bottom
Good for tarts and pies. Not ideal for tall cakes.
Adjustable Ring Mold
Used in professional kitchens. No base, so you must place it on a lined baking sheet.
Glass Pie Plate
Useful for pies, not for layered or tall cakes.
When To Switch
If you often bake cheesecakes or mousse cakes, stick with a springform pan. For brownies or simple sponge cakes, a regular pan works fine.
Smart Tips For Better Springform Baking
Even experienced bakers miss some tricks. Here are practical tips to help you bake like a pro:
- Use double foil wrapping when baking in a water bath. This prevents leaks even if your pan isn’t leak-proof.
- Cool cakes slowly in the pan. Rushing can cause cracks or collapse.
- Don’t over-tighten the latch. Too much force can bend the sides or break the spring.
- Test with water first. Pour water into the empty pan to check for leaks before using with batter.
- Avoid metal utensils in non-stick pans. This keeps the coating in good shape.
- Freeze before unmolding for mousse or ice cream cakes. It makes removal easier and keeps layers sharp.
- Clean the latch area thoroughly. Food buildup can make the latch stick, causing problems later.
Example
If you bake a layered mousse cake, chill each layer separately. This keeps colors and flavors neat and prevents mixing.
Recipes Perfect For Springform Pans
Looking for inspiration? Here are classic recipes made easier with a springform pan:
Classic New York Cheesecake
- 2 pounds cream cheese
- 1 cup sugar
- 4 eggs
- 1 cup sour cream
- 1 teaspoon vanilla
- Graham cracker crust
Mix ingredients, pour into a foiled springform pan, bake at 325°F for 60 minutes, cool, then unmold.
Chocolate Mousse Cake
- 1 chocolate sponge layer
- 2 cups whipped cream
- 1 cup melted chocolate
Layer sponge and mousse in the pan, chill for 4 hours, release sides, and serve.
Lemon Tart
- Shortbread crust
- Lemon custard filling
Bake crust, pour filling, chill, then remove sides.
No-bake Oreo Ice Cream Cake
- Oreo crust
- Ice cream filling
- Chocolate topping
Press crust, layer ice cream, freeze, and unmold.
Deep-dish Quiche
- Pie crust
- Egg mixture with cheese and vegetables
Pour into the pan, bake, cool, and release sides.
Springform Pan Safety And Health
Baking is fun, but safety matters. Here’s what you need to know:
Food Safety
- Wash pans after each use to prevent bacteria.
- Avoid using pans with flaking non-stick coating.
- Don’t store food in the pan for long periods.
Material Safety
- Aluminum pans can react with acidic foods (like lemon). Stainless steel is safer for these recipes.
- If you see scratches or rust, replace the pan.
Heat Handling
- Most springform pans are oven safe up to 450°F.
- Avoid broiling, as high heat can damage the latch or coating.
Credit: www.joybuy.de
Springform Pan History And Fun Facts
The springform pan was invented in Germany in the early 20th century. It became popular for baking German-style cheesecakes and tarts. Today, it’s used worldwide for both sweet and savory recipes.
- The largest springform pan ever made was used in New York to bake a 5-foot cheesecake.
- Professional bakers sometimes use custom springform pans for wedding cakes.
If you want to learn more about the history and design, check out this Wikipedia entry.
Frequently Asked Questions
What Size Springform Pan Should I Buy?
A 9-inch springform pan is the most versatile. It fits most standard recipes and serves 10–12 people. If you bake small batches, consider a 6-inch or 8-inch pan.
Can I Use A Springform Pan For Brownies Or Regular Cakes?
Yes, but it’s best for cakes that are hard to remove from standard pans. For brownies or sponge cakes, a regular pan is easier and less likely to leak.
How Do I Prevent Leaks In My Springform Pan?
Wrap the outside with aluminum foil before baking, especially with liquid batters. Place the pan on a baking sheet to catch any drips. Test the pan with water before using.
Is It Safe To Use A Springform Pan In The Dishwasher?
Most stainless steel pans are dishwasher safe. Non-stick pans may lose their coating if washed often in a dishwasher. Always check the manufacturer’s instructions.
Can I Bake Savory Dishes Like Quiche In A Springform Pan?
Yes! Springform pans are great for deep-dish quiche, layered casseroles, and even lasagna. The removable sides make serving easy and keep layers neat.
Baking with a springform pan opens up a world of possibilities. You can create beautiful, delicate cakes and desserts that look professional and taste amazing. With the right pan, careful preparation, and a few smart tricks, you’ll impress friends and family every time.
Remember to check material, latch quality, and size before buying, and take care of your pan after each use. Enjoy baking—and don’t forget to try something new with your springform cake pan!