Skip to content
If you love rich, strong coffee but don’t have an espresso machine, a moka pot could be your new best friend. It’s simple, affordable, and makes coffee that wakes you up with every sip.
But if you’ve never used one before, it might seem a bit tricky. Don’t worry—you’re about to learn exactly how to use a moka pot to make the perfect cup every time. Keep reading, and you’ll discover easy steps that turn your morning routine into something truly satisfying.

Choosing the Right Moka Pot: Expert Tips for Better Coffee
Choosing the right moka pot makes a big difference in your coffee experience. The right pot helps you brew strong, rich coffee easily. Several factors influence your choice, such as the material, size, and special features. Understanding these helps you pick a moka pot that fits your needs and kitchen setup.
Moka Pot Materials and Sizes
Moka pots come in different materials and sizes. The two most common materials are aluminum and stainless steel. Each has its benefits and drawbacks.
- Aluminum: Lightweight and heats up quickly. It gives a classic look but can react with acidic coffee over time.
- Stainless Steel: More durable and resistant to corrosion. It keeps the coffee taste pure but takes longer to heat.
Choosing the right size depends on how much coffee you drink or serve at once. Moka pots are usually measured in “cups,” which means espresso-sized servings.
| Size (Cups) | Approximate Coffee Volume | Best For |
|---|---|---|
| 1-2 | 50-100 ml | Single person or small espresso shot |
| 3-4 | 150-200 ml | Couples or small families |
| 6-9 | 300-450 ml | Groups or coffee lovers |
Pick a size that matches your daily coffee use to avoid waste or frequent brewing. A smaller pot heats faster, while a larger pot serves more people.
Key Moka Pot Features to Consider Before Buying
Some moka pots come with extra features that improve your brewing experience. These features add convenience and safety.
- Safety Valve: Releases excess pressure to prevent accidents.
- Heat-resistant Handle: Keeps the handle cool for easy pouring.
- Transparent Lid: Lets you watch the coffee as it brews.
- Easy-to-clean Design: Simple parts and wide openings help with cleaning.
Also, check if the moka pot works on your stove type. Not all pots are compatible with induction cooktops.
| Feature | Benefit | Tip |
|---|---|---|
| Safety Valve | Prevents pressure build-up | Must be present for safety |
| Heat-resistant Handle | Safe, easy handling | Look for plastic or silicone handles |
| Induction Compatibility | Works on all stove types | Check product details before buying |
Choosing features depends on your needs and kitchen. Prioritize safety and ease of use for a better coffee routine.
Preparing Your Moka Pot for First Use: Step-by-Step Setup Guide
Using a moka pot starts with proper preparation. Preparing the moka pot ensures a great coffee taste and a smooth brewing process. Before making your first cup, it is important to clean and assemble the pot correctly. These steps help avoid any off-flavors and make sure the parts fit well. The moka pot has several parts that need attention before use. Follow simple instructions to get your moka pot ready for brewing rich espresso-style coffee.
How to Clean a New Moka Pot Before Brewing
Cleaning the moka pot before the first use is essential. It removes any dust, metal residues, or manufacturing oils. These can affect the flavor of your coffee and the safety of your brew. Use warm water and mild soap for the cleaning. Avoid harsh chemicals or dishwasher use, as they can damage the pot.
- Disassemble all parts carefully.
- Rinse each piece with warm water.
- Wash the parts with mild soap and a soft sponge.
- Rinse thoroughly to remove all soap residues.
- Dry the parts completely with a clean towel.
Do not use abrasive cleaners or steel wool, as they can scratch the aluminum or stainless steel surface. For aluminum moka pots, avoid soaking the parts for too long to prevent corrosion. Stainless steel pots are more durable but still need gentle cleaning.
| Cleaning Step | Details |
|---|---|
| Disassemble | Separate the top chamber, filter funnel, gasket, and bottom chamber. |
| Rinse | Use warm water to remove loose particles. |
| Wash | Use mild soap and a soft sponge. |
| Rinse Again | Remove all soap residues. |
| Dry | Use a clean towel or air dry completely. |
Cleaning before the first use helps your moka pot last longer. It also ensures your coffee has a clean, fresh taste from the start.
You might find this helpful: Best Moka Pot for Induction Stove
How to Assemble a Moka Pot Correctly
After cleaning, the moka pot must be assembled correctly. The moka pot has three main parts:
- Bottom chamber: Holds the water.
- Filter funnel: Holds the coffee grounds.
- Top chamber: Collects the brewed coffee.
Follow these steps to assemble your moka pot:
- Fill the bottom chamber with fresh water. Do not exceed the safety valve.
- Place the filter funnel inside the bottom chamber.
- Fill the filter funnel with medium-fine ground coffee. Level it but do not press down.
- Check the rubber gasket and metal filter on the top chamber. Place them properly.
- Screw the top chamber onto the bottom chamber tightly but not too hard.
Proper assembly prevents leaks and ensures pressure builds up correctly. The safety valve on the bottom chamber helps release extra pressure. Make sure it is clean and free from blockages.
Here is a simple assembly checklist:
| Step | Action | Tip |
|---|---|---|
| 1 | Fill bottom chamber with water | Stop at safety valve level |
| 2 | Add coffee to filter funnel | Do not tamp the grounds |
| 3 | Check gasket and filter | Replace if damaged |
| 4 | Screw top chamber tightly | Hand-tighten only |
Following these steps makes the moka pot ready for heating. Correct assembly protects the pot and helps you make delicious coffee every time.
Selecting And Grinding Coffee
Using a moka pot to brew coffee starts with choosing the right coffee and grinding it properly. These steps affect the flavor, strength, and overall experience of your coffee. Selecting the right coffee type and grinding it to the perfect size ensures your moka pot works well and produces rich, balanced coffee. Poor choices in coffee or grind size can lead to weak or bitter coffee. This guide helps pick the best coffee and grind for moka pot brewing.
Best Coffee Beans for Moka Pot Brewing
Choosing the right coffee beans is key for moka pot success. The moka pot makes a strong, concentrated coffee similar to espresso. Dark roast beans often suit this method best because they have bold, deep flavors that match moka pot extraction.
- Dark Roast: Rich and intense, with chocolate, caramel, or smoky notes.
- Medium Roast: Balanced acidity and sweetness, offering a smoother taste.
- Single-Origin Beans: Provide unique flavors from specific regions, like fruity or floral notes.
- Blend Coffee: Mixes beans for consistent, full-bodied flavor.
Use fresh coffee beans roasted within the last few weeks. Freshness keeps the aroma and taste alive. Avoid pre-ground coffee, as it loses flavor quickly. Whole beans stay fresh longer and give better control over grind size.
| Coffee Type | Flavor Profile | Best Use |
|---|---|---|
| Dark Roast | Bold, smoky, chocolatey | Moka pot for strong, intense coffee |
| Medium Roast | Balanced, smooth, slightly acidic | For lighter moka pot coffee |
| Single-Origin | Unique fruity or floral notes | For tasting unique flavors |
| Blend | Consistent, full-bodied | Everyday moka pot use |
Ideal Grind Size for Moka Pot Coffee
The grind size affects how water passes through the coffee in a moka pot. The goal is to get a strong but smooth coffee without clogging the filter. A grind that is too fine can block water flow and cause bitter coffee. Too coarse grind leads to weak and under-extracted coffee.
Ideal grind size: medium-fine, somewhere between espresso and drip coffee grind.
- Grind should feel like fine sand or granulated sugar.
- It must be finer than drip coffee but coarser than espresso grind.
- Should allow water to pass steadily under pressure.
Use a burr grinder for a consistent grind. Blade grinders create uneven particles, affecting extraction quality.
Adjust grind size if the moka pot brews too fast or too slow:
- If coffee brews too fast and tastes weak, grind finer.
- If brewing is slow or coffee tastes bitter, grind coarser.
Test small amounts until you find the perfect grind. This balance helps extract the full flavor and body from coffee beans using your moka pot.
How to Fill a Moka Pot Correctly
Filling the moka pot correctly is the first step to brewing rich, strong coffee. This process involves two main parts: adding water to the bottom chamber and placing coffee grounds in the filter basket. Both steps affect the flavor and strength of your coffee. Pay close attention to the amounts and techniques to get the best results from your moka pot.
Adding Water
Start by filling the bottom chamber of the moka pot with fresh, cold water. Use clean water for the best taste. Fill the chamber up to the safety valve, but never above it. Overfilling can cause pressure problems and might make the coffee taste bitter.
Follow these steps for adding water:
- Remove the top and filter basket from the moka pot.
- Pour water into the bottom chamber until it reaches the safety valve level.
- Do not cover the valve with water.
- If you want a stronger coffee, use less water. For a milder taste, fill closer to the valve.
Here is a simple table to understand the water level and coffee strength:
| Water Level | Coffee Strength | Effect on Brew |
|---|---|---|
| Below Safety Valve | Strong | More intense flavor, less water diluted |
| Up to Safety Valve | Balanced | Optimal extraction and taste |
| Above Safety Valve | Not recommended | Risk of overpressure and poor taste |
Always check the safety valve before filling water. Clean and dry the chamber after each use to keep the moka pot in good condition.
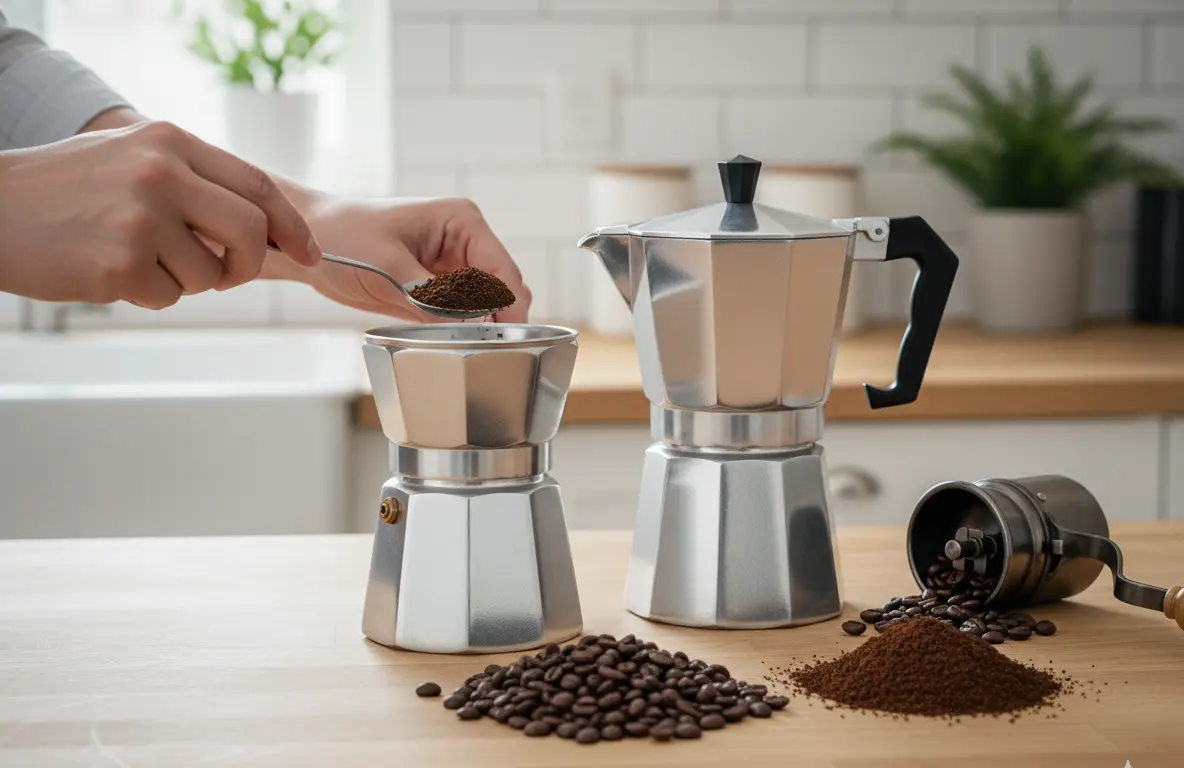
Adding Coffee Grounds
Next, add the coffee grounds to the filter basket. Use medium-fine ground coffee for the best results. The grind should not be too fine like espresso or too coarse like drip coffee. Too fine grounds can clog the filter, while coarse grounds will make weak coffee.
Follow these tips for adding coffee grounds:
- Fill the filter basket with coffee grounds evenly.
- Do not press or tamp the grounds down; just level them off.
- Make sure the coffee is spread evenly to allow good water flow.
- Use fresh coffee grounds for the best aroma and flavor.
Here is a quick guide on coffee grind size and its effect:
| Grind Size | Effect on Brew | Recommended For |
|---|---|---|
| Medium-Fine | Balanced extraction, smooth flavor | Moka Pot |
| Fine | May clog filter, bitter taste | Espresso Machines |
| Coarse | Weak extraction, watery coffee | French Press, Drip Coffee |
After filling the basket, place it back into the bottom chamber. Screw the top part firmly but avoid overtightening. This seals the moka pot and prepares it for brewing.
Moka Pot Brewing Process: How to Brew Rich, Espresso-Style Coffee
The brewing process with a Moka pot is simple yet requires attention. This process transforms water and coffee grounds into a rich, strong espresso-like drink. Proper heat and timing bring out the best flavors from your coffee. Follow each step carefully to avoid bitter or weak coffee. The key is balance—right heat, steady brewing, and timely monitoring.
Heat Settings
Setting the correct heat is vital for a perfect brew. Use medium-low heat to avoid burning the coffee or causing too much pressure. High heat can make the water boil too fast, leading to bitter coffee. Low heat might make the brewing too slow, resulting in weak flavor.
Here are some tips for heat settings:
- Start with medium-low heat: This controls the water temperature and pressure.
- Avoid high heat: It causes quick boiling and over-extraction.
- Use a stove with steady heat: Gas stoves work well for this.
- Electric stove users: Adjust the heat to the lowest setting that keeps water bubbling.
Use this table to guide your heat settings:
| Heat Level | Effect on Brew | Recommendation |
|---|---|---|
| High | Fast boiling, bitter taste | Avoid |
| Medium-Low | Stable pressure, balanced flavor | Ideal |
| Low | Slow brewing, weak coffee | Use if needed, but not preferred |
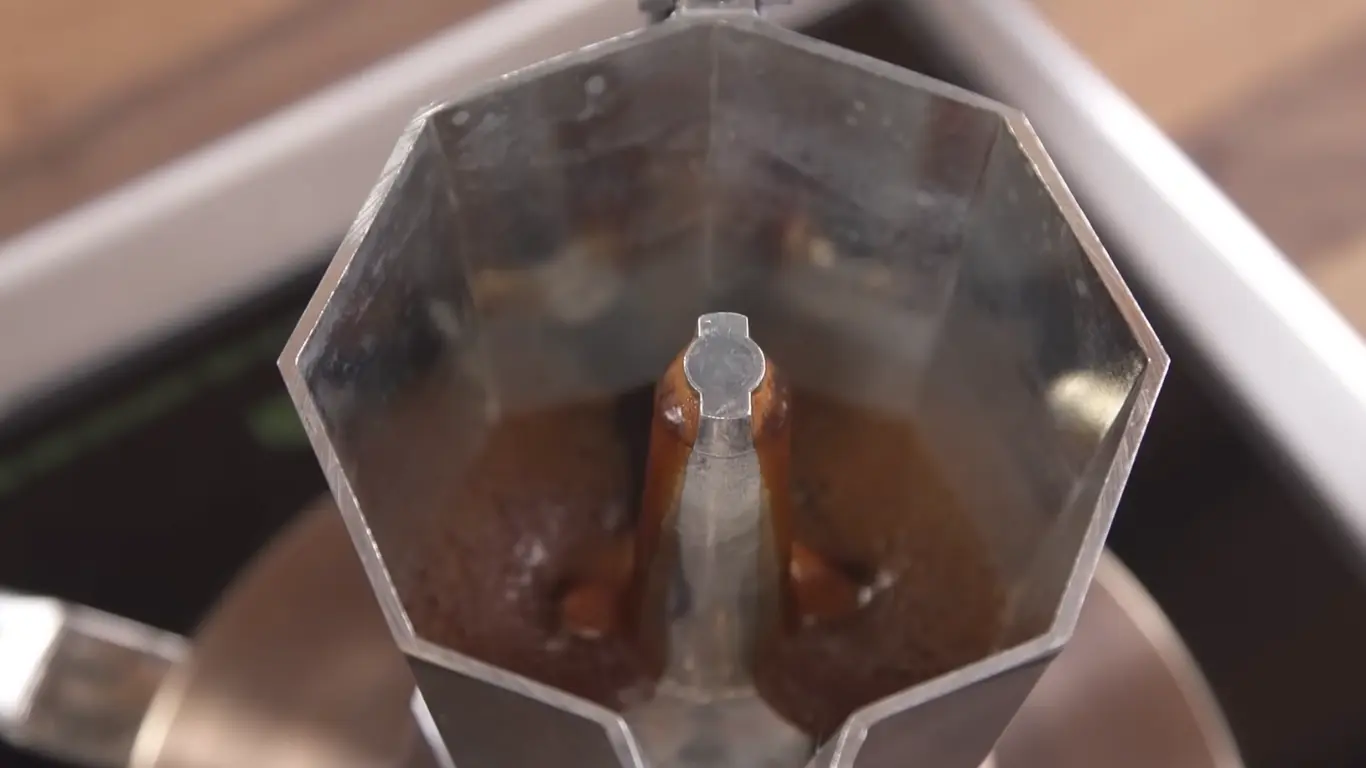
Monitoring The Brew
Watching the Moka pot during brewing helps you stop at the right moment. The coffee rises through the center tube and fills the upper chamber. Listen and watch carefully to avoid over-extraction, which causes bitterness.
Key points to monitor:
- Sound: The brew starts with a gurgling sound. When it changes to sputtering, brewing is almost done.
- Color: Coffee should flow with a rich brown color. Dark or burnt color means overcooked coffee.
- Timing: The process usually takes 4 to 6 minutes. Longer time means over-extraction.
Follow this simple step-by-step to monitor your brew:
- Place the Moka pot on heat.
- Listen for the initial gurgle sound.
- Watch the coffee flowing into the upper chamber.
- Stop heating when sputtering sounds start.
- Remove the pot from heat immediately.
Proper monitoring ensures a smooth and tasty cup of coffee. Avoid leaving the pot on heat after brewing stops. This keeps the coffee from burning and tasting bad.
Serving and Enjoying Moka Pot Coffee
After brewing coffee with a Moka pot, serving and enjoying it properly can make a big difference. The rich, strong coffee needs care when pouring and tasting. This section covers simple tips to serve your coffee with style and ways to enhance its flavor. Enjoying your Moka pot coffee is about more than just drinking—it is about savoring every sip.
Pouring Tips
Pouring Moka pot coffee needs a gentle hand. The coffee is hot and strong, so pouring it carefully keeps the taste smooth and avoids spills. Use a small cup or espresso glass to appreciate its bold flavor. Follow these tips for the best pouring experience:
- Hold the pot steady: Grip the handle firmly to control the pour.
- Pour slowly: A slow pour prevents splashing and lets the coffee settle.
- Fill cups halfway first: This helps avoid overflow and lets you enjoy the aroma.
- Wipe the spout: Clean the spout between pours to keep the coffee fresh and neat.
Use this table to compare pouring methods:
| Method | Benefit | Tip |
|---|---|---|
| Slow Pour | Prevents splashes and spills | Pour steadily with a firm grip |
| Halfway Fill | Allows aroma to be enjoyed | Pause before topping up the cup |
| Wipe Spout | Keeps coffee clean and fresh | Use a clean cloth after each pour |
Pour coffee into warmed cups. Warm cups keep coffee hot longer. Avoid pouring all at once. Let the coffee flow naturally for the best taste.
How to Enhance Moka Pot Coffee Flavor Naturally
The Moka pot makes strong coffee with rich flavor. Small changes can improve its taste even more. Try these easy ways to enhance your coffee:
- Use fresh coffee beans: Fresh beans give the best aroma and flavor.
- Grind just before brewing: A medium-fine grind works best for Moka pots.
- Control water temperature: Use hot water to reduce brewing time and bitterness.
- Clean the pot regularly: Old coffee oils can spoil the taste.
Adding extras can also boost flavor:
- Milk or cream: Softens the strong taste and adds creaminess.
- Sugar or sweeteners: Balances bitterness for a smoother cup.
- Cinnamon or cocoa powder: Adds a warm, spicy twist.
Use this simple flavor guide:
| Addition | Effect on Flavor | Recommended Amount |
|---|---|---|
| Milk or Cream | Makes coffee creamy and soft | 1-2 tablespoons per cup |
| Sugar | Sweetens and balances bitterness | 1 teaspoon or to taste |
| Cinnamon | Adds warmth and spice | Pinch sprinkled on top |
| Cocoa Powder | Gives a chocolatey flavor | Small sprinkle or mixed in |
Try small changes and taste often. This helps find your perfect cup. Enjoy coffee slowly. Savor the flavors and aroma with every sip.
Moka Pot Cleaning and Maintenance Guide
Proper cleaning and maintenance of your Moka Pot ensures great coffee and extends its life. The Moka Pot Brewing Process involves hot water pressure passing through coffee grounds. Residue builds up on Moka Pot Parts like the filter and gasket. This affects coffee extraction and the taste of your espresso coffee preparation.
Regular care keeps your stovetop espresso maker working well. Pay attention to water to coffee ratio and coffee grind size for the best results. Follow simple daily cleaning and long-term care tips to keep your coffee fresh and the pot safe.
Daily Cleaning Routine
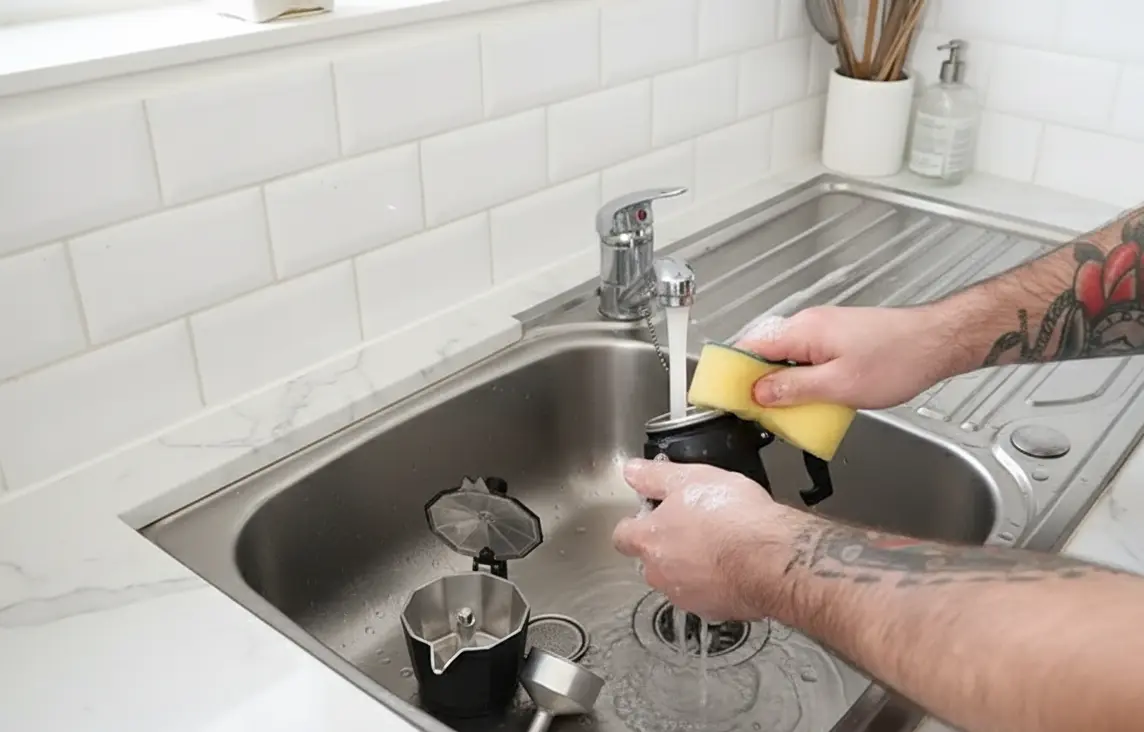
After each use, cleaning the Moka Pot is essential. The Cleaning Moka Pot step removes leftover coffee oils and grounds. These can cause bitterness in your next brew.
- Disassemble the pot: separate the top chamber, filter funnel, and bottom water container.
- Rinse all parts with warm water only. Avoid soap, which can leave residues and affect flavor.
- Use a soft brush or cloth to remove stuck coffee grounds from the filter and gasket.
- Check the rubber gasket and filter for wear. Replace parts if damaged to maintain proper pressure.
- Dry all parts thoroughly before reassembling to prevent mold and corrosion.
Here is a quick reference table for daily cleaning:
| Step | Action | Tip |
|---|---|---|
| 1 | Disassemble Moka Pot Parts | Do it while pot is cool |
| 2 | Rinse with warm water | No soap or detergent |
| 3 | Clean filter and gasket | Use soft brush or cloth |
| 4 | Dry completely | Air dry or use towel |
Long-Term Moka Pot Care
Maintaining your stovetop espresso maker over time keeps it working well. Maintaining Moka Pot includes deep cleaning and part checks.
Descaling coffee maker is important to remove mineral buildup from water. Scale affects the coffee extraction and can damage the pot.
- Fill the bottom chamber with equal parts water and white vinegar.
- Assemble the pot and heat it like brewing coffee.
- Stop before coffee extraction finishes and let it sit for 15-20 minutes.
- Discard the vinegar mixture and rinse all parts thoroughly with water.
- Run a cycle with clean water only to remove vinegar taste.
Also, check these key points monthly:
- Inspect Moka Pot Parts for rust or cracks.
- Replace the rubber gasket every 6-12 months for a tight seal.
- Use proper coffee grind size to avoid clogging the filter.
- Store the pot disassembled to keep it dry and prevent odors.
Following these steps ensures your stovetop espresso maker stays in top shape. Your espresso coffee preparation will taste fresh and pure every time.
Troubleshooting Moka Pot Problems: Fix Weak, Bitter, or Leaking Coffee
Using a moka pot is simple, but sometimes problems occur. These issues can affect the taste and brewing process. Troubleshooting common problems helps you enjoy better coffee every time. Understanding what causes weak, bitter, leaking, or clogged coffee can save time and frustration. Here are easy solutions for typical moka pot troubles.
Weak Or Bitter Coffee
Weak or bitter coffee often happens due to grind size, water amount, or brewing time. A weak brew lacks flavor and strength. Bitter coffee tastes harsh or burnt.
Common causes of weak coffee:
- Too coarse coffee grounds
- Not enough coffee in the filter
- Water level too low
- Short brewing time
Common causes of bitter coffee:
- Too fine coffee grounds
- Over-extraction from long brewing
- Water temperature too high
- Old or burnt coffee beans
Try these fixes:
- Use medium-fine grind, similar to table salt.
- Fill the filter basket fully, but do not pack coffee tightly.
- Fill the base with water just below the safety valve.
- Heat on medium flame, remove from heat once coffee stops bubbling.
- Use fresh coffee beans and clean the pot regularly.
| Problem | Cause | Solution |
|---|---|---|
| Weak coffee | Coarse grind, low coffee amount | Use finer grind, fill filter fully |
| Bitter coffee | Fine grind, over-extraction | Use coarser grind, remove from heat early |
How to Fix a Leaking or Clogged Moka Pot
Leaks and clogs stop coffee flow and can ruin your brew. Leaking usually happens at the seal or valve. Clogging blocks water or coffee flow.
Common causes of leaking:
- Worn or damaged rubber gasket
- Loose parts or improper assembly
- Overfilled water chamber
Common causes of clogging:
- Dirty or blocked filter basket
- Clogged safety valve
- Too fine coffee grind packed tightly
Solutions include:
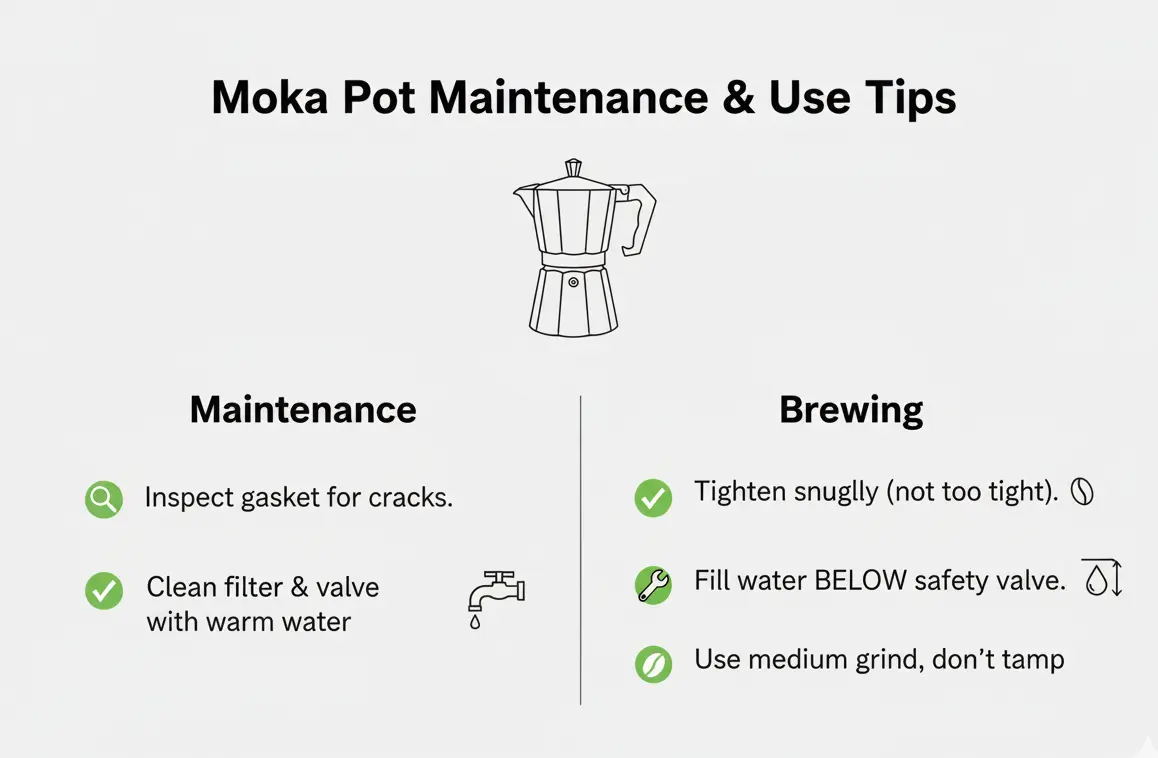
- Check the rubber gasket for cracks; replace if needed.
- Assemble parts tightly but avoid overtightening.
- Do not fill water above the valve level.
- Clean the filter and safety valve regularly with warm water.
- Use medium grind and avoid packing coffee too hard.
| Issue | Cause | Fix |
|---|---|---|
| Leaking | Old gasket or loose parts | Replace gasket, tighten parts |
| Clogging | Blocked filter or valve | Clean parts, use correct grind |
Final Thoughts
Using a moka pot lets you enjoy rich coffee at home. The steps are simple: add water, coffee, and heat gently. Watch the coffee rise and smell the fresh aroma. Cleaning your moka pot keeps it working well. Practice a few times to find your perfect taste.
With patience, you can make a great cup every time. A moka pot is a small tool with big coffee flavor. Why not try it today and enjoy your coffee moments?
FAQs: Common Questions About Using a Moka Pot
How Do I Prepare A Moka Pot For First Use?
Rinse all parts with warm water and dry them well. Avoid soap to keep the flavor.
What Grind Size Is Best For Moka Pot Coffee?
Use a medium-fine grind, finer than drip coffee but coarser than espresso.
How Much Water Should I Add To The Moka Pot?
Fill the bottom chamber with water just below the safety valve.
How Do I Know When Moka Pot Coffee Is Ready?
Listen for a hissing sound and watch the coffee fill the upper chamber.
Can I Use Pre-ground Coffee In A Moka Pot?
Yes, but fresh ground coffee gives better taste and aroma in your brew.