Skip to content
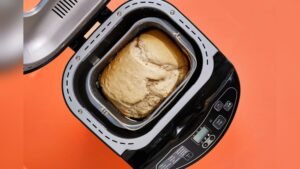
A bread maker is more than just a kitchen appliance—it’s your ticket to fresh homemade bread without the mess or hassle. But many people forget that, just like any machine, a bread maker needs regular care. Without it, you risk uneven baking, noisy operation, or even complete breakdown.
If you want your bread maker to last for years and always deliver perfect loaves, you need to understand maintenance. This guide will give you clear, practical advice to help keep your bread maker in top shape, save money, and prevent common mistakes that shorten its lifespan.
Why Bread Maker Maintenance Matters
A bread maker seems simple: add ingredients, press start, and wait. But inside, there are moving parts, heating elements, and sensors that need attention. Poor maintenance can cause:
- Stuck paddles that make removing bread difficult
- Burnt residue leading to bad smells and flavors
- Loose belts or gears causing loud noises or uneven mixing
- Heating element failure, so bread won’t bake properly
Most bread makers are built to last about 5–10 years with normal use, but regular care can easily extend this to 12–15 years. A well-maintained bread maker also saves money on repairs and replacement parts.
Another overlooked benefit of maintenance is consistency. If your bread maker is cared for, you get the same quality loaf every time. Small issues—like residue buildup or noisy parts—can affect the texture, flavor, and shape of your bread. Also, a neglected bread maker can suddenly stop working in the middle of a bake, which wastes ingredients and time.
Good habits save you from these surprises.
Cleaning Your Bread Maker: Step-by-step
Keeping your bread maker clean is the foundation of long life. Bread makers are sensitive to crumbs, sticky dough, and leftover oil. Here’s how to do it right:
Daily Cleaning After Each Use
- Unplug and cool down: Always unplug your machine and let it cool before cleaning. This prevents shocks and protects the electronics.
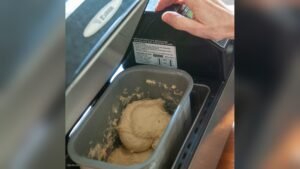
- Remove bread pan and paddle: Take out the removable parts carefully. If the paddle is stuck, soak the pan in warm water for a few minutes.
- Wipe crumbs and residue: Use a soft, damp cloth to wipe the inside and outside. For stubborn dough, let it dry first; then gently scrape it off. If dough sticks under the paddle, a toothpick can help reach tight spots.
- Clean the bread pan and paddle: Wash with warm water and mild soap. Do not use metal scrubbers—they scratch non-stick surfaces. If grease builds up, use a little baking soda with your soap.
- Dry everything thoroughly: Moisture leads to mold and rust. Air-dry or use a soft towel. If you’re in a hurry, use a hair dryer on low setting (never high heat).
Deep Cleaning (monthly)
- Check for hidden crumbs: Look under the heating element and inside corners. Use a flashlight for better visibility.
- Clean the lid and vents: Use a soft brush or toothpick for vents. Vents are important—if blocked, steam can build up and damage electronics.
- Inspect seals and gaskets: Wipe gently; don’t use harsh chemicals. If seals feel sticky, a damp cloth is enough.
- Sanitize exterior: Wipe down buttons and handles to prevent bacteria buildup. If your bread maker has touch controls, use a slightly damp cloth, not wet.
Cleaning Mistakes To Avoid
- Never immerse the bread maker in water. Even a quick dip can ruin the motor or electronics.
- Avoid bleach or strong chemicals—they damage plastic and electronics. Soap and water or gentle cleaners are best.
- Do not force wet cloths into electrical parts. If you spill, let the machine air-dry before plugging in.
Many people miss the area around the hinges and the underside of the lid. These spots collect flour and dough, so check them during deep cleaning.
Lubricating Moving Parts
Bread makers have paddles, shafts, and gears that need to move freely. Over time, they can get stiff or noisy.
Which Parts Need Lubrication?
- Paddle shaft: Where it rotates inside the bread pan. If it squeaks or sticks, it needs lubrication.
- Internal gears: Usually hidden, but check your manual. Some models have a small access panel.
- Drive belt: Some models need occasional adjustment or lubrication. If the belt slips, the mixing slows down.
How To Lubricate Safely
- Use food-safe lubricant (never regular oil or WD-40). Look for lubricants made for kitchen machines.
- Apply a drop to the paddle shaft and rotate it. If you see old lubricant, wipe it off first.
- Wipe away excess—too much attracts crumbs. A thin layer is enough.
- If gears are exposed, use a cotton swab to apply lubricant gently. Don’t use sprays near electronics.
Non-obvious tip: Many beginners forget to lubricate after deep cleaning, which can cause the paddle to stick. Always lubricate after cleaning the shaft.
Also, some bread makers have a small rubber ring on the shaft. Check this ring for wear—if it’s cracked, replace it to prevent leaks.
Checking And Maintaining The Heating Element
The heating element is the heart of your bread maker. If it fails, your bread won’t bake.
Signs Of Heating Element Trouble
- Bread is undercooked or raw in the middle
- Bread maker takes longer to bake than usual
- Burning smell during operation
Maintenance Steps
- Inspect for visible damage: Look for cracks, rust, or discoloration. If you see corrosion, it’s time to call a technician.
- Clean gently: Use a dry cloth; never water or chemicals. If flour or dough falls onto the element, brush it off when cool.
- Test performance: Bake a simple loaf and check results. If the crust is pale or uneven, the element may be failing.
If your heating element shows problems, contact a technician. Never try to fix it yourself—it can be dangerous.
Heating elements rarely fail quickly. Most problems start small—like uneven browning or a faint smell. If you catch these early, repairs are easier and cheaper.
Preventing Mold And Bad Odors
Bread makers are warm and moist—perfect for bacteria and mold if not cleaned well.
Practical Tips
- Always dry completely before storing. Even a few drops can cause mold in closed spaces.
- Leave the lid open for an hour after baking to air out. This reduces moisture and helps prevent odors.
- Store in a dry, cool place. Avoid cabinets with moisture.
Non-obvious tip: If your bread maker smells bad even after cleaning, place a bowl of baking soda inside overnight with the lid closed. It absorbs odors.
Another smart idea is to run an empty cycle once in a while. This heats the inside and helps kill bacteria. Just make sure the machine is empty and clean first.
Bread Maker Maintenance Schedule
Keeping track of tasks makes maintenance easier. Here’s a simple schedule:
| Task | Frequency | Time Needed |
|---|---|---|
| Daily cleaning | After every use | 5–10 minutes |
| Deep cleaning | Once a month | 20–30 minutes |
| Lubricate paddle shaft | Every 2 months | 2 minutes |
| Check heating element | Every 6 months | 5 minutes |
| Inspect for mold | Every month | 2 minutes |
If you use your bread maker often (more than three times a week), adjust the schedule. For example, lubricate the paddle shaft monthly, and deep clean every two weeks.
Storing Your Bread Maker Properly
If you use your bread maker only a few times a week, how you store it matters.
- Never store with the lid closed while damp. Moisture leads to mold.
- Remove the bread pan and paddle before storing. This lets air circulate and prevents odors.
- Cover with a cloth or use a dust cover. This keeps dust out and protects buttons.
If you live in a humid area, add a small silica gel packet inside to absorb moisture (keep away from kids and pets).
For longer storage (like over summer), wrap the bread maker in plastic, but leave air holes. This protects from dust but avoids moisture buildup.
Common Bread Maker Problems And Solutions
Even with good maintenance, problems can happen. Here are solutions to common issues:
Paddle Stuck In Bread
- Wait until the bread cools, then gently twist the paddle.
- Use a plastic tool to avoid scratching.
- Lubricate shaft before next use.
If your paddle sticks often, try lightly oiling the shaft before baking. Also, make sure to use the right amount of water in recipes.
Noisy Operation
- Check for loose screws or parts.
- Lubricate moving parts.
- Make sure the bread maker sits level on the counter.
Sometimes noise comes from the drive belt. If you hear squeaking or grinding, stop and check before continuing.
Uneven Baking
- Clean heating element.
- Make sure pan is seated correctly.
- Don’t overload with ingredients.
If your bread is high on one side, check that the paddle is centered and the pan is locked in place.
Bread Maker Won’t Start
- Check the power cord and plug.
- Inspect buttons for sticky residue.
- Try another outlet.
If problems continue, consult your manual or contact customer support.
Another overlooked issue is the fuse. Some bread makers have a built-in fuse—if it blows, the machine won’t start. Check your manual for details.
Bread Maker Types And Maintenance Differences
Not all bread makers are the same. Some are vertical, others horizontal; some have dual paddles. Maintenance can vary.
| Bread Maker Type | Maintenance Difficulty | Special Tips |
|---|---|---|
| Vertical (single paddle) | Easy | Focus on paddle shaft lubrication |
| Horizontal (dual paddle) | Moderate | Clean and lubricate both paddles; check alignment |
| Mini bread maker | Very easy | Regular cleaning, less moving parts |
| Complex (with nut dispensers) | Difficult | Clean dispensers and check sensors |
Dual paddle models need extra care. If one paddle sticks, dough mixes unevenly. For complex models with dispensers, check for jams and clean sensors regularly.
Choosing The Right Cleaning Tools And Products
Using the right tools makes maintenance faster and safer.
- Soft cloths: Prevent scratches. Microfiber works best.
- Food-safe lubricants: Essential for paddle shafts. Look for brands approved for kitchen use.
- Plastic scrapers: Remove dry dough. Silicone spatulas are gentle and effective.
- Brushes: Clean vents and crevices. Small bottle brushes work well.
Avoid harsh tools like steel wool or strong chemicals. They damage parts and void warranties.
Another smart tool is a vacuum with a nozzle. It helps remove crumbs from tight spaces, especially under the heating element.

Credit: www.nytimes.com
Bread Maker Maintenance And Warranty
Regular maintenance keeps your warranty valid. Most brands require:
- No unauthorized repairs
- Proper cleaning (no water in electrical parts)
- Using original parts and accessories
Read your manual carefully. If you’re unsure, check the brand’s official site or contact support.
If you need new paddles or pans, buy only original parts. Using generic replacements can void your warranty and cause fit problems.
Tips For Longer Bread Maker Lifespan
Here are practical steps to add years to your bread maker’s life:
- Clean regularly: Never skip daily wipe-downs.
- Lubricate as recommended: Prevent sticking and noise.
- Avoid overfilling: Stick to recipe limits.
- Use correct ingredients: Old yeast or sticky dough can damage the paddle.
- Inspect before each use: Look for loose parts or buildup.
- Store in a safe place: Away from heat and humidity.
- Don’t ignore small problems: Fix noises or sticking early.
- Use surge protectors: Prevent electrical damage.
Data point: Surveys show that users who follow maintenance routines report 30% fewer breakdowns and 50% longer appliance lifespan.
Another detail: Use recipes from your bread maker’s manual. Some online recipes overload the machine, causing wear.
.jpeg?v=1761941819946&options=w_870,h_700)
Credit: www.greenpan.us
Bread Maker Maintenance: Frequently Missed Details
Even careful owners miss some details:
- Vents and sensors: Dust can block sensors and cause errors.
- Bread pan seals: If seals leak, dough can get inside and damage the machine.
- Dispenser cleaning: Nut and fruit dispensers gather sticky residue. Clean them monthly.
For models with removable sensors, check alignment after cleaning. Misaligned sensors cause cycle errors.
Bread Maker Maintenance And Safety
Safety is as important as performance. Always unplug before cleaning. If you notice burning smells, sparks, or strange noises, stop using your bread maker until it’s checked.
Don’t use wet hands when plugging in. If you spill liquid inside, dry immediately and let it air out for 24 hours.
If you have children, keep the bread maker out of reach when not in use. Some models heat up quickly and stay hot after baking.
Bread Maker Maintenance: Smart Upgrades
Some upgrades help maintenance:
- Removable paddles: Easier to clean and replace.
- Non-stick pans: Prevent sticking and make cleaning easier.
- Transparent lids: Help you spot residue and monitor baking.
When buying a new bread maker, consider these features.
If your current bread maker lacks these features, look for compatible upgrades from your brand.
Bread Maker Maintenance And Quality Of Bread
Maintenance doesn’t just keep your machine working—it improves the bread:
- Clean paddles mix dough evenly.
- A clean pan prevents sticking and burning.
- Well-maintained heating elements bake bread consistently.
If you notice changes in texture or taste, check your cleaning routine.
Small crumbs or residue can cause off flavors. Regular cleaning ensures your bread tastes fresh every time.
Bread Maker Maintenance Data Table
Here’s a comparison of maintenance tasks and their impact:
| Task | Impact on Lifespan | Impact on Bread Quality |
|---|---|---|
| Daily cleaning | High | High |
| Lubrication | Medium | Medium |
| Deep cleaning | High | High |
| Heating element check | Medium | High |
| Proper storage | Medium | Low |
Skipping deep cleaning lowers both lifespan and bread quality. Lubrication mainly affects lifespan, but also helps prevent uneven mixing.
Bread Maker Maintenance: Environmental Impact
Taking care of your bread maker is good for the planet. Well-maintained machines last longer, so you buy fewer appliances, reducing waste. Clean, efficient bread makers use less power. This benefits your wallet and the environment.
If you upgrade, recycle your old bread maker responsibly. Many electronics stores accept small appliances for recycling.
Trusted Resources For Bread Maker Maintenance
For more detailed advice, check manufacturer websites or trusted guides like Good Housekeeping. They offer practical maintenance advice and safety tips.
Frequently Asked Questions
How Often Should I Clean My Bread Maker?
Clean your bread maker after every use. This prevents buildup and keeps the machine running smoothly. Deep cleaning is needed once a month.
What Is The Best Lubricant For Bread Maker Paddles?
Use food-safe lubricants made for kitchen appliances. Avoid regular oil or WD-40—they can contaminate your bread.
My Bread Maker Smells Bad. What Should I Do?
Clean thoroughly, dry completely, and air out with the lid open. Place a bowl of baking soda inside overnight to absorb odors.
Can I Use Metal Tools To Clean My Bread Maker?
No. Metal tools scratch non-stick surfaces and damage parts. Use plastic or wooden tools for cleaning.
Does Maintenance Affect Warranty?
Yes. Most warranties require proper maintenance and no unauthorized repairs. Always read your manual and use original parts.
Taking care of your bread maker does not have to be complicated. With a few simple routines and careful attention, you can enjoy fresh bread for years, save money, and avoid common problems. Remember, maintenance is not just about keeping the machine running—it’s about baking better bread, every time.

Credit: www.amazon.com