Cooking rice in a pressure cooker can feel like a small science experiment in your kitchen. The moment you close the lid and wait for those whistles, you might wonder: how many is enough? Too few, and your rice stays hard. Too many, and you get a sticky, mushy mess. Finding the right number of whistles is not just about following a rule—it’s about understanding your cooker, your rice, and a few simple tricks.
In this article, you’ll learn exactly how many whistles are needed for perfect rice, why the number can change, and what mistakes beginners often make. You’ll also see how different types of rice, water ratios, and cooker sizes affect the process. By the end, you’ll be confident about making fluffy, delicious rice every time.
Why Pressure Cookers Use Whistles
Pressure cookers are popular in many homes because they save time and energy. The whistle is more than just a sound—it’s a signal. When the cooker reaches the right pressure, steam pushes out through the vent, causing the whistle. Each time you hear it, you know the cooker has hit its top pressure.
In most recipes, the number of whistles helps you know how long to cook. It’s a simple timer, especially in Indian cooking. But not all pressure cookers are exactly the same. Some are heavier, some lighter, and some brands have different whistle strengths.
Still, the whistle system is a handy way to cook rice, dal, and many other dishes.
How Many Whistles For Rice? The Simple Answer
If you want a quick answer: 2 to 3 whistles is usually perfect for cooking plain white rice in a standard pressure cooker. This works for most types of white rice, like basmati or sona masoori. But, as with many things in cooking, the details matter. The exact number depends on several factors, including the type of rice, the size of your cooker, and even your altitude.
Here’s a basic guide for common rice types in a 2-5 liter stove-top pressure cooker:
| Rice Type | Whistles Needed | Water Ratio (Rice:Water) |
|---|---|---|
| Basmati (white) | 2 | 1:2 |
| Sona Masoori (white) | 3 | 1:2 |
| Short Grain (white) | 2-3 | 1:2 |
| Brown Rice | 7-8 | 1:2.5 |
| Parboiled Rice | 5-6 | 1:2.5 |

Credit: www.youtube.com
Factors That Affect Whistle Count
1. Type Of Rice
Not all rice is created equal. Long-grain rice like basmati cooks faster than brown rice or parboiled rice. Brown rice has more fiber and needs a longer time. Sticky or glutinous rice may also need adjustments.
2. Water-to-rice Ratio
The amount of water affects both texture and cook time. Too much water can make rice mushy, even if you use the right number of whistles.
- For fluffy rice: Use 1 cup rice to 2 cups water.
- For softer rice: Add a little extra water.
- For brown or parboiled rice: Use about 2.5 cups water per cup of rice.
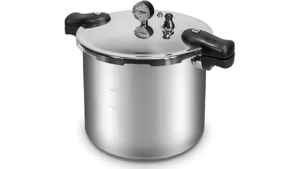
3. Size And Type Of Pressure Cooker
A small cooker heats up faster and may cook rice with fewer whistles. A larger cooker may need one more whistle. Also, electric pressure cookers (like Instant Pot) do not use whistles at all. For these, use the timer instead—usually 3-4 minutes on high pressure for white rice.
| Cooker Size | Typical Whistles (White Rice) |
|---|---|
| 2 Liters | 2 |
| 3-5 Liters | 2-3 |
| 7+ Liters | 3-4 |
4. Stove Power And Heat Settings
If your stove is very powerful, the cooker will reach pressure faster, so the whistles come quickly. Lower heat means slower whistles and possibly a longer cooking time.
5. Soaking Time
If you soak the rice for 20–30 minutes before cooking, it cooks faster. You can usually reduce one whistle if you soak the rice.
6. Altitude
At higher altitudes, water boils at a lower temperature, so cooking can take longer. You may need one extra whistle if you live above 3,000 feet (900 meters).
Step-by-step Guide To Cooking Rice In A Pressure Cooker
If you’re new to using a pressure cooker, here’s a simple process for perfect rice:
- Measure rice: Use a standard measuring cup.
- Rinse well: Wash the rice 2–3 times to remove extra starch.
- Soak (optional): Soak for 20 minutes for fluffier rice.
- Add water: Use the correct ratio for your rice type.
- Season (optional): Add salt, a few drops of oil, or a bay leaf for flavor.
- Close the lid: Lock it well and put the weight (whistle) on.
- Heat: Cook on high until you hear the first whistle.
- Lower heat: Turn down to medium-low and continue for the required number of whistles.
- Turn off the stove: After the last whistle, turn off the heat.
- Let pressure release: Wait for the pressure to drop naturally (about 8–10 minutes).
- Open and fluff: Use a fork to separate the grains.
Common Mistakes Beginners Make
Even with a simple process, there are some traps to avoid:
- Using too much water: This makes rice sticky and soft.
- Not waiting for natural pressure release: Releasing pressure quickly can make rice unevenly cooked.
- Opening too early: The rice finishes cooking as the pressure drops.
- Forgetting to adjust for soaked rice: Soaked rice needs fewer whistles.
- Not checking cooker size: A small cooker needs less cooking time.
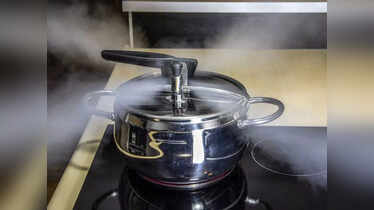
How Whistles Compare To Minutes
Some people want a time-based answer. On average, each whistle on a stove-top pressure cooker takes about 2–3 minutes after full pressure is reached. For white rice, 2 whistles usually mean about 6 minutes at pressure. For brown rice, 7–8 whistles mean about 15–18 minutes.
Here’s a quick comparison:
| Rice Type | Whistles | Time at Pressure |
|---|---|---|
| Basmati (white) | 2 | 5–6 min |
| Brown Rice | 7–8 | 15–18 min |
| Parboiled Rice | 6 | 12–15 min |
Credit: timesofindia.indiatimes.com
Tricks For Perfect Rice Every Time
- Let it rest: After the last whistle, let the cooker cool naturally. This helps rice finish cooking and keeps it fluffy.
- Add a few drops of oil or ghee: This prevents sticking and keeps grains separate.
- Don’t stir hot rice: Wait until it cools a bit, then fluff gently with a fork.
- If in doubt, start with fewer whistles: You can always put the lid back and give one more whistle, but you can’t undo overcooked rice.
- Experiment with your cooker: Every pressure cooker is a little different. Take notes the first few times you cook rice.
How To Adjust For Different Needs
For Firmer Rice
- Use a little less water (1.75 cups per cup of rice).
- Reduce whistles by one.
For Softer Rice
- Use more water (2.25 cups per cup of rice).
- Add one extra whistle.
For Large Batches
- If making more than 2 cups (uncooked), increase water slightly but keep whistles the same. Large amounts keep heat longer, so don’t overcook.

Credit: www.youtube.com
Comparing Pressure Cooking With Other Methods
Pressure cooking is much faster than traditional boiling or electric rice cookers. For example, boiling rice on the stove can take 15–20 minutes, while a pressure cooker does it in 6–8 minutes for white rice. Also, pressure cookers use less water and energy.
Some electric rice cookers have a “keep warm” function and do not need whistles. They shut off automatically when rice is cooked. However, pressure cookers give you more control over texture and speed.
You might find this helpful: How Long to Pressure Cook Cabbage
Non-obvious Insights Most Beginners Miss
- Different brands of pressure cookers whistle differently. A heavy Prestige cooker’s whistle may release more steam than a lighter Hawkins model. So, 2 whistles in one brand may equal 3 in another. It’s a good idea to check your rice after your first try and adjust next time.
- Altitude makes a real difference. If you travel or move to a high-altitude city, you may suddenly find your rice undercooked with the same number of whistles. Always add an extra whistle above 3,000 feet.
- The first whistle is not the start of cooking—it’s the start of pressure. The rice starts to cook seriously after the first whistle, not before. So count only after the first full whistle.
When To Use The Whistle Method Vs. Timer
The whistle method works best for stove-top pressure cookers. If you use an electric pressure cooker, follow the timer (not the whistle system). For Instant Pot, set to “Pressure Cook” or “Manual” for 3–4 minutes for white rice. For brown rice, set it for 22–24 minutes, then let pressure release naturally.
Safety Tips For Pressure Cooking Rice
- Always check the rubber gasket and vent before using.
- Never fill the cooker more than half with rice and water (it can overflow).
- Don’t force open the lid while under pressure.
- Use a fork, not a spoon, to fluff the rice after opening.
Frequently Asked Questions
How Many Whistles For 1 Cup Of Rice In A Pressure Cooker?
For 1 cup of white rice, use 2 cups of water and cook for 2 whistles in a 2–5 liter pressure cooker. If you soak the rice first, 1 whistle may be enough.
Can I Cook Brown Rice In A Pressure Cooker? How Many Whistles?
Yes, you can. Brown rice needs more time because of its hard outer layer. Use about 7–8 whistles with 2.5 cups water per cup of rice.
What If I Miss A Whistle Or Hear More Than Needed?
If you miss one whistle, rice may be a bit firm. If you get one extra whistle, rice may be softer but still edible. If you overcook by two or more whistles, rice may become sticky or mushy. Always start with fewer whistles and add one if needed.
Can I Use The Same Whistle Count For Other Grains?
No, each grain is different. For example, quinoa cooks in just 1 whistle, while lentils (dal) need 3–5. Always check recipes for each grain or pulse.
Do All Pressure Cookers Make The Same Whistle Sound?
No, different brands and models make different sounds. Some are loud, some are soft. The important thing is to count the full steam releases—not just any noise. If you’re unsure, check your cooker’s manual or try a test batch.
Cooking rice in a pressure cooker is easy once you understand the basics. By learning how many whistles to use and adjusting for your rice type, water, and cooker, you’ll get perfect results every time. Remember that every kitchen is a little different, so don’t be afraid to experiment. For more detailed cooking science, you can check this Wikipedia guide on pressure cooking. With practice, the sound of the whistle will signal not just pressure, but the promise of a delicious meal ahead.