Skip to content
Baking sourdough bread at home can feel like a small miracle. The crackling crust, the open crumb, the tangy aroma—it’s a baking ritual that’s both old and surprisingly simple. If you want to make beautiful sourdough loaves, a Dutch oven is one of your best tools. This heavy, lidded pot transforms a home oven into a mini bread oven, trapping steam to create a spectacular crust. But the process can be intimidating, especially if you’re new. This guide will walk you through every step, from preparing your starter to slicing your first loaf. You’ll learn not just how, but also why each step matters, and get plenty of practical tips you won’t find in most recipes.
Why Bake Sourdough In A Dutch Oven?
A Dutch oven is more than just a pot. Its thick walls and tight lid help maintain even heat and, most importantly, trap steam. Steam is essential for sourdough because it keeps the crust soft while the bread rises, allowing for a bigger oven spring and glossy, crisp finish. In a regular oven, steam escapes quickly, so your bread can dry out on the outside before it’s finished rising. The Dutch oven solves this problem, making artisan-quality loaves possible in any kitchen.
Another advantage: the Dutch oven acts as a shield, protecting your bread from harsh direct heat. This means a more even bake and less risk of burning the bottom crust. It’s also forgiving—if your oven has hot spots, the Dutch oven can help even things out.
What You Need To Get Started
You don’t need a lot of fancy equipment. Here’s what’s essential:
- Active sourdough starter (mature, bubbly, and ready to go)
- Bread flour (or a mix of bread and whole wheat flours)
- Water (filtered or tap, chlorine-free preferred)
- Fine sea salt
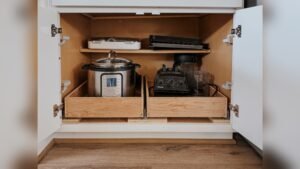
- Dutch oven (cast iron, 4–6 quarts is ideal)
- Mixing bowl
- Banneton (proofing basket) or a clean kitchen towel in a bowl
- Bowl scraper (optional but helpful)
- Bench scraper (optional for shaping)
- Parchment paper (for easy transfer)
- Sharp blade or lame (for scoring)
Some bakers also like a spray bottle for misting the dough, but with a Dutch oven, it’s not a must.
Understanding Sourdough: The Basics
Sourdough bread is made with wild yeast and bacteria, not commercial yeast. This means you need a sourdough starter—a living culture you feed regularly. The starter is what makes your bread rise, and it gives sourdough its unique flavor and texture. If you don’t have a starter yet, you’ll need to make or get one. This process takes about a week, but you only do it once. There are plenty of guides online; for example, King Arthur Baking has a reliable method.
A healthy starter is bubbly, doubles in size within 4–6 hours of feeding, and smells pleasantly tangy. If your starter isn’t quite there, feed it for a few more days before baking.
Sourdough Baking Timeline
Baking sourdough bread is not difficult, but it does take time. Here’s a sample timeline:
| Step | Time Needed | Notes |
|---|---|---|
| Feed starter | 4-6 hours before mixing | Starter should be active and bubbly |
| Mix and autolyse | 30–60 minutes | Rest after mixing flour and water |
| Bulk fermentation | 4–5 hours | Stretch and fold every 30 minutes |
| Shape and proof | 1–2 hours (room temp) or overnight (fridge) | Second rise, can cold-proof for better flavor |
| Bake | 45–60 minutes | Bake in preheated Dutch oven |
| Cool | 1 hour | Let rest before slicing |
A common beginner mistake is to rush the process. Sourdough rewards patience. You don’t have to watch the dough the whole time, but you do need to let nature do its work.
Ingredients And Quantities
Here’s a classic sourdough bread recipe for a Dutch oven:
- 500g bread flour (about 4 cups)
- 350g water (about 1 ½ cups), plus extra for adjustments
- 100g active sourdough starter (about ½ cup)
- 10g fine sea salt (about 2 teaspoons)
This makes one large loaf. Adjust quantities for smaller Dutch ovens or if you want to make two loaves.
Ingredient Tips
- Bread flour: Gives better structure than all-purpose. You can substitute up to 20% whole wheat for a nuttier flavor.
- Water: Hydration can be adjusted. More water = more open crumb, but stick to the recipe if you’re new.
- Starter: Use when it’s at its peak (just after doubling).
- Salt: Essential for flavor and gluten strength.
Step-by-step Sourdough Dutch Oven Method
1. Feed Your Starter
Feed your starter 4–6 hours before you plan to mix your dough. Use a ratio of 1:1:1 (starter:water:flour by weight) for a strong, active culture. Place it in a warm spot. When it doubles and is full of bubbles, it’s ready.
2. Mix The Dough
In a large bowl, combine 500g bread flour and 350g water. Mix until no dry flour remains. Cover and let rest for 30–60 minutes. This rest is called the autolyse—it lets flour absorb water, making the dough easier to handle.
After autolysis, add 100g active starter and 10g salt. Mix by hand or with a spoon until well combined. The dough will be sticky at this stage.
3. Bulk Fermentation With Stretch And Folds
Bulk fermentation is the first rise. Place your dough in a lightly oiled bowl. Over the next 4–5 hours, perform 3–4 sets of stretch and folds (every 30–45 minutes):
- Wet your hand.
- Gently grab one side of the dough, stretch it up, and fold it over the center.
- Turn the bowl and repeat 3 more times.
- Cover and rest until the next round.
This strengthens the gluten without kneading. The dough will become smoother and more elastic with each fold.
4. Shaping The Dough
When the dough has risen by about 50% and has visible bubbles, it’s ready to shape. Turn it out onto a lightly floured surface. Shape into a round (boule) or oval (batard) loaf. Use a bench scraper to help if the dough is sticky.
For beginners, a simple round shape is easiest:
- Gently flatten the dough into a rectangle.
- Fold the sides in, then roll up tightly.
- Flip seam-side down and use your hands to tighten into a ball.
5. Proofing (second Rise)
Place the shaped dough into a banneton (floured proofing basket) or a bowl lined with a well-floured towel. Cover and let proof at room temperature for 1–2 hours, or refrigerate overnight for better flavor and easier scoring.
A cold, overnight proof (8–12 hours in the fridge) is recommended. The dough will rise more slowly, develop a deeper flavor, and be easier to handle and score.
6. Preheating The Dutch Oven
About 30–45 minutes before baking, place your Dutch oven (with lid) in your oven and preheat to 500°F (260°C). The Dutch oven must be very hot to give the best oven spring.
Be careful when handling. Use heavy oven mitts.
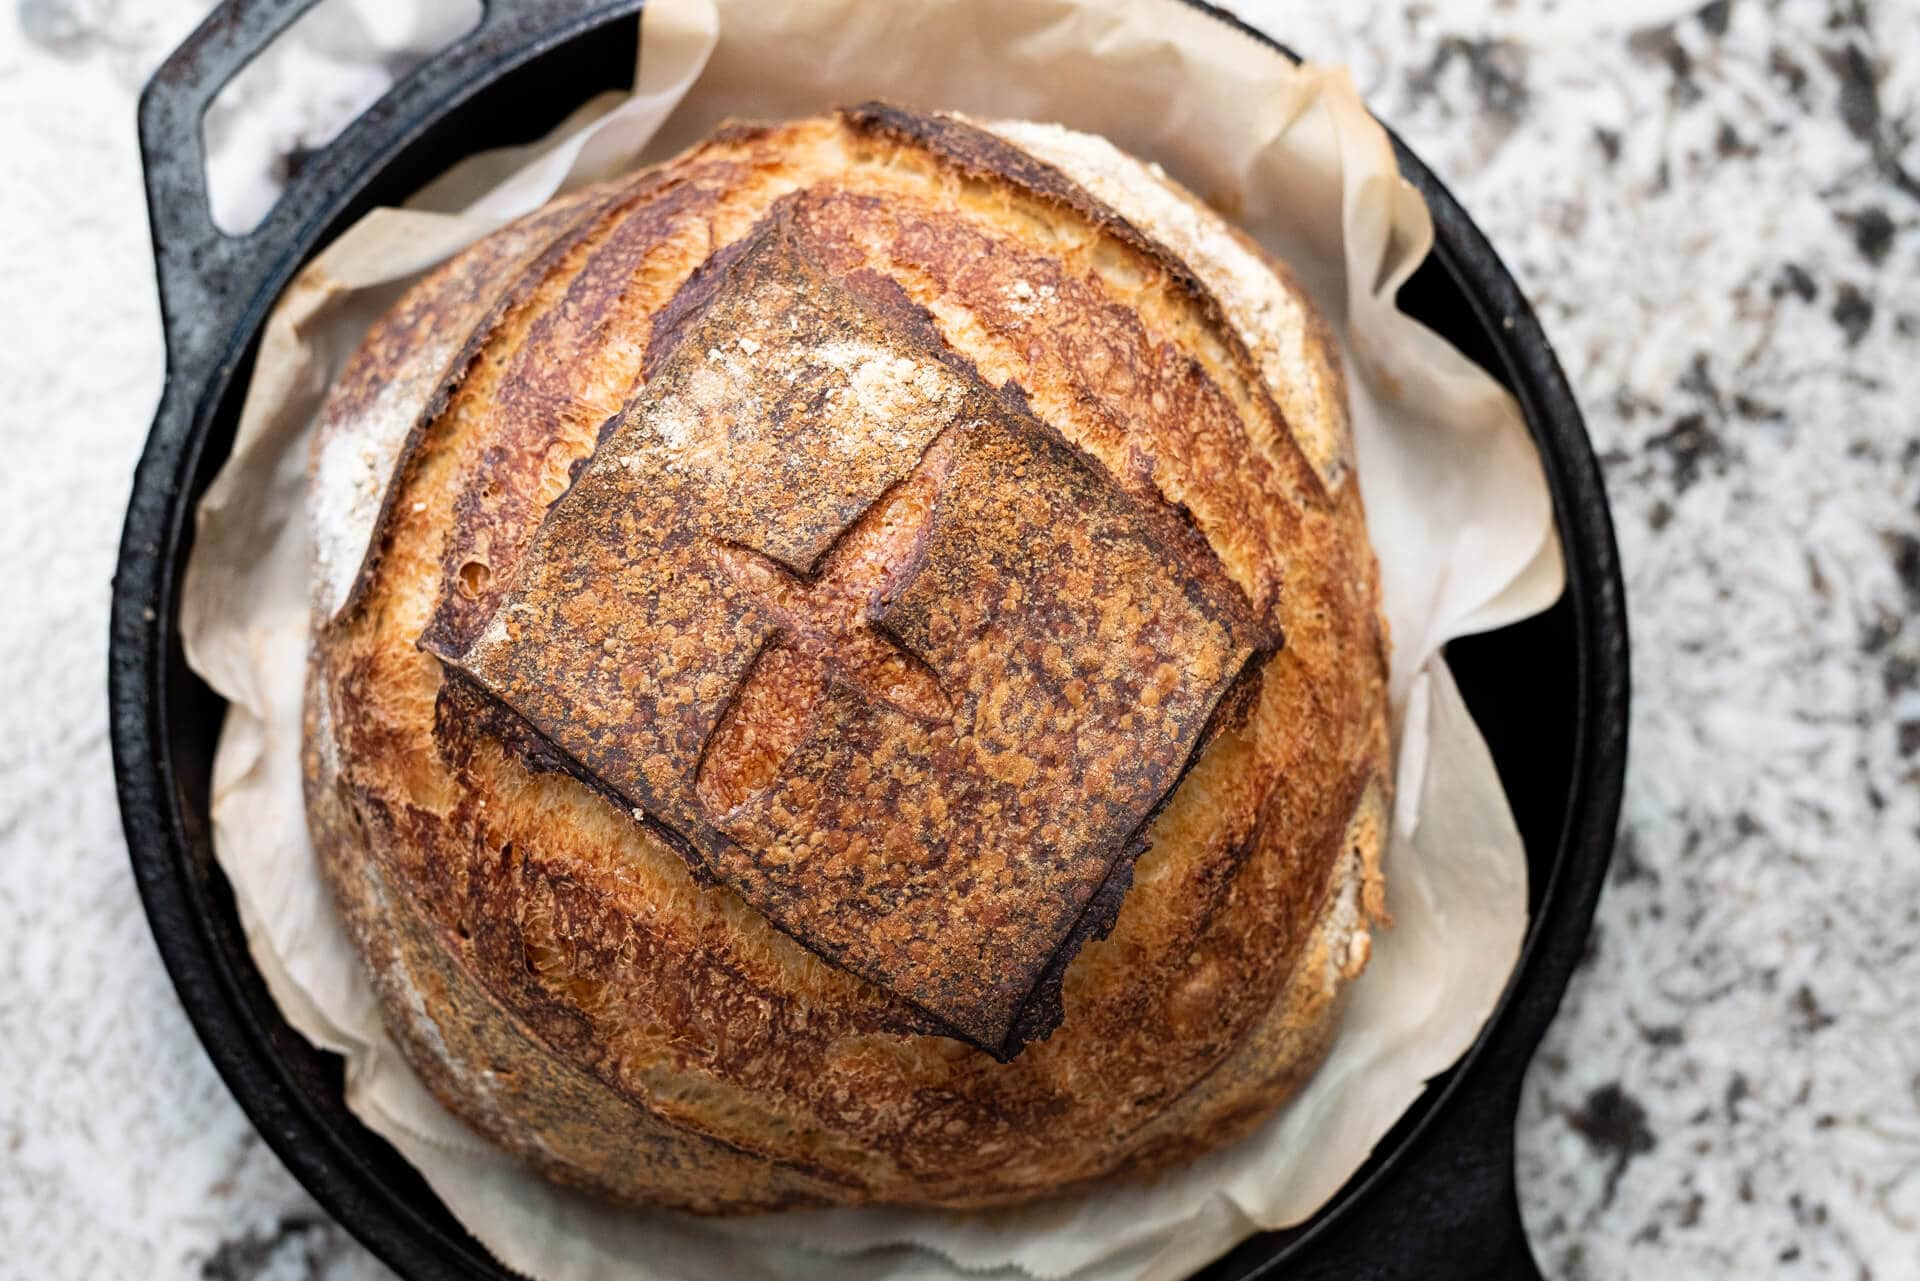
7. Scoring The Dough
When ready to bake, place a piece of parchment over your proofed dough and flip it out onto the counter. Score the top with a sharp blade (lame or razor). A single deep slash lets the bread expand. You can add decorative cuts, but don’t overdo it or the dough may deflate.
8. Baking
Carefully remove the hot Dutch oven from your oven. Lift the dough (with parchment) and place it inside. Cover with the lid and bake for 20 minutes.
After 20 minutes, remove the lid and reduce heat to 450°F (230°C). Bake uncovered for another 20–30 minutes, until the crust is deep golden and crisp. The loaf should sound hollow when tapped.
9. Cooling
Remove the bread from the Dutch oven and cool on a wire rack for at least 1 hour. This step is important: the crumb finishes setting as it cools. Cutting too soon can result in a gummy center.
Step-by-step Process At A Glance
Here’s a quick summary table:
| Action | What to Do | Why It Matters |
|---|---|---|
| Feed starter | 4–6 hours before mixing | Ensures strong rise |
| Mix/autolyse | Combine flour, water, rest 30–60 min | Hydrates flour, easier mixing |
| Add starter, salt | Mix well | Develops gluten, flavor |
| Bulk fermentation | 4–5 hours, stretch and fold | Builds structure |
| Shape | Form into ball, place in basket | Prepares for final rise |
| Proof | 1–2 hours or overnight in fridge | Improves flavor, easier scoring |
| Bake | 500°F covered, then 450°F uncovered | Creates crust, oven spring |
| Cool | 1 hour before slicing | Sets crumb, best texture |
Common Mistakes And How To Avoid Them
Not Waiting For A Mature Starter
A weak starter leads to flat, dense bread. Make sure your starter doubles in size within 4–6 hours of feeding and is full of bubbles before you bake.
Over- Or Under-proofing
If your dough over-proofs, it will collapse and bake up flat. Under-proofed dough won’t rise properly and will be dense. To test, gently poke the dough with a finger; if it springs back slowly and leaves a slight indent, it’s ready to bake.
Not Preheating The Dutch Oven
A cold pot leads to poor oven spring and a pale crust. Always let your Dutch oven preheat with your oven for at least 30 minutes.
Opening The Lid Too Soon
Steam is critical in the first part of baking. Don’t remove the lid before 20 minutes or you’ll lose oven spring and crust shine.
Cutting Before Cooling
It’s tempting, but slicing hot bread makes the crumb gummy. Wait at least one hour.
Advanced Tips For Better Results
Experimenting With Hydration
As you get more comfortable, try increasing water by 20–30g for a more open, airy crumb. Higher hydration means stickier dough, so be patient.
Scoring Designs
Scoring is both practical (it controls expansion) and artistic. Practice with different patterns, but keep at least one deep main score for best oven spring.
Rice Flour For Dusting
Rice flour doesn’t absorb moisture like wheat flour, so it’s ideal for dusting your banneton or towel. This prevents sticking without adding raw flour to the crust.
Cold Fermentation
Proofing in the fridge not only makes dough easier to handle, but also deepens flavor and improves crust. You can proof up to 24 hours with good results.
Whole Grain Variations
Try replacing 10–20% of your bread flour with whole wheat or rye for extra flavor. Too much whole grain can make the dough heavy, so increase water slightly if you experiment.

Credit: emilylaurae.com
Sourdough Bread Characteristics: What To Expect
A well-baked sourdough from a Dutch oven should have:
- Thick, crackling crust (deep golden, not burned)
- Glossy, open crumb (not dense or gummy)
- Tangy aroma and flavor
- Well-risen shape (tall, not flat)
If you’re not getting these results, check your starter, proofing, and oven temperature.
Cleaning And Maintaining Your Dutch Oven
Your Dutch oven will get very hot and may develop some brown spots inside over time. This is normal. After baking, let it cool, then wipe out crumbs and, if needed, clean gently with warm water (no soap for seasoned cast iron).
Dry thoroughly to prevent rust.
If your Dutch oven is enameled, you can wash it with a sponge and mild detergent. Avoid sudden temperature changes—never place a hot Dutch oven under cold water, as this can cause cracking.

Credit: www.farmhouseonboone.com
Troubleshooting: What Went Wrong?
Flat Or Dense Loaf
Check your starter activity. Make sure you let the dough rise enough during bulk fermentation. Under-proofed dough won’t rise; over-proofed dough can collapse.
Burned Bottom Crust
Place a baking sheet on a lower oven rack to shield the Dutch oven from direct heat. You can also sprinkle a thin layer of cornmeal or semolina on the bottom before adding the dough.
Pale Crust
Increase the baking time uncovered or raise the oven temperature slightly for the last 10 minutes. Make sure your Dutch oven is fully preheated.
Sticking To The Pot
Use parchment paper under the dough. Dust the proofing basket or towel generously with rice flour.
Frequently Asked Questions
How Do I Know When My Sourdough Bread Is Fully Baked?
Fully baked sourdough should have a deep golden crust and sound hollow when tapped on the bottom. An internal temperature of about 208–210°F (98–99°C) is ideal. If you slice and the crumb is gummy, the loaf needed more time.
Can I Bake Sourdough Without Parchment Paper?
Yes. You can sprinkle cornmeal or semolina in the bottom of the Dutch oven to prevent sticking. However, parchment makes transferring the dough much easier, especially for beginners.
What Size Dutch Oven Is Best For Sourdough Bread?
A 4–6 quart Dutch oven is ideal for most recipes. Too small and the bread may stick to the sides; too large and the loaf may spread out. For one standard loaf (using about 500g flour), a 5-quart pot is perfect.
Can I Use All-purpose Flour Instead Of Bread Flour?
You can, but bread flour gives better structure and a chewier crumb. If you use all-purpose, reduce water slightly, as it absorbs less than bread flour.
Why Is My Sourdough Crust Hard Or Too Thick?
A thick, hard crust is usually from baking too long or at too high heat. Try reducing the uncovered baking time, or cover the loaf for longer. Cooling the bread completely also softens the crust slightly.
Credit: www.theperfectloaf.com
Final Thoughts
Baking sourdough in a Dutch oven is a rewarding process that brings out the best in homemade bread. It gives you the crust, crumb, and flavor that bakers dream of, right from your own kitchen. Remember: patience, practice, and a well-fed starter are your keys to success. Don’t worry if your first loaf isn’t perfect—every loaf teaches you something new. With each bake, you’ll see—and taste—the results of your effort. The ritual of mixing, shaping, and baking connects you to a tradition that spans centuries. Once you’ve experienced the joy of slicing into your first crackling sourdough, you’ll understand why so many bakers never look back.
For more on sourdough and bread science, check out the excellent resources at The Perfect Loaf. Happy baking!