Skip to content
If you use a vacuum sealer at home, you already know how useful it is for keeping food fresh longer. But many people forget that regular cleaning is essential for both food safety and machine life. A dirty vacuum sealer can lead to bad smells, mold, poor seals, and even machine failure. Cleaning your vacuum sealer is simple, but there are key steps and tips that most owners overlook.
This guide will show you exactly how to clean your vacuum sealer, step by step, and help you avoid common mistakes.
Why Cleaning Your Vacuum Sealer Matters
A vacuum sealer removes air from bags and seals them tight. It’s used for storing meat, cheese, vegetables, and leftovers. If the machine is dirty, food particles and moisture can stay inside, leading to bacteria growth and odors. Studies show that bacteria can double in number every 20 minutes in warm, moist conditions. This means a dirty sealer can quickly become unsafe.
Cleaning also protects your investment. Vacuum sealers are not cheap—some models cost over $200. Regular cleaning prevents breakdowns, keeps seals strong, and avoids wasted food.
Basic Tools And Supplies You’ll Need
Before you start, gather these items:
- Soft cloths or paper towels
- Mild dish soap
- Warm water
- Small brush (like a toothbrush)
- Cotton swabs
- Rubbing alcohol
- Vacuum sealer manual (for model-specific tips)
Never use harsh chemicals, bleach, or abrasive pads. These can scratch surfaces or damage seals.
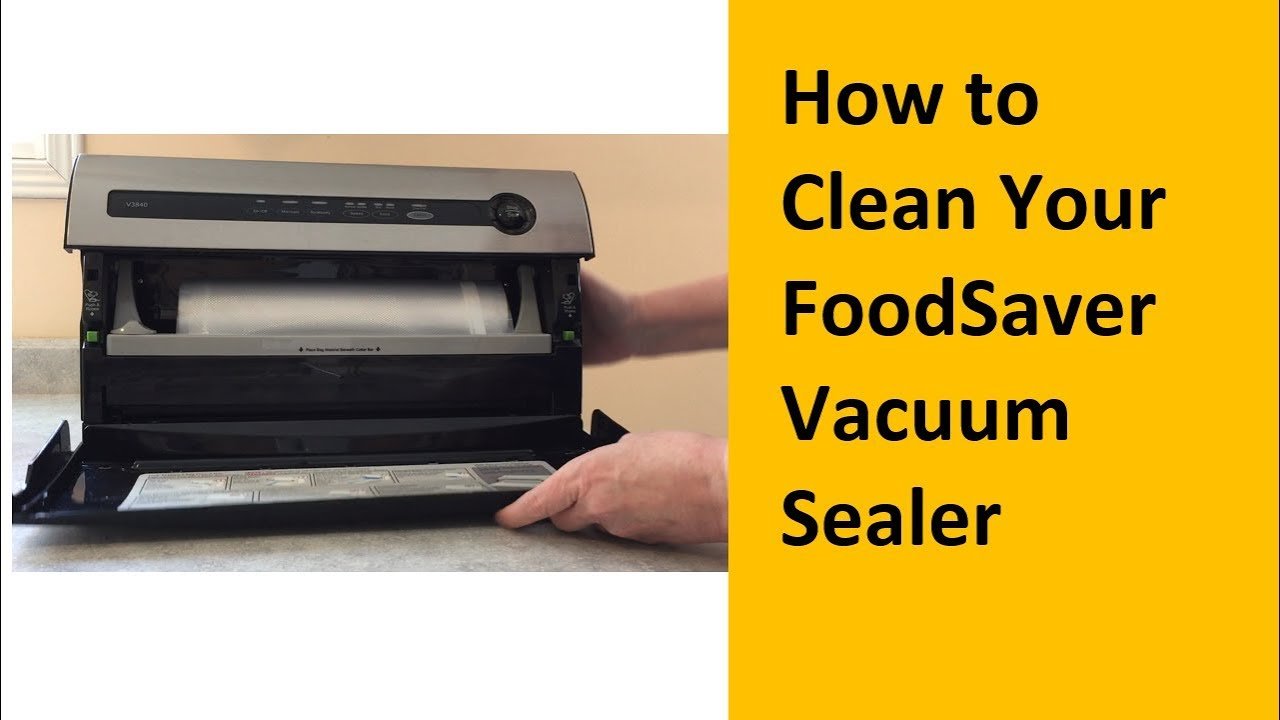
Step-by-step Cleaning Guide
Each vacuum sealer is a bit different, but the cleaning process is similar for most models. Here’s a detailed approach that works for both external and chamber vacuum sealers.
1. Unplug And Disassemble
Safety comes first. Always unplug your vacuum sealer before cleaning. Remove any detachable parts, like drip trays, gaskets, or sealing bars. Your manual will show how to do this. Not all parts are removable, so check carefully.
2. Clean The Exterior
Wipe the outside with a soft, damp cloth. Use mild soap if needed. Avoid letting water get inside any vents or buttons. For touch screens, use only a slightly damp cloth—never spray directly.
3. Clean The Sealing Area
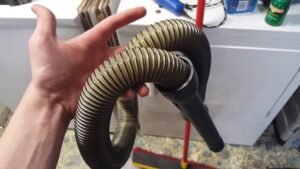
This is where food particles often collect. Moisten a cloth with warm, soapy water and wipe the sealing strip, vacuum channel, and surrounding areas. Use a small brush for tight spots. Cotton swabs help clean corners or the vacuum nozzle.
If your model has a drip tray, remove it and wash with soap and water. Dry completely before putting it back.
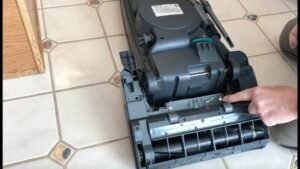
4. Clean Removable Parts
Wash removable parts (like trays or gaskets) in warm, soapy water. Some gaskets can be wiped only—check your manual. Dry everything thoroughly. Water left inside can cause mold.
5. Deep Clean The Chamber (for Chamber Sealers)
If you have a chamber vacuum sealer, the chamber needs extra care. Wipe the inside walls with a damp cloth. Clean the sealing bar and vacuum pump area gently. Never pour water inside. Use rubbing alcohol for sticky spots.
6. Check And Clean The Vacuum Pump (if Needed)
Some advanced models have a vacuum pump that requires cleaning. Usually, you just wipe the outside or use a cotton swab for dust. If your pump needs oil, use the recommended oil only.
7. Reassemble And Test
Once everything is dry, reassemble your sealer. Plug it in, run a short test cycle with an empty bag to check for leaks or poor seals.
Cleaning Frequency
How often should you clean your vacuum sealer? It depends on usage:
| Usage Level | Recommended Cleaning |
|---|---|
| Light (1-2 times/week) | Clean after each use, deep clean monthly |
| Moderate (3-5 times/week) | Clean after each use, deep clean bi-weekly |
| Heavy (daily) | Clean after each use, deep clean weekly |
Never let food residue sit for days. Even after sealing dry items, wipe the sealing area.
Credit: www.youtube.com
How To Clean Stubborn Stains And Odors
Sometimes, you’ll find sticky spots or bad smells. Here’s how to tackle them:
- For sticky food, use a cloth dipped in rubbing alcohol. This breaks down grease.
- For odors, wipe the chamber or sealing area with a solution of equal parts water and vinegar. Let it sit for 5 minutes, then wipe dry.
- If stains remain, repeat with a mild soap and water mix. Never use bleach.
Common Mistakes And How To Avoid Them
Many people make mistakes that can ruin their vacuum sealer. Here are the top issues:
- Using abrasive pads: These scratch the sealing bar and cause leaks.
- Leaving moisture inside: Wet parts can cause mold and corrosion.
- Forgetting to clean after sealing raw meat: Bacteria can transfer and grow.
- Using the wrong oil in the pump: Only use what the manual recommends.
- Not drying removable parts: Always air dry or use a cloth.
Avoiding these mistakes extends the life of your vacuum sealer and keeps food safe.
Tips For Cleaning Different Brands
While most vacuum sealers follow similar cleaning steps, some brands have special features. Here’s a comparison of three popular brands:
| Brand | Cleaning Feature | Common Issue |
|---|---|---|
| FoodSaver | Removable drip tray | Tray must be dried fully |
| VacMaster | Easy-access chamber | Pump needs oil check |
| Seal-a-Meal | Simple wipe-down design | Sealing bar scratches easily |
Always read your manual. Some brands recommend special cleaning products or have parts that should not get wet.
What To Do If Your Vacuum Sealer Smells Bad
If you notice a bad odor:
- Wipe all surfaces with vinegar solution.
- Remove and wash drip tray and gaskets.
- Leave the machine open to air dry for a few hours.
Odors often mean food residue is trapped inside. Deep cleaning solves most problems.
Preventive Maintenance
Cleaning is just one part of caring for your vacuum sealer. Here are some preventive steps:
- Store your sealer in a dry, cool place.
- Don’t overload bags—this can cause spills inside the machine.
- Use only recommended bags and accessories.
- Check seals regularly for wear.
- Oil the pump if your model requires it.
A well-maintained machine lasts years longer.
Signs Your Vacuum Sealer Needs Repair Or Replacement
Even with good cleaning, machines wear out. Watch for these signs:
| Sign | Possible Cause | Action |
|---|---|---|
| Poor seal quality | Dirty sealing bar, worn gasket | Clean or replace parts |
| Strange noises | Pump needs oil or cleaning | Check manual, oil pump |
| Leaking air | Damaged bag or seal | Check for cracks, replace bag |
| Persistent odor | Mold or deep residue | Deep clean, replace parts if needed |
If cleaning does not fix these issues, contact customer support or consider a new machine.
Credit: help.foodsaver.com
Real-world Example: Cleaning After Sealing Raw Chicken
Imagine you just sealed several bags of raw chicken. Meat juices can leak into the vacuum channel and drip tray. Here’s what to do:
- Unplug the machine and remove the tray.
- Wash the tray with hot, soapy water.
- Wipe the sealing strip and channel with rubbing alcohol.
- Use a cotton swab for hard-to-reach spots.
- Dry all parts fully before reassembling.
This prevents bacteria and ensures your next use is safe.
How A Clean Vacuum Sealer Improves Food Safety
A clean vacuum sealer keeps your food safe. Dirty sealers can transfer bacteria to new bags, causing spoilage or sickness. According to the CDC, foodborne illness affects 48 million Americans each year. Regular cleaning reduces risk and keeps food tasting fresh.

Credit: www.youtube.com
Non-obvious Insights Most Owners Miss
- Gasket maintenance: Many people forget the gasket. If it’s dirty or cracked, the seal fails. Clean and check it every time.
- Air-drying: Wiping is not enough. Air-dry all parts to prevent hidden moisture.
- Test run after cleaning: Always seal an empty bag after cleaning. This checks for leaks and helps spot missed residue.
These steps are simple but make a big difference.
Where To Find More Cleaning Tips
For deeper maintenance or troubleshooting, visit official sites like FoodSaver. Manuals often have cleaning guides and part replacement instructions.
Frequently Asked Questions
How Often Should I Clean My Vacuum Sealer?
Clean after every use, especially if sealing wet or raw items. Deep clean at least once a month. Heavy users should deep clean weekly.
What Parts Of The Vacuum Sealer Are Most Important To Clean?
Focus on the sealing strip, vacuum channel, drip tray, and gasket. These areas collect most food residue.
Can I Use Bleach Or Harsh Cleaners?
No. Bleach and strong chemicals can damage your vacuum sealer and leave unsafe residues. Use mild soap, water, and rubbing alcohol.
What If My Vacuum Sealer Still Smells After Cleaning?
Try cleaning with a vinegar solution and air dry. Persistent smells may mean mold or deep residue—consider replacing gaskets or trays.
How Do I Clean The Vacuum Pump?
Most pumps only need dust wiped away. If your model needs oil, follow manual instructions. Never use water inside the pump.
Cleaning your vacuum sealer is simple, but it makes a big difference. Taking a few minutes after each use keeps your machine working, protects your food, and saves money in the long run. A well-maintained vacuum sealer is your best friend in the kitchen—so don’t let cleaning slide.