Owning or managing an ice cream machine can feel like a dream—until it’s time to clean it. Whether you run a busy cafe, a small dessert shop, or just want to keep your home machine in top shape, cleaning isn’t optional. It’s necessary for food safety, machine performance, and the quality of every scoop you serve. Many people underestimate how much a dirty machine can affect taste, texture, and customer trust. In fact, a poorly cleaned ice cream machine is one of the most common reasons for failed health inspections and machine breakdowns.
This guide will show you everything you need to know about how to clean an ice cream machine. You’ll learn every step, why each part matters, and how to avoid common mistakes that can cost you time and money. By the end, you’ll have the confidence to keep your machine spotless, your product delicious, and your business safe from trouble.

Why Cleaning Your Ice Cream Machine Matters
A clean ice cream machine does much more than just look good. It keeps your ice cream tasting fresh, prevents bacteria buildup, and helps your equipment last longer. Food safety laws require regular and thorough cleaning, especially in commercial settings.
If you skip cleaning, you risk not only your reputation but also the health of your customers.
Bacteria like Listeria monocytogenes can survive in dairy products and ice cream machines if not properly cleaned. According to the U.S. Centers for Disease Control and Prevention, outbreaks of foodborne illness have been linked to unclean soft-serve machines. Even a small amount of leftover mix can lead to contamination.
Regular cleaning also prevents buildup of milk stone (a hard, chalky deposit), which can clog parts, reduce freezing efficiency, and lead to expensive repairs. Plus, clean machines freeze and dispense ice cream more smoothly, with better texture and flavor.
Understanding Your Ice Cream Machine
Before you start cleaning, you need to know the type of ice cream machine you have. Not all machines are the same, and each has its own cleaning needs.
| Type of Machine | Common Locations | Cleaning Frequency |
|---|---|---|
| Soft Serve | Fast food chains, cafes | Daily to every 3 days |
| Batch Freezer | Artisan shops, restaurants | After each use |
| Countertop/Home | Homes, small events | After each use |
Most commercial machines have a similar structure: a freezing cylinder, hoppers (where mix is poured), dasher (the rotating blade), dispensing tap, and many small parts like seals and gaskets. Always check your user manual for special instructions, but this article covers the core process for nearly every model.

Credit: www.rockymountainsdistributing.com
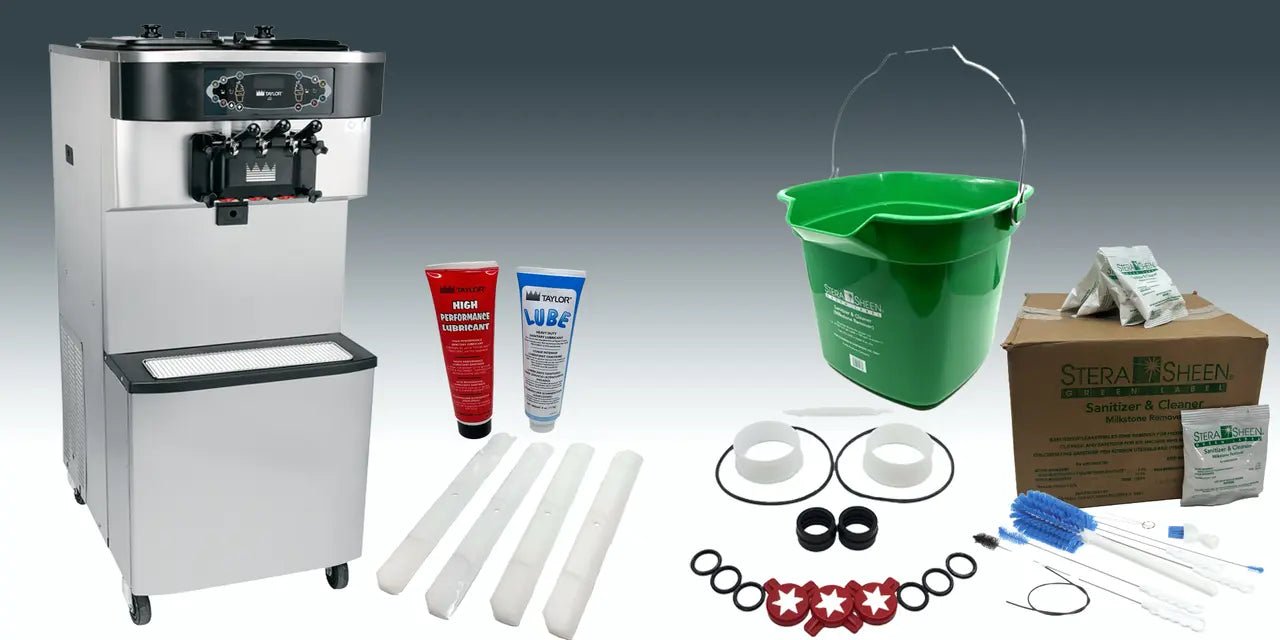
What You’ll Need: Essential Cleaning Supplies
You don’t need fancy tools, but using the right supplies makes cleaning faster and more effective. Here’s what you need:
- Food-safe sanitizer (like a commercial dairy sanitizer)
- Mild dish soap (fragrance-free is best)
- Clean towels or disposable paper towels
- Soft-bristled brushes (different sizes for small parts and corners)
- Buckets for mixing cleaning and sanitizing solutions
- Clean water (preferably warm)
- Protective gloves
Some machines come with their own cleaning brushes and tools. If yours did, use them—they fit the machine’s small parts perfectly.
Step-by-step: How To Clean An Ice Cream Machine
Cleaning an ice cream machine involves several steps. Missing even one can leave behind bacteria or damage your equipment. Here’s a full, practical guide:
1. Prepare The Machine
Turn off and unplug the machine. Safety first—never clean while the machine is running or plugged in. If your machine uses a water line, shut it off as well. Remove any ice cream mix from the hopper and dispensing cylinder.
Run the “wash” or “clean” cycle (if your machine has one) to push out as much remaining mix as possible. Collect this in a bucket and discard it.
2. Disassemble All Removable Parts
Take off every part you can: the hopper, dasher, blades, dispensing handles, seals, gaskets, and any other pieces. Lay them out on a clean towel so you don’t lose anything. Check your manual if you’re unsure which parts are removable.
Non-obvious insight: Small gaskets and O-rings can hide under the dispensing tap or inside the cylinder. Missing these during cleaning is a common beginner mistake.
3. Pre-rinse Parts And Surfaces
Rinse all parts and the inside surfaces of the machine with warm water to remove loose mix and debris. Never use hot water on cold machine parts—it can crack or warp plastic and rubber.
4. Wash With Soap And Brushes
Fill a bucket with warm water and a small amount of mild dish soap. Use brushes to scrub every part, especially corners, crevices, and inside the dispensing tap. Pay extra attention to the dasher and seals, as these touch the ice cream the most.
Clean the inside of the freezing cylinder and hopper with a soft cloth or brush.
Non-obvious insight: Even a thin film of dried mix can grow bacteria. Hold small parts up to the light—if you see a cloudy spot, wash it again.
5. Rinse Thoroughly
Rinse every part with clean, warm water. Soap residue can affect ice cream taste and may cause health issues. Rinse until water runs clear and there are no bubbles.
6. Sanitize All Parts
Mix a food-safe sanitizer according to the label instructions. Soak all removable parts for the recommended time (usually 2–5 minutes). Use a clean towel to wipe the inside surfaces of the machine with sanitizer as well. Do not rinse after sanitizing—let parts air dry to keep the sanitizer working.
7. Inspect For Damage
Check each part for cracks, worn gaskets, or loose seals. Damaged parts can cause leaks and poor freezing, and are a common place for bacteria to hide. Replace any worn or broken parts before reassembling.
8. Reassemble The Machine
Put all parts back in their correct positions. Make sure gaskets and O-rings are seated firmly. Loose seals can lead to leaks or machine failure. Follow your manual for the right assembly order.
9. Sanitize The Machine (final Cycle)
Fill the hopper with fresh sanitizer solution. Run the machine on the “wash” or “sanitize” cycle if it has one. This cleans inside areas you can’t reach by hand. Dispense the sanitizer through the tap, then let all surfaces air dry.
10. Ready For Use
Once all parts are dry, the machine is ready for new mix. Never add ice cream mix to a wet or damp machine—leftover water can dilute the product and affect freezing.
How Often Should You Clean Your Ice Cream Machine?
How often you clean depends on your machine and how much you use it. Here’s a practical comparison:
| Usage Level | Recommended Cleaning Frequency | Reason |
|---|---|---|
| High (e.g., busy shop) | Every day | Prevents bacteria, keeps machine efficient |
| Moderate (e.g., cafe) | Every 2–3 days | Reduces risk, preserves taste |
| Low (home use) | After each use | Stops spoilage and bad flavors |
Some health codes require daily cleaning for commercial machines. Always check your local laws.
Special Cleaning For Different Machine Types
Not all ice cream machines are the same. Here’s how to adjust your cleaning for different models:
Soft Serve Machines
These have more moving parts and usually require daily cleaning. They often have an automatic wash cycle, but you still need to disassemble and hand-clean all removable parts. Pay extra attention to the hopper and freezing cylinder. If your machine uses a heat treatment cycle (to reduce bacteria), you still need to deep-clean weekly.
Batch Freezers
Batch freezers (used for gelato and artisan ice cream) have a simpler structure. Clean after every batch, since old mix hardens quickly and is hard to remove. Focus on the dasher and cylinder, which get the most buildup. Many models have fewer seals and gaskets, making them a bit easier to clean.
Home/countertop Machines
These are usually smaller and easier to clean. Most have just a bowl, a blade, and a lid. Clean immediately after each use, before mix dries. Don’t put electrical parts in water—wipe with a damp cloth only.

Credit: www.youtube.com
Common Mistakes And How To Avoid Them
Even experienced staff make cleaning mistakes that can lead to problems. Here’s what to watch for:
1. Not Disassembling All Parts
Bacteria can hide under seals and in threads. Always take apart everything.
2. Using Hot Water On Cold Parts
Sudden temperature change can crack plastic or warp seals.
3. Forgetting To Sanitize
Soap isn’t enough. Sanitizer kills bacteria that survive cleaning.
4. Skipping Regular Maintenance
Worn gaskets and seals lead to leaks and contamination.
5. Rushing The Process
Each step needs time, especially soaking and sanitizing.
6. Using Harsh Chemicals
Only use food-safe cleaners. Bleach or strong chemicals can damage parts and leave unsafe residue.
Advanced Tips: Going Beyond Basic Cleaning
If you want to keep your machine in top condition, try these expert tips:
- Rotate your cleaning staff. Train several team members so cleaning never gets skipped.
- Keep a cleaning log. Record every cleaning with date and staff initials. This helps with health inspections and accountability.
- Check for milk stone monthly. Use a special milk stone remover if you see white, chalky buildup.
- Inspect seals weekly. Replace them at the first sign of wear.
- Deep clean monthly. Use a food-grade lubricant on moving parts (but never on food-contact surfaces).
- Schedule professional maintenance yearly. A technician can check for hard-to-see problems.
Troubleshooting: Solving Common Cleaning Problems
Sometimes you do everything right, but problems still happen. Here’s how to handle common issues:
Machine Smells Bad
Usually caused by missed cleaning steps or old mix. Disassemble and soak all parts in sanitizer. Clean the inside with a mix of water and baking soda to remove odors. If smell returns, check for damaged seals or hidden buildup.
Ice Cream Won’t Freeze Properly
This can be a sign of clogged or dirty parts. Clean everything again, focusing on the freezing cylinder and dasher. Check for milk stone or dried mix blocking the cooling system.
Machine Leaks
Often caused by worn or misaligned seals and gaskets. Inspect and replace as needed. Make sure all parts are assembled tightly, but don’t overtighten—this can damage rubber parts.
Ice Cream Tastes Off
Lingering soap, sanitizer, or old mix can affect flavor. Always rinse well after washing, and never mix fresh and old product. If taste problems continue, do a full deep clean and replace all seals.
Example: Cleaning Schedule For A Busy Cafe
To see how all this comes together, here’s a sample cleaning schedule used by a real ice cream shop:
- Every night: Disassemble machine, wash and sanitize all parts, wipe down external surfaces.
- Every morning: Run a sanitizer cycle before adding mix.
- Once a week: Deep clean with milk stone remover, inspect and replace seals if needed.
- Every month: Full maintenance check by a technician.
This schedule keeps the machine in top shape, meets health code, and helps prevent breakdowns.
Safety And Compliance: What The Law Requires
Food safety laws are strict about cleaning ice cream machines, especially in restaurants and cafes. The U. S. Food and Drug Administration (FDA) requires regular cleaning and sanitizing of all food-contact surfaces, including ice cream machines. Many local health departments require a written cleaning schedule and may inspect your machine anytime.
Failing to keep your machine clean can lead to fines, closure, or even lawsuits if someone gets sick. That’s why a clear, written cleaning plan is vital for every business.
For more details on food safety regulations, check the official FDA Food Code.
Equipment Upgrades And Accessories
If you want to make cleaning easier, there are accessories and upgrades worth considering:
- Custom-fit cleaning brushes: Reach deep into cylinders and taps.
- Automatic cleaning cycles: Some new machines have built-in sanitizing programs.
- Replacement parts kits: Keep spare seals, gaskets, and blades on hand.
- Milk stone remover: For deep cleaning and removing hard buildup.
Investing in the right accessories can save time and reduce risk of mistakes.
Staff Training: Building A Cleaning Culture
In a business, cleaning is only as good as your staff’s training. Make sure every worker knows:
- How to fully disassemble and reassemble the machine
- Which parts need extra attention
- The right cleaning supplies and where to find them
- How to mix sanitizer safely
- What to do if they find a damaged part
Offer short refresher sessions, especially when hiring new staff. Reward teams for perfect cleaning records—this builds pride and prevents “shortcut” habits that can lead to trouble.
Saving Time Without Sacrificing Quality
Everyone wants to clean faster, but shortcuts lead to problems. Instead, focus on:
- Organized workstations: Keep brushes, soap, and towels close by.
- Clear, step-by-step instructions: Post cleaning checklists near the machine.
- Teamwork: Two people can clean faster—one washes while the other dries and reassembles.
Avoid the temptation to skip steps. Remember, a few extra minutes spent cleaning can save hours of repair or lost business later.
Credit: taylorupstatestore.com
Frequently Asked Questions
How Often Should I Clean My Ice Cream Machine?
For most commercial machines, clean daily or as required by your local health department. Home machines should be cleaned after every use. High-traffic businesses may need to clean more often, especially during busy seasons.
Can I Use Bleach To Clean My Ice Cream Machine?
It’s best to avoid bleach. Use only food-safe sanitizers designed for dairy equipment. Bleach can damage rubber parts and may leave unsafe residue if not rinsed completely.
What Happens If I Forget To Clean My Machine For A Few Days?
Skipping cleaning allows bacteria and mold to grow. It can lead to bad smells, poor texture, or even food poisoning. If you forget, do a full deep clean before serving any more product.
Do I Need To Lubricate Parts After Cleaning?
Lubricate only the moving, non-food-contact parts as recommended by your machine’s manual. Never put lubricant where it can touch ice cream. Use only food-grade lubricant if required.
My Ice Cream Machine Is Still Dirty After Cleaning. What Should I Do?
Disassemble all parts and inspect for hidden buildup or milk stone. Use a specialized milk stone remover if needed. If the problem continues, contact a technician for professional cleaning.
Keeping your ice cream machine clean isn’t just about following rules—it’s about serving the best product possible and keeping your customers safe. With the steps and insights in this guide, you can confidently maintain your machine, avoid costly mistakes, and enjoy smooth, delicious ice cream every day.