Your immersion blender is one of the most versatile tools in your kitchen—whipping up silky soups, emulsifying dressings, and frothing milk in seconds. But that powerful little motor and those sharp blades demand respect when it comes to cleaning. A poorly maintained immersion blender can harbor bacteria, develop unpleasant odors, and even fail prematurely.
The good news is that cleaning your immersion blender doesn't have to be a chore. With the right technique and a bit of timing, you can keep it spotless and ready for your next culinary adventure. These seven tips cover everything from a quick daily rinse to a thorough deep clean, ensuring your trusty kitchen companion lasts for years. You can also read our guide on how to sharpen blender blades.
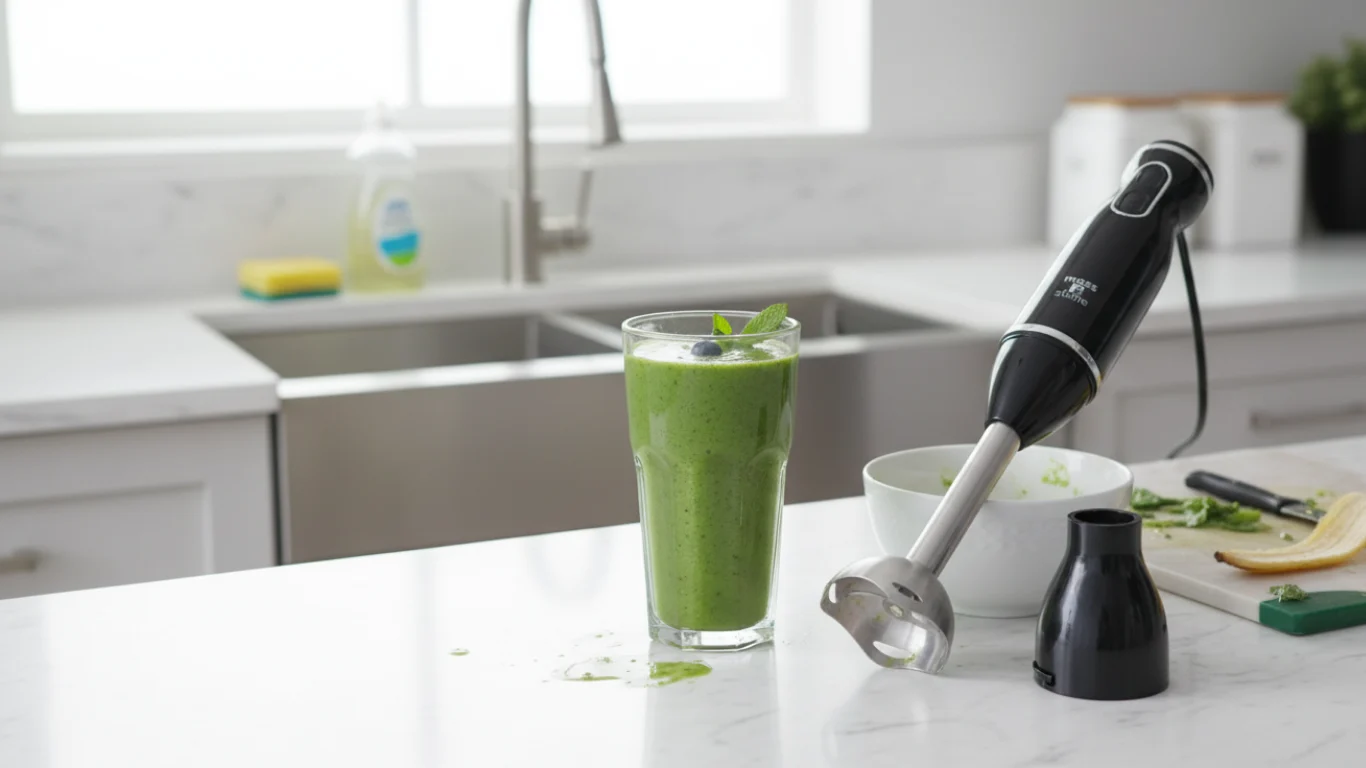
Why Cleaning Your Immersion Blender Matters More Than You Think
Beyond the obvious hygiene concerns, there are several practical reasons to clean your immersion blender properly after every use:
Food safety. The blades and shaft come into direct contact with raw ingredients, including meats, poultry, and eggs. If left uncleaned, bacteria like Salmonella and E. coli can multiply rapidly on food residue. Proper cleaning eliminates this health risk.
Taste preservation. A blender that isn't properly cleaned can transfer flavors. Nobody wants their strawberry smoothie to taste like last night's tomato soup. The fats and oils from previous recipes cling to the blades and shaft, tainting future dishes.
Longevity. Food acids and salts can corrode the metal shaft and blade assembly over time. Dried-on residue also forces the motor to work harder, which can strain the electrical components and shorten the appliance's lifespan.
Performance. A clean blade spins more efficiently and blends more consistently. Stubborn buildup on the blade edges can literally dull their effectiveness over time.
Tip 1: Rinse Immediately After Each Use
The single most effective habit you can develop is rinsing your immersion blender immediately after you finish blending. Hot soup, thick sauces, and sticky batters dry into stubborn crusts the moment they cool. Once that happens, you're facing a much more difficult cleaning job.
In practice, this takes about 10 seconds. Here's the drill:
- Keep the blender plugged in only if you're immediately blending a quick rinse afterward (see Tip 2). Otherwise, unplug it immediately.
- Run the blade and shaft under warm running water to remove the bulk of the residue.
- Use your thumb to gently wipe away any visible food particles from the blade guard and shaft.
This quick rinse won't replace a full wash, but it dramatically reduces the work required later. A common mistake is setting the blender aside for "later" after using it—by the time you return, the residue has hardened and become significantly harder to remove.
Tip 2: The 20-Second Soapy Water Trick
This is the fastest and most effective way to clean your immersion blender, and it's the method most professional chefs use. It takes advantage of the blender's own power to clean itself.
Step-by-Step Instructions
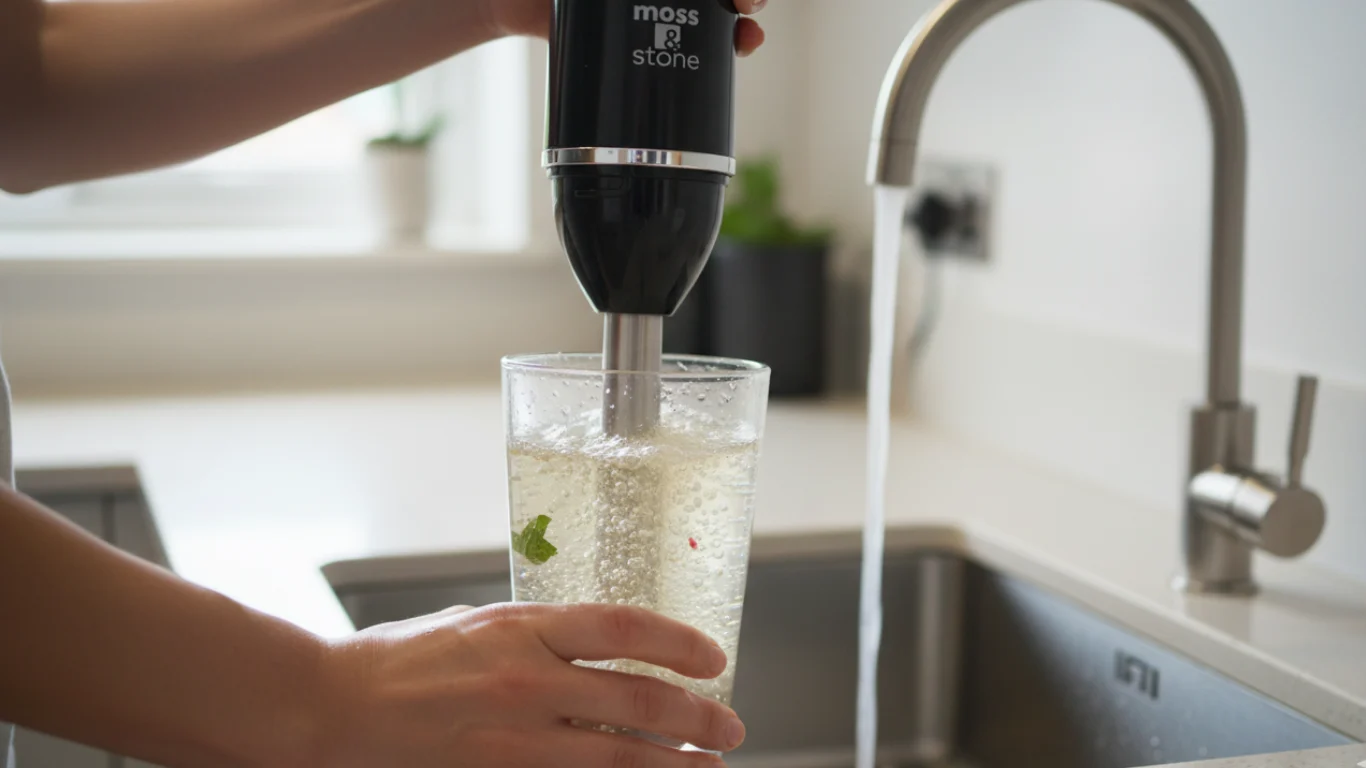
- Fill a tall container—preferably the same beaker that came with your blender or a tall mixing glass—with warm water.
- Add one or two drops of mild dish soap.
- Submerge the blender head so that the blades are completely covered by the soapy water.
- Run the blender for 15 to 20 seconds. The spinning blades create a vortex that pulls water across every surface, dislodging food particles and dissolving grease.
- Empty the container and refill with clean, warm water.
- Blend for a few more seconds in the clean water to rinse away any soap residue.
- Remove and shake off the excess water.
Choosing the Right Container
The container matters more than you might think. You need something tall enough that the water level reaches well above the blade assembly. If the container is too shallow, the blender will fling soapy water everywhere—and you'll be cleaning the counter instead of the blender.
A note on heat: Use warm water, not hot. Water that's too hot can warp plastic components and degrade the seals that protect the motor. Warm water dissolves oils and fats effectively without risking damage.
Tip 3: Master the Deep Clean for Stubborn Residue
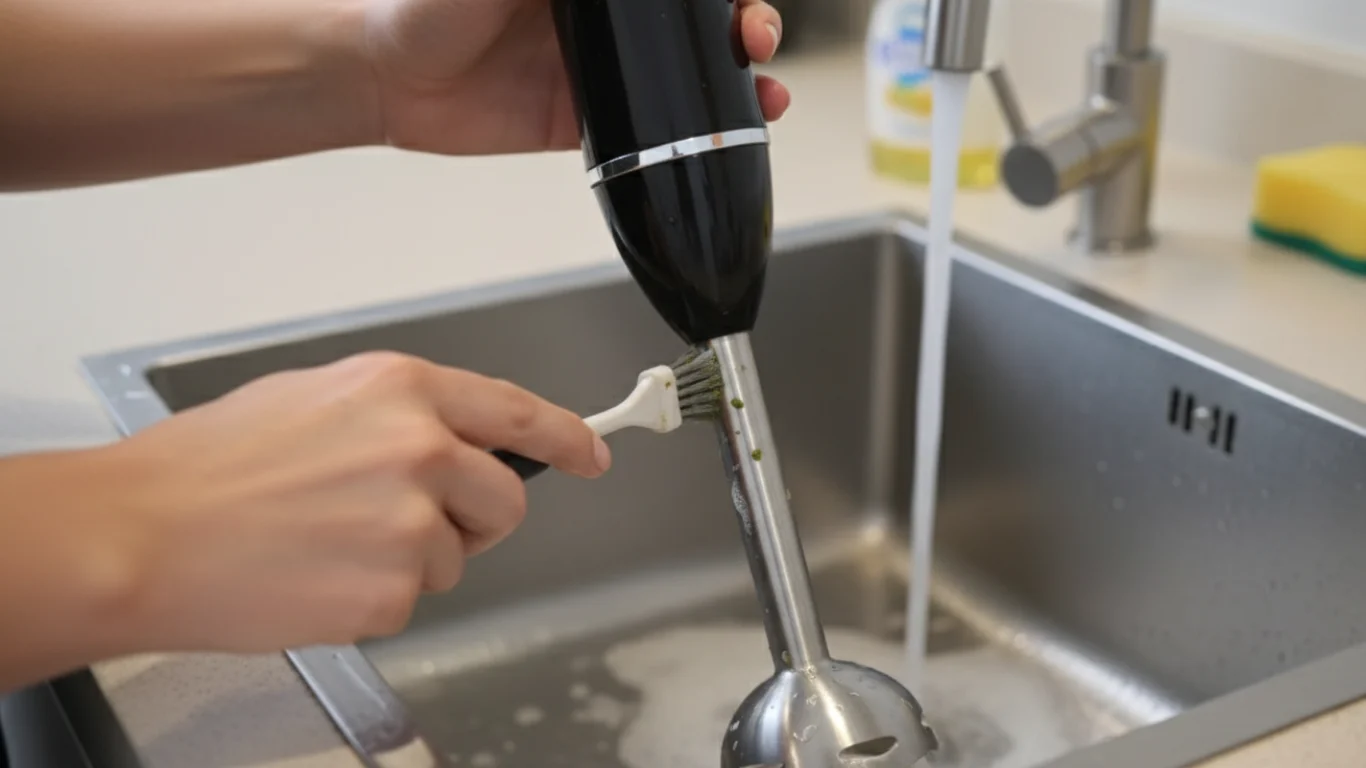
Even with regular quick cleaning, food particles can accumulate in hard-to-reach areas—particularly where the blade meets the shaft, behind the blade guard, and in any crevices of the housing. Once a week (or whenever you notice buildup), give your blender a more thorough cleaning.
What You'll Need
- A soft-bristled brush (a dedicated bottle brush or a clean toothbrush works perfectly)
- Mild dish soap
- Warm water
- A clean, dry microfiber cloth
The Process
- Unplug the blender and detach the blending shaft from the motor body if your model allows it.
- Soak the shaft in warm, soapy water for 10 to 15 minutes if residue is particularly stubborn.
- Scrub gently with your soft brush, focusing on the blade edges, the underside of the blade guard, and the crevice where the blade meets the shaft. Use slow, circular motions and avoid applying excessive pressure—the blades are sharp and scratching the metal surface can create hiding spots for bacteria.
- Rinse thoroughly under warm running water, ensuring all soap is gone.
- Wipe the motor body with a damp cloth. Never submerge the motor housing in water.
What to Avoid
- Steel wool or abrasive pads — these will scratch the metal finish and create microscopic grooves where bacteria can thrive.
- Bleach or harsh chemical cleaners — these can damage the finish and leave harmful residues. For sanitizing, a solution of one part white vinegar to three parts water works well (more in the FAQ below).
- Submerging the motor — even a small amount of water entering the motor housing can cause a short circuit.
Tip 4: Never Submerge the Motor Housing
This is arguably the most crucial safety tip when it comes to cleaning your immersion blender. While the blending shaft is designed to be immersed in liquids, the motor housing is not.
The motor body contains electrical components that are extremely vulnerable to water damage. A single drop of water seeping through the seals can cause:
- Short circuits that permanently destroy the motor
- A serious electrical shock risk
- Corrosion and rust on electrical connections
- Voiding of the manufacturer's warranty
The Safe Way to Clean the Motor Housing
- Unplug the blender completely.
- Remove the blending shaft if your model allows it—this gives you access to the motor's underside.
- Dampen a cloth with a mild cleaning solution. Wring it out thoroughly so it's just slightly damp, not wet.
- Wipe down the entire motor housing, including the handle and buttons.
- Dry immediately with a clean, dry cloth.
- Pay extra attention to the area where the shaft attaches, as food residue often accumulates there.
If your model isn't detachable, keep the motor body away from any standing water. Tilt it so water runs off the shaft rather than pooling around the base of the motor when rinsing.
Tip 5: Always Unplug Before Handling the Blades
We understand how tempting it is to quickly wipe the blades right after use, especially if the blender is still plugged in. This is a dangerous habit that should be avoided at all costs.
Immersion blender blades are sharp—in many cases, sharper than you might expect. They're designed to cut through raw vegetables, frozen fruit, and even bones in some models. The motor is powerful, and if the blender is plugged in, there's a risk of accidental activation.
The Statistics Don't Lie
According to a report by the Consumer Product Safety Commission, thousands of blender-related injuries occur each year in the United States, with many involving lacerations from blades. While most incidents involve countertop blenders, the risk applies equally to immersion blenders.
A Simple Habit to Develop
Make it a non-negotiable rule: the blender is unplugged before any part of it is touched with your hands. This includes:
- Removing food debris from the blades
- Detaching the blending shaft from the motor
- Wiping down the blade edges
- Replacing or sharpening the blades
A common mistake is unplugging the blender but leaving the shaft attached to the motor body. While unplugged, there's no risk of accidental activation, but it still makes the cleaning process more cumbersome. Detaching the shaft (where possible) makes cleaning much easier and reduces the risk of water dripping into the motor.
Tip 6: Dry Thoroughly Before Storing
Moisture is the enemy of any kitchen appliance. Storing your immersion blender while it's even slightly damp can lead to rust, mold, and unpleasant odors.
The Drying Process
- Shake off excess water after rinsing.
- Pat dry the blade and shaft with a clean, lint-free cloth.
- Air dry completely before storing. Stand the blender upright (with the blades pointing up) or hang it if your model has a hanging loop. Leaving it flat on a drying rack works too, but ensure air can circulate around all surfaces.
- Check the area where the shaft meets the motor body—water can pool in this small crevice and cause problems later.
Storage Tips
Once your blender is completely dry, store it in a cool, dry cabinet or drawer away from sources of heat and humidity. If your blender came with a protective cover, use it. If not, consider storing the blending shaft vertically (blades up) rather than horizontally where it might get bumped and damaged.
Tip 7: Don't Forget the Blade Collar and Underneath Areas
The most commonly neglected area on an immersion blender is the blade collar—the plastic or metal ring that connects the blade assembly to the shaft. Food particles and grease love to accumulate in this narrow space, just above the blades where the shaft meets the guard.
Why This Area Matters
This hidden crevice is a prime spot for:
- Bacteria growth. The warm, moist environment provides the perfect breeding ground.
- Food odors. Old residue here can release foul smells with every future use.
- Mold development. If left unchecked, mold can form and spread to food during blending.
- Mechanical issues. Dried residue can interfere with the blade's movement over time.
How to Clean It
- Hold the blender upside down so you can see the underside of the blade guard.
- Use a toothpick or the pointed end of a cleaning brush to gently dislodge any particles lodged in the groove where the blades attach.
- Pay special attention to the area around the shaft's base—the hinge point of the blade assembly.
- Rinse with warm water and swipe a cotton swab dipped in soapy water around the collar.
For Detachable Models
If your immersion blender has a detachable blending shaft, make cleaning this area much easier by removing the shaft after every use and cleaning it separately. This also allows you to air-dry both components properly.
Mastering the "No-Soak" Quick Clean for Busy Days
Sometimes, you're in a hurry and need your blender clean now. The 20-second soapy water trick is your answer, but there's a variation that works even faster:
- Fill your sink with warm, soapy water.
- Submerge the blending shaft directly into the sink.
- Run the blender for 10 seconds.
- Rinse under the faucet and you're done.
This method is best for when you're planning to do dishes anyway and need the blender ready for immediate reuse.
Immersion Blender Cleaning FAQ
Can you put the head of an immersion blender in the dishwasher?
It depends on the model. Many modern immersion blenders have removable blending shafts that are dishwasher-safe, typically on the top rack. However, to avoid any risk, always check your manufacturer's instructions. The motor housing should never go in the dishwasher. To maximize longevity, hand washing is recommended. And if you're looking for appliances that are easier to maintain overall, our latest kitchen guides cover top-rated options.
How to sanitize an immersion blender?
After cleaning with soap and water, fill a tall container with a solution of one part white vinegar to three parts water. Run the blender for 20 seconds in this solution. Rinse thoroughly with clean water. White vinegar is a natural, food-safe disinfectant.
How do I clean an immersion blender without getting water in the motor?
Always detach the blending shaft from the motor body (if your model allows) before washing. Wipe the motor with a damp, not wet, cloth. Never hold the blender upside down under running water—this route can guide water into the motor.
Why does my immersion blender smell bad, and how do I fix it?
A bad smell usually indicates trapped food residue. After cleaning, blend a solution of baking soda and warm water for 20 seconds—baking soda neutralizes odors. Leave it to sit for 10 minutes, then rinse and dry thoroughly.
How often should I deep clean my immersion blender?
After daily use, we recommend a deep clean every 7 to 10 days, focusing on the blade collar and crevices. The 20-second soapy water trick is sufficient for daily cleaning.
Can I blend hot soup with my immersion blender?
Yes, most immersion blenders are designed to handle hot liquids. Just be sure to do so carefully in a tall container to prevent splashes. Always let the soup cool slightly (to below 180°F) if you're concerned about the plastic components—prolonged contact with boiling liquid can warp some models. If your model has a plastic shaft that’s showing signs of wear, consider a durable replacement option.
Essential Care Tips to Extend the Life of Your Immersion Blender
Regular cleaning is just one part of responsible ownership. Here are additional things to keep in mind:
Keep the vents clear. The motor housing has ventilation slots to prevent overheating. Food splatter can clog these vents. Wipe them clean during your weekly deep clean to ensure proper airflow.
Check the cord regularly. Fraying, cracks, or exposed wires are safety hazards. Unplug and replace the blender immediately if you find any damage.
Avoid overfilling containers. Filling a container more than halfway is a common mistake. Hot liquids expand and can cause splashback when blending, which makes a mess and can push food into the motor housing.
Don't run the blender dry. Running it with no liquid places excessive strain on the motor and can damage the blades.
Use it gently in nonstick cookware. While immersion blenders are generally safe for nonstick pans, resting the blade guard against the surface with heavy pressure can scratch the coating. Keep the blade slightly raised to avoid direct contact with the pan's base.
Final Thoughts
Mastering how to clean an immersion blender is a small investment of time that pays off in food safety, flavor purity, and appliance longevity. Making the 20-second soapy water blend a non-negotiable habit after each use will save you from the unpleasant experience of scrubbing dried-on food. For a deeper clean, the weekly routine—focusing on the blade collar—will keep it working like new.
A clean immersion blender makes cooking more enjoyable—from silky butternut squash soup to perfect homemade mayonnaise. Keep these tips in mind, and your trusted kitchen companion will reward you with flawless performance for years to come.
Quick Recap: Your 7 Essential Rules
| Tip | Key Action | Time Investment |
|---|---|---|
| 1 | Rinse immediately after use | 10 seconds |
| 2 | Use the soapy water blend trick | 30 seconds |
| 3 | Deep clean weekly, focus on crevices | 5 minutes |
| 4 | Never submerge the motor housing | — |
| 5 | Always unplug before handling blades | 2 seconds |
| 6 | Air dry completely before storing | Overnight |
| 7 | Clean the blade collar and underside | 1 minute weekly |
Now go enjoy your immersion blender—clean, safe, and ready for whatever you're cooking next!
Extend the Same Care to Your Other Kitchen Tools
Your immersion blender isn't the only tool that benefits from regular upkeep. The same principle—clean consistently, deep-clean occasionally—applies to everything you cook with.
Grease and airborne cooking oils accumulate on range hood filters and surfaces over time, forcing the appliance to work harder and run louder. That's why routine ventilation maintenance every few weeks prevents stubborn residue from building up, keeping your kitchen air fresh in the process.
The same logic applies to your everyday knives and utensils. Before replacing a worn-out tool, it's worth checking whether premium knives earn their price—and understanding when a well-made purchase genuinely saves you effort. Even small upgrades, like sturdy metal utensils that resist stains and odors, make daily cleanup dramatically easier than flimsy plastic alternatives.
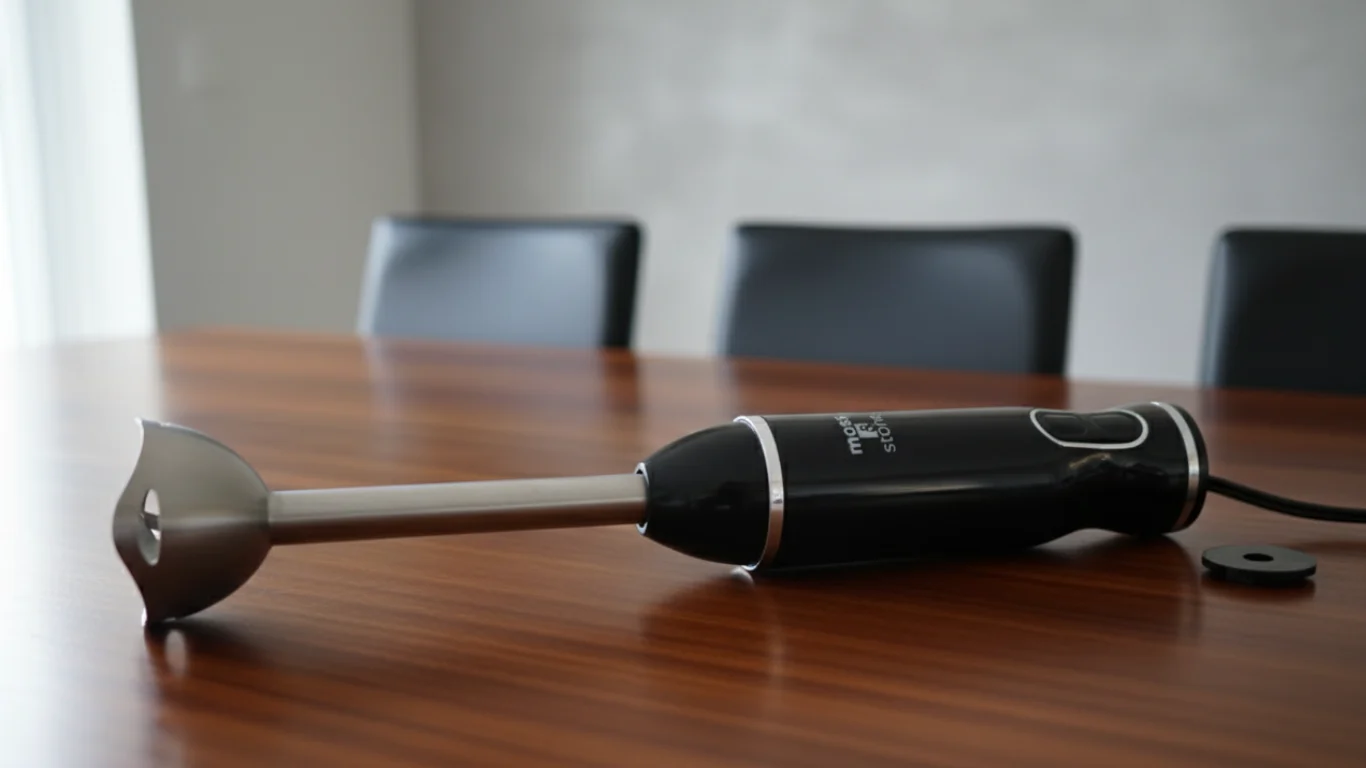
Rinsing the detachable shaft within seconds of use is the simplest way to keep it in perfect condition.
A Maintenance Schedule That Actually Works
| Frequency | Action |
|---|---|
| After every use | Run the 20-second soapy-water blend, then rinse |
| Daily | Wipe down the motor housing with a slightly damp cloth |
| Weekly | Deep-clean the blade collar and inspect the power cord |
| Monthly | Sanitize with a white-vinegar solution and air dry fully |
This routine takes less than five minutes per week and protects a tool that should serve you for years. Commercial kitchens rely on standards like those set by NSF International for a reason: consistently clean tools don't cross-contaminate food.
Common Cleaning Mistakes to Avoid
- Using hot water on plastic parts. Warm water dissolves grease just as well without warping seals.
- Letting food dry onto the blades. A 10-second rinse now beats a 10-minute scrub later.
- Dunking the motor housing "just for a second." That's all it takes to short-circuit the motor.
- Storing the blender while damp. Trapped moisture in the blade collar is how rust and mold start.
A Final Word
The best time to clean your immersion blender is right after you use it—and the second-best time is now. Make the soapy-water blend a reflex, keep the motor dry, and give the blade collar extra attention. Your blender will stay safe, your food will taste fresher, and everyday cooking will stay enjoyable. If you're ever unsure about safe food-handling practices, the U.S. Food and Drug Administration publishes clear, free guidance for home kitchens. And once your blender is spotless, why not put it to work on something delicious, like a silky camembert soup?
Happy blending—and happy cleaning.
Troubleshooting: When the Routine Isn'T Quite Enough
Even with a solid cleaning habit, you may spot a few quirks over time. Here's how to handle the common ones:
Lorem-oring and cloudy film on the shaft. This residue usually comes from hard water minerals, not leftover food. Blend a 50:50 mix of white vinegar and warm water for 30 seconds, then rinse. Rinse again with a few more blips of clean pure water and wipe dry. Repeat monthly if you live in a hard-water zone.
Trapped food bits inside the bell-shaped guard. When the 20-second method doesn't remove the dowdy chunks, take the easy step of scrubbing with a dedicated brush. To reach the corners, keep the blade guard angled upward so you can visually track the crevices where a toothbrush can reach a dry corner, then rinse generously.
A lingering garlic aroma. Garlic and onion notes adhere to plastic shafts especially. Fill your containers with water, add a generous teaspoon of baking soda, and blend for a full minute. Let it soak for five minutes, then rinse and dry. This typically the fastest tactic.
Blade that spins unevenly or locks. If there's no visible food residue but the shaft is hard to rotate by hand, you may have a bearing issue rather than cleaning problem. Check that no thread or fibrous strings are tangled under the blade; if so, glide them out with tweezers, never your fingers. If the motion remains rusty, the drive seal is the likely candidate for replacement.
When Cleaning Won't Fix It (Know When to Retire)
Every immersion blender has a lifespan. Regular deep cleaning extends it, but certain issues mean the unit has reached the end that is time to look for a new one:
- A frayed or damaged cord. Its sheathing has cracked or you can see bare wire—unplug it now and stop using it.
- A motor that smells of burning during use. It's often an electrical overheating stroke, not a crusty residue.. Stop and move to complete tag disposal.
- Cracks or melting on the motor housing loudly visible anywhere.
- A broken center post on the blade cage or heavily deformed blade blades. Always serious-worth a time to invest.
The rotating ring etc.
If your blender has even one of those signs in good repair, don't continue using it just to avoid a purchase. Look first at new models that have easily detachable and dishwasher-friendly features.
Your Immersion Blender Deserves a Clean Slate
Once you've got your immersion blender's daily wash and weekly deep, the routine becomes a pleasant, 30-second habit. The easy helps the taste of your dishes stay pure, your kitchen finishes more refreshed, and each boutique smoothie is produced more homely.
Use the dishwashing time as a proud micro-habit: Every use gets a buzzing, a drying rack, and its place. Then if you're ever caught about a sanitizing or care-specific rule for your model, consult the U.S. Food and Drug Administration for overarching kitchen safety and your appliance's manual for specific care guidelines.
So, tonight when you serve the soap follow, don't forget the relaxing conclusion—return to the sink, fill the small jar, use soapy water—and let that blades run. Your blender will keep working hard, quietly ready for the next splatter—clean, safe, and exactly as you'd want it.