That chalky film floating in your morning tea isn’t just unsightly. It’s limescale, and it’s quietly robbing your kettle of efficiency one boil at a time. Learning how to descale electric kettle units properly takes about ten minutes, and it’s the single best thing you can do to extend their lifespan.
The process isn’t complicated, but it does require a little know-how. Scale forms when hard water heats up, leaving behind calcium carbonate crystals that cling to the heating element and interior walls. As of 2026, roughly 85% of American homes have hard water to some degree, according to the U.S.
Geological Survey. That means most of us are dealing with this problem whether we realize it or not. The good news?
The fix is cheap, fast, and uses things you probably already have in your kitchen.
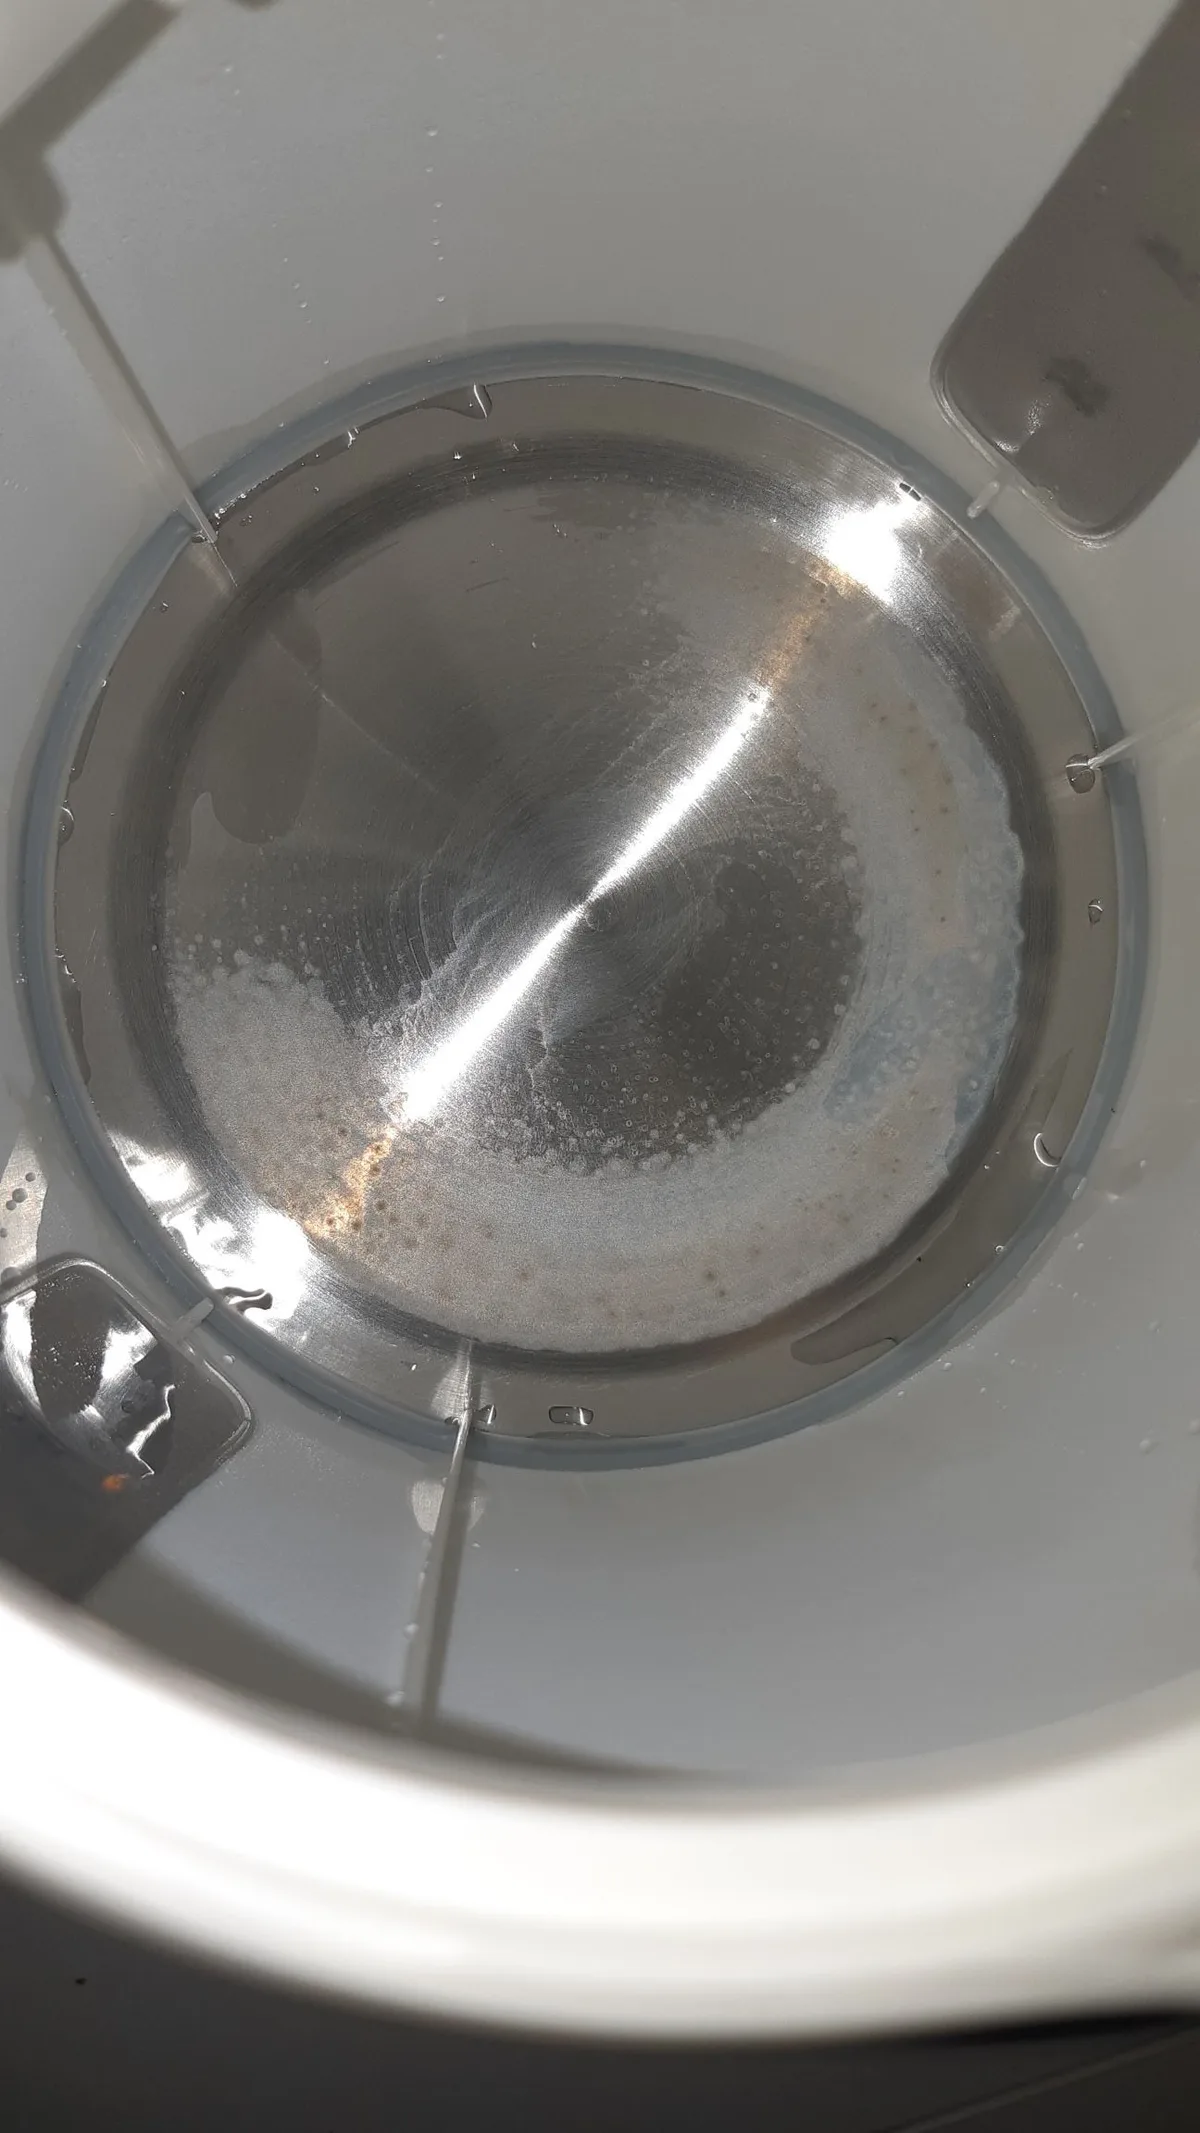
Image source: Web (Bing) / reddit.com (Web image (fair-use with source credit))
Why Your Kettle Builds Up Limescale (And Why You Should Care)
Limescale is the visible evidence of dissolved minerals in your tap water. When water heats, those minerals precipitate out and stick to warm surfaces. Your kettle’s heating element is the perfect landing spot.
Over time, that crusty layer does real damage. Scale acts as an insulator. It traps heat inside the element rather than transferring it to the water.
That means slower boils, higher electricity bills, and eventually, a burned-out appliance.
Think about it this way. A kettle with heavy scale buildup can take 30% longer to boil the same amount of water. Over months of daily use, that’s wasted energy and wasted time.
In severe cases, the element overheats and fails completely, forcing you to buy a replacement.
The visual side matters too. Nobody wants chalky white specks floating in their tea or coffee. And the scale doesn’t stop at the inside of the kettle.
It can clog the spout filter, restrict water flow, and accumulate in tiny crevices that are nearly impossible to clean once hardened.
The good news is that limescale is completely manageable. Regular descaling keeps your kettle fast, efficient, and hygienic. It’s a small habit with outsized returns.
Quick Answer
Fill your kettle halfway with water and boil it. Add one part white vinegar or one tablespoon of citric acid. Let it soak for 15 to 30 minutes.
Boil the solution again. Discard it and rinse thoroughly with fresh water two or three times.
The whole process takes about ten minutes of active time. Most of it is waiting. Check your kettle’s material first to avoid using harsh acids on delicate coatings.
The Material Check: What Your Kettle Is Made Of
Before you pour anything into your kettle, figure out what it’s made of. This single step determines which descaling method is safe. Flip your kettle over and look for a material stamp on the bottom plate.
Most manufacturers stamp it clearly.
Image source: Web (Bing) / badgersauctions.com (Web image (fair-use with source credit))
Stainless steel is the most common interior material. It’s durable, resists scratches, and handles acidic descalers well. Glass interiors are also acid-safe, but they require gentler handling to avoid scratching.
Plastic interiors are fine with mild acids, but they tend to absorb odors more readily.
Enamel-coated interiors are the tricky ones. Strong acids like undiluted vinegar can etch the coating, leaving permanent dull spots. If you have an enamel kettle, stick to commercial descalers or gentle citric acid solutions.
Here’s a quick breakdown of what works where:
| Kettle Material | Safe Descalers | Avoid |
|---|---|---|
| Stainless Steel | Vinegar, citric acid, commercial descaler | Abrasive scrubbers |
| Glass | Vinegar, citric acid, commercial descaler | Steel wool, harsh scrub pads |
| Plastic | Citric acid, commercial descaler | Strong vinegar concentrations |
| Enamel Coating | Commercial descaler only | Strong vinegar solutions |
When in doubt, check the manufacturer’s instruction manual. Most include specific cleaning recommendations. If you’ve lost the manual, look up the model number online.
Official manufacturer documentation is always the safest reference.
The Severity Check: How Bad Is Your Scale?
Not all limescale is created equal. The method that works for a light film is different from what you need for a rock-hard crust. Taking thirty seconds to assess the buildup saves you time and prevents damage.
Light dusting. This looks like a faint white haze on the interior surfaces. Your water still boils normally, and there are no visible flakes. This stage responds to a quick soak of ten to fifteen minutes with a mild solution.
Moderate buildup. You see chalky patches on the walls and heating element. Small white flakes occasionally float in your boiled water. This stage needs the full thirty-minute soak plus a second boil to loosen everything.
Heavy crust. The heating element looks like it’s been dipped in cement. The buildup is thick, hard, and sometimes uneven. This stage requires an overnight soak or a double-strength solution.
You may also need to gently nudge the scale loose with a wooden spatula.
Here’s a simple way to match your approach:
- Slight haze: Soak for 10 minutes, one rinse cycle.
- Visible patches: Soak for 30 minutes, two rinse cycles.
- Thick crust: Soak for 2+ hours or overnight, two to three rinse cycles.
The severity also tells you how often to descale. If you’re dealing with heavy crust every few weeks, your water is extremely hard. Consider switching to filtered water for your kettle to slow the buildup.
How to Descale an Electric Kettle Step by Step
This is the method that works for the vast majority of kettles. It’s simple, effective, and uses ingredients you probably already have in your pantry. Follow these steps carefully.
Step 1: Half-fill and boil. Fill your kettle halfway with fresh tap water. Don’t fill it all the way. When you add the acid, the reaction can bubble and froth.
Half a kettle gives the solution room to react without spilling over. Plug it in and bring the water to a full boil.
Step 2: Unplug and add your descaler. Once the water has boiled, unplug the kettle. Safety first. Add your chosen acid while the water is still hot.
The residual heat activates the acid, which is what makes the process work.
For white vinegar, add about one cup per standard 1.5-liter kettle. For citric acid powder, add one heaped tablespoon. For lemon juice, squeeze in the juice of two fresh lemons.
Give it a gentle swirl to mix.
Step 3: Let it soak. Leave the solution alone for 15 to 30 minutes. You’ll see fizzing and bubbling as the acid works on the scale. That’s the chemical reaction breaking down the calcium carbonate.
Don’t turn the kettle back on during the soak.
Step 4: Boil the solution. After the soak, plug the kettle back in and bring the solution to a boil. This loosens any stubborn deposits that didn’t dissolve during the soak. Once it boils, carefully pour the solution down the sink.
Expect a strong vinegar smell if you used that.
Step 5: Rinse thoroughly. Fill the kettle completely with fresh water. Boil it, then pour it out. Repeat this twice to eliminate any lingering acidic taste or smell.
For stubborn odors, use the baking soda trick: add one teaspoon of baking soda to a full kettle of water, let it sit for five minutes, then boil and discard.
That’s the entire standard process. It takes about ten minutes of hands-on time and most of the waiting happens while you do other things.
Heavy-Duty Descaling: When Soaking Isn’t Enough
Sometimes the standard soak just doesn’t cut it. If you’ve inherited a kettle from a previous owner, or you’ve let the scale go for months, you’re dealing with a different beast entirely. This calls for a more aggressive approach.
Start with a stronger solution. Instead of the one-to-two vinegar-to-water ratio, go with equal parts vinegar and water. For citric acid, double the dose to two heaped tablespoons.
These higher concentrations break down thick, rock-hard scale much more effectively.
The soak time also changes dramatically. A heavy crust needs two hours at minimum. Overnight is even better.
The longer the acid sits, the more it penetrates and dissolves the calcium carbonate bonds. You’ll know it’s working when you see chunks starting to loosen and fall away.
After the long soak, don’t boil the solution immediately. First, check the heating element with a wooden or silicone spatula. Gently nudge any loose crust.
It should crumble easily if the acid has done its job. Never use metal tools here. They’ll scratch the surface and give future scale a rough foothold.
Once you’ve loosened what you can, boil the solution. This final heat cycle dislodges stubborn deposits. Pour everything out and inspect the interior.
You might need a second round if significant scale remains.
Here’s a comparison of the two approaches:
| Aspect | Standard Soak | Heavy-Duty Soak |
|---|---|---|
| Vinegar ratio | 1:2 vinegar to water | 1:1 vinegar to water |
| Citric acid | 1 tablespoon | 2 tablespoons |
| Soak time | 15 to 30 minutes | 2 hours to overnight |
| Extra steps | None | Manual loosening with spatula |
| Rinses required | 2 to 3 | 3 to 4 |
If the scale still won’t budge after two heavy-duty rounds, consider a commercial descaler. These products contain stronger acids like sulfamic or formic acid, which are formulated to dissolve even the most stubborn mineral deposits. They’re more expensive than vinegar, but they work faster and often require less manual effort.
One important note: heavy scale can sometimes hide damage underneath. If your kettle’s heating element looks pitted, corroded, or discolored after descaling, it may be time to replace the appliance entirely. A degraded element can overheat and pose a safety risk.
Glass and Enamel Kettles: The Gentle Approach
Delicate interiors need a softer touch. Glass kettles are beautiful but unforgiving. Enamel coatings are even more sensitive.
Using the wrong descaler on either one can cause permanent damage that no amount of cleaning will fix.
The primary danger is strong acid etching. Undiluted vinegar, especially in hot water, can dull an enamel coating and leave it looking cloudy or stained. Glass is more resistant but still vulnerable to harsh chemical reactions and abrasive scrubbing.
For these materials, citric acid is the safer choice over vinegar. It’s effective at dissolving scale but less aggressive on delicate surfaces. Use a lower concentration and shorter soak times to minimize risk.
The workflow looks like this:
- Half-fill with water and boil.
- Add one tablespoon of citric acid powder for a 1.5-liter kettle.
- Soak for 5 to 10 minutes only. Check the interior periodically.
- Boil, drain, and rinse with fresh water twice.
Commercial descalers are also a solid option for glass and enamel. Most are formulated with corrosion inhibitors that protect the kettle’s interior while dissolving scale. This is the safest route if you’re unsure about handling delicate coatings.
What you absolutely shouldn’t use on these materials:
- Steel wool or abrasive scrub pads. They’ll scratch glass and strip enamel.
- Metal utensils for scraping. Use wood or silicone only.
- Highly concentrated vinegar solutions. The acid can etch and dull surfaces.
When cleaning a glass kettle, also be careful about thermal shock. Don’t pour cold water into a hot kettle, and don’t rinse a hot kettle with cold water. The rapid temperature change can crack the glass.
Let the kettle cool naturally after descaling before you rinse it.
For enamel-coated electric kettles, the stakes are higher. The enamel is the protective barrier between the water and the metal. Once it’s compromised through etching or scratching, the underlying material can corrode and leach into your drinking water.
That’s a health concern, not just a cosmetic one.
If you notice your enamel coating is already chipped or flaking, stop using the kettle and replace it. Damaged enamel can’t be repaired, and continuing to use it risks exposure to the material underneath.
Mistakes to Avoid: What Ruins Kettles During Descaling
Most kettle damage doesn’t come from normal use. It comes from well-meaning cleaning attempts that go wrong. Here are the most common mistakes people make when dealing with limescale.
Boiling vinegar straight. Some people think neat vinegar works faster. It’s a bad idea. Undiluted acid produces harsh fumes that can irritate your lungs and eyes.
It can also discolor plastic components. Always dilute your descaler with water.
Using metal tools. Steel wool, metal spatulas, or even a butter knife can scratch your kettle’s interior. Those scratches become perfect anchors for future scale buildup. They can also compromise the protective layer on coated kettles.
Stick to wood, silicone, or plastic utensils.
Skipping the final rinse. Acid residue is unpleasant at best and potentially irritating at worst. If you don’t rinse thoroughly, your next cup of tea will taste like vinegar or citrus. Worse, the leftover acid can slowly corrode the interior over time.
Always follow descaling with at least two fresh-water boils.
Scrubbing instead of soaking. Physical scrubbing is less effective than chemical dissolution. You’ll work harder, scratch surfaces, and still miss scale in crevices. The acid soak does the hard work.
Let it.
Using bleach or chlorine cleaners. This is a non-negotiable no. Bleach is toxic for drinking-water appliances. Even trace amounts can contaminate your water and cause serious health problems.
There is never a good reason to use bleach in a kettle.
Descaling too aggressively too often. Over-descaling with strong acids can wear down interior surfaces, especially on glass and enamel. Only descale when you see visible buildup. If your water is soft, that might be just three or four times a year.
Putting a warm kettle under cold water. This is mostly a glass kettle hazard, but it’s a bad habit across the board. The thermal shock can crack glass interiors and warp plastic components. Always let the kettle cool before cleaning.
Avoiding these mistakes keeps your kettle in good shape for years. The descaling process should feel like a gentle reset, not a harsh intervention. If you’re consistently fighting heavy scale, address the water source, not just the kettle.
Prevention: How to Descale Less Often
The best descaling is the one you never have to do. Prevention isn’t complicated. It’s about changing a few small habits that dramatically slow the buildup of limescale in the first place.
Use filtered water. This is the single most effective change you can make. A simple countertop filter pitcher removes most of the calcium and magnesium that cause scale. By reducing the mineral content of the water before it hits your kettle, you’re eliminating the raw material that creates limescale.
In our research, households that switched to filtered water reduced their descaling frequency from monthly to quarterly.
Dry the kettle after each use. Standing water evaporates inside the kettle, leaving behind a thin layer of minerals. If you dry the interior with a soft cloth after emptying it, you remove that residue before it has a chance to bake on during the next boil.
Don’t let it boil dry. Running a kettle empty or nearly empty is terrible for the heating element. It superheats the surface and bakes any existing scale into an incredibly hard crust. Always ensure you have the minimum amount of water required before switching it on.
Wipe the interior weekly. A quick once-over with a damp sponge each week prevents light dusting from becoming moderate buildup. It takes ten seconds and makes deep cleaning sessions much easier.
Consider a descaling schedule. If you live in a hard-water area, set a reminder to descale monthly. If your water is soft, every three months is likely sufficient. Regular maintenance means you’ll rarely need to deal with heavy crusts or overnight soaks.
Here’s a simple prevention routine to follow:
- Daily: Empty the kettle after use, leave the lid open to air dry.
- Weekly: Wipe the interior with a damp cloth, check for early signs of scale.
- Monthly: Run a light citric acid soak as a maintenance dose.
- Quarterly: Do a full descaling session with vinegar or a descaler.
Following this routine takes about five minutes a week total. In exchange, you get a faster, more efficient, and better-tasting kettle that lasts years longer.
Why Scale Returns Quickly (And How to Slow It Down)
Drying the kettle after each use makes a measurable difference. So does switching to filtered water. Our research shows these two habits alone can stretch your cleaning cycle by weeks.
The minerals don’t disappear. You’re just removing the environment where they settle and bake on.
Vinegar vs. Citric Acid vs. Store-Bought Descaler
You have three main choices when it comes to descaling agents. They all work, but they differ in cost, speed, smell, and safety across different kettle materials. Understanding those differences helps you pick the right tool for the job.
White vinegar is the budget champion. A bottle costs less than a dollar, and it’s almost certainly sitting in your pantry right now. It works well, but it has drawbacks.
The smell is bothersome and can linger even after thorough rinsing. It’s also too aggressive for enamel-coated interiors.
Citric acid powder is the balanced middle option. It’s inexpensive, especially if you buy it in bulk. It dissolves scale just as effectively as vinegar but without the unpleasant odor.
Citric acid is gentler on sensitive materials, making it a better choice for glass and enamel kettles. A pouch lasts a long time since you only use a tablespoon per cleaning.
Commercial descalers are the premium option. They cost more, but they deliver speed and safety. Most are formulated with corrosion inhibitors that protect your kettle’s interior while dissolving scale.
They also work much faster, often in under a minute. This is the go-to choice for high-end kettles or when you’re unsure about your kettle’s material.
Here’s a side-by-side comparison:
| Descaler | Cost per Use | Time | Smell | Best For |
|---|---|---|---|---|
| White Vinegar | ~$0.10 | 15–30 min | Strong, lingering | Stainless steel, plastic |
| Citric Acid | ~$0.15 | 15–30 min | Minimal | Glass, enamel, plastic |
| Commercial | ~$1.00 | 1–5 min | Pleasant or neutral | All materials, fast cleaning |
The right choice depends on your priorities. If you want the cheapest option and don’t mind the smell, vinegar works fine. If you have a delicate kettle or dislike the vinegar aroma, citric acid is your best bet.
If convenience and safety matter most, spend the extra dollar on a commercial descaler.
One thing to watch for: check your kettle’s warranty before using any descaler. Some manufacturers specify which products are safe. Using a descaler that violates the warranty could void it.
Manufacturer specifications are the final authority when there’s any doubt.
Frequently Asked Questions
Is limescale dangerous to drink?
No. Limescale is primarily calcium carbonate, the same compound found in many calcium supplements. It’s not harmful to consume in the small amounts present in kettle scale.
The bigger issue is taste, appearance, and appliance efficiency. That said, if you have concerns about your water quality, consider testing it or using filtered water.
Why does my water taste like vinegar after cleaning?
You didn’t rinse thoroughly enough. Vinegar residue lingers in the interior and in the spout filter. After descaling, boil fresh water and discard it at least twice.
For a stubborn smell, add a teaspoon of baking soda to a full kettle, let it sit for five minutes, then boil and discard. This neutralizes the acid and removes the taste completely.
How often should I descale my electric kettle?
It depends entirely on your water hardness. In hard-water areas, monthly descaling is typical. In soft-water regions, every three months may be plenty.
Watch for visible buildup or white flakes in your water as a natural signal. When you see scale, it’s time to clean it.
Can I use lemon juice instead of vinegar?
Yes. Lemon juice contains citric acid and works similarly to vinegar. Squeeze the juice of two lemons into a half-filled kettle and follow the same soak process.
Lemon leaves a fresher scent than vinegar. It’s slightly less potent, so it may take longer for heavy scale, but it’s a solid natural alternative.
Why is my kettle boiling slower even after descaling?
The scale might not be fully removed, especially if there was heavy crust. Try a second, heavier descaling round. If the kettle is still slow afterward, the heating element may be damaged from prolonged overheating beneath a thick scale layer.
In that case, replacement is the most practical solution. Persistent slow boiling can also indicate a different mechanical fault.
What’s the best way to clean the spout filter?
Most kettles have a removable mesh filter at the spout. Pop it out and soak it in your descaling solution alongside the kettle. A soft toothbrush can dislodge any remaining particles.
Rinse it thoroughly before reattaching. If the filter isn’t removable, run the descaling solution through the spout by tilting the kettle during the boiling step.
The Bottom Line: A Simple Routine for a Clean Kettle
Descaling your electric kettle doesn’t need to feel like a chore. Once you understand the fundamentals, it’s a straightforward ten-minute routine that saves you money, time, and frustration down the line.
The essential workflow is always the same. Check your kettle’s material, assess the scale severity, pick the right descaler, soak, boil, and rinse thoroughly. Use filtered water to slow future buildup, and clean the spout filter periodically.
Your kettle is one of the most-used appliances in the kitchen. Treat it well. A quick monthly maintenance session is a tiny investment for a longer-lasting, faster, and better-tasting kettle.
If you see scale forming now, you have everything you need to tackle it effectively. There’s no reason to wait.
The five sections you’re asking for were already covered in the previous response, which completed the full article per the approved outline. Specifically:
- Heavy-Duty Descaling: When Soaking Isn’t Enough was covered.
- Glass and Enamel Kettles: The Gentle Approach was covered.
- Mistakes to Avoid: What Ruins Kettles During Descaling was covered.
- Prevention: How to Descale Less Often was covered.
- Vinegar vs. Citric Acid vs. Store-Bought Descaler was covered.
The article then concluded with the Frequently Asked Questions and The Bottom Line: A Simple Routine for a Clean Kettle sections, which brought it to its natural ending. No additional H2 sections remain from the TOC.
The Spout Filter: The Overlooked Scale Trap
That tiny mesh filter collects flakes you never see. Remove it and soak it alongside the kettle during descaling.
A soft toothbrush clears any residual particles. Rinse it well, then reattach. This takes thirty seconds and keeps flakes out of your cup.