Installing an over the range microwave can transform your kitchen. It saves counter space, adds convenience, and gives your kitchen a modern look. Many homeowners do this themselves, but the process needs careful planning and attention to detail. Whether you’re replacing an old unit or adding a microwave for the first time, this guide will help you understand every step.
You’ll learn what tools you need, how to prepare, and how to avoid mistakes that can cause safety issues or damage. If you’re ready to get started, let’s walk through the process together.
Understanding Over The Range Microwaves
An over the range microwave is designed to fit above your stove. It often includes a built-in vent, which can help remove smoke, steam, and odors from cooking. These microwaves usually have lights underneath to illuminate your cooktop. Because they combine the microwave and vent, they’re ideal for small kitchens.
Benefits Of Over The Range Microwaves
- Space-saving: Frees up counter space for meal prep.
- Efficient ventilation: Removes heat and steam from cooking.
- Integrated lighting: Makes it easier to see while cooking.
- Modern design: Gives your kitchen a sleek, finished look.
Key Features To Consider
Before you buy, think about:
- Size: Standard widths are 30 inches, but measure your space carefully.
- Vent type: Choose between external venting (through the wall or roof) or recirculating (filters air and returns it to the kitchen).
- Power: 900–1100 watts is common for fast, even cooking.
- Control panel: Touch controls are easier to clean than buttons.
- Filter type: Charcoal filters (for recirculating) vs. grease filters (for venting).
Preparing For Installation
Proper preparation makes the installation easier and safer. Start by understanding your kitchen layout and checking electrical connections.
Measuring Your Space
Use a tape measure to check the space above your stove. Most over the range microwaves need at least 30 inches of width and 12–15 inches of height. There should be at least 13–18 inches between the cooktop and the bottom of the microwave. This prevents heat damage and ensures safety.
| Measurement | Recommended Minimum | Why It Matters |
|---|---|---|
| Width | 30 inches | Fits standard microwave size |
| Height above stove | 13–18 inches | Prevents overheating |
| Depth | 12–15 inches | Allows proper installation |
Electrical Requirements
Most over the range microwaves require a dedicated 120V outlet. The outlet should be inside the cabinet above the microwave. If you don’t have one, you may need an electrician to install it. Never use an extension cord for microwaves.
Venting Choices
Decide whether you want external venting or recirculating. External venting moves air outside through a duct. Recirculating vents filter and return air to your kitchen. If you already have ductwork, check its size and placement. If you don’t, recirculating may be easier.
Tools And Materials Needed
Gather these before you start:
- Drill and drill bits
- Screwdrivers (Phillips and flat-head)
- Measuring tape
- Level
- Stud finder
- Masking tape
- Pencil
- Safety goggles
- Gloves
- Mounting template (usually included)
- Hardware kit (often included)
- Microwave oven
If you’re venting outside, you’ll also need:
- Ducting kit
- Wall/roof cap
- Aluminum tape
Removing The Old Microwave (if Needed)
If you’re replacing an existing unit, take it out first. This step is important—microwaves are heavy and awkward.
- Unplug the microwave.
- Remove screws from the upper cabinet. These hold the microwave in place.
- Support the microwave. Use a helper to hold it as you remove the last screws.
- Lift and tilt. Carefully tilt the microwave forward and lift it off the mounting bracket.
- Remove the bracket. If the new microwave uses a different bracket, take the old one off.
Many beginners forget to check the mounting bracket compatibility. Not all microwaves use the same bracket. If you skip this step, the new unit may not fit correctly.
Installing The Mounting Bracket
The bracket supports most of the microwave’s weight. It must be attached to wall studs for safety.
- Find wall studs. Use the stud finder and mark their location with a pencil.
- Position the bracket. Use the mounting template to align the bracket. Make sure it is level.
- Mark drill holes. The template helps you mark where to drill.
- Drill pilot holes. Drill into studs, not just drywall.
- Attach the bracket. Use heavy-duty screws to secure it.
| Bracket Step | Common Mistake | Tip |
|---|---|---|
| Finding studs | Misidentifying stud location | Double-check with two methods (stud finder and knocking) |
| Marking holes | Misaligning template | Use masking tape to hold template steady |
| Attaching bracket | Using short screws | Use screws at least 2 inches long |
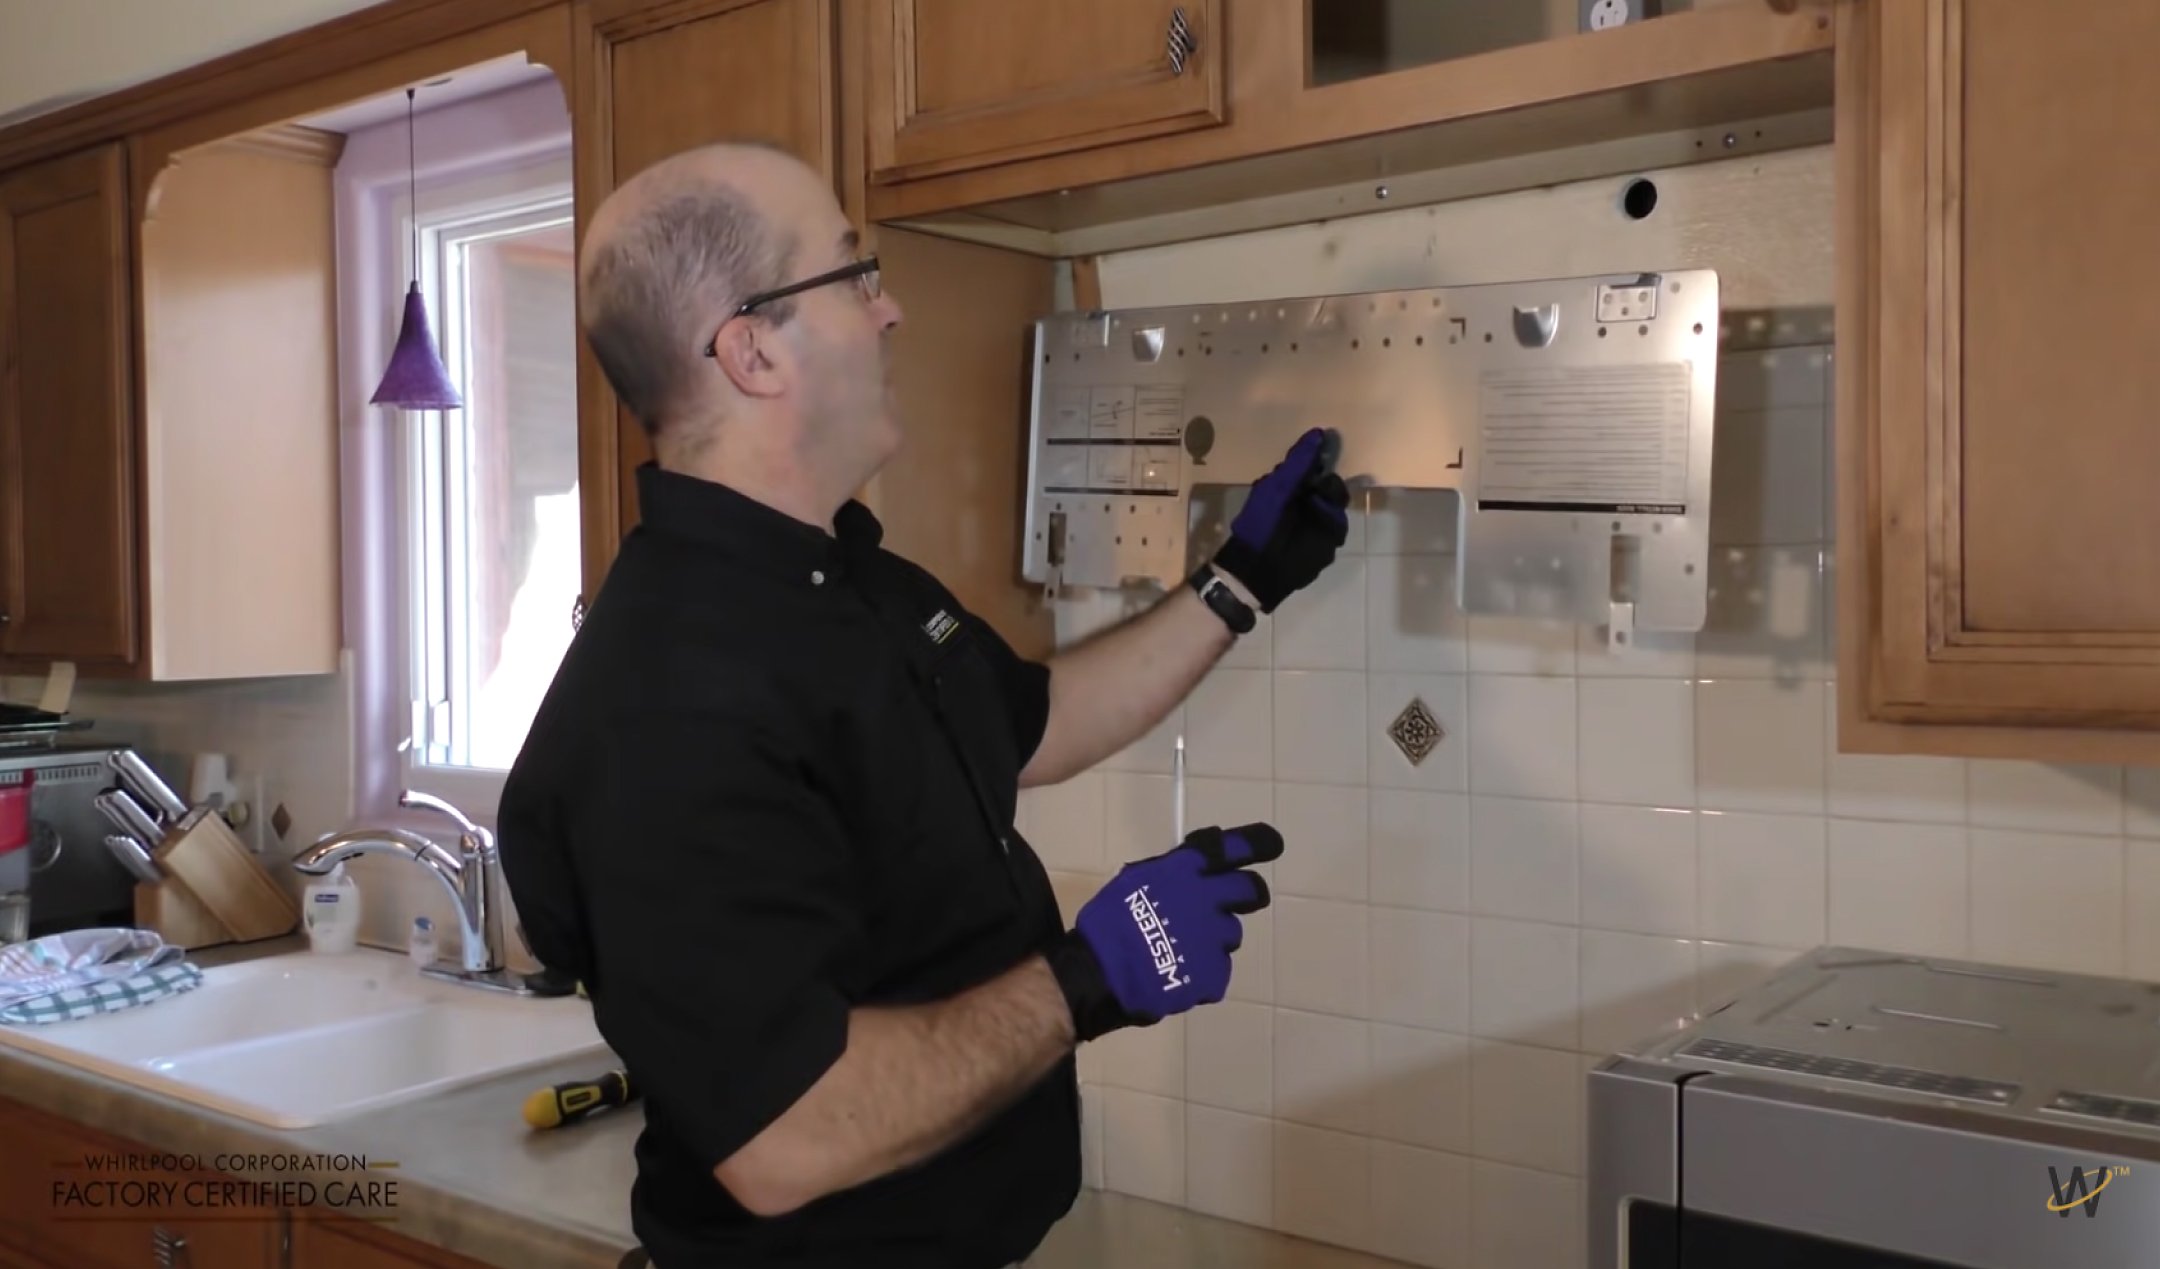
Credit: www.whirlpool.com
Preparing The Cabinet
The cabinet above the microwave needs holes for electrical cords and, if venting externally, for the duct. Use the template for guidance.
Cutting The Cabinet Holes
- Mark the hole locations. Use the template to mark where the power cord and vent will go.
- Drill starter holes. Use a drill bit to make a small hole.
- Cut the holes. For larger holes, use a hole saw or jigsaw.
- Smooth the edges. Sand rough spots to prevent cord or duct damage.
Many homeowners forget to protect the cabinet finish. Use masking tape around cut areas to prevent splintering.
Setting Up The Vent System
If your microwave will vent outside, install ductwork before mounting.
Installing The Duct
- Check duct direction. Most microwaves can vent up or out the back.
- Install the duct connector. Attach it to the microwave, following the manual.
- Fit the duct through the cabinet hole. Make sure it’s snug.
- Connect to existing ductwork or install new duct.
- Seal joints with aluminum tape. Never use regular duct tape.
- Install wall or roof cap. This prevents rain and pests.
Recirculating Vent Setup
If you choose recirculating, install the charcoal filter inside the microwave, as directed in the manual.
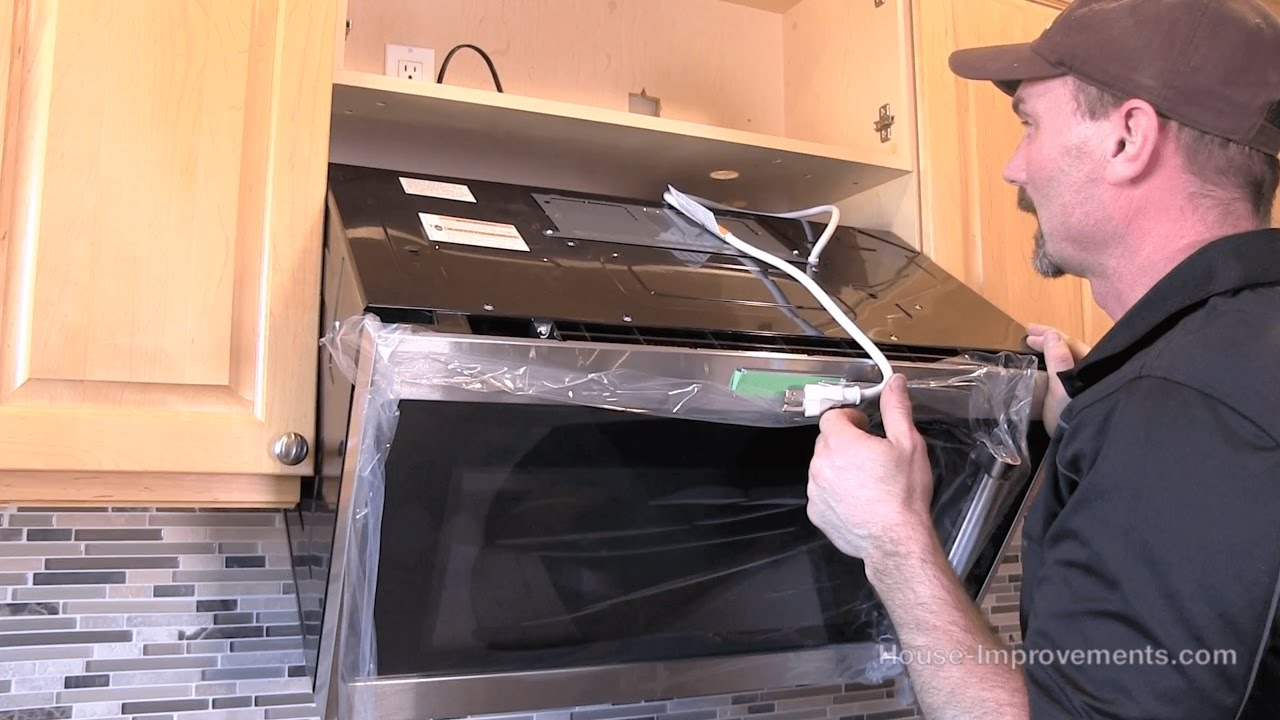
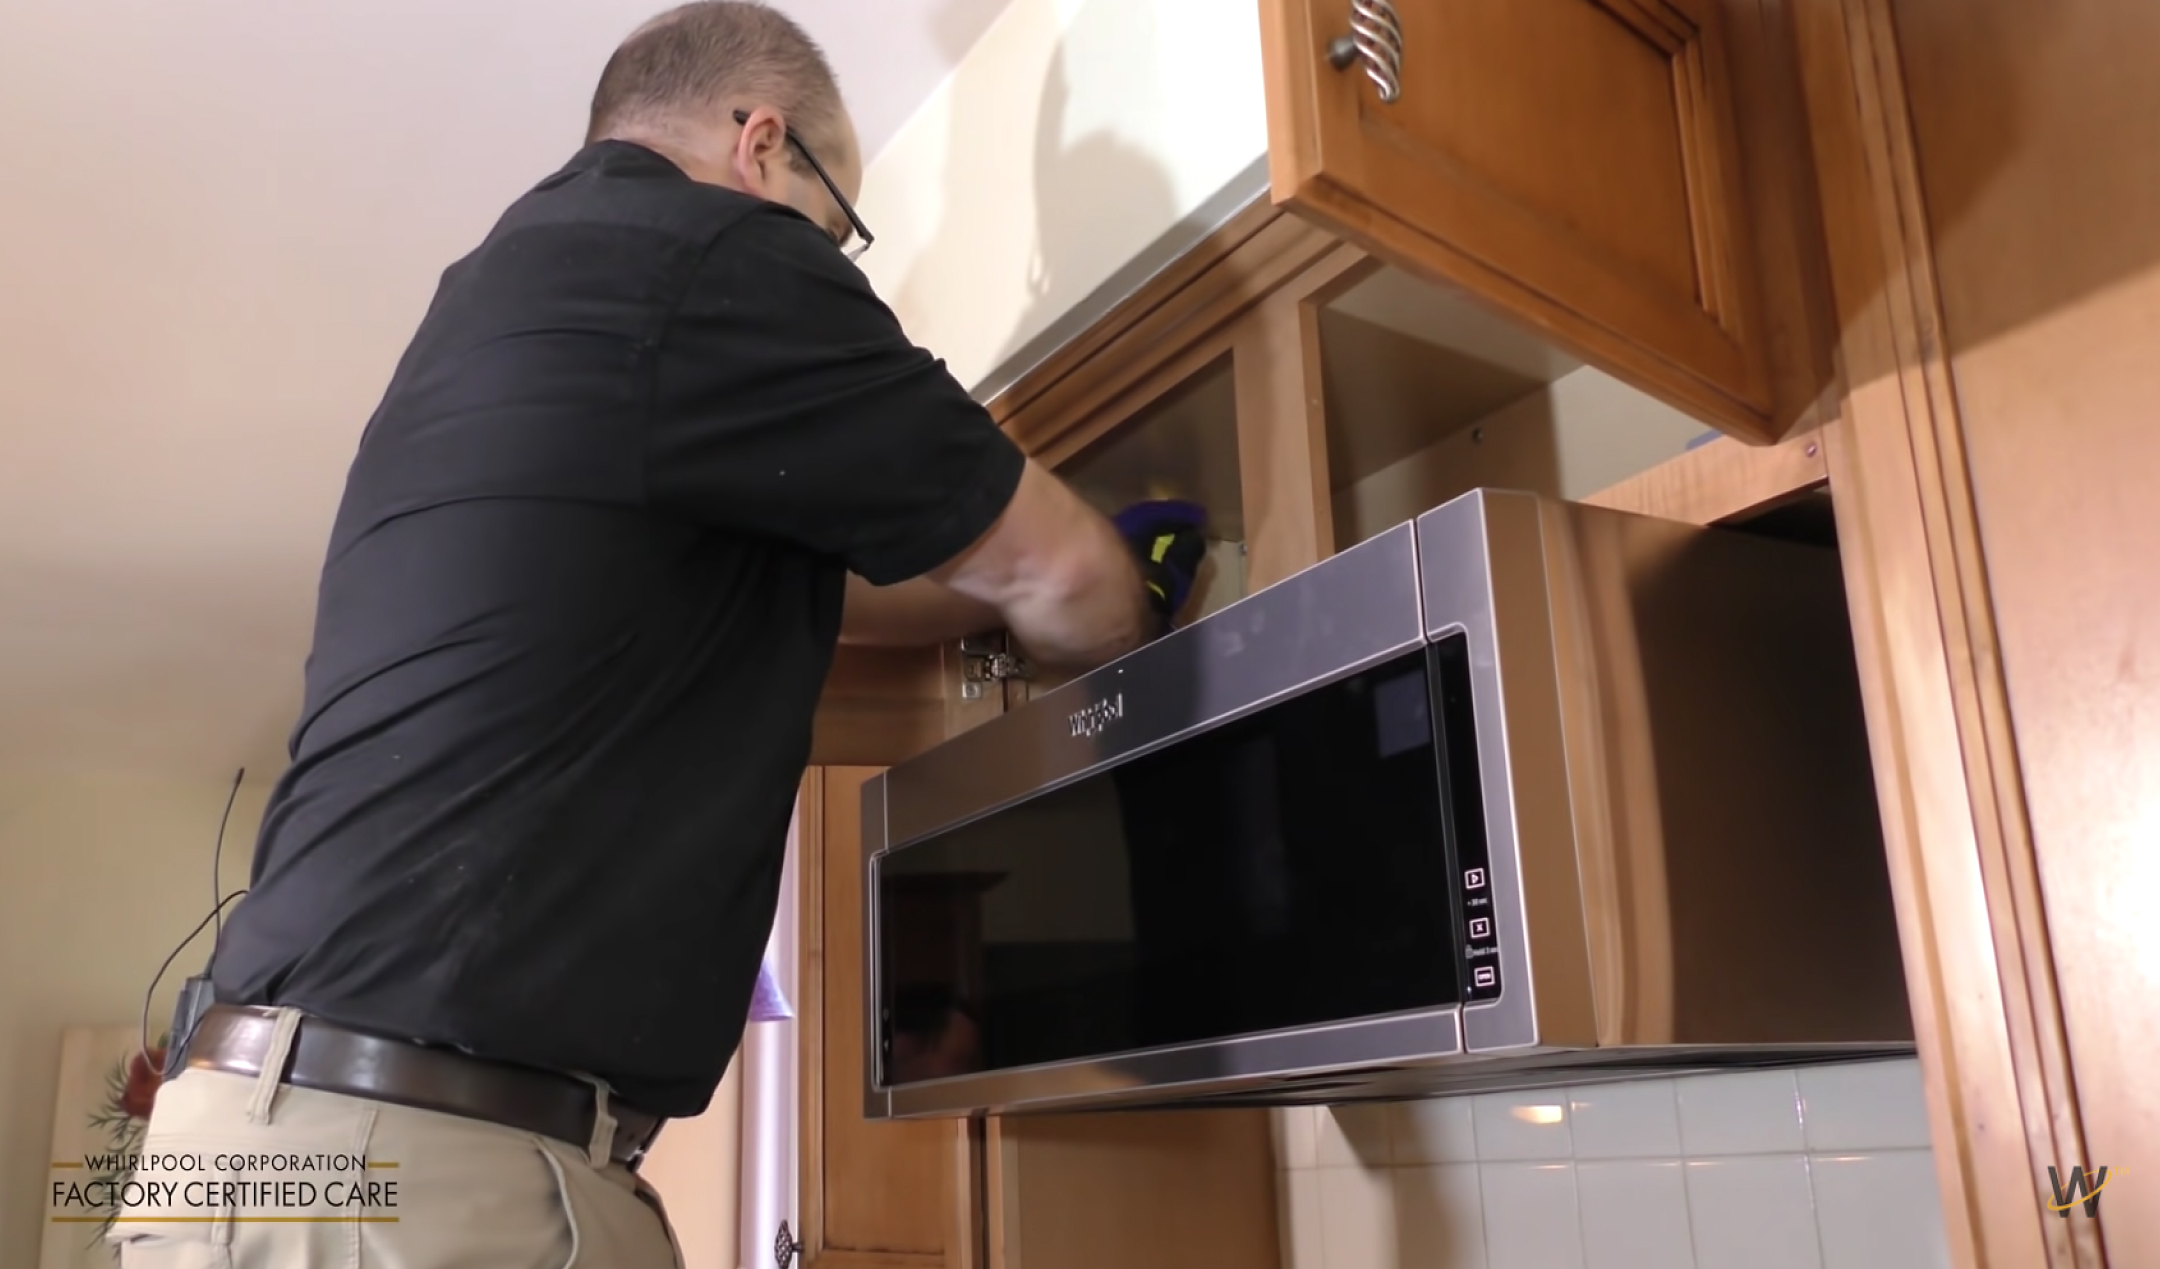
Lifting And Installing The Microwave
This is usually a two-person job. The microwave is heavy, and you need to align it with the bracket and cabinet holes.
- Plug in the power cord. Feed the cord through the cabinet hole and plug it in.
- Lift the microwave. Hold it underneath and tilt it up toward the bracket.
- Hang on the bracket. Hook the microwave onto the bracket.
- Align with cabinet holes. The top of the microwave should line up with the holes you drilled.
- Insert top screws. From inside the cabinet, thread screws down into the microwave. Tighten securely.
- Check alignment. Make sure the microwave is level and flush with cabinets.
Safety Tips
- Wear gloves to protect your hands.
- Always have a helper—never lift alone.
- If screws don’t fit, don’t force them. Re-check alignment.
Connecting The Vent And Power
Once the microwave is secure, finish the vent and power connections.
- External vent: Connect the duct to the microwave. Seal joints with aluminum tape. Make sure the vent flap opens and closes freely.
- Recirculating: Check that the filter is installed and the vent grille is in place.
- Electrical: Plug in the microwave and check for power. If it doesn’t turn on, check the outlet and circuit breaker.
Many beginners forget to test the vent function. Turn on the fan and check airflow before finishing.
Credit: www.villagehomestores.com
Testing The Microwave
Before using the microwave for cooking, test all functions.
- Turn on the light. Check if it illuminates the cooktop.
- Run the fan. Listen for airflow and check venting.
- Heat a cup of water. This checks the cooking function.
- Check the door. It should open and close smoothly.
- Check for leaks. Make sure no air escapes from the sides.
If anything isn’t working, consult the manual or contact support.
Common Installation Mistakes
Avoid these frequent errors:
- Ignoring wall stud locations: Never mount the bracket only on drywall.
- Incorrect venting: Always follow manufacturer instructions for duct direction.
- Rushing cabinet cuts: Careless cutting can damage cabinets.
- Using wrong screws: Only use heavy-duty fasteners.
- Skipping helper: Lifting alone can cause injury and damage.
- Not checking alignment: The microwave must be level for safe operation.
- Forgetting to test: Always check all functions before finishing.
Credit: www.whirlpool.com
Cost And Time Estimates
Installing an over the range microwave is affordable compared to hiring a professional.
| Task | DIY Cost | Professional Cost | Time Needed |
|---|---|---|---|
| Microwave purchase | $200–$500 | $200–$500 | — |
| Installation tools | $30–$80 | Included | — |
| Labor | $0 | $150–$400 | 1–2 hours |
| Ductwork (if needed) | $50–$100 | $100–$250 | 30–60 minutes |
If you do it yourself, expect to spend 2–3 hours for a first-time install. Professionals may finish faster, but you’ll save money and learn valuable skills.
Practical Tips For A Smooth Installation
- Read the manual fully. Each microwave is different.
- Use the mounting template. It prevents mistakes.
- Label drill holes. Use masking tape and pencil for clarity.
- Have a helper ready. You’ll need extra hands.
- Work slowly. Rushing leads to errors.
- Check local codes. Some areas have rules about venting and electrical work.
Non-obvious Insights
Many beginners miss these points:
- Don’t rely on old hardware: Always use new screws and brackets. Old hardware may not support the new microwave.
- Check for clearance: Some microwaves have doors that swing wider than expected. Check for cabinet or wall obstructions before installing.
When To Call A Professional
Consider hiring a pro if:
- You don’t have an electrical outlet above the stove.
- You need new ductwork installed.
- Your cabinets are difficult to cut or fragile.
- You’re not comfortable lifting heavy objects.
Professional installers follow safety codes and can handle unexpected challenges. If you’re unsure, get a quote before starting.
Maintaining Your Over The Range Microwave
Proper maintenance keeps your microwave working safely and efficiently.
- Clean the filters regularly. Grease and charcoal filters need cleaning or replacing every few months.
- Wipe the interior. Food spills can cause odors and damage.
- Check the vent. Make sure airflow isn’t blocked.
- Inspect mounting screws. Tighten if they loosen over time.
- Replace light bulbs as needed. Use the type recommended in the manual.
Neglecting maintenance can reduce your microwave’s lifespan and cause safety risks.
Frequently Asked Questions
How Do I Know If My Cabinets Can Support An Over The Range Microwave?
Cabinets above the stove must be sturdy. Use a stud finder to check for solid wood. If the bracket screws go into solid wood or wall studs, your cabinets should support the microwave. If you see thin plywood or particleboard, reinforce the area before installing.
Can I Install An Over The Range Microwave Without External Venting?
Yes. Most models offer recirculating venting. They use filters to clean air and return it to your kitchen. This is ideal if you don’t have ductwork or can’t install one. Just remember to replace charcoal filters regularly.
Is It Safe To Use An Extension Cord For The Microwave?
No. Over the range microwaves need a dedicated 120V outlet. Extension cords may cause overheating or electrical hazards. If your kitchen doesn’t have an outlet above the stove, hire an electrician to add one.
What Is The Best Height To Install The Microwave Above The Stove?
Install the microwave 13–18 inches above the cooktop. This prevents heat damage and ensures the microwave is easy to reach. If you have tall family members or use large pots, aim for the higher end of this range.
Where Can I Find More Detailed Installation Instructions?
Always check your microwave’s manual. For expert guidance, visit Family Handyman for step-by-step details and tips.
Installing an over the range microwave takes planning and patience. By following each step and paying attention to details, you’ll create a safer, more efficient kitchen. Remember, working slowly and double-checking your work prevents mistakes and keeps your home safe.
With the right tools, a helper, and this guide, you can enjoy the benefits of your new microwave for years to come.