Skip to content
Making fresh butter at home feels like magic. You start with just heavy cream, and after a short time, you have rich, creamy butter that tastes far better than most store brands. If you own a stand mixer, the process is surprisingly simple and efficient.
Even beginners can make high-quality butter in under 30 minutes. This guide will show you exactly how to make butter with a stand mixer, including tips, common mistakes, and creative ways to use your homemade butter. By the end, you’ll understand every step and feel confident to try this in your own kitchen.
Why Make Butter At Home?
Homemade butter has several advantages. First, you control the ingredients—no preservatives, additives, or artificial flavors. Second, the taste is noticeably fresher. Third, making butter gives you buttermilk as a bonus, which is useful in baking. Finally, it’s cost-effective if you buy cream in bulk or find it on sale.
Fresh butter also opens up possibilities: you can add herbs, spices, or even honey for custom flavors. Many people don’t realize that homemade butter can last for weeks in the fridge, and months in the freezer, if stored properly.
What You Need To Make Butter
Before starting, gather the right tools and ingredients. Preparation is key for smooth results.
Equipment
- Stand mixer: Any brand works, but a tilt-head model is easiest.
- Whisk attachment: This aerates the cream and speeds up separation.
- Spatula: For scraping the bowl.
- Fine mesh strainer or cheesecloth: To strain buttermilk.
- Clean bowl: To collect butter.
- Cold water: For rinsing butter.
Ingredients
- Heavy cream: Use at least 35% fat. Organic or grass-fed cream gives the best flavor.
- Salt (optional): For salted butter, add 1/4 to 1/2 teaspoon per cup of cream.
Some people add herbs, garlic, or honey after making plain butter. Start with basic butter, then try flavoring as you gain experience.
Step-by-step Butter Making Process
Making butter is simple, but timing and attention matter. Here’s a detailed walkthrough.
1. Prepare Your Tools
Wash and dry your stand mixer bowl, whisk, and spatula. Butter absorbs flavors easily. Any leftover food smells can affect the taste, so start with clean equipment.
2. Pour Heavy Cream
Pour chilled heavy cream into the mixer bowl. Use at least 2 cups; this gives you about 1 cup of butter and 1 cup of buttermilk. Larger batches work fine, but don’t fill above halfway—splattering increases as the cream thickens.
3. Whip The Cream
Attach the whisk and start mixing at medium speed. After 2-3 minutes, the cream turns into soft peaks (like whipped cream). Keep mixing. After another minute, it becomes stiff peaks.
Most beginners stop here, thinking the cream is ready. But for butter, you must keep mixing. The cream will soon break down—this is normal.
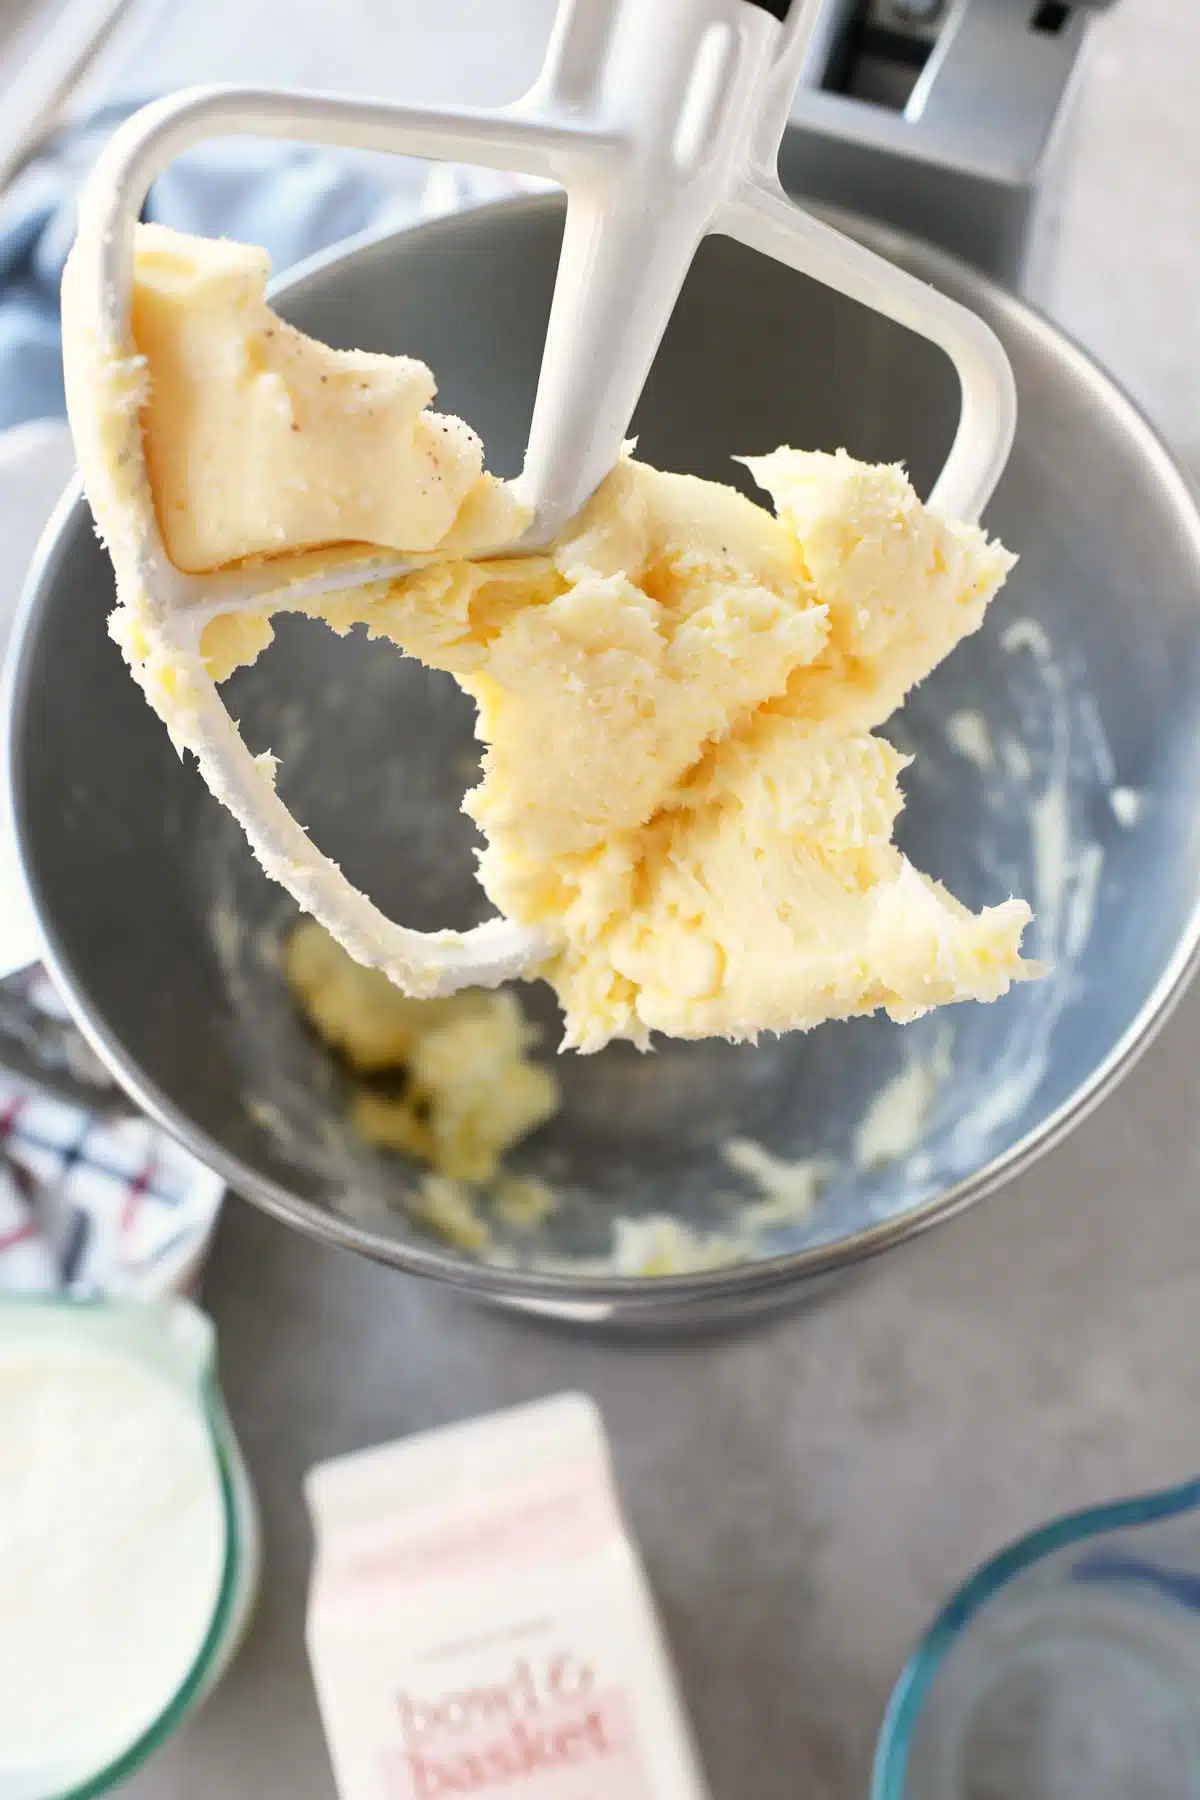
4. Watch For Separation
Suddenly, the cream clumps and liquid splashes in the bowl. This is the buttermilk separating from the butterfat. Reduce speed to prevent splashing.
Mix for another minute, just until yellow clumps form. Don’t overmix; it can make the butter crumbly.
5. Strain The Buttermilk
Stop the mixer and scrape the butter into a strainer or cheesecloth. Let the buttermilk drain into a bowl. Save this liquid for pancakes, biscuits, or baking.
6. Rinse The Butter
Butter contains tiny bits of buttermilk, which can make it spoil faster. Rinse the butter under cold water in the strainer, pressing gently with a spatula. Repeat until water runs clear. This step is often missed by beginners but is crucial for longer shelf life.
7. Salt And Flavor
For salted butter, sprinkle salt and mix gently. For flavored butter, add herbs, spices, or honey now. Shape the butter into a block or ball.
8. Store Properly
Wrap the butter in parchment paper or store in an airtight container. Refrigerate for up to 2 weeks, or freeze for up to 3 months.
Butter Yield And Buttermilk Comparison
How much butter do you get from different amounts of cream? Here’s a simple guide:
| Heavy Cream (cups) | Butter Yield (cups) | Buttermilk Yield (cups) |
|---|---|---|
| 1 | ~0.5 | ~0.5 |
| 2 | ~1 | ~1 |
| 4 | ~2 | ~2 |
The actual yield varies depending on cream quality and fat content. Higher fat cream gives more butter and less buttermilk.

Credit: kitchenaid.com.au
Choosing The Right Cream
Not all cream is equal. The fat percentage affects both taste and yield. For butter making, look for heavy cream or double cream with at least 35% fat. Avoid “light cream” or “half-and-half”—these don’t have enough fat.
Organic or grass-fed cream gives butter a richer flavor and golden color. If you’re shopping, compare labels for fat content and origin.
Here’s a quick comparison:
| Cream Type | Fat % | Best For Butter? |
|---|---|---|
| Heavy Cream | 36-40% | Yes |
| Whipping Cream | 30-35% | Okay |
| Light Cream | 18-30% | No |
| Half-and-Half | 10-18% | No |
Many people overlook the importance of fat content. Using the wrong cream leads to disappointing results.
Stand Mixer Vs Other Methods
You can make butter by shaking a jar or using a food processor. However, a stand mixer is faster and easier, especially for larger batches.
Let’s compare methods:
| Method | Time (minutes) | Effort | Batch Size |
|---|---|---|---|
| Stand Mixer | 8-10 | Low | Medium-Large |
| Food Processor | 7-8 | Low | Small-Medium |
| Jar Shaking | 15-20 | High | Small |
A stand mixer handles larger volumes and keeps your hands clean. It’s the best choice for regular butter making.
Common Mistakes And How To Avoid Them
Making butter is simple, but a few mistakes can cause problems. Here’s what to watch out for:
- Using low-fat cream: Results in little or no butter.
- Stopping too soon: Whipped cream is not butter. Keep mixing until separation.
- Overmixing: Makes the butter crumbly and hard to shape.
- Not rinsing: Butter goes rancid quickly if buttermilk isn’t washed out.
- Adding flavor too early: Salt or herbs stop the cream from separating.
Another detail beginners miss: the temperature of cream. Cold cream (straight from the fridge) works best. Warm cream can separate too quickly, causing uneven butter.
Tips For Better Butter
To improve your homemade butter, try these ideas:
- Chill the mixer bowl before starting. Cold tools speed up the process.
- Use fresh, high-quality cream. Older cream may taste sour.
- For softer butter, add a tablespoon of oil (like sunflower) before mixing.
- Shape butter with molds or cookie cutters for special occasions.
- Try different flavors: Garlic, parsley, lemon zest, or smoked paprika.
If you want to make butter often, consider buying cream from local dairies—quality varies, but local cream is often fresher and more flavorful.
Credit: www.savvysavingcouple.net
Creative Ways To Use Homemade Butter
Homemade butter isn’t just for toast. Here are some ideas:
- Spread on fresh bread: The classic use.
- Cooking and baking: Use in cookies, cakes, or sautéing vegetables.
- Herb butter for steak: Mix in garlic and herbs for topping grilled meats.
- Compound butter: Add spices, honey, or dried fruit for custom flavors.
- Gift giving: Wrap in parchment and give as a homemade present.
Many people don’t realize homemade butter can be frozen. Portion into small blocks, wrap well, and freeze. Thaw in the fridge before use.
How To Store Butter For Best Results
Proper storage keeps butter fresh and prevents spoilage. Here are proven methods:
- Refrigerator: Store in an airtight container. Homemade butter lasts about 2 weeks.
- Freezer: Butter freezes well for up to 3 months. Wrap tightly to prevent freezer burn.
- Butter bell: For soft butter, use a butter bell on the counter. Change water daily.
If you make large batches, divide into smaller portions. This way, you can take out what you need and keep the rest fresh.
Real-life Example: Making Butter For A Family
Let’s say you want to make butter for a family of four. You use 4 cups of heavy cream. After mixing, you get about 2 cups of butter and 2 cups of buttermilk. The butter lasts about 1 week with daily use on toast and cooking.
The buttermilk is perfect for pancakes on weekends.
This size batch is easy for a stand mixer. Cleanup takes only 10 minutes. The family enjoys fresher, healthier butter—and you save money compared to buying premium brands.
Nutritional Benefits And Data
Homemade butter is pure, with only cream (and optional salt). It contains:
- Calories: About 100 per tablespoon
- Fat: 11 grams per tablespoon
- Vitamins: A, D, E, K (from grass-fed cream)
- No preservatives: Unlike many store brands
Buttermilk is low-fat and high in protein, making it a useful ingredient in baking and cooking.
According to the USDA, butter made from grass-fed cream has more Omega-3 and Vitamin K2 than conventional butter. This is a hidden benefit many people miss.
Butter Making Around The World
Butter is made in many cultures, but the process is similar everywhere. In India, people make ghee by clarifying butter. In France, beurre de baratte is made in wooden churns. In Ireland, butter is famous for its golden color, thanks to grass-fed cows.
Making butter at home is a tradition passed down through generations. Using a stand mixer brings this old process into modern kitchens.
Safety And Hygiene Tips
Cleanliness is important. Homemade butter is sensitive to bacteria. Always wash your tools and hands before starting. If using raw cream, use it quickly and keep finished butter refrigerated. If you notice sour smell or mold, throw it away.
Some people worry about lactose. Butter contains almost no lactose, because the buttermilk is removed. People with lactose intolerance can usually eat butter without problems, but consult your doctor if unsure.
Comparing Store-bought Vs Homemade Butter
How does homemade butter compare to store brands? Here’s a summary:
- Taste: Homemade is fresher and richer.
- Ingredients: Only cream and salt, no additives.
- Shelf life: Store-bought lasts longer due to preservatives.
- Cost: Homemade can be cheaper, especially with bulk cream.
- Customization: You can add any flavors you like.
Many people are surprised at how different homemade butter tastes. Even premium brands can’t match the flavor of fresh butter made at home.
Troubleshooting: Fixing Common Butter Problems
Sometimes things go wrong. Here’s how to fix issues:
- Butter is too hard: Let it sit at room temperature for 10 minutes.
- Butter is crumbly: Add a teaspoon of cream and mix gently.
- Butter is too soft: Chill in fridge for 30 minutes.
- Butter smells sour: Discard—it’s spoiled.
If your butter doesn’t separate, check the cream type and temperature. Only heavy cream works well; if the cream is too warm, try chilling before mixing.

Credit: thepracticalkitchen.com
Environmental Impact
Making butter at home reduces packaging waste. Store brands use plastic tubs or foil, while homemade butter can be stored in reusable containers. You also control the source—local, organic cream is better for the environment.
If you want to learn more about sustainable dairy farming, visit USDA Food Waste Resources.
Frequently Asked Questions
How Long Does Homemade Butter Last?
Homemade butter lasts about 2 weeks in the refrigerator if stored in an airtight container. In the freezer, it stays fresh for up to 3 months.
Can I Use Non-dairy Cream For Butter?
No. Only dairy cream with high fat content will separate into butter. Non-dairy alternatives do not make real butter.
What Is Buttermilk, And How Can I Use It?
Buttermilk is the liquid separated from cream during butter making. It’s great for baking pancakes, biscuits, and cakes. Store it in the fridge for up to 1 week.
Is Homemade Butter Healthier Than Store-bought?
Homemade butter has fewer additives and preservatives. If you use organic or grass-fed cream, it has more nutrients like Omega-3 and Vitamin K2.
Can I Flavor My Butter?
Yes. After rinsing, mix in salt, herbs, garlic, honey, or spices. Shape the butter and refrigerate. Flavored butter adds excitement to meals.
Making butter at home is easier than most people think. With a stand mixer, you can enjoy fresh, custom butter in minutes. The process is quick, the result is delicious, and you gain valuable skills in your kitchen. Whether you’re making butter for your family or as a gift, the satisfaction is real.
Try it yourself, and discover the difference fresh butter makes.