Sometimes, taking apart your blender can feel a little tricky, especially for folks just starting out. You might be wondering about how to remove blender coupler because yours is stuck or you just need to clean it. It’s a common thing many people run into.
Don’t worry, it’s usually much simpler than you think! We’ll walk through it step-by-step so you can get your blender back in working order without any fuss.
Key Takeaways
- Understand why the blender coupler might be stuck.
- Learn the basic tools needed for removal.
- Follow a simple process to detach the coupler safely.
- Discover tips for making the removal easier.
- Know when to seek professional help if needed.
Understanding Your Blender Coupler
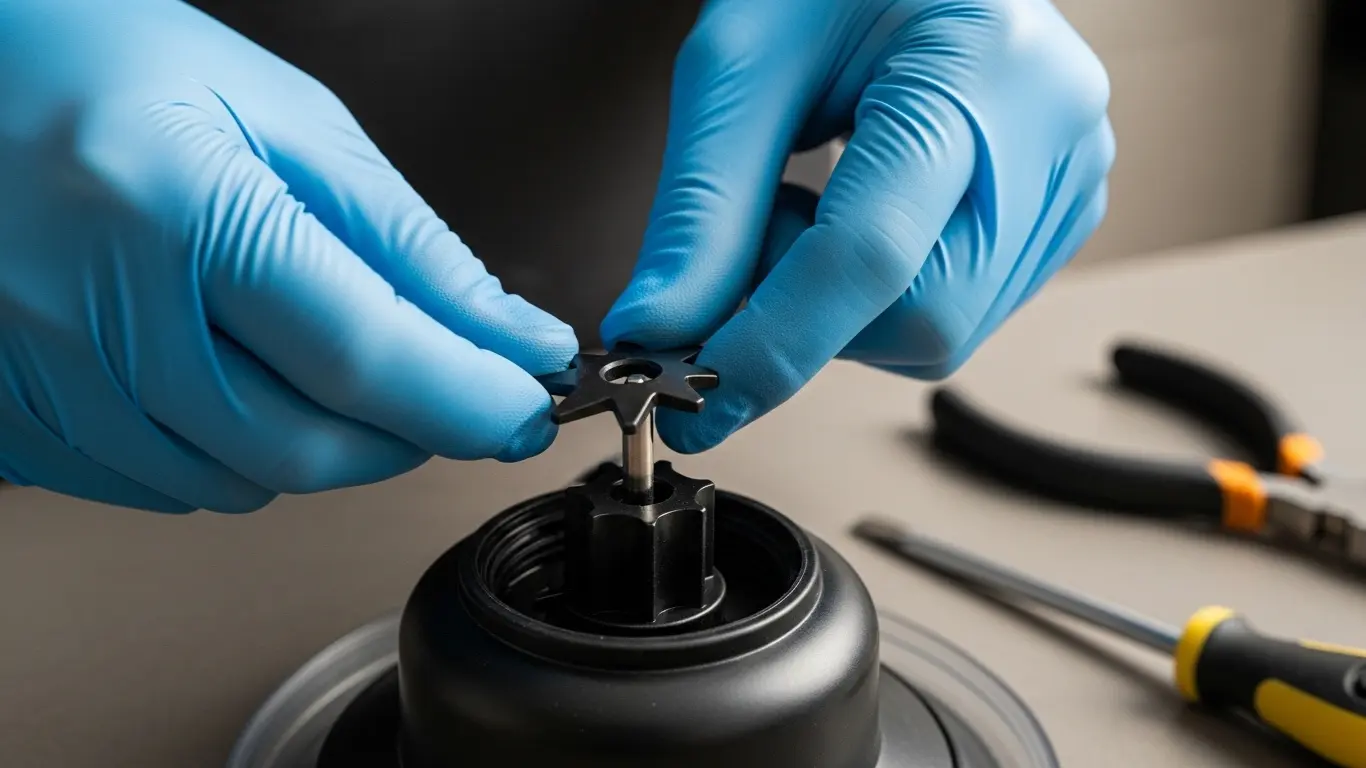
What is a Blender Coupler?
Your blender coupler is a small but important part. It’s usually a piece that looks like a gear or a star shape. One side connects to the blender motor’s shaft inside the base.
The other side connects to the bottom of your blender jar. This connection is what transfers the power from the motor to the blades, making your blender work. Without it, the motor spins, but the blades stay still.
Why Might a Blender Coupler Need Removing?
There are a few reasons you might need to remove your blender coupler. The most common is for cleaning. After many uses, food bits and liquids can get stuck around the coupler, making it hard to clean the jar or the base properly.
Sometimes, the coupler itself might get damaged or wear out. If your blender is making strange noises or the blades aren’t spinning right, the coupler might be the issue. Replacing a worn-out coupler can often fix these problems and extend your blender’s life.
Common Challenges When Removing
For beginners, the main challenge is often that the coupler can get stuck. This happens because food particles, sugar, or moisture can cause it to seize up. It might also be a tight fit from the factory, designed to prevent leaks and ensure a secure connection during blending.
Trying to force it without the right method can lead to damage, either to the coupler or the blender base itself. Another issue is not knowing which part actually needs to be removed – is it part of the jar or part of the motor base? We’ll make this clear.
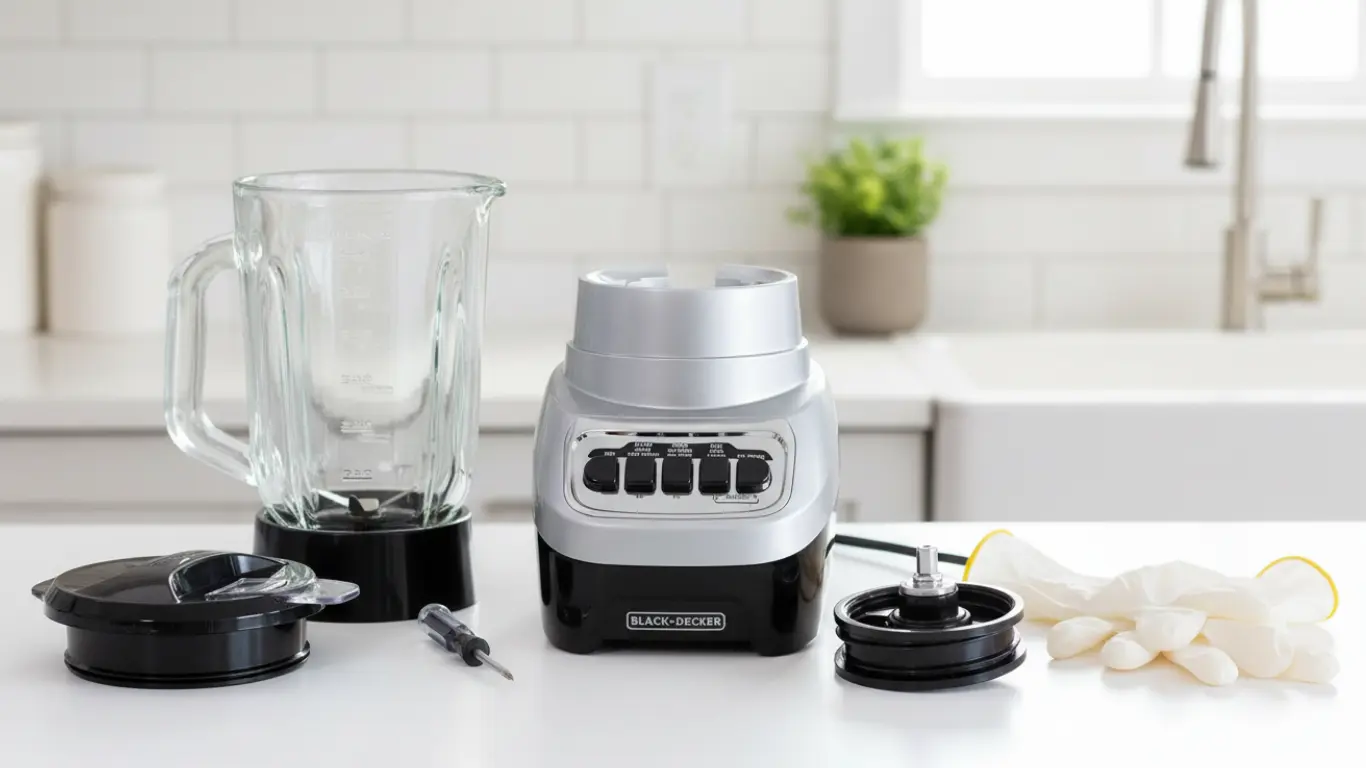
Tools You Might Need
Before you start, it’s good to have a few simple items ready. You don’t need fancy tools for this job. Most of the time, you can get the job done with things you already have around your home.
Having the right tools makes the process smooth and safe.
- A clean, dry cloth or paper towels.
- Dish soap and water for cleaning.
- Possibly a pair of rubber gloves for a better grip.
- A flathead screwdriver (use with extreme caution and only if necessary).
- A small wrench or pliers (again, use with care).
Step-by-Step Guide: How To Remove Blender Coupler
This guide focuses on the most common types of blender couplers that can be removed from the blender jar. Some blender models have couplers that are permanently attached to the motor base and cannot be removed by the user. Always check your blender’s manual if you’re unsure.
Step 1 Unplug Your Blender
This is the most important step for your safety. Before you do anything else, make sure your blender is unplugged from the electrical outlet. Never attempt to remove any parts from your blender while it is plugged in.
This prevents any accidental starting of the motor.
Step 2 Detach The Blender Jar
Carefully lift the blender jar off the motor base. Turn the jar upside down and look at the bottom. You should see the coupler attached to the jar.
It’s usually a plastic or rubber piece that fits into a metal or plastic receptacle.
Step 3 Identify The Coupler Type
There are two main types of removable couplers:
- Screw-on Couplers: These are usually made of plastic or rubber and have threads. They are screwed into the bottom of the blender jar.
- Press-fit or Snap-on Couplers: These are often a bit more challenging. They are pushed into the bottom of the jar and held in place by friction or small clips.
Step 4 Removing A Screw-On Coupler
For screw-on couplers, the process is usually straightforward. The coupler will have notches or a textured surface to help you grip it.
- Try to grip the coupler firmly with your hands. If it’s slippery, dry your hands and the coupler completely.
- Turn the coupler counter-clockwise. Think “lefty loosey.”
- If it’s a bit tight, you can try using a rubber glove to get a better grip.
- If it’s still stuck, you might need a tool. Gently use the edge of a flathead screwdriver or the teeth of pliers to nudge one of the notches. Be very careful not to damage the plastic threads of the jar or the coupler. Apply steady, gentle pressure.
Step 5 Removing A Press-Fit or Snap-On Coupler
These can be a bit trickier. They are designed to be a snug fit.
- Inspect the edges of the coupler. Sometimes there are small gaps or tabs you can work with.
- You might need to gently pry the coupler out. Use a flathead screwdriver or a similar flat tool. Insert it into a small gap between the coupler and the jar.
- Work your way around the coupler, gently prying a little at a time. This helps to loosen it gradually.
- Avoid forcing it too hard in one spot, as this can crack the coupler or damage the jar.
- Some models might have a retaining ring or clips that need to be released first. Check for any small metal rings or plastic clips around the coupler.
Step 6 Cleaning The Coupler And Jar
Once the coupler is removed, you can clean both parts thoroughly. Use warm, soapy water. A small brush, like an old toothbrush, can be helpful for scrubbing away any stubborn residue from the coupler’s grooves and the inside of the jar where it connects.

Step 7 Reattaching The Coupler
When you’re ready to put it back together, make sure both the coupler and the opening in the jar are completely dry. This helps create a good seal and prevents sticking.
- For screw-on couplers, simply align the threads and screw it back in clockwise (“righty tighty”). Tighten it until it’s snug, but don’t overtighten.
- For press-fit couplers, line it up with the opening and push it firmly into place. You might hear or feel it click when it’s seated correctly.
Troubleshooting And Tips
Sometimes, even with the right steps, a coupler can be stubborn. Here are a few extra tips to help:
- Warm Water Trick: For very stubborn couplers, especially screw-on types, you can try running some warm (not hot) water over the coupler for a minute or two. The slight expansion might help loosen it. Make sure to dry it completely afterward.
- Penetrating Oil (Use Sparingly): In rare, extremely stubborn cases, a tiny drop of a food-safe penetrating oil might help. Apply it very carefully to the threads and let it sit for a few minutes. Clean it off thoroughly before reassembling and using. This is a last resort.
- Check For Damage: While removing, inspect the coupler and the threads on the jar for any signs of cracking, stripping, or excessive wear. If either part is damaged, it might need to be replaced entirely.
- Know Your Model: Every blender is a bit different. If you’re having trouble, look up your specific blender model online. Many manufacturers provide diagrams or even videos showing how their parts come apart.
When To Seek Help
If you’ve tried these steps and the coupler still won’t budge, or if you feel you might break something, it’s time to stop. Forcing it further could damage your blender beyond repair. In such cases, consider:
- Contacting the blender manufacturer’s customer support.
- Taking your blender to a small appliance repair shop.
Frequently Asked Questions
Question: How do I know if my blender coupler is removable?
Answer: Most removable couplers are on the bottom of the blender jar. If you can see a separate piece that screws or pushes into the jar, it’s likely removable. Some are built directly into the motor base and are not user-removable.
Question: Can I use pliers to remove my blender coupler?
Answer: Yes, you can use pliers gently. Grip the coupler and turn it counter-clockwise. Be careful not to squeeze too hard, as this can crush or damage the coupler, especially if it’s plastic.
Question: What if the coupler is stuck and I can’t get it off?
Answer: First, ensure you have a good grip and are turning it the right way. Try the warm water trick. If it’s still stuck, a very gentle nudge with a flathead screwdriver on the notches might help.
If you’re worried about breaking it, it’s best to seek professional help.
Question: How often should I remove and clean my blender coupler?
Answer: It’s a good idea to remove and clean the coupler whenever you notice food residue building up or if you’ve blended sticky ingredients. For regular use, a deep clean every few months is usually sufficient.
Question: My coupler broke. Where can I buy a new one?
Answer: You can typically buy replacement couplers from the blender manufacturer’s website, online retailers like Amazon, or specialized appliance parts stores. Make sure to get the correct part for your specific blender model.
Final Thoughts
Learning how to remove blender coupler is a useful skill. It helps you keep your blender clean and working well. By following these simple steps, you can easily detach, clean, and reattach your blender’s coupler.
Don’t be afraid to try it. You’ve got this!