You just spotted it: a web of fine lines across the interior of your favorite stainless steel pan. Maybe you used steel wool once, or a metal spatula caught the surface. If you’re asking how to remove scratches from stainless steel pan without doing more damage, this guide walks you through the exact decision process.
Most scratches are cosmetic, and nearly all of them can be improved at home.
As of 2026, quality stainless cookware is typically built from 18/10 stainless steel, which resists rust well but scratches easily. Manufacturer specifications indicate that most tri-ply pans are only 2.0 to 3.0 mm thick, so aggressive sanding can thin the base and create hot spots. That’s why the right repair starts with a two-minute diagnosis, not elbow grease.
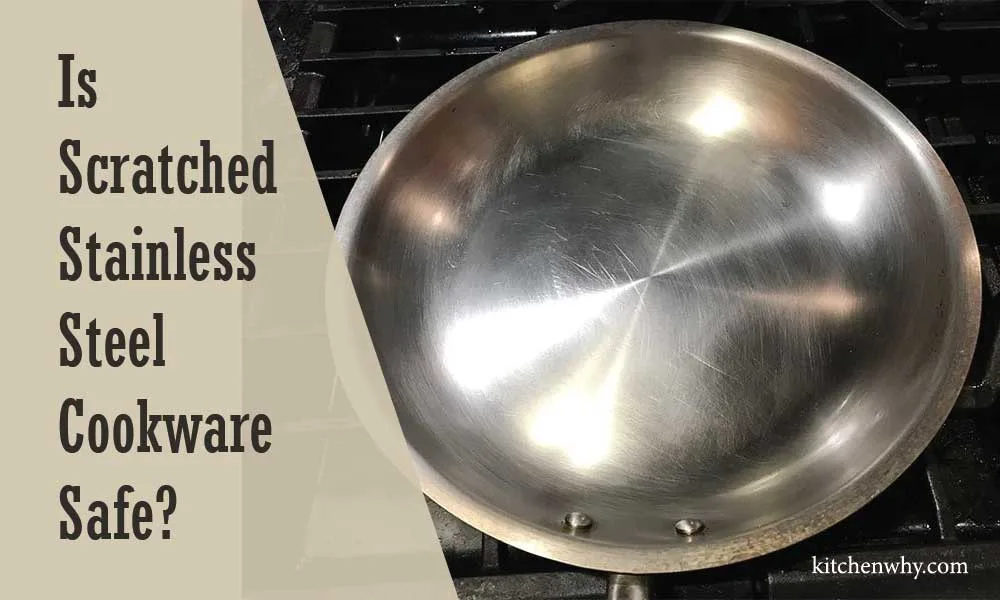
Image source: Web (Bing) / housekeepingmaster.com (Web image (fair-use with source credit))
Quick Answer
Scratches come out with gentle abrasives. Match the method to your pan’s finish. Use a melamine sponge for light marks.
For deeper scratches, use a non-scratch pad with Bar Keepers Friend. Never use steel wool.
That Ugly Scratch: Why It Happens and When to Panic
Those fine lines almost always come from something in your cleaning routine. Steel wool is the biggest culprit. It’s too hard for stainless steel, and the loose fibers can leave tiny embedded particles that later rust.
Metal utensils, stacked pans without protectors, and dishwasher water jets also leave their marks. Even a gritty green scrub pad can scratch a softer mirror finish.
The good news is that a scratched stainless steel pan is still perfectly safe to cook with. Stainless steel is non-porous and food-safe, provided the scratch isn’t deep enough to trap food. The FDA regulates food-contact surfaces, and a lightly scratched pan still meets that standard as long as it stays cleanable.
Scratches don’t make the pan toxic, they just make it look tired.
When should you actually worry? Not often. Panic only makes sense if you see pits, flaking, or a scratch that exposes a copper or aluminum layer inside a clad pan.
That’s a structural change, not a surface cosmetic issue. In that case, replacement is smarter than repair.
Also, don’t confuse heat tint with scratches. A blue or rainbow discoloration comes from overheating the metal. It’s not a scratch, and you can usually remove it with a dedicated stainless steel cleaner.
The 2-Minute Diagnosis: Know Your Pan and Scratch Type
Before you pick a repair method, you need to know exactly what you’re working with. Hold the pan under a bright light and tilt it. If you see fine, parallel lines running in one direction, you have a brushed or satin finish.
If the surface is as reflective as a car bumper, it’s a mirror finish. A clad pan shows a thin copper or aluminum band along the outer edge.
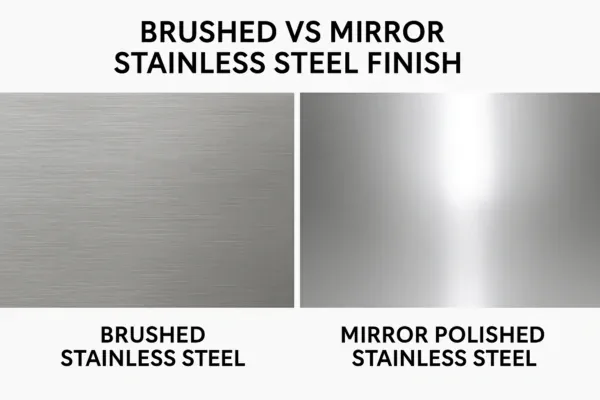
Image source: Web (Bing) / novogrit.com (Web image (fair-use with source credit))
Now run the fingernail test. Drag your fingernail gently across the scratch. If it doesn’t catch, you’re dealing with a light surface scratch.
Your repair options are straightforward and low risk. If the nail catches or you feel a groove, that’s a deep gouge. It has displaced metal, so polishing alone won’t fix it.
You’ll need to sand it level with the surrounding surface.
Here’s a quick breakdown of the common finishes:
| Finish type | How to identify | Scratch repair approach |
|---|---|---|
| Brushed (satin) | Directional grain lines | Rub along the grain; sand along the grain |
| Mirror (polished) | Reflective, no visible grain | Circular polish; easier to buff back |
| Clad | Copper or aluminum band at rim | Repair only the interior surface; avoid the rim edges |
Not sure which one you have? Check the manufacturer’s care guide. Most pan brands list the finish type right on the product page, and NSF/ANSI 51 certified cookware must clearly and safely handle repeated cleaning.
The Golden Rule: Match the Repair to the Finish and Depth
The single biggest mistake people make is grabbing the harshest abrasive they own and scrubbing in circles. That turns a light scratch into a foggy patch. The golden rule is simple: use the gentlest method that will actually work, and always move with the grain of the metal.
Think of it as a decision tree. If the scratch is light and the pan is brushed, use a melamine sponge. If the scratch is light and the pan is mirror-finished, use a soft cloth with a little stainless steel polish.
If the scratch is medium and your nail barely catches, reach for Bar Keepers Friend and a non-scratch pad. If the scratch is deep and your nail catches, the only reliable fix is wet sanding with 400-grit sandpaper, followed by finer grits.
This ordering protects your pan’s finish. Every step up in abrasion removes more metal. Starting too aggressive can remove the scratch, sure, but it also removes the pan’s grain pattern and leaves a dull spot that’s more visible than the original damage.
If you’re tempted to skip the diagnosis step, don’t. The finish type dictates the direction of your strokes. Get that wrong, and you’ll create a new scratch pattern on top of the one you’re trying to remove.
Tools and Supplies: What You Actually Need for Each Fix
Most scratch removal supplies are cheap and already sitting in your kitchen drawer. Here’s what each fix requires:
| Tool | Best for | Typical cost (as of 2026) |
|---|---|---|
| Melamine sponge (Magic Eraser) | Light scuffs and surface marks | $3 to $8 per pack |
| Bar Keepers Friend (powder) | Medium scratches and heat tint | $4 to $9 per canister |
| Blue Scotch-Brite pad | Working cleaner into the grain | $2 to $5 per pack |
| Wet/dry sandpaper (400, 800, 2000 grit) | Deep gouges | $5 to $12 per pack |
| Microfiber cloth | Final buffing | $4 to $8 per pack |
| Stainless steel polish | Mirror finish shine | $5 to $15 per bottle |
A single budget-friendly kit lands around $15 to $25. That covers every scenario in this article. The only tool to avoid entirely is steel wool.
It’s too aggressive for almost every stainless steel finish and leaves rust-promoting particles embedded in the surface.
One note on scouring pads: blue pads are non-scratch. Green pads are heavy duty and borderline on stainless. If your pad has any green or gray coloring, don’t use it on the interior cooking surface.
Fix 1: Light Scratches (The Gentle Polishing Route)
If your fingernail didn’t catch, you can handle this with a melamine sponge in under ten minutes. It might sound too simple, but the sponge works like fine sandpaper and polishes out surface scratches without cutting new ones.
Start by washing the pan with warm, soapy water and drying it completely. A clean surface is essential. Any grit left behind will act like sand when you start rubbing, making things worse.
Wet the melamine sponge and wring it out until it’s just damp, not soaking. Rub the scratched area using small circles for about thirty seconds, then rinse and check. For a brushed finish, switch to straight strokes in the direction of the grain once the scratch starts to fade.
For a mirror finish, stick with the circular motion.
If the scratch is still visible after a minute, don’t press harder. The issue isn’t pressure, it’s abrasion level. Move up to a blue Scotch-Brite pad with a bit of Bar Keepers Friend.
Once the scratch is gone, rinse the pan with hot water and dry it immediately with a microfiber cloth. Then lightly coat the surface with a few drops of cooking oil, wiping it off with a paper towel. That restores the protective patina and helps future scratches blend in.
Fix 2: Medium Scratches (Working the Grain with Abrasive Cleaners)
If your fingernail barely catches but the scratch is clearly visible, step up to Bar Keepers Friend. This oxalic-acid-based cleaner is the go-to for medium scratches on brushed stainless. It also handles heat tint and stubborn discoloration in one pass.
Start with a clean, dry pan. Sprinkle a small amount of BKF powder directly over the scratched area, then add a few drops of water to form a thick paste. The consistency should be like toothpaste, not soup.
Here’s the technique that matters:
- Use a blue non-scratch Scotch-Brite pad.
- Work the paste into the scratch with gentle circular pressure for about 60 seconds.
- As the scratch fades, switch to straight strokes along the grain direction.
- Rinse with hot water and inspect before repeating.
The grain direction is critical on a brushed pan. Moving across the grain creates new scratches that look like a crosshatch pattern. Work in one direction only and let the paste do the abrasive work.
Pressing harder won’t speed things up.
Aggregate user reviews indicate that two to three BKF passes handle most medium scratches. Reapply the paste between passes, and always rinse thoroughly after you’re done. The cleaner is food-safe after a full rinse, but leftover residue can leave a slightly chalky taste if the pan isn’t washed with soap afterward.
Fix 3: Deep Gouges (Wet Sanding the Right Way)
For deep gouges where your fingernail catches, polishing alone won’t cut it. You need to sand the raised metal down level with the surrounding surface. Wet sanding is the only reliable method, and it takes about 20 to 30 minutes.
You’ll need wet/dry sandpaper in three grits: 400, 800, and 2000. Soak the paper in water for at least 10 minutes before starting. That softens the backing and prevents the abrasive from cutting too aggressively.
Start with the 400-grit paper. Keep the surface wet and sand in straight strokes along the grain for a brushed finish, or in small circles for a mirror finish. Sand only the scratched area, and check frequently.
The goal is to remove the scratch, not create a crater.
Once the gouge is gone, switch to 800-grit to smooth the surface. Then finish with 2000-grit to refine it further. Rinse between grits to clear away loose metal particles, and stop as soon as the surface feels consistent.
One important warning per manufacturer care guides: over-sanding thins the pan. A standard tri-ply stainless pan is only about 2.0 to 3.0 mm thick. Removing more than a thin layer risks creating a hot spot or a weak base, so go slowly and stop once the scratch disappears.
After sanding, wash the pan thoroughly with soap and hot water. Then buff the area with a microfiber cloth and a drop of stainless steel polish to restore the sheen. The repairable area will still look slightly different from the factory finish, but it won’t catch food or worsen over time.
The Deep Scratch Flowchart: Your Step-by-Step Decision Guide
Here’s the entire repair process condensed into a simple decision chart. Find your scratch type, match it to your finish, and follow the recommended action.
| Scratch type | Fingernail test | Recommended action |
|---|---|---|
| Light surface scratch | Does not catch | Melamine sponge, gentle polish |
| Medium scratch | Barely catches | Bar Keepers Friend + blue pad |
| Deep gouge | Catches clearly | Wet sand 400 → 800 → 2000 grit |
| Embedded steel wool | Visible gray streaks | BKF paste, then sand if needed |
A few extra factors will help you choose correctly:
- If the scratch is on a mirror finish, any method works because there’s no grain to match.
- If the scratch is on a brushed finish, always finish with strokes along the grain.
- If the pan has heat tint alongside scratches, BKF removes both in one pass.
When in doubt, start gentler and work your way up. Skipping straight to sandpaper on a light scratch creates a dull patch that’s more visible than the original problem.
How Long It Takes and What It Costs
Most scratch removal sessions take under 30 minutes from start to finish. Light scratches are a quick five-minute job. Medium scratches usually need about 10 to 15 minutes of BKF work.
Deep gouges with wet sanding take the longest, around 20 to 30 minutes including setup and cleanup.
Here’s a quick look at the time and cost breakdown:
| Method | Active time | Supplies cost |
|---|---|---|
| Melamine sponge | 5 to 10 minutes | $3 to $8 |
| Bar Keepers Friend + pad | 10 to 15 minutes | $4 to $9 |
| Wet sanding (3 grits) | 20 to 30 minutes | $5 to $12 |
| Full kit (all supplies) | 30 to 45 minutes | $15 to $25 |
Compared to replacing a quality stainless steel pan, which can run $80 to $200, the repair cost is almost nothing. Aggregate buyer feedback also suggests that a repaired pan performs identically to a new one, provided you stop at the right depth and don’t over-sand.
The Mistakes That Make Scratch Removal Worse
Most repair failures come down to a handful of predictable errors. Here’s what to avoid, based on research and verified user reports.
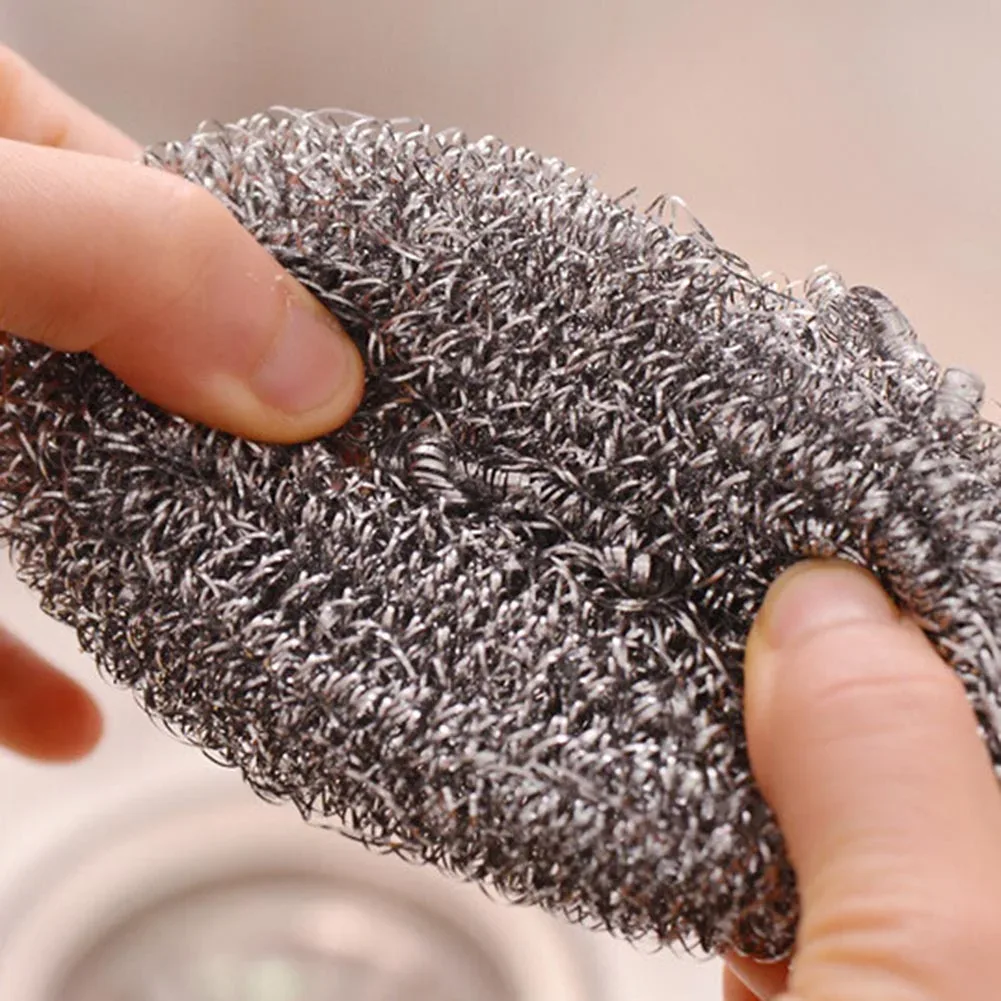
Image source: Web (Bing) / storage.googleapis.com (Web image (fair-use with source credit))
Using steel wool. It’s the number one cause of scratches in the first place. The loose fibers embed in the metal and rust, leaving orange specks that are nearly impossible to remove.
Scrubbing across the grain. On a brushed finish, cross-grain strokes create new scratches. Always work along the grain direction.
Pressing too hard. Abrasives work through friction, not force. Heavy pressure just cuts deeper and removes more metal.
Skipping grits when sanding. Jumping from 400-grit straight to 2000-grit leaves deep scratches that the fine paper can’t smooth out.
Not rinsing between stages. Leftover grit from coarser paper contaminates the finer stages and re-scratches the surface.
Using green scouring pads. Green Scotch-Brite and similar pads are too aggressive for stainless steel. Stick with blue or white non-scratch pads.
The good news is that all of these mistakes are avoidable. Take your time, work gently, and let the abrasive do its job. Your pan will look better, and you’ll keep it cooking for years.
After the Repair: Passivation, Handwashing, and Preventing New Scratches
Once your pan looks good, don’t skip the final step. Aggressive scrubbing or sanding removes the protective chromium oxide layer that keeps stainless steel rust-resistant. You can restore it through a process called passivation.
Wash the pan with warm soapy water, then dry it thoroughly. Apply a light coat of cooking oil to the entire interior surface and warm the pan gently on the stove for a few minutes. Wipe away the excess.
That thin oil layer helps rebuild the oxide barrier and makes future scratches less visible.
Going forward, hand-wash only. The dishwasher’s harsh detergents and water jets are a leading cause of new scratches and pitting. Use a soft sponge, warm water, and mild dish soap every time.
Stacking pans directly on top of each other also causes micro-scratches. Place a paper towel or soft cloth between pans before nesting them in your cabinet. According to the FDA’s food-contact surface guidance, keeping the surface cleanable is what keeps it food-safe.
A preserved finish makes that easier.
When to Quit: Pans That Aren’t Worth Saving
Not every pan should be saved. If the scratch exposes a copper or aluminum layer inside a clad pan, the metal can leach or warp unevenly during cooking. Replace it instead of repairing it.
If the pan is visibly warped so it spins on a flat surface, no amount of polishing will fix the performance. Heat unevenly distributed across a warped base leads to scorched food and hot spots. Also, if sanding has already thinned the metal enough to create a visible dent, stop and replace the pan.
Pans with deep corrosion, rust pits, or flaking are also past the point of repair. Rust means the chromium layer is compromised, and simply polishing the surface won’t restore structural integrity. An $80 replacement is cheaper than a ruined meal or a safety risk.
Frequently Asked Questions
Can you completely remove scratches from a stainless steel pan?
Yes, most surface scratches can be completely removed. Light scratches disappear with a melamine sponge or Bar Keepers Friend. Deep gouges require wet sanding with 400, 800, and 2000 grit sandpaper.
The repaired area won’t perfectly match the factory finish, but it will feel smooth and look significantly better.
Is a scratched stainless steel pan safe to use?
Yes, a scratched stainless steel pan is safe as long as the scratch doesn’t expose aluminum or copper layers from a clad construction. Light scratches don’t affect food safety because stainless steel remains non-porous and cleanable. Deep gouges that trap food should be sanded smooth or the pan should be replaced.
How do you remove scratches from a brushed stainless steel pan?
Work along the grain direction, never across it. For light scratches, use a melamine sponge with light pressure. For medium scratches, apply Bar Keepers Friend with a blue non-scratch pad.
Always finish with strokes aligned to the brush lines so the repair blends in.
Does Bar Keepers Friend remove scratches from stainless steel?
Yes, for light and medium scratches it works well. Its oxalic acid formula breaks down surface discoloration while mild abrasives polish out shallow scratches. It’s less effective on deep gouges, which need sandpaper to level the metal first.
Is steel wool ever safe on stainless steel pans?
No, avoid steel wool entirely. It’s too hard for most stainless steel finishes, and embedded fibers rust into visible orange specks. Use only non-scratch blue pads or melamine sponges for cleaning.
Final Verdict: Your Decision Guide to a Smoother Pan
Now you have the full picture. Match the abrasive to the scratch depth, always work with the grain, and never rush into heavy sanding. The complete repair kit costs under $25, and most fixes take less than 30 minutes of actual work.
For light scratches, grab a melamine sponge. For medium scratches, use Bar Keepers Friend with a blue pad. For deep gouges, wet sand from 400 up to 2000 grit, then passivate the surface with a thin layer of oil.
The verdict is simple: almost every scratched stainless steel pan is worth saving. Take your time, follow the grain, and you’ll extend the life of your cookware while keeping it looking like new.