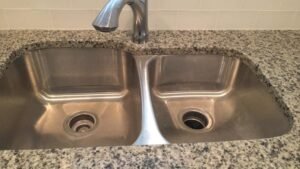
A clogged kitchen sink can stop your day. Dirty water sits. Dishes pile up. You may feel stressed or frustrated. Many people try plungers or harsh chemicals, but these often only give temporary results or damage your pipes. If you want a long-term fix without harming your plumbing, using a drain snake is a smart choice. This tool reaches deep into pipes and clears blockages that other methods miss.
Unclogging a kitchen sink with a snake is not just for plumbers. With simple tools and careful steps, you can do it yourself—even if you’ve never touched plumbing before. Many homeowners are surprised at how much money and time they save.
This guide will show you how to unclog your kitchen sink with a snake, explain which type to use, and offer tips that even some experienced DIYers forget. You’ll also find out what to do if things don’t go as planned, plus answers to common questions people ask about kitchen sink clogs.
Why Sinks Get Clogged
Kitchen sinks handle a lot of waste—grease, food bits, soap scum, and sometimes small objects. Over time, these materials build up inside pipes, especially in the P-trap (the curved section under your sink). Here are the main reasons your kitchen sink might clog:
- Grease and oil: These cool down and stick to pipe walls.
- Food scraps: Even with a garbage disposal, starchy or fibrous foods can form clumps.
- Soap buildup: Some soaps leave residue that traps other debris.
- Foreign objects: Small utensils, jewelry, or toys can get stuck.
- Old pipes: Corroded or uneven pipes catch debris more easily.
Knowing what causes a clog helps you fix it and prevent it from happening again. Many people don’t realize that pouring hot water or using store-bought chemicals rarely solves the real issue. They might clear the surface, but deeper blockages remain.
What Is A Drain Snake?
A drain snake (also called a plumber’s auger or drain auger) is a flexible, coiled wire tool. It’s designed to slide through pipes and break up or pull out clogs. The end of the snake usually has a corkscrew or hook to grab debris. You turn a handle or crank to push the snake deeper and spin it through bends in the pipe.
There are different types of drain snakes:
- Manual hand snakes: Short, easy to use, and cheap. Good for simple clogs near the sink.
- Drum augers: Stronger, with a rotating drum and a longer cable. Suitable for tougher or deeper clogs.
- Power snakes: Attach to a drill or have an electric motor. Best for big blockages or long pipes.
Not all sinks need a power tool. For most kitchens, a manual or drum auger is enough.
Tools And Materials You’ll Need
Before you start, gather everything you need. This avoids frustration and mess. Here’s what you’ll want:
- Drain snake (manual or drum auger)
- Bucket (to catch water from pipes)
- Adjustable wrench (for loosening fittings)
- Rubber gloves (to protect your hands)
- Old towels or rags (for spills)
- Flashlight (to see under the sink)
- Safety goggles (optional, but helpful)
- Cleaning brush (for pipe parts)
Some people like to use a plastic bag to cover their arm if they expect dirty water. A small container for screws or parts can also help you stay organized.
Safety Tips Before You Start
Working under the sink can be messy, but safety is important. Here are some simple rules:
- Turn off the faucet: Make sure no one uses the sink while you’re working.
- Unplug garbage disposal: If you have one, unplug it to prevent accidents.
- Wear gloves: Pipes can be sharp, and dirty water may contain bacteria.
- Protect your eyes: Splashing water or debris can be a hazard, especially when pulling out a clog.
If you smell gas or see pipe damage, stop and call a professional.
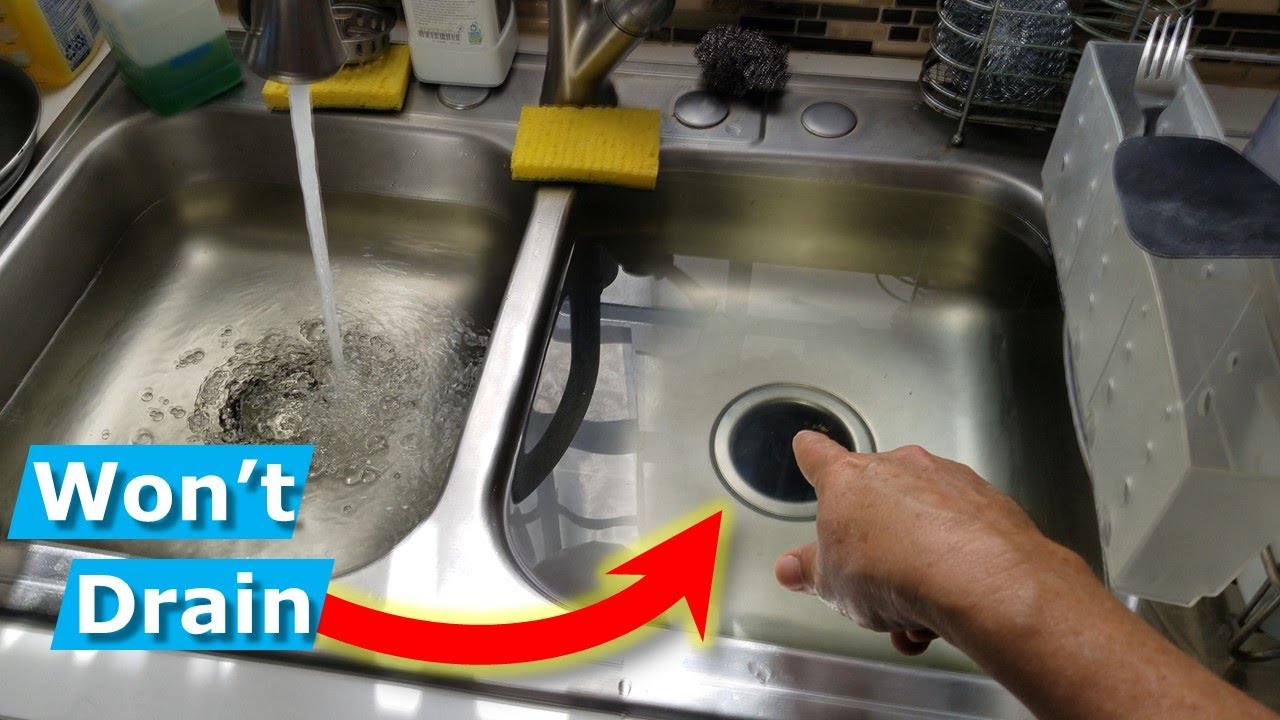
Credit: www.youtube.com
Step-by-step: How To Unclog A Kitchen Sink With A Snake
Let’s walk through the process. Take your time. Rushing often leads to leaks or missed blockages.
1. Clear The Area
Take out any cleaning supplies, bins, or objects under your sink. Lay down old towels to catch drips. Place the bucket under the pipes, directly under the P-trap (the curved section).
2. Remove Standing Water
If your sink is full of water, scoop it into a bucket or large bowl. This keeps the area less messy and lets you see if you’ve fixed the clog later.
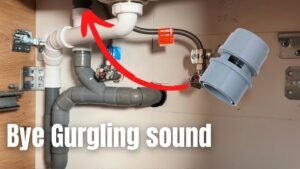
3. Loosen And Remove The P-trap
Most clogs gather in the P-trap. Use your wrench or hands to loosen the slip nuts (round rings) on both sides of the P-trap. Turn them counterclockwise. Be careful—dirty water will spill out, so keep your bucket ready.
Take out the P-trap and inspect it. If you see a blockage inside, clean it with a brush or by running water through it. Sometimes, this step alone solves the problem.
4. Check The Trap Arm
The trap arm is the straight pipe that connects the P-trap to the wall. Look inside with your flashlight. If you see debris close to the opening, remove it with your fingers or a brush.
5. Insert The Snake Into The Drain Pipe
If the clog is deeper, you’ll need the snake. Feed the tip of the snake into the opening where the trap arm was connected. Push gently at first. When you feel resistance, stop.
Pro tip: Don’t force the snake. If it bends or gets stuck, pull back a little, then try again. Forcing can damage pipes, especially in older homes.
6. Rotate And Advance The Snake
Turn the handle or crank clockwise as you gently push forward. This spinning helps the tip grip and break through the clog. Work slowly—rushing can tangle the snake or miss the blockage.
When you feel the snake push through or the resistance eases, you’ve likely reached the clog. Move the snake back and forth a few times, then slowly pull it out.
Non-obvious insight: Many people only push the snake in, but moving it back and forth several times breaks up stubborn clogs better and grabs more debris.
7. Remove The Snake And Clean Up
Pull the snake out carefully. Wipe it with a rag as you go. You might see greasy clumps, hair, or food bits attached. This is normal and means the snake did its job.
Pro tip: Clean the snake before storing it. If you leave debris on the coil, it can smell bad or rust.
8. Reassemble The Pipes
Put the P-trap and trap arm back in place. Tighten the slip nuts by hand, then give them a gentle turn with the wrench. Don’t overtighten—plastic fittings can crack.
9. Test The Drain
Run hot water for several minutes. Watch for leaks under the sink and check that water flows smoothly down the drain.
If the sink still drains slowly, repeat the process. Sometimes two or three tries are needed for stubborn clogs.
When To Use A Snake Vs. Other Methods
Not every clog needs a snake right away. Here’s a comparison of common methods:
| Method | Best For | Pros | Cons |
|---|---|---|---|
| Plunger | Soft, surface clogs | Quick, cheap | Limited depth |
| Chemical drain cleaner | Grease and soap | Easy to use | Damages pipes, not eco-friendly |
| Drain snake | Deep or tough clogs | Effective, reusable | Needs more effort |
| Professional plumber | Major blockages | Expertise, guarantees | Expensive |
If you’ve already tried plunging and hot water with no luck, a snake is your next best step.
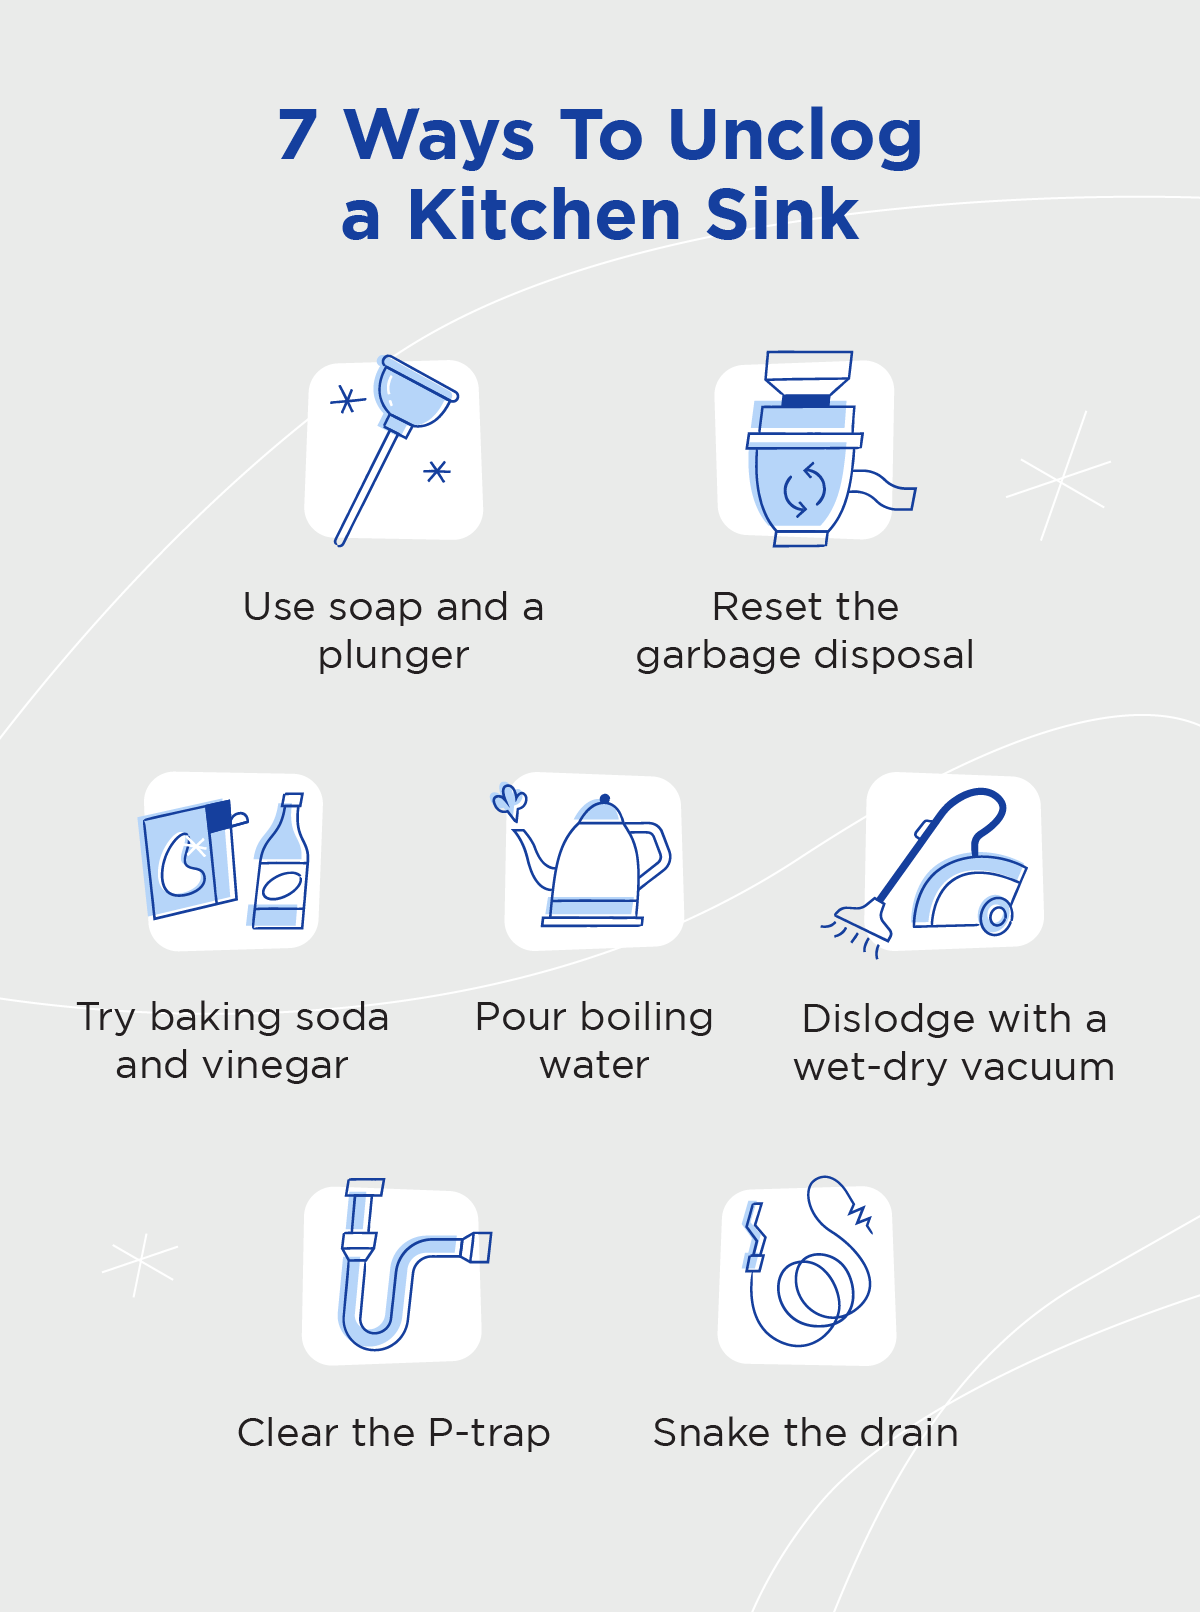
Credit: www.mrrooter.com
Types Of Drain Snakes: Which One To Choose?
Choosing the right snake can make the job easier. Here’s a quick look at the main types:
| Type | Length | Best For | Average Price (USD) |
|---|---|---|---|
| Manual hand snake | 3-15 feet | Simple sink clogs | $10-$25 |
| Drum auger | 15-25 feet | Medium clogs, bends | $25-$50 |
| Power snake | 25-50 feet | Heavy, deep clogs | $50-$150 |
For most kitchen sinks, a manual or drum auger is enough. Only use a power snake for very tough or old clogs, as it can damage pipes if used incorrectly.
Common Mistakes To Avoid
Many homeowners make simple errors that can make a small problem worse. Watch out for these:
- Forcing the snake: If you push too hard, you can break old pipes or jam the tool.
- Not removing the P-trap: Snaking from above the sink often misses the clog or pushes it deeper.
- Skipping pipe inspection: Always check the P-trap and trap arm before snaking.
- Overusing chemicals: Combining chemicals and snaking can create dangerous fumes or splashes.
- Forgetting to check for leaks: After reassembly, run water and look for drips.
One thing many people miss: Always clean the area under the sink before starting. A messy workspace leads to lost screws, dirty tools, or missed leaks.
How To Prevent Future Clogs
Clearing a clog is good, but avoiding it is better. Here are practical steps:
- Don’t pour grease down the drain. Wipe pans with a paper towel and throw it in the trash.
- Use a sink strainer. This catches food scraps before they go down the pipe.
- Run hot water after each use. Hot water keeps oils and soap from sticking.
- Avoid coffee grounds and fibrous foods like celery or potato peels.
- Clean the P-trap every few months. It’s easier to prevent buildup than remove it.
Many people don’t realize that even small amounts of grease or coffee grounds add up over time. These small habits make a big difference.
What If The Snake Doesn’t Work?
Sometimes, even after snaking, the sink stays clogged. Here’s what to check:
- The clog is too deep: Some blockages form farther down the line, beyond the reach of a standard snake.
- Collapsed or damaged pipes: Old pipes can break or sag, trapping debris.
- Multiple clogs: If you have a double sink or shared drain line, both sides may be blocked.
If you’ve tried several times and nothing works, it’s time to call a plumber. Persistent blockages may require a camera inspection or pipe replacement.
Environmental Impact: Chemicals Vs. Snaking
Chemical drain cleaners are common, but they’re harmful. The main risks:
- Pipe damage: Strong chemicals can eat away at plastic or metal.
- Health risks: Fumes can irritate lungs and eyes, especially in small kitchens.
- Water pollution: Chemicals end up in local water systems.
Snaking is safer and creates less waste. It’s a more eco-friendly option. According to the U.S. Environmental Protection Agency, mechanical cleaning methods help protect water quality and keep pipes in better shape.
Troubleshooting: Special Sink Setups
Some kitchens have extra features that change the process.
Double Sinks
With double sinks, the clog may be in the shared pipe. Remove and snake both P-traps if possible. Alternate the snake between both sides.
Garbage Disposals
Always unplug the disposal first. Never snake through the disposal opening; use the pipe after the disposal instead.
Old Or Fragile Pipes
Older homes may have thin or corroded pipes. Use a manual snake and go slowly to avoid damage. If you see rust or cracks, call a plumber.
Signs You Need A Plumber
DIY is great, but sometimes you need help. Call a professional if:
- Water backs up into other drains (like the tub or toilet)
- You smell sewage or gas
- Pipes are leaking or broken
- Clogs return often
Professional plumbers have longer snakes, cameras, and hydro-jetting tools for serious problems.
Real-world Example: A Stubborn Grease Clog
Let’s look at a common scenario. Maria, a homeowner, noticed her kitchen sink drained slowly. She tried hot water and a plunger—no luck. She removed the P-trap and found it clear. Using a 15-foot drum auger, she snaked the pipe and hit a tough spot 10 feet in.
After rotating the snake back and forth, she pulled out a thick grease ball.
Her mistake? Pouring leftover oil down the drain for months. After fixing the clog, Maria started wiping pans with paper towels and using a strainer. Her sink has stayed clear since.
How Often Should You Snake Your Sink?
You don’t need to snake your sink regularly—only when it’s clogged or slow. However, if you have old pipes or a history of blockages, check the P-trap and use a snake every 6-12 months as preventive maintenance.
Cost Comparison: Diy Vs. Professional
Snaking your own sink saves money. Here’s a quick comparison:
| Option | Average Cost (USD) | What’s Included |
|---|---|---|
| DIY (manual snake) | $10-$25 | Tool purchase, your time |
| DIY (drum auger) | $25-$50 | Tool purchase, more reach |
| Professional plumber | $100-$250 | Service call, expertise |
For most homes, buying a snake pays off after just one use.
Cleaning And Storing Your Drain Snake
After use, clean your snake with hot, soapy water. Dry it well to prevent rust. Store it in a cool, dry place. Wrap the coil loosely—tight coils can create kinks and make the tool harder to use next time.
Many people forget to clean their snake, leading to bad smells or bacteria growth. A clean tool lasts for years.
Frequently Asked Questions
How Long Does It Take To Snake A Kitchen Sink?
Most people can snake a kitchen sink in 30 to 60 minutes. If you’re new, allow extra time for removing the P-trap and cleaning up. Deep or tough clogs may take longer.
Can I Use A Drain Snake If I Have A Garbage Disposal?
Yes, but never insert the snake into the disposal opening. Always unplug the disposal and feed the snake into the drain pipe after the disposal. This avoids damage and keeps you safe.
Is A Drain Snake Safe For All Types Of Pipes?
Manual and drum snakes are safe for most kitchen pipes, including plastic (PVC) and metal. Avoid using power snakes on fragile or very old pipes—they can cause cracks or leaks.
What Should I Do If The Snake Gets Stuck?
If your snake gets stuck, stop and reverse the direction gently. Don’t force it. Try to rotate and wiggle it loose. If it won’t budge, remove the P-trap if possible. For severe jams, call a plumber.
When Should I Call A Professional Instead Of Snaking Myself?
Call a plumber if you smell sewage or gas, see pipe damage, or the clog won’t clear after several tries. Also call for recurring clogs, as these often signal bigger plumbing problems.
A clogged kitchen sink doesn’t have to ruin your day or your pipes. With the right tools and steps, you can solve most clogs yourself and keep your kitchen running smoothly. Remember, prevention is easier than repair—so build good habits and keep your snake handy for the future.

Credit: www.youtube.com