Using an air fryer for sublimation has become a creative solution for crafters who want to make custom mugs, tumblers, and other sublimation blanks at home. Sublimation is a process where special ink is transferred onto a coated surface using heat.
Traditionally, this is done with a heat press or oven, but the air fryer offers a simpler, more accessible alternative. If you’re new to crafting or just curious about new ways to personalize items, learning how to use an air fryer for sublimation can open up exciting possibilities.
Below, you’ll find a step-by-step guide, practical tips, common mistakes to avoid, and much more. Let’s dive in and explore how you can master this technique safely and successfully.
What Is Sublimation And Why Use An Air Fryer?
Sublimation is a method where ink changes from solid to gas without becoming liquid, bonding with a special coating on the blank (like a mug or tumbler). When heated, the design becomes a permanent part of the item. The result is vibrant, dishwasher-safe, and long-lasting.
An air fryer is usually used for cooking, but its hot air circulation and compact size make it useful for sublimation as well. Compared to a traditional convection oven or mug press, air fryers are:
- Affordable: Most people already own one.
- Space-saving: Smaller than most heat presses.
- Efficient: Heats up quickly and keeps temperature steady.
But not every air fryer is suitable. You need one large enough for your blank and with precise temperature controls. The popularity of this method has grown thanks to social media, making it accessible for small businesses and hobbyists alike.
What You Need To Start Sublimation With An Air Fryer
Before you begin, gather the right materials and tools. Using the correct supplies is key for safety and quality.
Essential Supplies
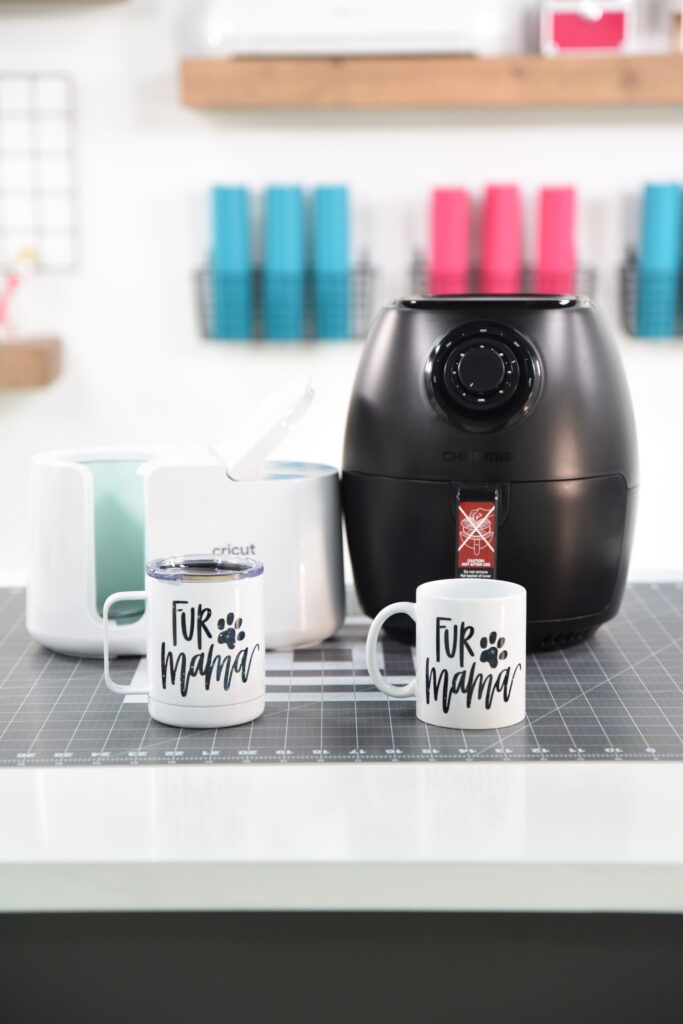
1. Sublimation Blanks
These are items with a special polyester coating, such as ceramic mugs, metal tumblers, or ornaments.
2. Sublimation Printer And Ink
Regular inkjet printers don’t work. You need a printer with sublimation ink.
3. Sublimation Paper
This special paper holds the ink and releases it under heat.
4. Heat-resistant Tape
Keeps your design in place during heating.
5. Heat-resistant Gloves
Essential for handling hot items safely.
6. Shrink Wrap Or Silicone Wraps
These provide even pressure, ensuring the design transfers correctly.
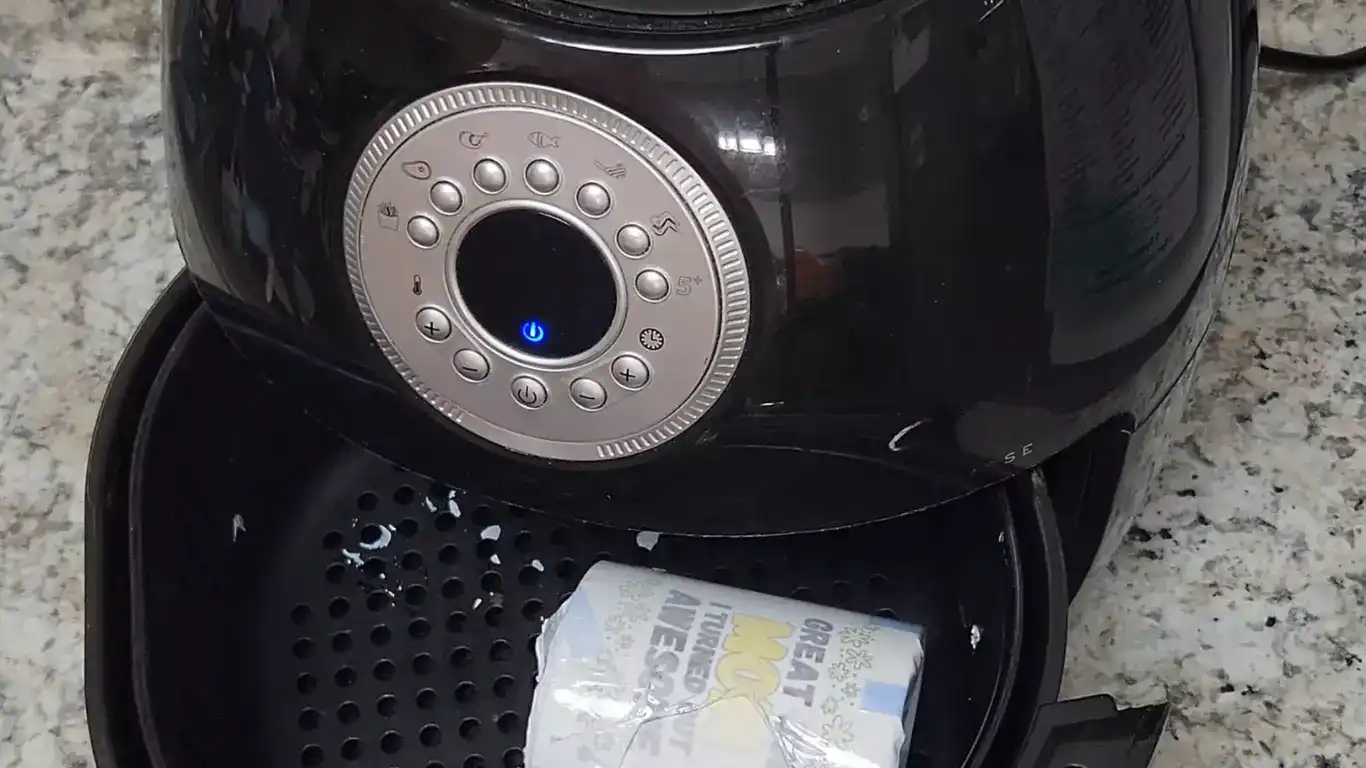
7. Air Fryer
Must have a temperature range of 350–400°F (175–205°C) and enough space for your blank.
Optional But Useful Items
- Thermometer: To double-check the real temperature inside the air fryer.
- Lint roller: Removes dust from blanks before transfer.
- Scissors or craft knife: For cutting designs and tape.
- Protective mask: Especially if working in a small, unventilated space.
Many beginners overlook the need for shrink wrap or silicone wraps, but these help the design stick tightly to curved surfaces, preventing blurry or faded transfers.
Credit: makersgonnalearn.com
Preparing Your Design And Blanks
Getting your design and blank ready is just as important as the heating process. Rushing here can lead to frustrating results.
Step 1: Print Your Design
- Use your sublimation printer and print on sublimation paper.
- Set your printer to its highest quality setting.
- Mirror the image before printing so it appears the right way on the item.
- Let the ink dry fully before handling.
Step 2: Prepare The Sublimation Blank
- Clean the surface with alcohol wipes or a lint roller. Any dust or oil can ruin the transfer.
- Make sure the blank is completely dry.
- Preheat the blank in the air fryer for 1–2 minutes (optional, but can help with smoother transfers).
Step 3: Attach The Design
- Place the printed design face-down on the blank.
- Secure it tightly with heat-resistant tape.
- For mugs or tumblers, wrap with shrink wrap and use a heat gun to shrink it snugly.
- If using a silicone wrap, make sure it’s tight with no air bubbles.
Not using enough tape or pressure can cause ghosting (a blurry, double-image effect), a common mistake for first-timers.
Step-by-step Guide: Sublimating With An Air Fryer
Now it’s time to use your air fryer for the sublimation process. Each step is crucial for a high-quality result.
1. Preheat The Air Fryer
- Set to 350–400°F (175–205°C).
- Allow it to preheat for at least 5 minutes for a consistent temperature.
2. Place The Wrapped Blank Inside
- Use heat-resistant gloves to avoid burns.
- Place the item in the basket, making sure it’s not touching the heating element or sides.
- Do not overcrowd the basket. Sublimate one or two items at a time.
3. Set Timer And Start Heating
- Most mugs and tumblers need 5–7 minutes.
- Flip the item halfway through if possible for even heat, especially if your air fryer has uneven spots.
- Stay nearby. Air fryers heat quickly and can burn the wrap or item if left too long.
4. Remove And Cool
- When the timer goes off, wear heat-resistant gloves to take out the blank.
- Place it on a heat-safe surface (like a silicone mat).
- Let it cool for 10–15 minutes before removing the wrap and paper.
5. Unwrap And Reveal
- Carefully peel off the tape, shrink wrap, and paper.
- Enjoy your vibrant, custom item!
Typical Air Fryer Sublimation Timings
Here’s a quick reference for common blanks:
| Item | Temperature (°F) | Time (minutes) |
|---|---|---|
| 11oz Mug | 380 | 6 |
| 20oz Tumbler | 400 | 7 |
| Ceramic Ornament | 370 | 5 |
These are starting points; adjust based on your air fryer’s performance.
Common Mistakes And How To Avoid Them
Sublimation with an air fryer can be easy once you know the pitfalls. Here are frequent errors and how to prevent them:
1. Wrong Temperature Or Time
Too hot or too long leads to burnt paper and faded colors. Too cool or too short means the design won’t transfer fully. Always test with a sample first.
2. Loose Wrap Or Tape
If the design isn’t tightly pressed, you’ll see ghosting or blurry lines.
3. Using The Wrong Blanks
Only items with a polyester coating will work. Regular mugs won’t hold the ink.
4. Overcrowding The Air Fryer
Items need air to circulate for even heat. Do just one or two at a time.
5. Not Using Heat-resistant Materials
Regular tape or gloves will melt or burn. Always choose products rated for high heat.
A common beginner mistake is trusting the air fryer’s display without checking with a thermometer. Many air fryers run hotter or cooler than the display shows, which affects results.
Safety Tips For Sublimation In An Air Fryer
Safety should never be ignored. Here’s how to protect yourself and your work space:
- Only use an air fryer dedicated to crafting. Do not use the same fryer for food and sublimation. Sublimation ink fumes and wraps can leave residues.
- Work in a well-ventilated area. Some wraps and inks release fumes at high temperatures.
- Always wear heat-resistant gloves when handling hot items.
- Do not leave the air fryer unattended during use. Shrink wrap can catch fire if overheated.
Following these tips makes the process safer and also helps you get better results.
Choosing The Right Air Fryer For Sublimation
Not all air fryers are suitable for sublimation. Here’s what to look for:
| Feature | Why It Matters |
|---|---|
| Basket Size | Should fit your blank comfortably without touching heating elements |
| Temperature Range | Needs to reach 350–400°F for most sublimation transfers |
| Precise Controls | Helps avoid overheating or underheating |
| Easy to Clean | Ink or wrap residue can build up; removable baskets are helpful |
Some crafters prefer air fryers with digital controls for better temperature accuracy. Others like basket-style fryers because they’re easier to load and unload.
Comparing Air Fryer Vs. Traditional Sublimation Methods
Is an air fryer as good as a heat press or convection oven? Here’s a quick look:
| Method | Cost | Ease of Use | Results |
|---|---|---|---|
| Air Fryer | Low | Easy | Very good for small items |
| Mug Press | Medium | Moderate | Professional, consistent |
| Convection Oven | High | Harder (large) | Best for bulk or larger items |
For home crafters, the air fryer is a great middle ground—affordable, easy, and effective for most projects.

Credit: www.youtube.com
Advanced Tips For Better Results
If you want to go beyond the basics, try these tips:
- Test your air fryer’s hot spots: Place small pieces of bread or parchment in various spots and see which browns fastest. This helps you avoid uneven heating.
- Double-wrap for tumblers: Some crafters use both shrink wrap and a silicone sleeve for better pressure.
- Rotate items: If your air fryer heats unevenly, rotate the blank halfway through.
- Preheat wraps: Warming the silicone wrap for a few seconds makes it more flexible and gives a tighter fit.
Many beginners do not realize that small changes in time and temperature can cause big differences in color. Always keep a notebook of your settings and results for future reference.
Cleaning And Maintenance
After sublimation, allow your air fryer to cool completely before cleaning. Remove any wrap or ink residue with a soft, damp cloth. Do not use harsh chemicals. If you use your fryer only for crafting, you can line the basket with parchment to help prevent stains.
Never use an air fryer for food after sublimation use.
Where To Find More Information
If you want to dive deeper, many online crafting communities and YouTube channels offer detailed guides and troubleshooting help. The Wikipedia Sublimation Printing page is a good starting point for understanding the science behind this process.
Frequently Asked Questions
What Items Can I Sublimate In An Air Fryer?
You can sublimate mugs, tumblers, ornaments, and other small, polyester-coated blanks. Make sure the item fits comfortably in your air fryer and is designed for sublimation.
Is It Safe To Use The Same Air Fryer For Food And Sublimation?
No. After sublimation, the air fryer may have ink or wrap residue that is not food-safe. Always use a dedicated fryer for crafting projects.
Why Does My Design Look Faded Or Blurry?
This usually happens if the temperature is too low, the time is too short, or the design isn’t pressed tightly to the blank. Check your settings and ensure a snug fit with wraps and tape.
Can I Sublimate Multiple Items At Once?
It’s best to do one or two at a time. Overcrowding can lead to uneven heating and poor transfers, especially in smaller air fryers.
Do I Need Shrink Wrap Or Silicone Wraps?
For most mugs and tumblers, shrink wrap or silicone wraps help apply even pressure, preventing the design from shifting and ensuring sharp results.
Mastering sublimation with an air fryer is within reach for any creative person. With careful preparation, the right materials, and attention to detail, you can produce professional-looking, personalized items at home—no expensive equipment required. Remember to prioritize safety, always test your settings, and have fun experimenting with your own unique designs.

Credit: www.youtube.com