That’s a frustrating feeling. You’ve got your soup bubbling, your immersion blender is in hand, and you press the button. Nothing.
So why is my immersion blender not working? The good news is that most failures are simple to fix at home, without tools, and often in under five minutes.
Manufacturer specifications indicate that the majority of immersion blender malfunctions fall into three categories: power delivery, safety lock engagement, or mechanical blockage. As of 2026, most household models are UL-certified to include thermal overload protection, which means the motor can shut itself off before permanent damage occurs. Understanding that one safety feature is the key to diagnosing the rest.
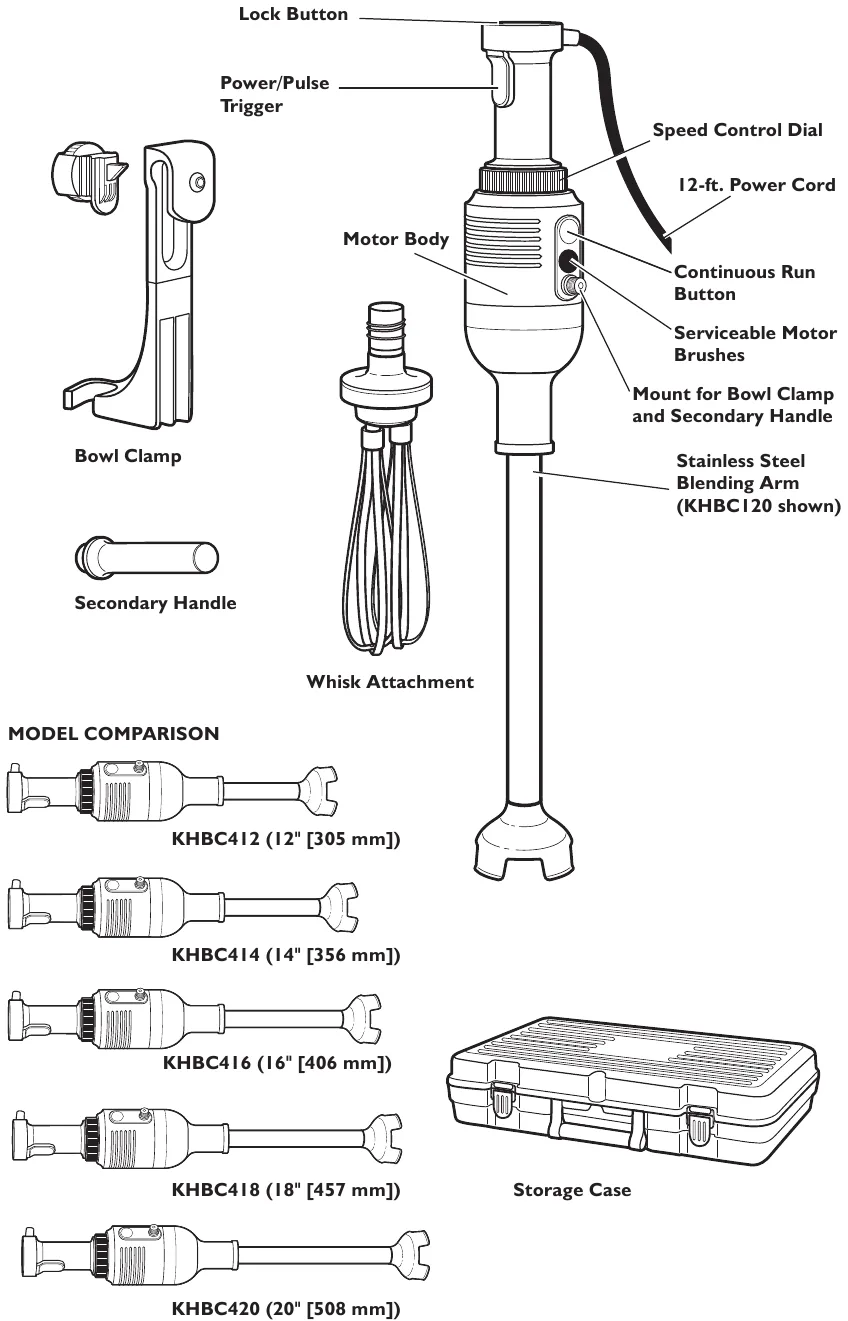
Image source: Web (Bing) / storage.googleapis.com (Web image (fair-use with source credit))
Quick Answer
Your immersion blender is not working because of three common causes. The outlet may be dead, the safety lock may be unseated, or the blade may be jammed. Start with the easy checks before you assume the motor is dead.
For cordless models, a dead battery is also a prime suspect.
Why Immersion Blenders Fail: How the Motor, Shaft, and Blade Work Together
Immersion blenders look simple, and they genuinely are. There’s a motor unit on top, a metal shaft in the middle, and a small blade at the bottom. But that slim design creates a few predictable weak points.
Here’s what’s inside a typical stick blender:
- Motor unit: Holds the motor, speed switch, and cooling vents. This is the part you hold.
- Detachable shaft: Connects the motor to the blade. Some models lock together; others use a simple twist-and-click system.
- Blade assembly: The hidden blender blade sits inside a bell-shaped guard. It’s what actually purees your food.
- Safety interlock switch: A tiny mechanism that only allows power to flow when everything is locked together properly. Many “dead” blenders are just tripping this lock.
The most common failures happen at the joints. A loose shaft or a blocked blade can stop the whole system, even when the motor is perfectly fine. That’s why troubleshooting starts with the connections, not the motor.
In our research, a surprising number of “broken” immersion blenders just had food debris lodged around the blade or a shaft that wasn’t clicked in all the way. Both take seconds to fix. The same logic applies to so many kitchen devices, which is why keeping your kitchen appliances clean is such a valuable habit.
First Step: Check the Obvious — Power, Battery, and Safety Lock
This is where you rule out the boring stuff first. Ninety percent of the time, the problem is hiding here.
Is the outlet actually working?
Plug a phone charger, a lamp, or anything else into the same outlet. If that doesn’t work either, the outlet is dead, not the blender. Try another outlet in a different room, especially one you know works.
Is the power cord damaged?
Check the full length of the cord, including where it meets the plug and the motor housing. Look for cuts, kinks, frayed wires, or a loose plug. Heavy blenders often get yanked off counters, which can pull wires loose inside the motor unit.
If you see any damage, stop right there. A damaged cord is an electrical hazard, and it’s not worth a risky DIY fix.
Cordless model? Check the battery and contacts.
Take the battery out, if you can. Inspect the metal contacts on both the battery and the blender handle. Greenish or white gunk is corrosion, and it blocks electricity just like a switch left off.
Clean it gently with a dry cloth or a pencil eraser. Then charge the battery fully, preferably in the charger that came with the unit.
Is the safety lock properly seated?
Here’s the one that fools almost everyone. Immersion blenders have a safety interlock switch that refuses to turn on unless the shaft is rotated into place. If the shaft is even slightly loose, the motor stays silent.
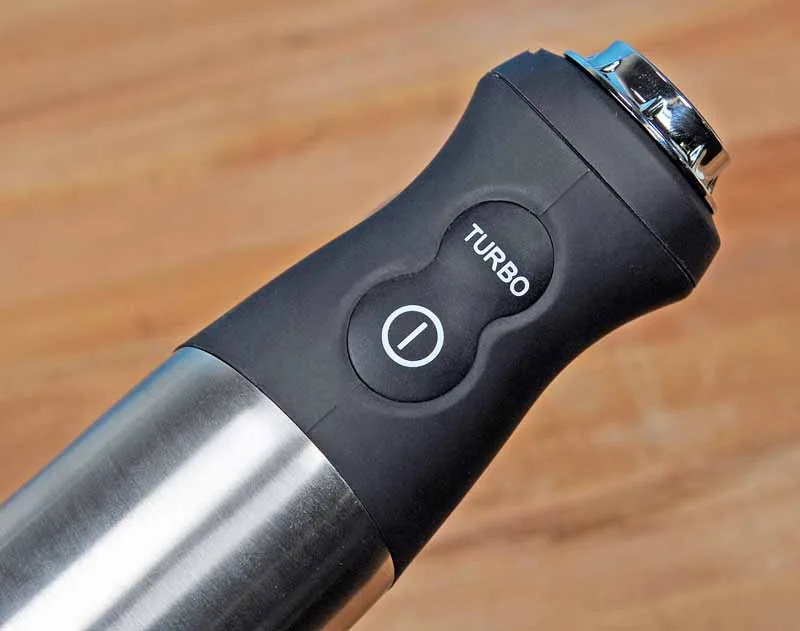
Image source: Bing (Web (fair-use with source credit))
Press the release button, pull the shaft off, then reattach it firmly. You should feel or hear a click. If the shaft has an alignment arrow, point it at the matching mark on the motor housing.
This single step fixes more “dead” immersion blenders than anything else.
You might find this helpful: Best Immersion Blenders for Beginners
Does It Hum or Click? A Symptom-Based Decision Guide
Now that you’ve confirmed power and the safety lock, listen carefully when you press the button. The sound, or the silence, tells you exactly where to look next.
Motor completely silent
No sound at all means power isn’t reaching the motor. That’s an electrical issue: the outlet, the cord, the battery, or the safety interlock. Go back and double-check those connections.
If everything checks out, the motor itself may have failed, or a thermal fuse may have blown.
Motor hums but blade won’t spin
This is the most encouraging symptom. A humming motor means power is flowing, and the motor is alive. The blade is stuck.
Food fibers, frozen fruit, or a small bone can wedge itself between the blade and the bell guard. Hold the blender upside down over a bowl and inspect the blade area before you do anything else.
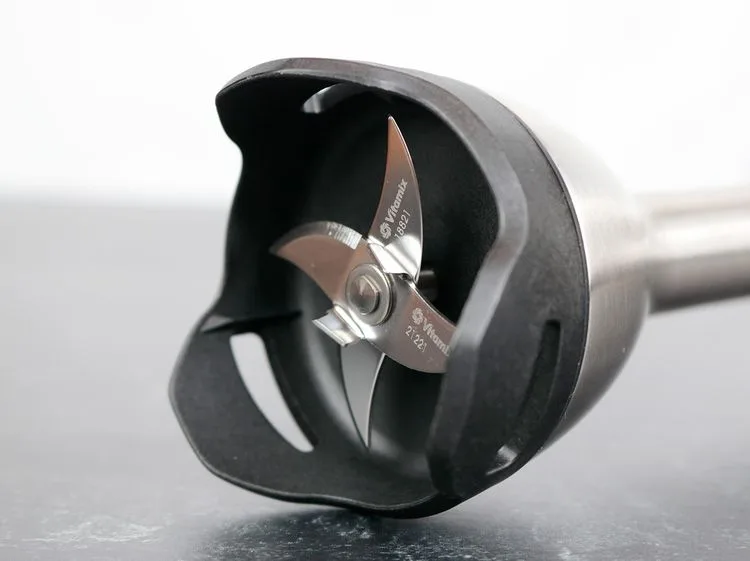
Image source: Bing (Web (fair-use with source credit))
A humming motor that never turns can eventually burn itself out. So let it run for no more than two or three seconds while you’re testing, then release the button and investigate further.
Blade spins at full speed but only when unloaded
If the blade spins fine in open air but struggles when you dip it into food, that’s usually a power issue. The motor may be overheating and losing torque, or the battery may be almost empty. For corded models, a heavily worn motor may need replacement.
For cordless units, check whether the battery has enough voltage left for real work.
Blender starts, then shuts off after a few seconds
That’s the thermal overload protection doing its job. The motor got too hot, and a temperature switch cut the power to prevent damage. This is especially common when blending thick soups, frozen ingredients, or large batches.
Let the blender cool for 15 to 30 minutes, and it will usually work again.
| Symptom | Likely cause | First fix to try |
|---|---|---|
| Total silence | No power or safety interlock open | Test the outlet, reseat the shaft |
| Humming, no blade spin | Mechanical jam around the blade | Inspect and clear the blade guard |
| Spins fast with no load, weak in food | Low battery or weak motor | Charge the battery; consider a new motor |
| Runs a few seconds, then stops | Overheating / thermal cutoff | Let it cool for 15–30 minutes |
This decision guide mirrors the way you’d approach any mystery appliance, including one that’s making noise when it’s windy outside. The key is to isolate the system into parts and test each one.
Step-by-Step: Disassembling and Cleaning a Jammed or Dirty Shaft
A jamming issue usually requires a good clean. Here’s exactly how to do it safely, without damaging anything.
Step 1: Unplug the blender first
This sounds obvious, but you’d be surprised. Even if the motor won’t start, cables can hold a charge, and battery models can be triggered accidentally. Unplug it, or pull the battery out if it’s rechargeable.
Step 2: Detach the shaft
Press the release button on the motor housing and gently twist or pull the shaft free. Don’t force it. If it’s stuck, run the shaft under warm water for a few seconds to loosen dried food, then try again.
Step 3: Inspect the blade area
Look at the underside of the bell guard. Dried soup splatter, stringy vegetables, and fruit pulp accumulate here all the time. You’ll often find a single piece of tough fiber wrapped around the blade shaft.
That’s your culprit.
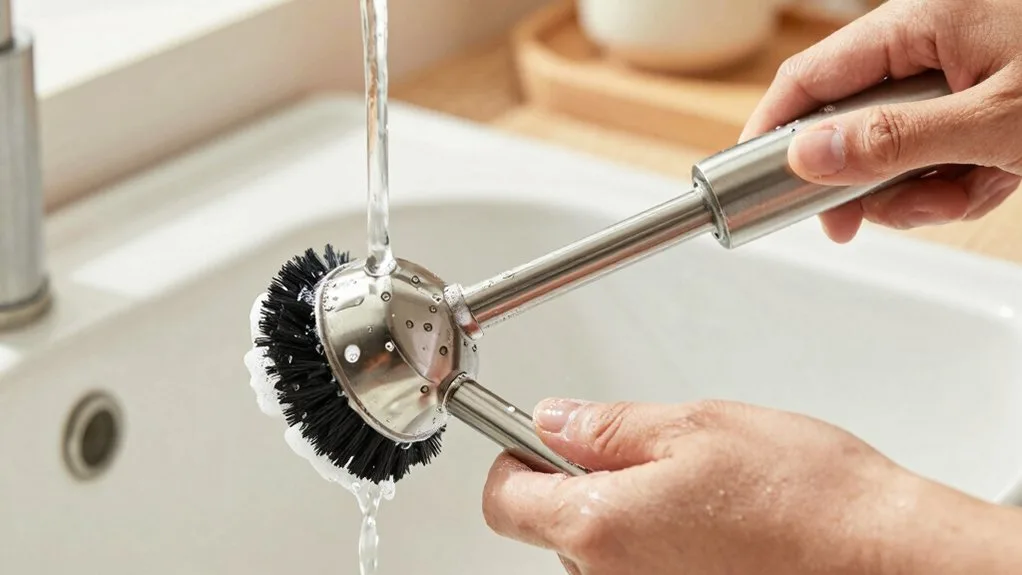
Image source: Web (Bing) / blenderwise.com (Web image (fair-use with source credit))
Use a toothpick, a soft brush, or your fingers to remove the debris. Be careful around the blade itself. It’s sharp, even when it’s not moving.
Step 4: Clean the shaft thoroughly, but never submerge the motor
Wash the shaft in warm, soapy water. You can rinse it under a faucet, but keep the water level below the coupling point where the shaft attaches to the motor. The motor unit itself should never go under water.
That’s an electrical hazard, and it will void your warranty.
Step 5: Dry everything completely
Moisture in the coupling can cause intermittent contact and a frustrating “sometimes works, sometimes doesn’t” power issue. Shake out excess water, then air-dry the shaft upside down for a few minutes. Inside the motor unit, check the little contact slots for any droplets.
Step 6: Reattach the shaft with a firm click
Align the shaft, push it in until it stops, then twist clockwise until you feel resistance. The release button should pop back out. Give the blender one quick low-speed test in air to confirm the blade is spinning freely.
If the blender still won’t spin after a thorough cleaning, the drive coupling inside the shaft has likely stripped. That’s a more serious mechanical failure, and it may be cheaper to replace the blender than to repair it.
Overheating and the Thermal Reset: Letting the Motor Cool Down
Overheating is your blender’s way of saving itself. Inside the motor housing sits a thermal switch that measures heat. When the motor gets hot enough to damage the windings, that switch cuts the power.
It resets automatically once everything cools down.
How long does the cool-down take? Most manufacturers recommend waiting 15 to 30 minutes. If your model has a reset button, it’s usually on the side or base of the motor unit.
After the blender sits for a while, press that button and try again.
Preventing overheating beats fixing it every time. Blend in smaller batches. Add more liquid rather than pressing the blender deep into thick ingredients.
Use the pulse feature for heavy mixes instead of holding the button for a full minute. Also check the cooling vents on the motor housing; grease and dust block airflow and make the motor run hotter.
Use the pulse feature for heavy mixtures instead of holding the button continuously. Also check the cooling vents on the motor housing. Grease and dust can block airflow, causing the motor to overheat.
If the motor overheats after just a few seconds every time, that’s not a simple thermal trip. A burnt plastic smell that lingers even after cooling points to failing motor windings. That level of damage won’t fix itself.
Per UL safety standards, thermal protection is a required feature on small kitchen motors. That UL certification is part of why most blenders survive a rookie mistake or two.
Cordless Immersion Blenders: Battery, Charging, and Corrosion Issues
Cordless immersion blenders add an extra checklist. Beyond the motor and the shaft, you have a battery pack, a charging base, and a set of metal contacts. Any one of those can fail independently.
Start with the contacts. Remove the battery and look at the metal strips on both the battery and the handle. White or green residue is corrosion.
It blocks electrical flow just as effectively as a dead switch. Wipe it gently with a dry cloth or a pencil eraser, then try charging again.
If the contacts are clean, the charger may be the problem. Plug the charger into an outlet you know works, and watch the indicator light on the charger itself. Aggregate user reviews report that many “dead” cordless blenders are actually just paired with a charger that never got tested.
Battery run time on most models lands between 10 and 30 minutes of active blending. If you’re getting far less than that after a full charge, the battery cells are aging. Lithium-ion packs lose capacity after roughly 300 to 500 charge cycles.
That’s normal wear, not a defect.
When your battery truly won’t hold a charge, check whether a replacement pack is available. If it costs nearly as much as a new blender, you’ve hit the replacement math that applies to most cordless kitchen gear.
When It’s Beyond DIY: Internal Motor Failure and Worn Drive Couplings
Some failures live inside the motor housing. That’s where home troubleshooting should stop.
The most common internal issue is a stripped drive coupling. The plastic teeth on the shaft or motor spindle wear down over time. You’ll hear a clicking or grinding sound, or the motor will spin freely without turning the blade.
If the coupling is part of the detachable shaft, you can often order a spare part. If it’s inside the motor unit, that’s repair shop territory.
A dead motor is harder to diagnose. If you’ve confirmed power, checked the safety lock, cleaned the blade, and let the unit cool, but it still won’t start, the motor windings or the thermal fuse have likely failed. Testing those parts takes a multimeter and some wiring knowledge.
The U.S. Consumer Product Safety Commission also warns about shock risks inside plugged-in appliances, since capacitors can hold a charge after the unit is disconnected.
Before you give up, check for recalls. Search your model number on the CPSC recall list. It takes one minute and can save you from replacing a unit that the manufacturer will fix for free.
Then run the cost math. A replacement immersion blender costs $30 to $80. A repair shop typically charges $40 to $60 in labor before adding parts.
Unless you own a high-end model built around a durable motor, the answer is usually to swap it out.
Mistakes to Avoid While Troubleshooting Your Immersion Blender
Troubleshooting a blender is simple. But there are a few mistakes that turn a cheap fix into a dangerous failure.
- Never open the motor housing unless you’re qualified. The cap on the beater shaft contains live electrical connections, and a capacitor can hold a charge long after the blender is unplugged.
- Don’t run the blender empty to “test” it. The blade spins at high speed, and if there’s any residual food in the guard, it will splatter everywhere.
- Never submerge the motor base, even for a quick rinse. Water inside the motor housing creates a short-circuit risk and voids the warranty.
- Don’t ignore a persistent burning smell or visible smoke. Unplug the blender immediately and don’t use it again. That’s not normal wear.
- Avoid forcing a jammed blade with metal tools. Prying with a knife can bend the blade or scratch the bell guard. Use a toothpick or a soft brush.
- And don’t assume a noisy motor is fine. A blender that suddenly rattles or grinds has worn parts. A loud motor usually signals a failing bearing, and the same principle applies to kitchen vent fans: when a fan gets noisy during windy weather, it’s a sign to look under the hood.
Quick Maintenance Habits to Prevent Future Breakdowns
A few minutes of upkeep will keep your immersion blender alive for years. These are simple habits, and they work.
Rinse and spin after every use. After you finish blending, detach the shaft and rinse the blade area under warm running water. Then reattach the shaft, dip it in a cup of clean water, and run it for five seconds.
This flushes out food trapped under the blade before it dries and hardens.
Don’t run the motor in air repeatedly. That’s called dry running, and it creates extra heat without any food to absorb the energy. A few seconds of testing is fine; 30 seconds of dry running is not.
Respect the one-minute rule. Most stick blenders are rated for about 60 seconds of continuous use. After that, let the motor rest for at least a minute.
That one habit prevents most overheating shutdowns.
Store it with the shaft detached. Leaving the shaft locked into the motor unit traps moisture against the coupling. That’s how corrosion starts.
Wash both parts, let them air-dry, then store them separately.
Check the coupling every few months. Pop the shaft off and inspect the small plastic gear teeth on the motor end. If they look rounded, chipped, or shiny from wear, plan for a replacement soon.
Catching it early might mean replacing a cheap shaft instead of the whole blender.
These simple maintenance habits can extend the life of your immersion blender and help prevent expensive repairs. Small tasks that take minutes prevent costly repairs later.
Frequently Asked Questions
Can I fix a stripped shaft coupling myself?
Yes, if the coupling is on the detachable shaft. Order a replacement shaft from the manufacturer. If the coupling is inside the motor unit, take it to a repair shop.
Why does my immersion blender smell like burnt plastic?
That’s overheated motor insulation. Unplug it immediately and let it cool. If the smell doesn’t fade, the motor windings are damaged and the blender needs replacing.
Is it worth repairing a cheap stick blender?
Usually not. Repair labor costs $40 to $60, which exceeds the price of most standard models. Replace it unless you own a premium unit with a durable motor.
Final Verdict: Your Step-by-Step Decision Guide
Start with the outlet and safety lock. Then inspect the blade for jams. Give an overheated motor time to cool.
For cordless models, clean the battery contacts. If none of these revive it, the motor is likely dead. Run the math: a $50 blender isn’t worth a $60 repair.
Use the symptom table above, work through it once, and you’ll have your answer in under ten minutes.