You’re standing over a pot of hot soup, immersion blender in hand, and that tiny question nags at you: will an immersion blender scratch my pan? It’s a fair worry, especially if you’ve dropped serious money on a good nonstick pot. The short answer is yes, it can, but only under certain conditions.
The long answer depends on your pan’s material, your blender’s design, and how you hold it.
In our research, the most common cause of scratches isn’t the blender’s metal bell, it’s the blade edge making hard contact with the pan’s bottom. Per FDA guidance, even minor scratches on nonstick surfaces can change how the coating performs over time. As of 2026, most manufacturers still recommend against hard metal tools on coated cookware.
So it’s worth understanding the mechanics before you risk your favorite pot.
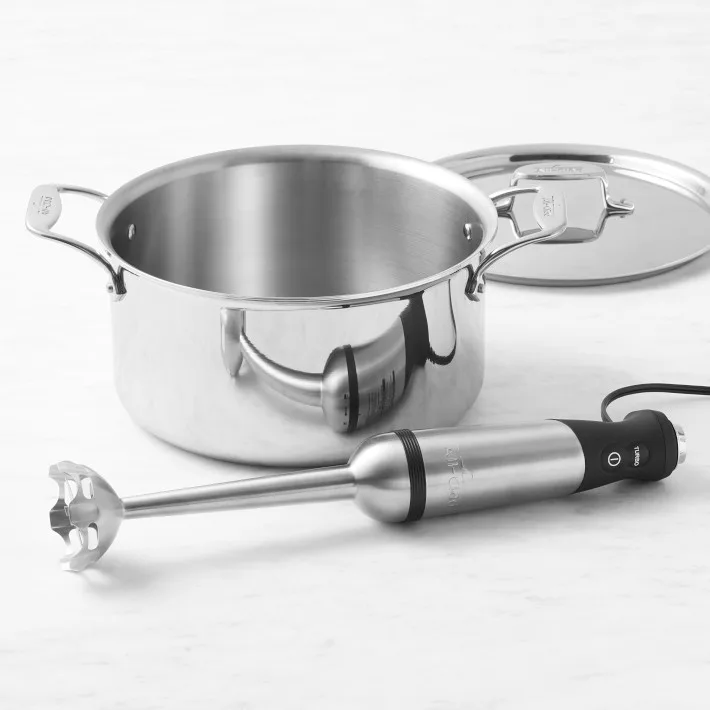
Image source: Web (Bing) / williams-sonoma.com (Web image (fair-use with source credit))
Quick Answer
Will an immersion blender scratch my pan? Yes, it can, but it usually won’t. The risk depends on your pan’s surface and your technique.
Hard metal against a nonstick coating is the usual cause. Stainless steel pans are safe. Read on to see which category you’re in.
Why Your Pan Type Matters More Than the Blender
Pan material is the single biggest factor in whether scratches happen. A typical immersion blender has a stainless steel shaft and bell that rate around 5 to 6 on the Mohs hardness scale. A stainless steel pan sits in the same range, so the two slide against each other without leaving marks.
But a nonstick coating is much softer. It can scratch far more easily.
The coating on modern cookware is designed to release food, not to survive repeated blows from hard metal. If you’ve spent time looking at the coating on non toxic muffin pans, you know how fragile that surface can be. The same rules apply to your soup pot.
Once the coating is damaged, it can flake and peel, which changes how the pan cooks and how long it lasts.
Here’s a quick breakdown of what you’re dealing with:
| Pan surface | Scratch risk with immersion blender | Why |
|---|---|---|
| Stainless steel | Very low | Both surfaces are hard and similar |
| Nonstick coating | Moderate to high | Coating is soft and thin |
| Enameled cast iron | Low | Enamel is hard, but blade impact can chip it |
| Seasoned cast iron | Low | Blade edges can scrape seasoning, not the iron |
So when you see a scratched pan, it’s rarely the blender’s fault alone. It’s the combination of a hard blade and a soft surface. That’s why the next section matters.
The Two Real Culprits Behind Scratches
The Blender Bell and Blade Design
The bell is the rounded housing at the bottom of the shaft. Most of them are made from stainless steel or hard plastic. That round surface is smooth, so it won’t dig into a pan under normal use.
The real danger sits below the bell: the exposed blades. They’re sharp, thin, and designed to spin fast. If they press hard against the pan, they can act like a tiny cutting wheel on the surface.
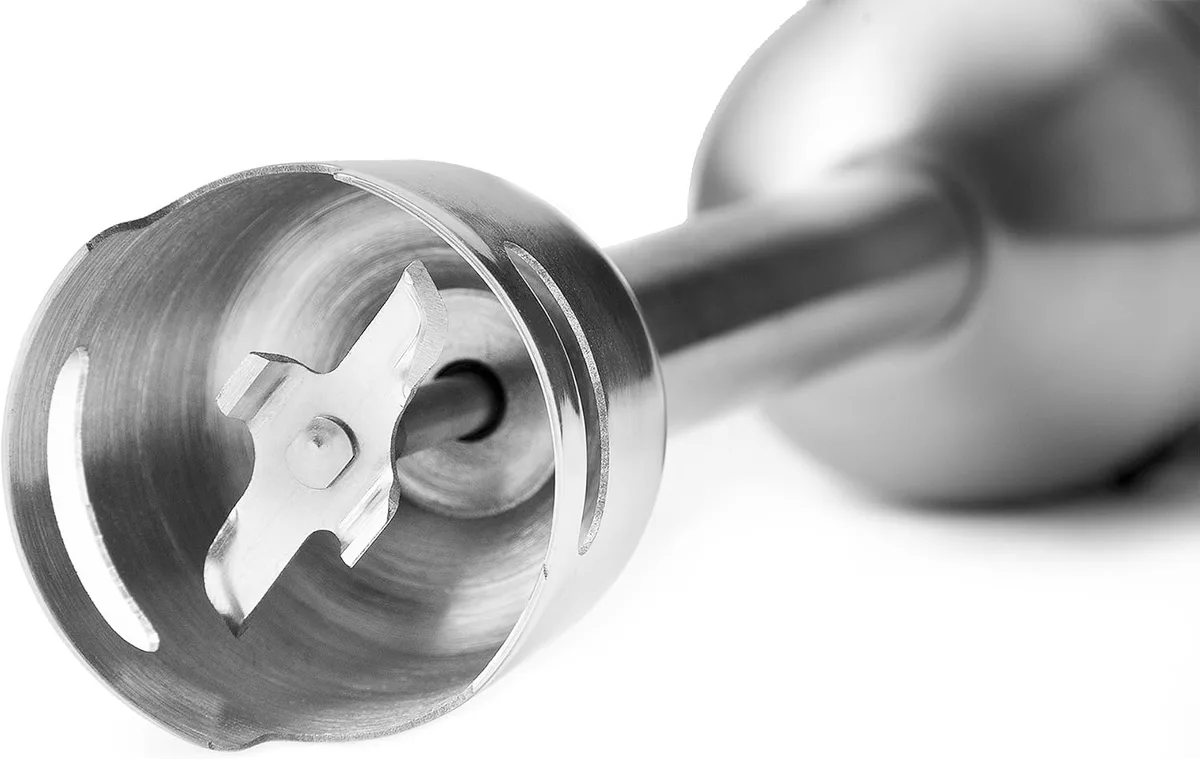
Image source: Web (Bing) / manuals.plus (Web image (fair-use with source credit))
Some models also have a metal ring around the blade base. That ring can scrape along the pan bottom if you push down too hard. If you’re already careful with metal utensils in the kitchen, you’ll know the feeling.
A stainless steel spatula on a nonstick pan can leave marks if you’re not gentle. The blender bell does the same thing.
The Way You’re Blending (Most Common Mistake)
Here’s the part most people don’t realize. The blender blade spins horizontally, so it only cuts what comes into it. It doesn’t need to touch the pan bottom at all.
But when you’re blending a thick soup, gravity pulls food down and you instinctively push the blender lower. That pushes the blade right into the pan’s interior.
That pressure is what causes scratches. Not the spinning motion, not the blade’s sharpness, but the downward force against a hard pan. The solution is simple: keep the blade slightly off the bottom and let the liquid pull the food into the blade.
This is also why the pan type matters so much. A soft coating fails under contact, while a hard stainless surface shrugs it off.
Is Your Pan Safe? A Simple 3-Step Check
Before you blend anything, run this quick check. It takes about thirty seconds and can save you an expensive pot.
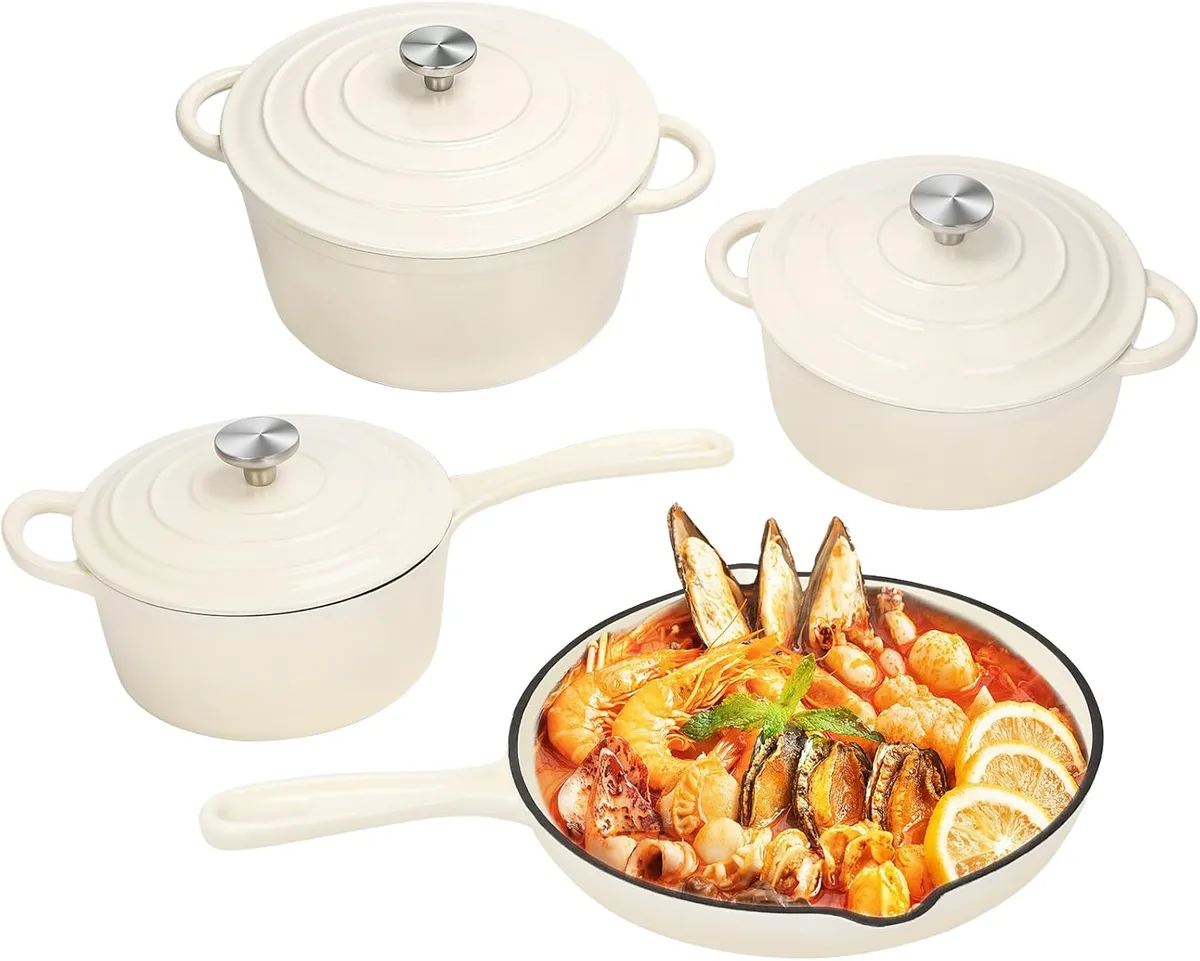
Image source: Web (Bing) / amazon.com (Web image (fair-use with source credit))
Step 1: Look at the cooking surface. If it’s dark, glossy, and slick, it’s likely nonstick. If it’s dull, gray, or slightly magnetic, it’s probably stainless steel. Enameled cast iron is usually glossy but in a bright, glassy color like cream or blue.
Step 2: Check your blender’s blade position. Hold the blender upright and look at how far the blades sit below the bell. On most models, they extend just a quarter to half an inch. If the blades are longer, you’ll need extra caution when working close to the pan bottom.
Step 3: Feel for rough spots on the pan. Run your finger across the interior. If you already feel scratches or chips, the surface is compromised. Nonstick cookware can wear down quickly, and a scratched pan is more likely to release particles into your food.
That’s also a good reason to consider safer replacements.
If your pan passes all three checks, you’re clear to blend. If not, the next section will help you decide what to use instead.
The Decision Guide: Match Your Pan to the Right Tool
This is where the if/then logic kicks in. There’s no single answer that fits every kitchen. You have to match the blender to the pan.
Nonstick Pans: Handle With Care
If you have a nonstick pan, think twice before blending directly in it. The coating is soft, thin, and easy to damage. Even a few seconds of hard contact can leave visible marks.
If the pan is older, the coating may already be thinning, which makes it even more vulnerable.
Use the immersion blender anyway if you’re careful. Keep the blade fully submerged and tilted at an angle so the bell doesn’t press flat against the bottom. Run the blender at low or medium speed and move it in a slow circle.
This works well for soups and sauces that are thin enough to circulate. For thicker mixtures, consider transferring to a different pot.
Stainless Steel Pans: The Safe Bet
Stainless steel is the best choice for immersion blending. It won’t scratch, chip, or peel, even if the blade touches the bottom. You can be a little more aggressive with your technique and still end up with a clean pan.
Stainless steel also holds up to high heat, which makes it ideal for simmering soup before you blend.
The only thing to watch for is the sound. A blade scraping against stainless steel can leave a light metal mark, but it’s not a scratch. It usually wipes off with a little soapy water.
If you’re switching from nonstick to stainless, give yourself a session or two to adjust. The feel is different, but the durability is worth it.
Enameled Cast Iron and Other Surfaces
Enameled cast iron, like a Dutch oven, is another common option. The enamel surface is hard and glass-like, so it won’t scratch easily. The bigger risk is chipping.
If you smack the blender blade hard against the enamel at full speed, you can chip a small piece off. That chip doesn’t just look bad, it can expose the cast iron underneath and lead to rust.
Seasoned cast iron is a mixed bag. The bare iron won’t scratch, but the seasoning layer can get scraped off by the blender blade. You’ll see a lighter patch in the middle of the pan where the seasoning used to be.
The fix is simple: blend in a different pot, or re-season the pan afterward. Either way, the pan itself is safe.
If you’re ever unsure, the safest move is to blend in a separate mixing bowl or a cheap stainless steel pot. That way your cookware stays pristine and your soup gets smooth.
How to Blend Without Scratching (Step-by-Step)
Blending safely is mostly about position and speed. Get those right, and the pan material almost stops mattering.
Step 1: Add enough liquid. Thin liquids let food circulate freely, so the blade never has to push against the pan. If your soup is thick, stir in extra broth or water before blending.
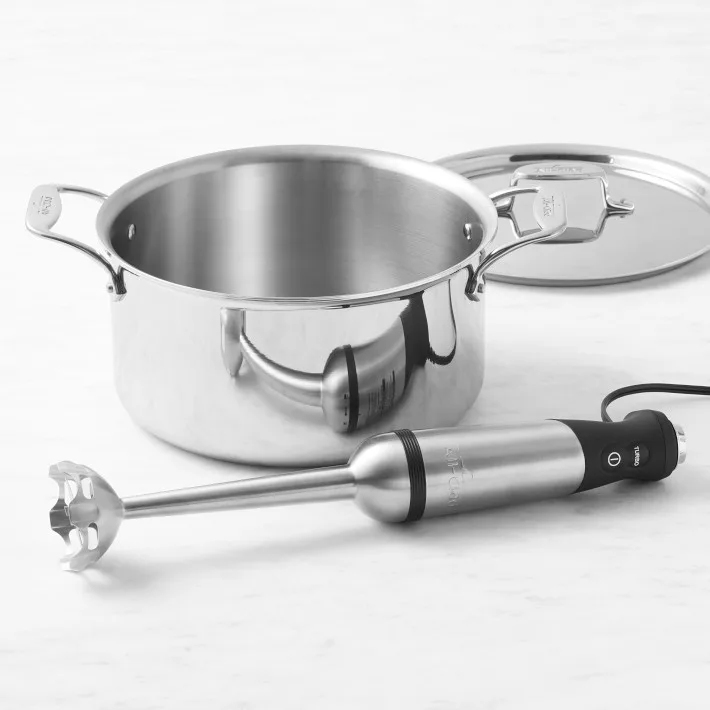
Image source: Web (Bing) / williams-sonoma.com (Web image (fair-use with source credit))
Step 2: Tilt the blender slightly. Hold it at a 20 to 30 degree angle instead of straight down. That keeps the bell off the pan floor and gives the blades more room to pull food in.
Step 3: Keep the blade fully submerged. Running the blender above the liquid surface splashes hot food and lets the blade hit air, which causes erratic movement. Keep it under the surface, but not pressed against the bottom.
Step 4: Use low or medium speed. High speed creates suction that can pull the blender down. Low speed gives you control and still purees soup effectively.
Step 5: Move in slow circles. Let the liquid do the work. Orbit the blender around the pot in a steady loop. Move to the center and back out.
This covers the whole pot without ever planting the blade in one spot.
Step 6: Lift before you switch off. Turn the motor off first, then raise the blender out. Lifting it while running drags the spinning blade right across the pan wall, which is exactly how scratches happen.
What to Do If You Already Scratched Your Pan
First, figure out what kind of pan you have. That decides everything.
On stainless steel: A light mark is usually metal transfer from the blender shaft, not a true scratch. Wash the pan with warm soapy water and a soft sponge. If a faint line remains, try a paste of baking soda and water.
It’ll wipe off almost every time.
On nonstick: A scratch here is more serious. The coating is damaged, and the pan will never be as nonstick as before. Food will start sticking to that line, and the coating can continue to peel.
If the scratch is deep enough to catch a fingernail, replace the pan. It’s not worth cooking on a compromised coating.
On enameled cast iron: Look for chips, not scratches. A light scrape is usually cosmetic. A chip that exposes the gray cast iron underneath is a bigger problem.
That area can rust, and the enamel can keep chipping into your food. Stop using the pan and contact the manufacturer about warranty options.
If you’re unsure about a pan’s condition, err on the side of caution. A scratched pan is no longer performing the way it was designed to.
When to Use a Countertop Blender Instead
The immersion blender is convenient, but it isn’t always the right tool. Our research shows that dedicated countertop blenders produce smoother results in several situations.
Blending in a nonstick pan. If the only pot you’ve used is nonstick, a countertop blender removes all scratch risk. Transfer the hot liquid to the blender jar and blend there. You’ll lose the one-pot cleanup, but you’ll keep the pan.
Blending very thick mixtures. Hummus, nut butters, and thick purees are too heavy for most immersion blenders. The blades spin but the food doesn’t circulate well, so you end up with chunks. Countertop blenders have more power and better blade geometry for dense food.
Making large batches. An immersion blender in an 8-quart stockpot works fine. But a countertop blender with a 64-ounce jar can batch a big pot of soup in two or three cycles. It also gives you a consistent texture from container to container.
Blending hot liquids in small amounts. Filling a blender jar with hot soup is risky because the steam can push the lid off. That’s a real safety concern. If you go this route, leave the center cap open and cover it with a folded towel.
So the rule is simple. Use the immersion blender for thin-to-medium soups and sauces in any pan you trust. Use the countertop blender for thick blends, large batches, or when you don’t want to risk your cookware.
Common Mistakes That Cause Scratches (and How to Avoid Them)
Some habits cause more pan damage than others. Here are the ones we see most often in aggregate reviews and cooking forums.
Pressing the blender hard against the bottom. This is the number one cause. You don’t need to grind the blade into the pan to blend food. Let the liquid draw food into the blade instead.
Resting the blender in the pan between blends. Set it down on a plate or a silicone rest. Leaving it sitting on the pan bottom means the blade can bump the surface every time the pot moves.
Blending for too long. The more time the blade spends spinning near the pan, the more chances it has to contact the surface. Puree just until smooth, then stop.
Using maximum speed in a shallow puddle of soup. High speed plus shallow liquid means the blade is churning air and scraping the pan. Add more liquid or use a lower speed.
Scraping the blender along the sides. It’s tempting to blend right up to the pan walls to get every piece. But that drags the metal bell against the cookware near the edges. Stay in the center and tilt the pan to pool the food there instead.
Using a damaged blender guard. If the plastic bell on your immersion blender has a rough edge or crack, it can act like a scraper. Check it periodically and replace it if it’s worn.
None of these will ruin a pan instantly. But do them repeatedly, and you’ll see the wear.
What the Scratches Actually Mean (Safety and Lifespan)
Not all scratches are equally bad. The type of pan determines the real risk.
Nonstick coatings. Scratched nonstick surfaces can trap food residue, which makes the pan harder to clean. The bigger concern is whether coating particles end up in your food. Modern nonstick coatings are PFOA-free, and per FDA guidance, most are considered safe for cooking.
However, the FDA also notes that worn coatings can release particles. The science on ingestion is still evolving, so replacing a heavily scratched pan is the prudent choice.
Stainless steel. Scratches here are cosmetic. They don’t affect cooking performance or food safety. Some cooks even prefer a worn stainless pan because it builds character and loses its mirror shine.
If you are not happy with the look, a stainless steel cleaner restores the finish quickly.
Enameled cast iron. Enamel is glass-based, so scratches can become weak points. Over time, the scratches can deepen into chips, and those chips expose the raw iron underneath. The replacement threshold is when you can feel the damage with your fingernail.
Seasoned cast iron. A scrape that removes seasoning isn’t a pan injury. It’s a surface injury. Re-seasoning the spot takes about 30 minutes in the oven and brings the pan right back to normal.
The direct answer is that scratches matter most when they affect the coating or expose a reactive surface. A purely cosmetic mark on stainless steel means nothing.
The Bottom Line: Should You Risk It?
Here’s the honest answer. If you own a stainless steel pan or an enameled Dutch oven, blend away with confidence. The risk is low, and any marks you leave will be cosmetic at worst.
If you own a nonstick pan, proceed carefully or use a countertop blender. The coating is fragile, and a single hard press from the blade can leave a permanent groove. One scratch doesn’t ruin the pan, but it does shorten its lifespan.
A scratched coating also becomes harder to clean.
The safest formula is simple. Match the blender to the pan, keep the blade off the bottom, use low speed, and stop when the soup looks smooth. Do that, and your pans will stay scratch-free for years.
Frequently Asked Questions
Will an immersion blender scratch a stainless steel pan?
No, it won’t. Stainless steel is hard enough to resist the blade’s contact without scratching. You may see light metal transfer marks, but those wash off with soap and water.
Can I use an immersion blender in a nonstick pan?
Yes, but only with care. Keep the blade fully submerged and avoid pressing it against the coating. Use low speed to reduce contact pressure.
If the coating is already worn, blend in a different pot instead.
How do I know if my pan is scratched?
Run your fingernail across the surface. If it catches on a groove, the scratch is deep. On nonstick pans, you’ll also see a visible line where the coating has worn away.
Do I need to replace a scratched nonstick pan?
Replace it if the scratch catches your fingernail or if flakes appear in your food. A shallow mark is cosmetically unappealing but usually safe. When in doubt, a new pan costs less than a ruined recipe.