Skip to content
You’ve stared at the blender aisle, wondering if you really need another appliance. Or maybe you’ve got an immersion blender gathering dust in a drawer, and you’re wondering if it can pull double duty. Let’s get straight to it: can you use an immersion blender for smoothies? Yes, you absolutely can, but the results depend heavily on what you’re blending, how patient you are, and the wattage sitting in your hand.
Here’s the reality. A 300-watt immersion blender will handle soft fruit, yogurt, and milk without breaking a sweat. But throw in a cup of frozen strawberries and a handful of kale, and you’re asking a handheld tool to do the job of a machine with ten times the motor.
In our research, manufacturer specifications suggest that most immersion blenders are rated for intermittent use, typically running 60 to 90 seconds before they need a rest. As of 2026, that’s still the standard across major brands.
Let’s break down exactly when this tool saves your morning and when it leaves you chewing your smoothie.
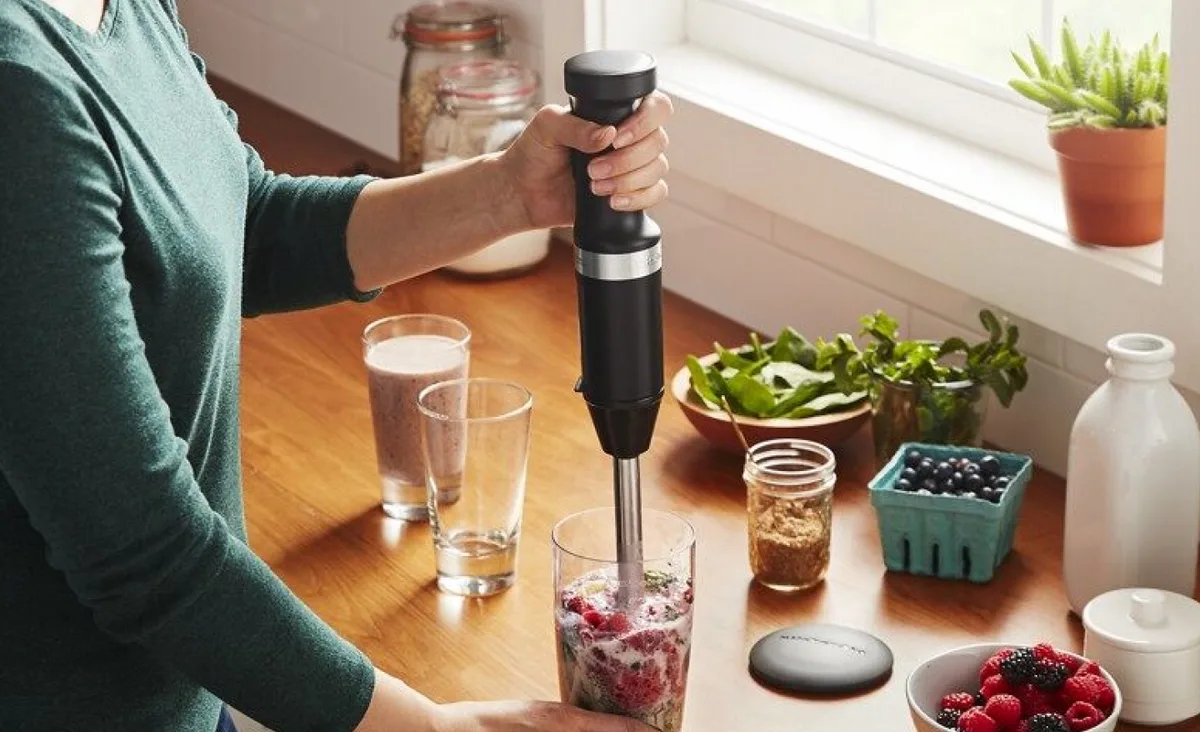
Image source: Web (Bing) / kitchenaid.com (Web image (fair-use with source credit))
Quick Answer
Yes. A 300-watt or higher immersion blender can make a single-serving smoothie.
Soft fruits blend easily. Yogurt and milk work perfectly. Frozen fruit requires pre-thawing or small pieces.
Leafy greens need extra blending time. Seeds may remain whole. Countertop blenders still produce smoother results.
Immersion blenders work best for quick, simple blends.
When an Immersion Blender Actually Works for Smoothies
Single-Serving Blends
The sweet spot for an immersion blender is a smoothie for one. Think a banana, a handful of berries, a scoop of protein powder, and enough liquid to keep things moving.
Why does this work? The blade sits right in the liquid, and the shaft creates a vortex that pulls ingredients down. With soft ingredients and adequate liquid, that’s enough to get a drinkable consistency in about 45 seconds.
Soft and High-Moisture Ingredients
Here’s what blends beautifully:
- Bananas (fresh or slightly frozen)
- Mango chunks
- Peaches
- Cooked oats
- Avocado
- Silken tofu
- Nut butters (with enough liquid)
These ingredients break down quickly because they don’t require the blade to shatter anything hard. The blade spins at roughly 8,000 to 15,000 RPM, which is plenty for soft cell structures.
Quick Morning Shakes
If your “smoothie” is really a protein shake with some fruit, the immersion blender is genuinely ideal. You can blend directly in your travel mug or a mason jareb. No extra container to wash.
That alone saves you a solid minute of cleanup.
We’ve written about the broader uses of a hand blender elsewhere, and smoothies are honestly one of its better applications when you keep expectations realistic.
When the Liquid Ratio Is High
The more liquid you have relative to solids, the better the immersion blender performs. A smoothie that’s roughly 60 percent liquid by volume will blend easily. The blade stays submerged, the mixture circulates, and you get consistent results.
Dropping below that ratio means trouble. You’ll see it struggle, you’ll hear it strain, and you’ll end up pulsing and scraping more than blending.
Where It Falls Short: Texture, Frozen Fruit, and Motor Strain
The Frozen Fruit Problem
This is the big one. Frozen strawberries, blueberries, and especially frozen bananas are hard. Really hard.
The blade has to shatter them, and most immersion blenders simply don’t have the torque.
What happens:
- The blade jams against a frozen chunk
- The motor strains and heats up
- You end up with lumpy, uneven texture
- You have to stop and reposition the blender repeatedly
The workaround? Let frozen fruit thaw for five to ten minutes first. Or cut it into smaller pieces before freezing.
Neither is convenient when you’re in a rush, which is the whole point of using a hand blender.
Leafy Greens and Seeds
Spinach and kale are fibrous. The blade may chop them into small flecks, but you’ll often see stringy bits floating around. Chia seeds and flax seeds survive mostly intact unless your unit has exceptional blade design.
For context, gritty texture comes from seeds and greens not being fully pulverized. Countertop blenders at 20,000 RPM handle these easily. Hand blenders struggle.
Motor Overheating and Run Time Limits
Manufacturer specs are clear on this. Most immersion blenders are rated for one to three minutes of continuous use before they need cooling time. Heavy blends with frozen ingredients can push the motor past its safe zone faster.
If you smell burning or hear the motor pitch change, stop immediately. Let it cool for at least five minutes before trying again. Pushing through will shorten the motor’s lifespan or kill it entirely.
The Minimum Volume Requirement
Immersion blenders need enough liquid to submerge the blade head completely. In a wide bowl, that might mean two cups of liquid minimum. In a narrow jar, less.
But you still need that volume, which makes small portions tricky.
If you’re trying to blend a half-cup smoothie in a big mixing bowl, it simply won’t work. The liquid will splatter, and you’ll have nothing but frustration.
You might find this helpful: Best Immersion Blenders for Beginners
How to Make a Smoothie with an Immersion Blender: Step-by-Step Workflow
Getting good results takes a specific sequence. Here’s what actually works, based on technique guidelines from major appliance manufacturers.
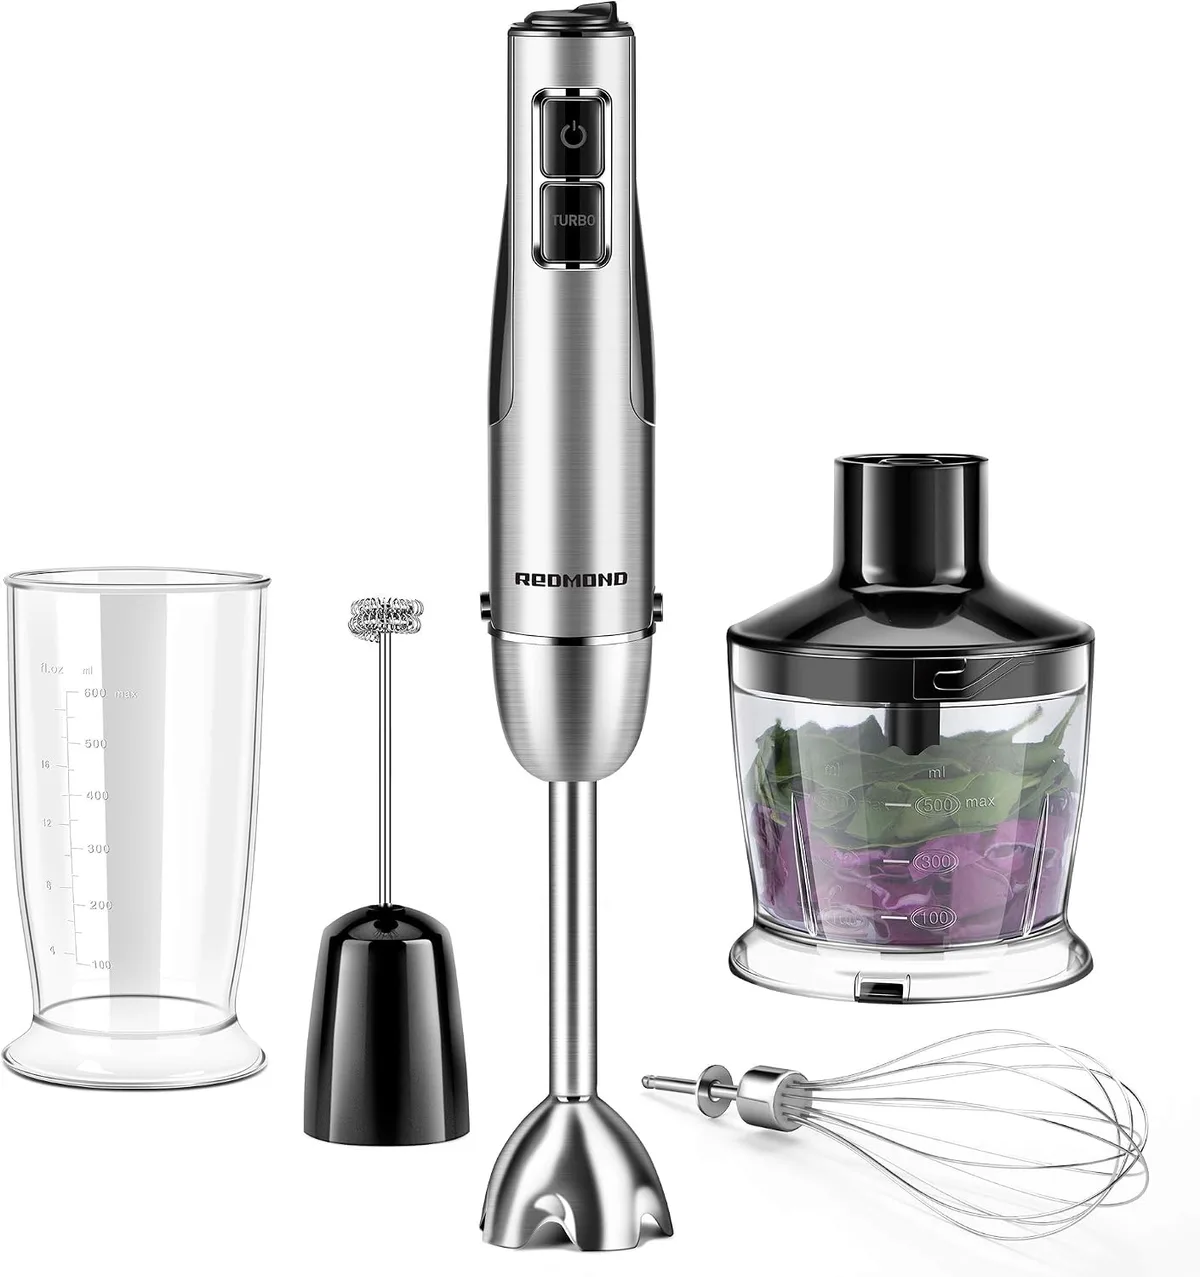
Image source: Web (Bing) / storage.googleapis.com (Web image (fair-use with source credit))
Step 1: Choose the Right Container
Use a tall, narrow container. A dedicated immersion blender beaker, a large mason jar, or a protein shaker bottle works best. The narrow shape keeps ingredients close to the blade and prevents splashing.
A wide mixing bowl is your enemy here. The liquid spreads out, the blade sits too shallow, and you’ll wear your smoothie instead of drinking it.
Step 2: Layer Ingredients in the Right Order
This order matters more than you think:
- Liquid base first. Milk, juice, yogurt, or water.
- Soft ingredients next. Banana, avocado, cooked oats.
- Powders and seeds. Protein powder, chia, flax.
- Frozen or hard items last. And only if they’re cut into small pieces.
The liquid layer keeps everything moving from the start. Hard ingredients on top get pulled down into the vortex as the blade spins.
Step 3: Submerge the Blade Completely
The blade head must be fully covered by liquid. This isn’t optional. An exposed blade creates a fountain of smoothie across your kitchen.
Hold the blender so the blade sits near the bottom of the container, then tilt the unit slightly while running. This angle improves the vortex and pulls more ingredients toward the blade.
If you notice blades sticking out of the liquid at any point, stop and add more liquid. Keep the blade covered at all times. If you’re curious about the safety considerations for blending hot liquids, the same principles apply here in reverse.
Step 4: Start Low, Then Increase Speed
Don’t go full power immediately. Start on low speed to pull ingredients into the blade. Once everything is moving, ramp up to high.
This two-step process prevents the blade from flinging chunks against the container walls and reduces strain on the motor.
Step 5: Use an Up-and-Down Pumping Motion
Keep the motor running and slowly move the blender up and down through the mixture. This motion pulls more ingredients into the blade path and creates a smoother consistency.
You’re not just holding it still while the blade spins. The movement is half the technique. Spend 30 to 60 seconds doing this for a single-serving smoothie.
Step 6: Add Liquid as Needed
If the mixture starts to chug or the blade slows down, stop and add more liquid. A couple of tablespoons at a time. The right consistency is a smooth, rolling vortex with no visible chunks.
Thicker smoothies need more liquid than you think. A banana, a cup of berries, and a scoop of protein can require up to a cup and a half of liquid to blend cleanly with a hand blender.
Step 7: Test and Repeat
Stop every 20 to 30 seconds and check the texture. Scoop a bit out with a spoon. If you feel chunks, pump the blender again for another 15 seconds.
If the motor is hot, let it rest before continuing.
Patience is the difference between a drinkable smoothie and a disappointing one. Most failures come from rushing the process.
Immersion Blender vs. Countertop Blender vs. Personal Blender
The Side-by-Side Picture
Here’s the honest comparison. Each tool has a job it does well, and smoothies aren’t equally served by all of them.
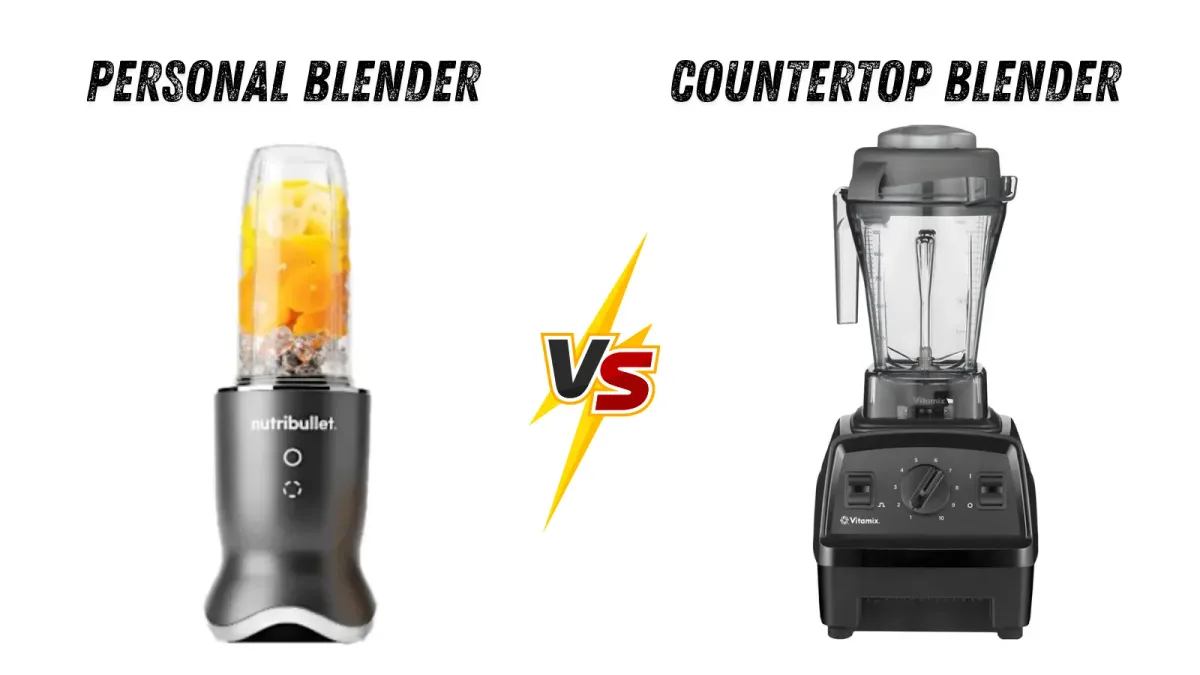
Image source: Bing (Web (fair-use with source credit))
Comparison Table
| Blender Type | Motor Power | Best Smoothie Size | Texture Quality | Cleanup Effort | Price Range |
|---|---|---|---|---|---|
| Immersion | 200–800W | 1 serving | Medium, may be lumpy | Minimal, blend in glass | $30–$150 |
| Personal (Bullet style) | 300–1000W | 1–2 servings | Good to great | Moderate, blend and go | $40–$120 |
| Countertop | 500–1500W | 2+ servings | Excellent, silky | Higher, multiple parts | $50–$600+ |
When Each Tool Wins
Immersion blender wins when you want one smoothie, fast cleanup, and minimal storage space. It’s also the best option if you’re blending directly in a travel cup.
Personal blender wins when you want the smoothie to be your to-go cup. You blend, flip, attach the lid, and walk out the door. The blade base also does a better job with frozen fruit because the jar is narrow and the blade sits close to the ingredients.
Countertop blender wins when you’re making smoothies for a family, want perfectly smooth texture, or regularly use frozen fruit and leafy greens. The extra power translates directly to better results.
If you’re wondering about the actual difference between a blender and a food processor, the same logic applies here. Tools have strengths, and forcing one to do another’s job means compromise.
The Texture Difference Is Real
Aggregate user reviews consistently report that countertop blenders produce noticeably smoother smoothies. The high RPM and larger blade sweep break down cell walls more effectively. Fibers from greens and seeds get pulverized rather than chopped.
Immersion blenders can get you 80 percent there. For most people, that’s fine. For anyone who’s picky about texture, it’s not.
The Direct Comparison: Which Should You Buy?
There’s no wrong answer. Just a question of what you actually need.
- Choose an immersion blender if you make single-serving smoothies a few times a week, hate cleaning blender jars, and have limited counter space.
- Choose a personal blender if your smoothie is also your commute cup and you want frozen fruit handled better.
- Choose a countertop blender if you make smoothies for multiple people, blend daily, or want the smoothest possible result.
You can also just use what you own. An immersion blender doesn’t make sense to buy exclusively for smoothies if you already own a countertop model. But as a second tool, it’s genuinely useful.
If you’re experiencing blending issues with your existing blender, fixing that might be the better move.
Common Mistakes That Ruin a Hand-Blended Smoothie
Not Enough Liquid
This is mistake number one. People dump in frozen berries, a banana, and a scoop of powder, then wonder why the blade chugs and the motor strains.
The fix: start with more liquid than you think you need. You can always add more but not take it out. A good starting ratio is one part liquid to one part solids by volume.
Blending a Frozen Solid Block
If your frozen fruit has been sitting in the freezer for weeks and fused into a solid mass, no immersion blender will handle that. The blade will hit it like a brick wall.
The fix: let frozen fruit thaw for five to ten minutes, or break it apart before adding. Some people microwave frozen fruit for 15 seconds to loosen it up.
Holding the Blender Still
You can’t just hold the immersion blender in one spot and expect a smooth result. The ingredients need circulation, and the vortex only forms when the blade is moving through the mixture.
The fix: pump the blender up and down continuously while it runs. Move it around the container. This active technique makes a dramatic difference in final texture.
Using a Wide Container
A big stockpot or wide mixing bowl is terrible for immersion blending. The liquid spreads out too thin, the blade doesn’t stay submerged, and you get splatter.
The fix: use the tallest, narrowest container you have. The immersion blender beaker that came with the unit is ideal. A mason jar also works well.
If you’re dealing with a cracked or damaged blending container, check out our guide on fixing cracked blender jars before you risk blending in a faulty vessel.
Overfilling the Container
Fill a container more than two-thirds full, and you’re asking for trouble. The vortex will push liquid up over the rim, and you’ll end up with smoothie on your counter.
The fix: blend in batches if you’re making more than one serving. It’s inconvenient, but it’s safer and gives better results.
Ignoring the Motor’s Limits
Immersion blender motors are small. They heat up faster than countertop motors, and they need breaks. If you run it continuously for more than a minute, you’re pushing the limits of most consumer models.
The fix: run in 30-second bursts. Pause for a few seconds, stir the mixture, then resume. This keeps the motor cool and extends the life of your unit.
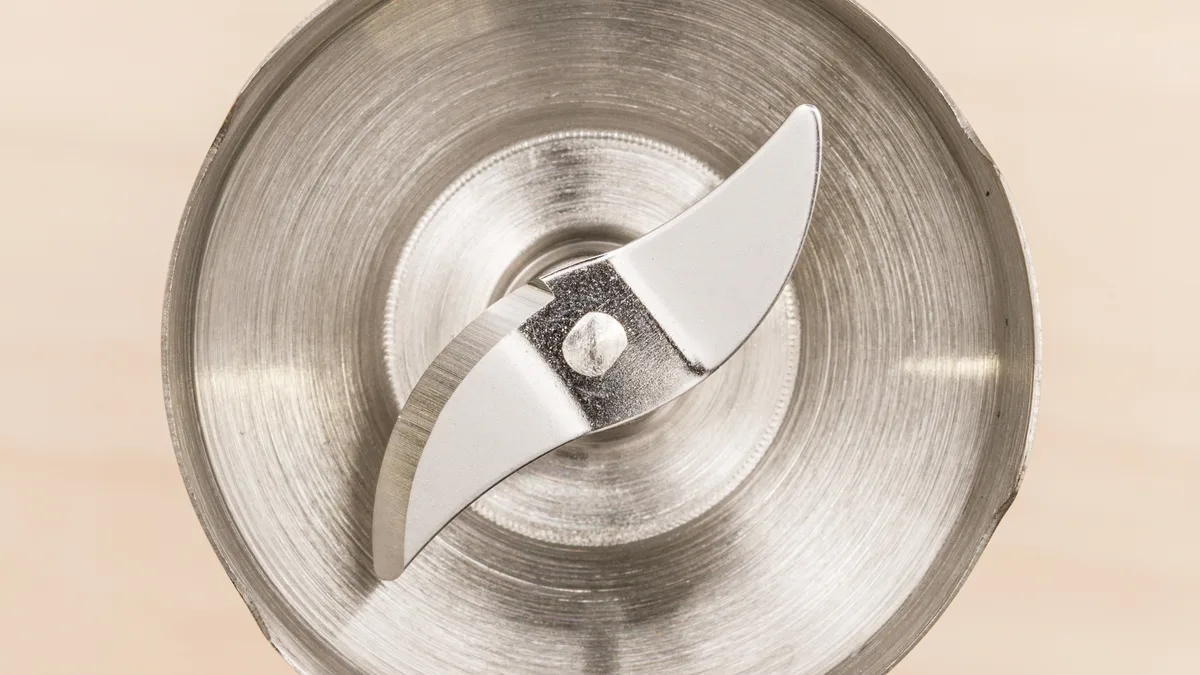
Image source: Web (Bing) / storage.googleapis.com (Web image (fair-use with source credit))
Blending Against the Container Wall
Pressing the blade hard against the bottom or sides of the container doesn’t help. It actually dulls the blade faster and creates more heat.
The fix: keep the blade in the center of the container, slightly off the bottom, and let the vortex do the work.
Expert Tips for Getting a Creamier, Chunk-Free Blend
Start with a Fatty Base
Yogurt, milk, or a spoonful of nut butter creates a smoother texture. The fats coat the blade and help suspend tiny solids in the liquid. You’ll notice fewer grit flecks floating around.
A ripe banana does the same job. Its starch thickens the mixture and gives a creamy mouthfeel that masks imperfections from the blade.
Chill Your Liquid
Cold liquid keeps everything firm enough to circulate properly. Overly warm ingredients turn into a thin slurry that resists the vortex. Use milk or juice straight from the fridge.
Add a few ice cubes if your mixture starts looking watery.
Blend in Short Bursts
Run the immersion blender for 15 seconds, then pause for five seconds. Stir the mixture with a spoon during the pause. This pulse-and-stir cycle breaks up larger pockets of dry ingredient without overheating the motor.
Add Greens Before Frozen Fruit
Layer spinach or kale directly on top of the liquid, then add soft fruit, then frozen items. This way, the greens spend more time near the blade. They get chopped before heavy ingredients bury them.
If greens still leave stringy bits, try grinding flax seeds and similar tough ingredients first. The same pre-pulverizing trick works for fibrous leaves when you accept a slightly coarser result.
Who Should Use an Immersion Blender for Smoothies (and Who Shouldn’t)
You Should Use One If…
- You make a single serving most mornings
- You want to blend directly in a travel jar or mason jar
- You’re short on counter space or cabinet storage
- You don’t mind slightly chunkier texture
- You already own one and want to skip another purchase
You Should Skip It If…
- You blend for two or more people at once
- You rely on frozen fruit and dense greens daily
- You expect silky, restaurant-quality smoothness
- You’re buying one specifically for this task
For that last one, a personal blender handles frozen ingredients better at a similar price. If you already own a countertop model, comparing them to food processors is a smarter next step before adding more gear.
Frequently Asked Questions
Can an immersion blender crush ice for smoothies?
Most models cannot. Ice requires high torque and a wide blade sweep. A 600-watt or higher unit might shave ice into snow, but even that struggles with large cubes in thick mixtures.
How long does it take to make a smoothie with a hand blender?
Expect 45 to 90 seconds for a single serving. Soft fruit and adequate liquid move faster. Frozen ingredients push you toward the upper end, or longer if you need to stop and stir.
Do I need a special container for immersion blending?
Yes, a tall, narrow one. The included beaker or a mason jar works perfectly. Wide bowls cause splashing and uneven blending.
Can I blend leafy greens smooth in an immersion blender?
Spinach and kale chop into flecks, not a pure puree. You’ll see small green bits in the drink. Countertop blenders at higher RPM pulverize greens more completely.
Is it worth buying an immersion blender just for smoothies?
Not if smoothies are your only use. But it’s a great companion tool for soups, sauces, and single drinks. If you’re curious about its other strengths, the full list of uses shows why it earns counter space.
Final Verdict: Is It Worth It?
Yes, with conditions. An immersion blender makes a solid single-serving smoothie when you use soft fruit, enough liquid, and the right technique. It falls short with heavy frozen blends, silky texture, and family-size batches.
Match the tool to the task. If your morning smoothie is a banana, some yogurt, and a splash of milk, you’ll be happy. If you’re blending frozen kale and hard berries every day, save for a proper countertop blender.
And regularly clean your blender blades to keep any machine working its best.
The answer isn’t a simple yes or no. It’s a matter of expectations. Know what you’re making, and you’ll know which tool to grab.
What to Look For in an Immersion Blender for Smoothie Duty
If you’re buying one specifically for smoothies, the specs matter. Look for at least 300 watts of power, preferably higher. A 500 to 600 watt model handles frozen fruit better without overheating.
The blade design also matters. A cross-blade with slightly curved edges pulls ingredients down more effectively than a flat single blade. A removable blade head makes cleanup easier, and that shaft length needs to reach the bottom of your deepest jar.
If you’re comparing options, higher wattage does make a real difference in heavy blending tasks.
Cost and Value Considerations
Immersion blenders run anywhere from $30 to $150. Budget models handle soft fruit smoothies fine but struggle with frozen ingredients. Mid-range units around $60 to $80 offer the sweet spot for most home users.
Countertop blenders cost more and take up more space. If you already own a functional immersion blender, spending another $100 on a dedicated smoothie machine isn’t necessary for occasional use. The energy cost difference between the two is also negligible for short blending sessions.