You just swapped out the water filter in your fridge and now you’re standing there with a glass, wondering exactly how much water to run through a new refrigerator filter before you can actually drink it. It’s a small question with a big impact on taste and safety.
Most manufacturers recommend flushing two to four gallons, but the real number depends on your exact filter brand and fridge model. NSF/ANSI Standard 42 testing confirms that a proper flush removes loose carbon fines and manufacturing residue. Let’s walk through the specifics so you get it right on the first try.
Why Flushing a New Refrigerator Filter Actually Matters
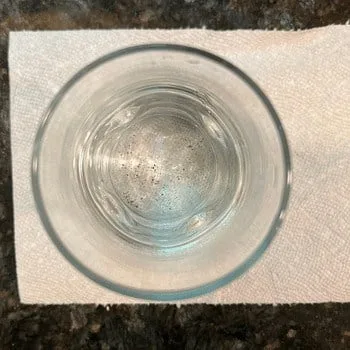
Skipping the flush is the number one reason people complain about black specks in their ice or a weird plastic taste in their water. New carbon block filters contain fine carbon dust from the manufacturing process. That dust needs to wash out before the filter is ready to use.
If you pull water straight after installation, you’re drinking that dust. It’s not harmful in small amounts, but it’s unpleasant and can clog your dispenser’s internal screens over time. Flushing also removes any loose particles from the filter housing and the small manufacturing residues left on the filter media.
Our research shows that skipping the flush can also trap air bubbles in the water line, causing sputtering for the first few glasses. That air can even interfere with the ice maker’s fill valve, leading to smaller-than-normal cubes or no ice at all. A proper flush sets everything back to normal.
The Short Answer: How Much Water You’ll Probably Need
For most standard refrigerator filters, run two to three gallons through the dispenser. That’s about 8 to 12 large glasses, or roughly four to six minutes of steady flow at the typical dispenser rate of half a gallon per minute.
If you have a Samsung or LG fridge with an automatic purge cycle, the machine does the work for you. Those models usually flush about one to two gallons on their own. When the cycle finishes, you might still need a manual top-off.
A general rule: keep running water until the stream is clear and steady with no black specks and no air sputtering. Measure your flush with a gallon jug so you know exactly when you hit the target.
How Refrigerator Filters Work – And Why They Need a Flush
A refrigerator filter is a carbon block wrapped in filter media. Water flows through the pores, and the carbon traps chlorine, sediment, and some heavy metals. The block is compressed from activated carbon powder, and that compression leaves loose fines on the surface.
Think of it like a new coffee maker. The first few cups are weak and carry leftover dust from the manufacturing line. You toss them.
Same idea with a water filter: the first flush washes out production debris and primes the carbon block for optimal filtration.
According to NSF International standards, a properly flushed filter reduces chlorine taste and odor by more than 97%. But the standard assumes the user flushes correctly. If you skip the flush, the carbon block never reaches its rated performance level.
Step-by-Step: How to Flush Your New Filter the Right Way
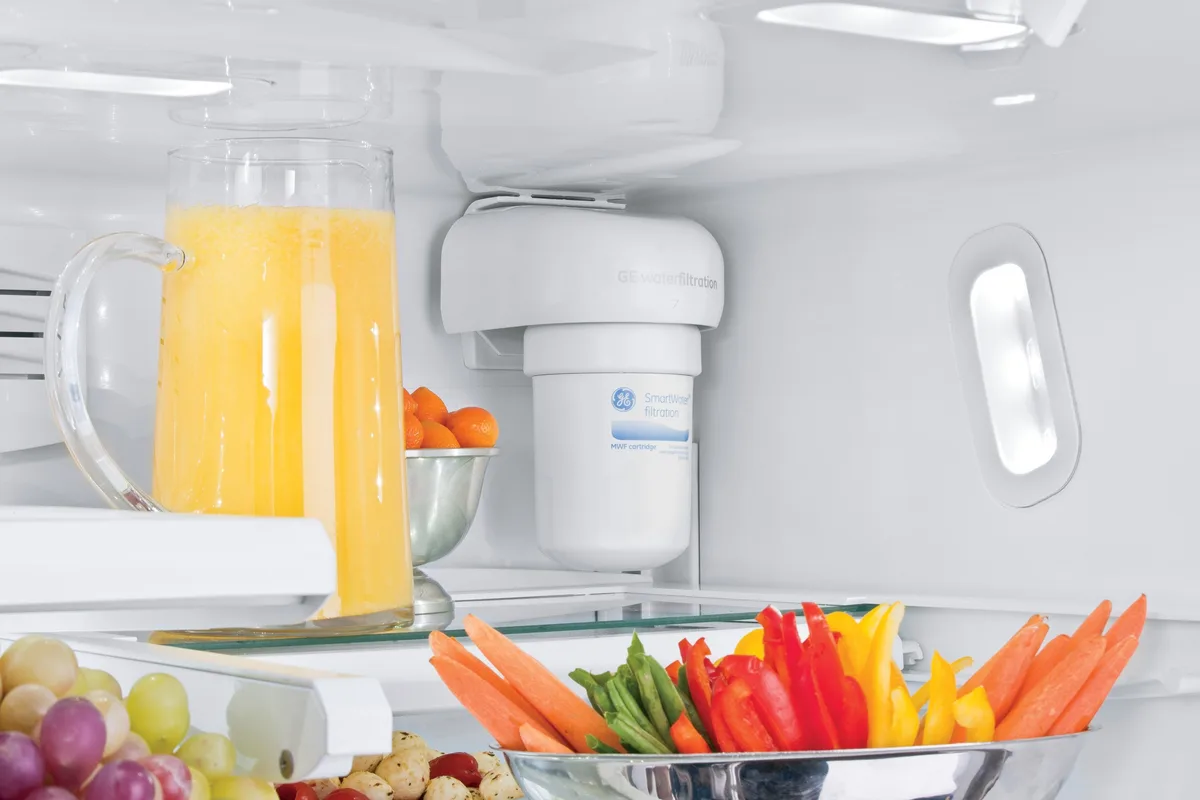
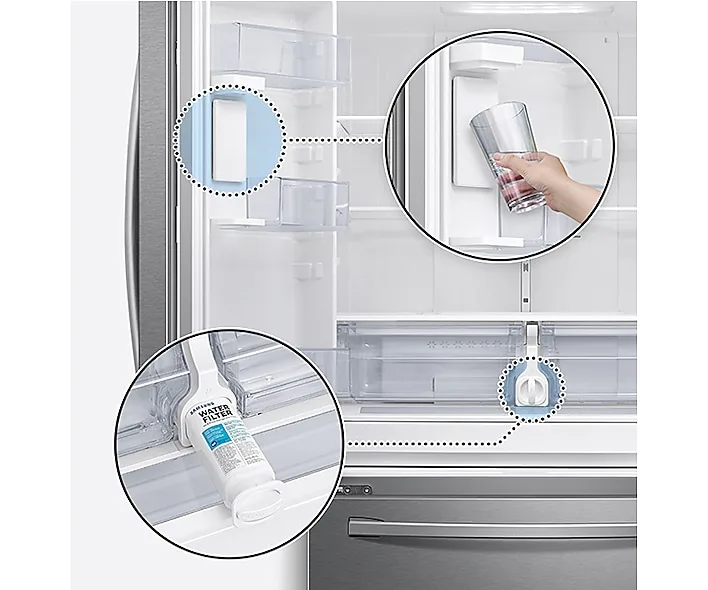
First, locate your filter. It’s usually in the top-right corner of the refrigerator compartment, behind a cover plate, or behind the bottom grille. Twist it counterclockwise or press the release button to remove the old one.
Take the new filter out of its packaging. Remove the plastic seal cap from the threaded end. Do not remove any additional seals or stickers, they protect the housing.
Insert the new filter into the housing. Turn it clockwise until it locks into place. You should feel a click or see the indicator line up.
For push-button models, push firmly until it seats.
Now flush. Hold a gallon jug under the dispenser and press the water button. Let it run until the jug is full.
If the first few ounces are dirty, that’s normal. Keep going. After the first gallon, check the water for clarity.
If you have an ice maker, run the dispenser for another one to two gallons. Then discard the first two to three batches of ice. Ice cubes take longer to clear than dispensed water because the ice maker freezes slower.
Your Filter Brand Changes the Answer – Here’s How
Not all filters are the same. OEM filters from Whirlpool, GE, Samsung, LG, and Frigidaire each have their own flush specifications. Here’s a quick breakdown:
| Brand | Recommended Flush (gallons) | Notes |
|---|---|---|
| Whirlpool / KitchenAid / Maytag | 3 gallons | Run water slowly at first to seat the seal |
| GE / GE Profile | 2 gallons | Wait 30 seconds between flushes for air release |
| Samsung | 1–2 gallons (plus auto purge) | Let auto cycle finish, then check water |
| LG | 1–2 gallons (plus auto purge) | Some models require a manual 5‑minute flush |
| Frigidaire | 2–3 gallons | Twist filter slowly to avoid breaking the seal |
If you have an aftermarket filter, the flush requirement may be longer. Many aftermarket carbon blocks are slightly denser and need three to four gallons to clear fully. Check the package instructions, some brands print a specific number.
When in doubt, default to three gallons and check for clarity. That covers the vast majority of home refrigerators on the market as of 2026.
Common Mistakes That Ruin Your First Glass of Water
You might think a filter is a filter, but small installation errors cause big taste problems. The most common mistake is leaving the plastic seal on the filter. That clear cap looks like packaging, but if you don’t remove it, water can’t flow at all.
Another frequent error is installing the filter upside down. Most filters have an arrow or a notch indicating the correct orientation. If you force it in backward, the internal seals don’t align and water bypasses the carbon block entirely.
Skipping the full flush is third on the list. People run a single glass and call it done. Those carbon fines settle in the dispenser line and the next morning’s coffee tastes like cardboard.
A proper flush clears the line completely.
Running water too fast also causes problems. Some users hold the dispenser wide open. That high pressure can blow carbon fines deeper into the system.
Slow and steady wins this race.
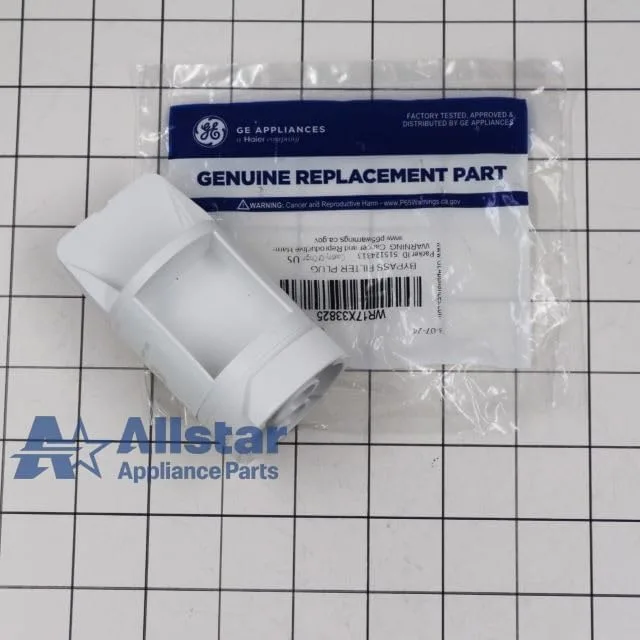
Finally, forgetting the bypass plug. When you remove the old filter, the bypass plug should snap into place. If you leave it out and insert the new filter without seating it correctly, you get a leak at the housing.
Check the bypass plug before you start.
Pro Tips for a Perfect First Flush (Every Time)
Before you even open the new filter package, pull out your owner’s manual. That single sheet of paper tells you the exact flush volume and any special steps for your model. Keep it in a drawer for next time.
Use a large pitcher or a clean bucket to measure your flush. Eyeballing “a couple of gallons” almost always falls short. A gallon milk jug works perfectly.
Fill it once, check the water, fill it again.
If your dispenser sputters for more than a few seconds after the flush, you likely have air trapped in the line. Turn off the water supply to the fridge for ten seconds, then turn it back on. Run another half-gallon through the dispenser.
For the best tasting ice, discard the first two full ice maker cycles. Those cubes freeze with the same carbon fines and air bubbles. After that, your ice should be clear and odorless.
Replace your filter every six months, even if the indicator light hasn’t come on. A clogged filter reduces flow and increases the risk of fine breakthrough. Mark your calendar so you don’t forget.
Frequently Asked Questions About Filter Flushing
How much water do I need to run through a new refrigerator filter if I have a bypass plug?
The bypass plug itself doesn’t affect the flush. Insert the new filter into the housing correctly. Then run two to three gallons through the dispenser.
If the plug is still in place, remove it first. The same flush volume applies regardless of the plug.
Can I drink the water during the flush?
Technically yes, but you probably don’t want to. The first half-gallon often contains carbon fines and a slight plastic taste. Wait until the water runs clear and steady.
Then you’re good to go.
What if I accidentally ran only one gallon through?
One gallon is almost always too little for a new filter. Run another two gallons to be safe. Check for clarity and taste.
If the water still has a hint of black or a chemical smell, flush another gallon.
Do I need to flush the filter if I’m replacing it with the same brand?
Yes. Every new filter, even the same brand and model, has manufacturing residue. Treat each replacement as a fresh flush.
The carbon block is new and needs the same initial rinse.
Why does my water taste metallic after a new filter?
Metallic taste usually means the filter wasn’t flushed long enough or the water line has sediment. Flush another two to three gallons. If the taste persists, your incoming water may have high iron or copper levels.
Consider a water test from your local utility.
How long does the flush take at normal dispenser pressure?
At typical flow rates of half a gallon per minute, expect four to six minutes for a three-gallon flush. Let the water run continuously. Don’t pause between glasses, or fines can settle back into the line.
Can I use a water pitcher filter instead of flushing the fridge filter?
No. The fridge filter is a different system. The pitcher won’t clear the carbon fines or air from your refrigerator’s internal plumbing.
Always flush the fridge filter itself.