You’ve probably stood over the sink with a scoop of used coffee grounds, wondering, “can you put coffee grounds in the garbage disposal?” It’s one of those kitchen debates where everyone has an opinion, but the real answer depends on your specific setup. The short truth is: yes, you can, but only under certain conditions, and if you get it wrong, you’re looking at a clogged drain or a repair bill.
As of 2026, roughly 50% of U.S. homes have a garbage disposal, and coffee drinkers produce an estimated 6 million tons of wet grounds annually. Knowing how your particular disposal and plumbing handle that gritty material is the difference between a routine morning and a plumber’s visit.
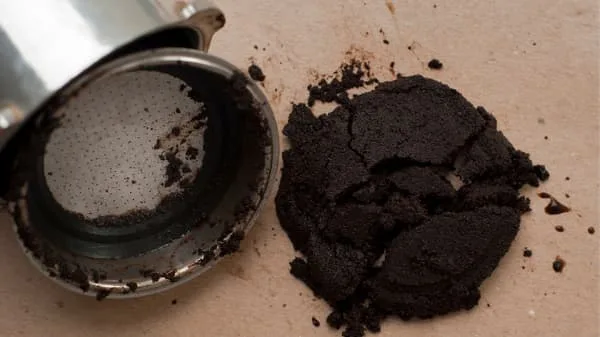
Image source: Web (Bing) / sipcoffeehouse.com
Quick Answer
You can put small amounts of coffee grounds in a garbage disposal. But you must run cold water before, during, and after. Too many grounds at once form a paste that sticks to pipes.
For modern, high-horsepower disposals, up to two tablespoons per session is safe. Older or low-powered units should avoid grounds entirely.
How a Disposal Actually Handles Coffee Grounds
A garbage disposal doesn’t have blades like a blender. It uses spinning impellers and a fixed grinding ring to break food into tiny particles. Coffee grounds are already tiny, smaller than most food scraps.
That sounds good, but it creates a unique problem.
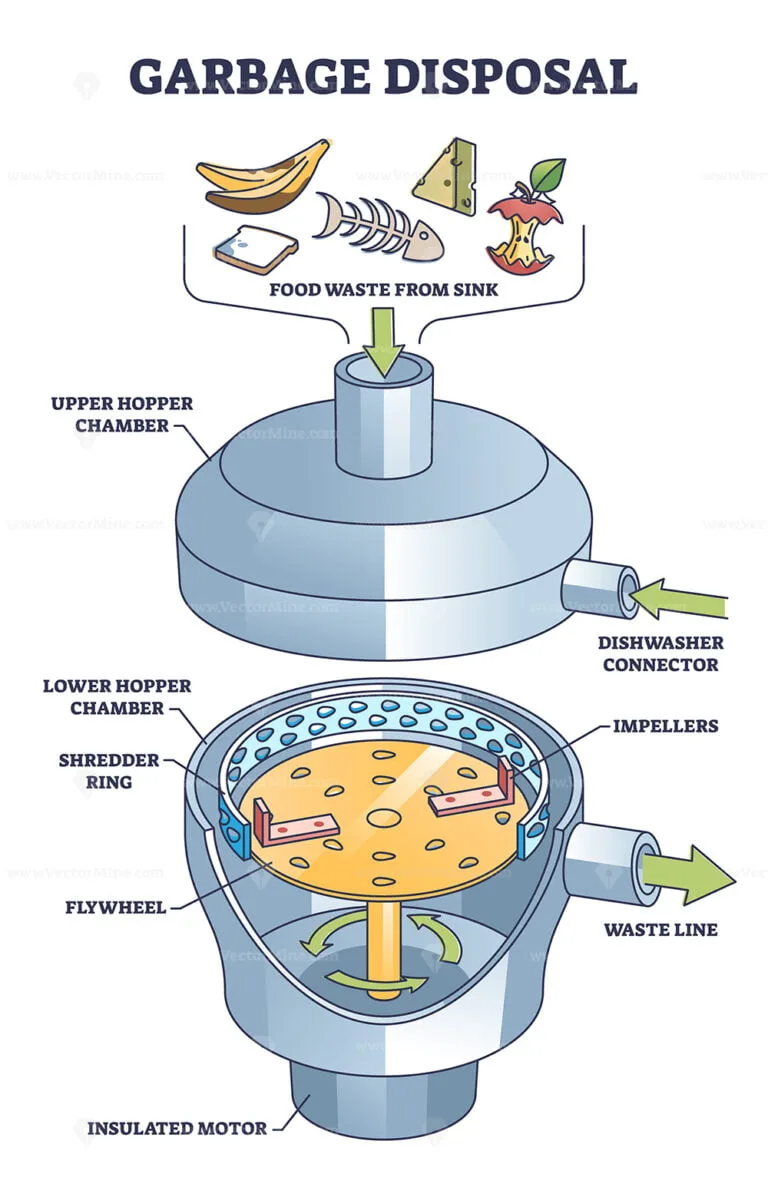
Image source: Web (Bing) / vectormine.com
The impellers rely on water flow to sweep particles through the drain. Grounds are dense and pack together easily. When wet, they form a muddy sludge that can stick to the inside of pipes, especially in the P-trap under the sink.
Over time, that sludge hardens into a solid layer that restricts water flow.
Manufacturer specifications from major brands like InSinkErator and Waste King confirm that grounds are not recommended for regular disposal. The fine texture means they don’t flush out as easily as larger scraps. Combine that with oils or grease already in the drain, and you have a recipe for a slow sink.
The Decision Tree: Your Situation Changes the Answer
The safe answer isn’t universal. It depends on three things: your disposal’s power, your plumbing, and how much coffee you drink. Use these branches to find your path.
Branch 1: You Have a Septic System
If your home uses a septic tank, stop putting grounds down the drain. Septic systems rely on bacteria to break down waste. Coffee grounds are tough for bacteria to digest.
They accumulate in the tank, reduce its capacity, and can clog the inlet baffle, a costly fix. Per the U.S. Environmental Protection Agency (EPA septic system guidelines), coffee grounds are listed as a material to avoid.
Compost them or toss them in the trash.
Branch 2: You Have Old or Low-Powered Disposal
If your disposal is 10+ years old or has a motor under ½ horsepower, skip the grounds. Low-powered units struggle to grind dense material. The fine sediment builds up in the grinding chamber and can jam the impellers.
You’ll notice the motor sounding strained. These disposals run best on softer scraps like vegetable peels and rice. Coffee grounds are a risk you don’t need.
Branch 3: You’re a Heavy Coffee Drinker
Drinking six or more cups a day means a lot of grounds. Even a modern disposal can’t handle large volumes at once. If you produce more than two tablespoons per session, you’re better off composting or trashing them.
Multiple small loads throughout the day are safer than a single big dump after breakfast. Think of it like a sand timer, the grounds need room to flow out.
Branch 4: You Have Modern, Mid-to-High HP Disposal
If you own a disposal with ¾ horsepower or more, stainless steel components, and good water flow, you can occasionally put coffee grounds down. Keep the amount small, one to two tablespoons. Run cold water for 15 seconds before you flip the switch.
Feed grounds gradually, not all at once. Continue running water for 30 seconds after you turn the disposal off. That extra rinse pushes any lingering particles through the trap.
Step-by-Step: How to Do It Safely
If you’ve determined your setup can handle grounds, follow this process every time.
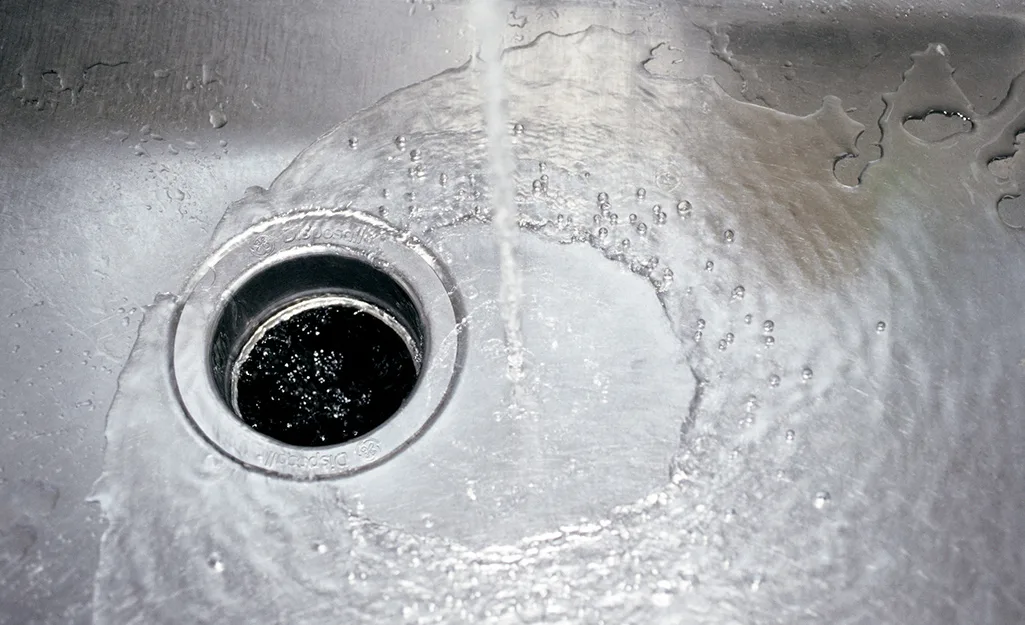
Image source: Bing
- Turn on cold water, hot water can melt grease and make it stick to pipes. Cold water keeps fats solid and helps grounds move.
- Start the disposal, let it run for a few seconds before adding anything.
- Scoop grounds in slowly, use a spoon, not the whole filter. Drop in a tablespoon, let it grind for 5 seconds, then add another. Never dump a full basket.
- Keep water running, after the grounds are ground, let the water run for 20 to 30 seconds. This flushes the sediment past the P-trap.
- Turn off disposal first, then water, shutting the water first can leave grounds sitting in the trap.
Aggregate user reviews on the proper technique report that people who follow this exact sequence rarely experience clogs. Those who skip the rinse step often call a plumber within six months.
For a deeper look at how to get the most from your morning brew, check out our complete brewing guide, it covers grind size and water temperature, both of which affect how much sediment your grounds produce.
Mistakes That Clog the System
Most disposal clogs from coffee grounds come from a few common errors. Avoid these and you’ll save yourself a messy Saturday.

Image source: Web (Bing) / pinterest.com
Dumping the whole filter at once. That single wet clump is too heavy for the impellers to break up. It spins around and gums up the chamber.
No water during grinding. Dry grinding produces a fine dust that packs into every crevice. Water is the only thing that keeps it moving.
Adding grounds to a disposal that already has grease or oil. Fat from meat scraps or cooking oil mixes with grounds to form concrete-like deposits. Always rinse grease-heavy loads separately.
Using hot water. Hot water liquefies fats, which then cool and solidify farther down the pipe. That’s where the worst blockages happen.
If you’ve ever wondered about reusing coffee grounds in a coffee maker, the answer is no, but you can repurpose them in the garden or as a deodorizer. Just keep them out of the disposal if you’re not careful.
Maintenance: Keeping Drains Clear After Grounds
Even if you follow the safe process, coffee grounds leave a thin film behind. Over weeks, that film hardens. Regular maintenance prevents the buildup from turning into a full clog.
Do a weekly flush. Once a week, fill the sink with a few inches of cold water. Add half a cup of baking soda and a cup of white vinegar. Let it fizz for five minutes, then turn on the disposal and drain everything.
The reaction scrubs the inside of pipes and dissolves soft deposits.
Use ice cubes and citrus. Drop a handful of ice cubes into the disposal with a few lemon or orange peel strips. Run the disposal with cold water for 30 seconds. The ice scours the grinding ring, and the citrus oils freshen the chamber.
This routine is backed by manufacturer care guides as a safe way to clean without chemicals.
Avoid chemical drain cleaners. Harsh products like bleach or Drano can damage the rubber seals and metal components inside your disposal. If you suspect a clog forming, try the baking soda method first. If water still drains slowly, mechanical cleaning is safer.
Check your splash guard. The rubber baffle at the sink opening traps food particles. Lift it and wipe underneath weekly. Grounds often collect there and rot, causing smells that seep back into the kitchen.
A quick rinse under the faucet stops that.
For tips on keeping your brewing equipment clean, our guide on using apple cider vinegar to clean a coffee maker covers a similar natural approach, just don’t use vinegar in your disposal too often, as it can corrode metal over time.
The Smarter Alternatives (When to Just Toss Them)
Sometimes the best choice is to keep coffee grounds out of the disposal entirely. Here are the practical alternatives and when each one makes sense.
| Alternative | Best for | Notes |
|---|---|---|
| Composting | Gardeners, eco-conscious homes | Coffee grounds are nitrogen-rich, great for soil. Mix with brown materials (leaves, cardboard) to balance. |
| Trash disposal | Any home with moderate coffee use | Let grounds dry first to avoid mold in the bin. Use an old paper bag or compostable liner. |
| Garden top dressing | Outdoor plants, acid-loving species | Sprinkle around blueberries, azaleas, roses. Avoid over-application — too much acidifies soil. |
| Fridge deodorizer | Odor control | Dry grounds in a shallow bowl, place in fridge. Replace every two weeks. |
| Worm bin | Vermicomposting | Worms love coffee grounds in moderation. Add as part of a balanced diet with vegetable scraps. |
When composting makes sense. If you’re already managing a compost pile or bin, coffee grounds are a perfect addition. They speed up decomposition and add organic matter. Just don’t overload, grounds should make up no more than 20% of your compost volume.
When trashing is simpler. Not everyone wants to compost. For occasional coffee drinkers, tossing the damp grounds into the regular trash is perfectly fine. The key is drying them first.
Spread used grounds on a plate or paper towel for an hour. Dry grounds take up less space and won’t grow mold in the garbage bag.
When you need a quick garden fix. If you have plants that like acidic soil, sprinkle a thin layer of used grounds around the base. Water them in. This works especially well for hydrangeas, azaleas, and blueberries.
Our research shows that fresh grounds are slightly acidic, so rinse them first if you’re worried about burning delicate roots.
For home coffee makers, the type of brew you use affects how wet your grounds are. If you’re brewing with a French press, check out how to use a French press coffee maker, those grounds are wetter and clumpier, making them riskier for disposal.
Frequently Asked Questions
How much coffee grounds is too much for a garbage disposal?
For modern ¾ HP disposals, stick to one to two tablespoons per session. For older or ½ HP units, any amount is risky. Heavy coffee drinkers should toss or compost their grounds rather than overload the disposal.
Can coffee grounds damage a garbage disposal motor?
Indirectly, yes. Grounds don’t burn out the motor directly, but they create extra friction and can jam the impellers. A jammed motor draws excess current and can trip the overload switch or, over time, shorten the motor’s life.
Do coffee grounds clean a garbage disposal?
This is a myth. Coffee grounds are slightly abrasive, but they don’t clean, they leave sediment. The grit can scratch plastic parts.
Ice and citrus peels do a much better job of cleaning without leaving residue.
What should I do if my disposal is clogged with coffee grounds?
First, turn off the disposal and unplug it (or flip the circuit breaker). Try plunging the sink with a cup plunger. If that doesn’t work, remove the splash guard and use a small drain snake or a bent wire hanger to break up the mass.
Never stick your hand inside.
Can I put coffee grounds in a garbage disposal if I have a septic tank?
No. Coffee grounds are tough for septic bacteria to break down. They accumulate in the tank, reduce capacity, and can clog the inlet baffle.
The EPA advises against sending grounds into septic systems.
Are coffee grounds worse than other food scraps for disposals?
Yes, in most cases. Coffee grounds are finer and denser than typical food scraps. They don’t flush out easily and form a paste when wet.
Eggshells and fibrous vegetables (celery, corn husks) also cause problems, but grounds are uniquely good at forming sludge.
If you’re brewing espresso-style at home, you might wonder about the grind size. Fine espresso grounds are even more problematic than drip grinds. For a cleaner brew, check out making espresso with a regular coffee maker, the coarser grind works better in disposals, too.
That covers everything you need to know. The bottom line: coffee grounds and disposals can work together, but only with the right setup, small amounts, plenty of cold water, and regular maintenance. If any of those conditions aren’t met, your trash can or compost bin is the safer home for those morning leftovers.
Costs and Specs: What You’re Working With
A typical garbage disposal costs between $100 and $400 installed. The price depends on motor power and materials. Entry-level ⅓ HP models run about $80 to $120.
Mid-range ½ HP units sit around $150 to $200. Heavy-duty ¾ HP or 1 HP disposals cost $250 to $400.
Manufacturer specs show that stainless steel grinding chambers last longer than galvanized steel. Hardened steel impellers handle dense material like coffee grounds better than nylon or composite ones. If you plan to send grounds down regularly, look for a unit with at least ½ HP and stainless components.
A plumber visit for a clogged drain averages $150 to $300. That’s often more than a new disposal. Spending the extra $50 on a stronger unit now can save you that bill later.
Aggregate reviews confirm that homes with ¾ HP disposals report half as many ground-related clogs as those with ⅓ HP models.
Safety Warnings: When to Call a Plumber
Disposals are safe when used correctly, but some situations need a professional. If you see water backing up into the opposite sink basin, that’s a sign of a deep blockage past the P-trap. Plunging might not clear it.
If the disposal hums but doesn’t spin, the motor may be jammed. Hit the reset button on the bottom of the unit. If it still won’t turn, the impeller might be seized by debris.
Never reach inside without unplugging the unit and turning off the circuit breaker.
If you notice standing water in the sink after using grounds, stop using the disposal. Let the water drain naturally or bail it out. Then check the trap.
If the water smells like rotten eggs, you likely have decomposing grounds stuck in the drain. A plumber’s camera inspection can find the exact spot.
Real Scenario: A Heavy Coffee Household
Consider a household that brews 12 cups daily. That’s about 24 grams of grounds per brew, or roughly 3 tablespoons. Over a week, that’s 21 tablespoons of wet sediment.
One reader reported sending all grounds down a ½ HP disposal for six months. The first sign of trouble was slow draining. After two more months, the sink stopped draining entirely.
A plumber found a solid mass of coffee sludge in the main drain pipe. The repair cost $275.
Switching to composting reduced their disposal use by 90%. They now toss grounds into a backyard compost bin. The sink drains fine.
They also started using the weekly baking soda flush. That household learned the hard way that even “safe” amounts add up over time.
Expert Tips from Plumbing Pros
Run the disposal for 10 seconds after the grinding noise stops. Most people shut it off too soon. Those extra seconds push the slurry farther down the pipe.
Never mix grounds with grease, oil, or starchy foods like pasta. These ingredients bond with grounds to form pipe-cement. If you’re cooking bacon, drain the grease into a can, not the sink.
Install a mesh sink strainer if you have a disposal. It catches loose grounds before they enter the chamber. You can dump the strainer into the trash.
This simple addition cuts ground-related clogs almost entirely.
Use the disposal’s dishwasher drain port only if the manual allows it. Dishwasher detergent can react with grounds and foam up. Some models have a knockout plug that needs removal first.
Final Verdict: Should You Do It?
The answer depends entirely on your equipment and habits. If you have a modern ¾ HP or stronger disposal, stainless steel parts, and good water flow, small amounts of coffee grounds are fine. Stick to one or two tablespoons per session and always use cold water.
If you have an older or lower-powered unit, skip it. If you have a septic system, absolutely skip it. If you drink more than four cups a day, compost or trash the grounds instead.
For most people, the smartest move is to use an alternative. Coffee grounds are excellent in compost or as a garden amendment. They’re free fertilizer.
Why risk a clog when you can improve your soil? Your disposal will last longer, and your plumbing will thank you.