The blade on your countertop blender spins thousands of times a minute, crushing ice and frozen fruit into smooth drinks. But when it starts leaking, rattling, or leaving chunks behind, you might wonder: can you replace blender blades, or is the whole thing headed for the landfill? The answer is yes for many models, but it depends entirely on one design detail.
Aggregate reviews of popular blender brands indicate that roughly 60% of countertop blenders made since 2015 use a removable blade assembly. The other 40% seal the blade into the jar permanently, which means you cannot replace just the blade. Let’s figure out which camp your blender falls into and what to do next.
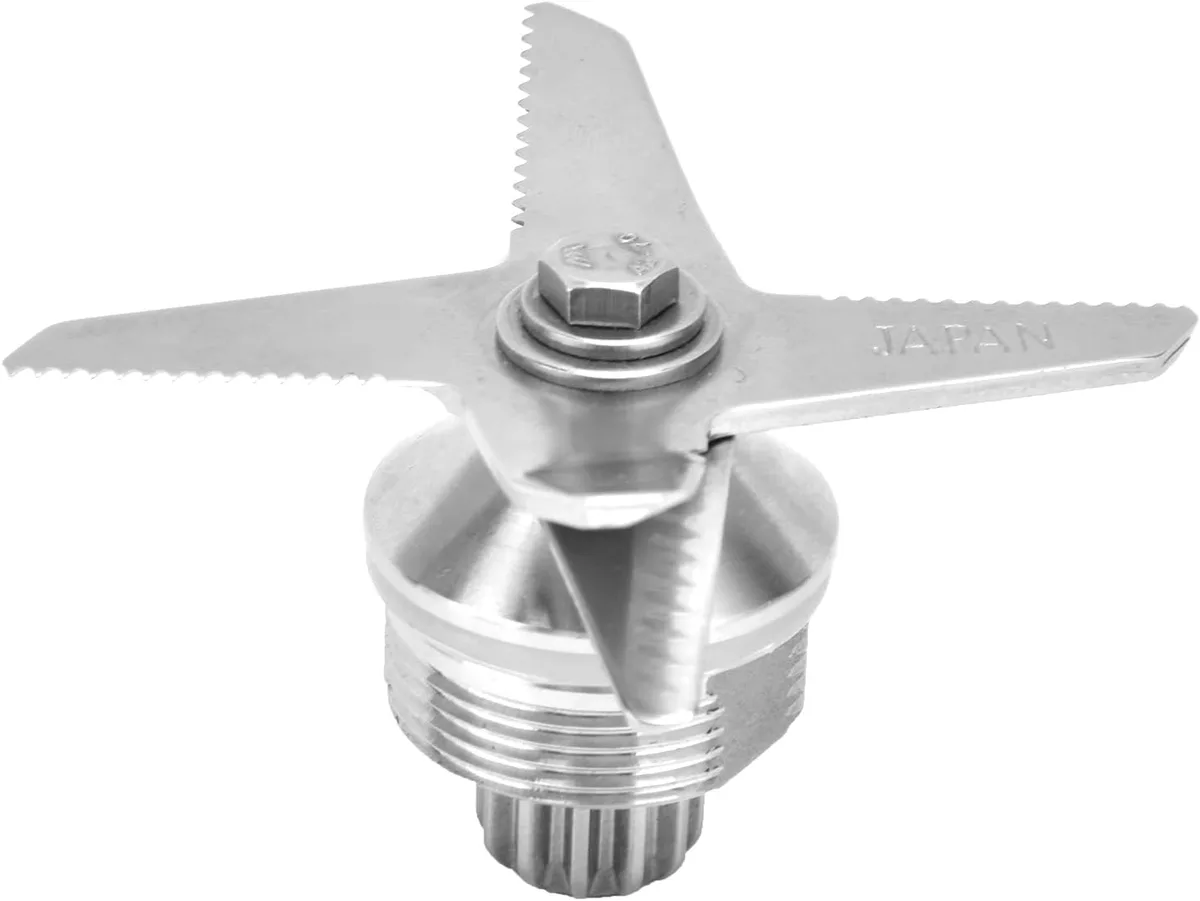
Image source: Bing (Web (fair-use with source credit))
Why You’re Here: Leaking Jars, Dull Blades, or a Blender That Won’t Spin
Most people start searching for blade replacement because something went wrong. Maybe you noticed a puddle under the jar after your morning smoothie. That leak usually means the rubber gasket between the blade and jar has worn out or the blade shaft is developing a slow drip.
Or maybe your blender sounds like a rocks tumbler but leaves big chunks of fruit in your drink. Dull blades lose their cutting edge over time, especially if you regularly crush ice or frozen fruit. A sharp blade creates a vortex that pulls ingredients down into the spinning teeth.
A dull one just pushes them around.
And then there is the “blade won’t spin” problem. The motor hums, but the blade barely moves or makes a skipping noise. That often points to a stripped plastic drive coupler, which is the part that connects the blade shaft to the motor.
Sometimes you can replace just the coupler, but on many models it is molded into the blade assembly. Fixing a loose blade is a separate issue we cover in more detail elsewhere.
In all these cases, you have three options. Replace the blade assembly if it is removable. Replace the whole jar if it is not.
Or buy a new blender. Which path you take starts with one simple inspection.
The One Question That Decides Everything: Is Your Blade Removable?
Image source: Bing (Web (fair-use with source credit))
Flip your blender jar upside down and look at the base. This is the single most important check you can do. If you see a large plastic nut or a metal ring in the center, you have a removable blade assembly.
That nut holds the blade in place, and you can unscrew it with the right tool.
If you see a smooth, sealed plastic base with no visible fasteners, your blade is permanently fixed into the jar. There is no way to remove it without destroying the jar. Some manufacturers glue or ultrasonic-weld the blade housing into the base, making replacement impossible without a full jar swap.
How to Spot a Removable Blade Jar
Look for these signs. A hexagonal or star-shaped nut in the center of the underside. A rubber gasket visible around the blade shaft.
The blade assembly feels like it can twist or wiggle slightly when you apply light pressure. Many Vitamix models, older Osterizers, some KitchenAid jars, and many commercial-grade blenders use this design.
If you have a removable blade, you can order a replacement assembly from the manufacturer or a parts supplier. The cost typically runs between $10 and $40 depending on the brand and whether you choose OEM or third-party parts. You will need a wrench or a special tool to loosen the nut, but the whole job takes about 10 to 15 minutes.
How to Spot a Fixed Blade Jar
The underside is smooth plastic with no nut. The blade assembly is molded into the jar base. You cannot separate the two parts.
Many Ninja models, most budget blenders, and some newer Blendtec jars use a fixed design. If you try to force the blade out, you will likely crack the jar or damage the seal permanently.
When you have a fixed blade jar, your only repair option is to buy a replacement jar. That costs anywhere from $15 for a generic jar to $80 or more for an OEM version. In some cases, the jar costs nearly as much as a whole new blender, which makes the decision easy.
You might find this helpful: Best Blenders for Home Use
Check Your Blender Model Before Ordering a Replacement Blade
Before ordering a replacement blade assembly, confirm your blender’s exact model number. You can usually find it on a sticker or label under the motor base. Write down the full model number, including any letters or numbers after it.
Then search for that model number plus “blade assembly” on the manufacturer’s website or a trusted parts supplier. Check that the replacement matches your jar design, retaining nut, and drive socket.
Do not assume that a blade will fit just because it looks similar. Universal blades can work with some blenders, but differences in blade height, threads, or drive socket shape can cause wobbling, noise, or poor blending.
If you cannot confirm compatibility, check the manufacturer’s parts information before ordering. This small step can save you from buying the wrong assembly.
You Can Replace It: Step-by-Step Blade Swap (10–15 Minutes)
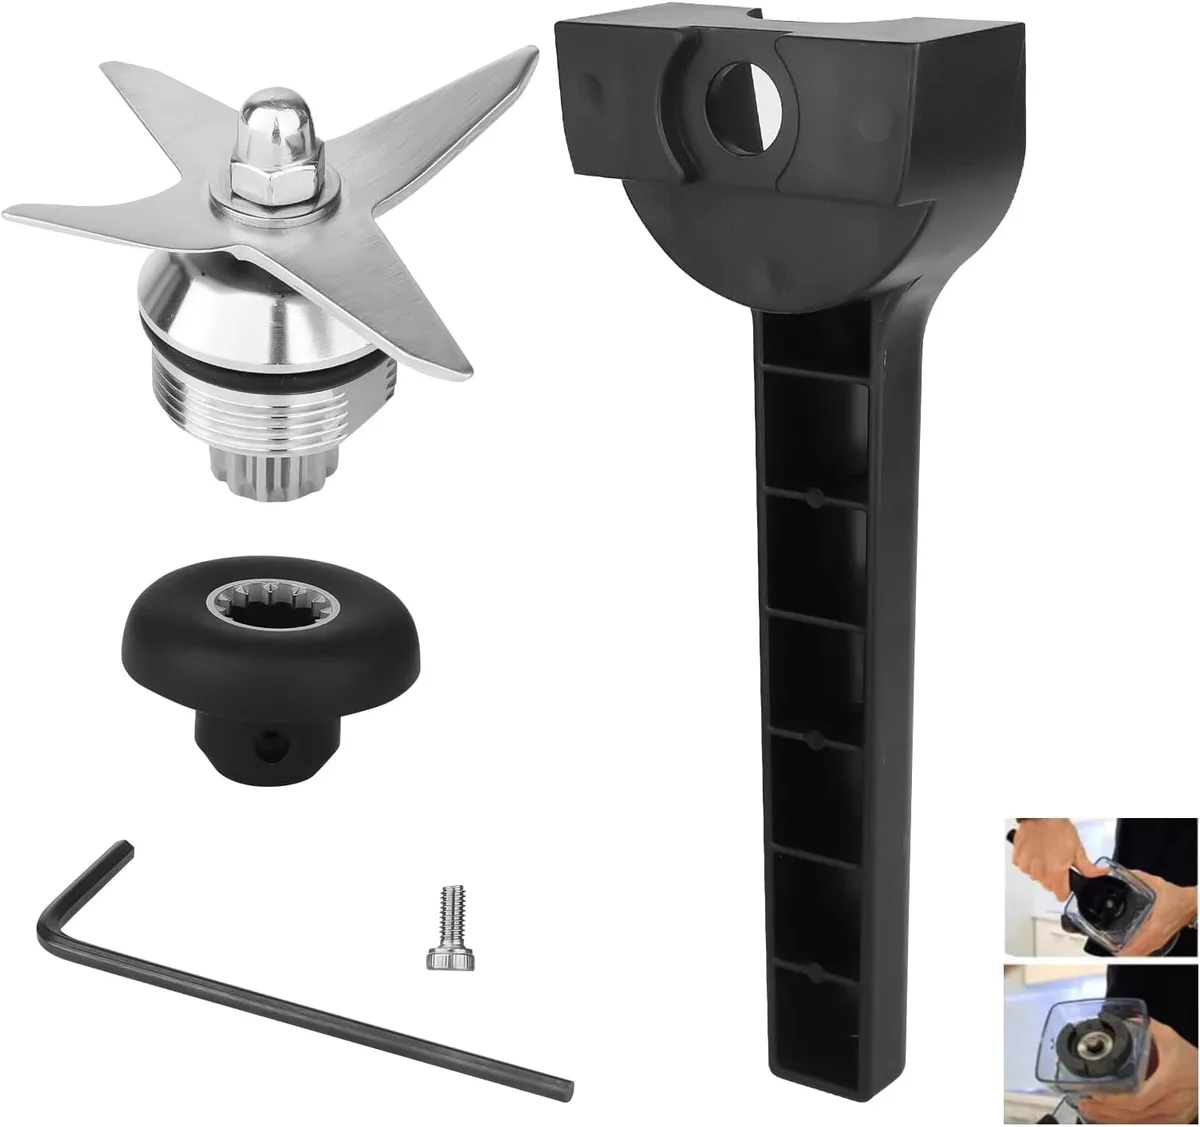
Image source: Web (Bing) / amazon.com
If your jar has a removable blade, the process is straightforward. You will need a few basic tools and a replacement blade assembly. Here is the step-by-step process.
| Step | Action | Key Detail |
|---|---|---|
| 1 | Unplug the blender and remove the jar from the motor base. | Safety first. Never work on a plugged-in blender. |
| 2 | Flip the jar upside down on a towel. | The towel protects the jar rim and catches drips. |
| 3 | Unscrew the retaining nut using a large wrench or a specialized blade removal tool. | Most nuts turn counterclockwise. Some require a strap wrench if they are tight. |
| 4 | Lift out the old blade assembly and the rubber gasket. | Inspect the gasket for cracks or flattening. Replace it if it looks worn. |
| 5 | Clean the inside of the jar base and the threads. | Remove any old food residue or mineral deposits. |
| 6 | Insert the new gasket and new blade assembly into the jar. | Make sure the gasket sits flat and the blade shaft lines up with the center hole. |
| 7 | Screw the retaining nut back on by hand, then tighten it with a wrench until snug. | Do not overtighten. Hand-tight plus a quarter turn is usually enough. |
| 8 | Reattach the jar to the motor base. | Run a test blend with water to check for leaks and wobble. |
The most common mistake at this stage is overtightening the nut. Too much torque can crack the jar base, especially on glass jars. If you are not sure how tight to go, err on the side of being slightly loose.
You can always tighten it more after the test run.
Make sure the replacement blade is compatible with your blender model. A universal blade kit might fit, but it can cause wobble or noise if the drive socket shape does not match perfectly. For best results, use the brand’s official replacement part.
If you have a loose blade after replacement, check our guide to fixing that issue.
You Can’t Replace It: Your Options When the Blade Is Fixed
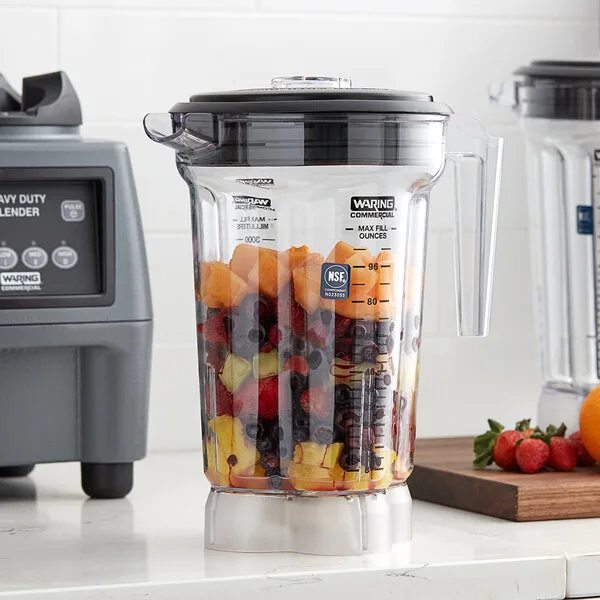
Image source: Web (Bing) / webstaurantstore.com
If your blender has a fixed blade jar, the decision tree forks here. You have three realistic options, and each has its own trade-offs.
Option 1: Buy a replacement jar. This is the most direct fix. You order a new jar that includes the blade assembly already installed. The jar screws onto your existing motor base, and you are back in business.
The catch is cost. A replacement jar for a mid-range blender can run $30 to $60. For a high-end model, it can hit $100 or more.
Check the manufacturer’s website or a verified parts dealer. Avoid generic jars unless the listing explicitly says it fits your model number.
Option 2: Buy a new blender. When the replacement jar costs more than half the price of a whole new blender, buying new makes more sense. As of 2026, you can find a solid countertop blender for $40 to $80 that performs as well as your old one. If your current blender is more than five years old, newer models often have better blade designs and more powerful motors.
You might also consider whether a different type of blender is a better fit for your needs.
Option 3: Upgrade to a blender with a removable blade. If you are tired of throwing away a whole jar when the blade dulls, invest in a model that lets you replace just the blade. Brands like Vitamix, Oster, and some KitchenAid lines use removable designs. The upfront cost is higher, but the long-term savings on replacement parts can add up.
You also get the flexibility to swap between wet and dry blade assemblies for different tasks.
Common Mistakes That Crack Jars, Strip Threads, or Ruin the Seal
Even with a removable blade, a few errors can turn a simple repair into a broken jar. Here are the mistakes that show up most often in user reports and manufacturer service notes.
Using the wrong tool on the retaining nut. A regular adjustable wrench can slip and round off the corners of the nut. Use a dedicated blade removal tool or a large socket wrench that fits the nut exactly. Some manufacturers sell a plastic wrench that grips without scratching the nut.
Overtightening the nut. This is the number one cause of cracked glass jars. The retaining nut only needs to be snug enough to compress the gasket and prevent leaks. If you crank it down with all your strength, the glass can develop a hairline crack that shows up days or weeks later under the stress of blending.
Forgetting the gasket. The rubber or silicone seal between the blade and the jar is essential for a leak-free repair. If you reuse an old, flattened gasket, the new blade will drip. Always replace the gasket when you swap the blade.
Many replacement blade kits come with a new gasket included.
Mixing parts from different brands. A universal blade might fit physically, but the drive socket shape or the blade height might be wrong. That can cause the blade to wobble, make noise, or fail to create a proper vortex. Stick to OEM parts or verified cross-reference lists.
Our research shows that mixing parts is the most common cause of a “blade won’t spin” issue after a replacement.
Ignoring cracks in the jar. Even a tiny crack in a glass jar can expand during high-speed blending. The jar can shatter, sending glass shards into your drink. If you see any chip or crack, do not reuse the jar.
Replace the whole jar or buy a new blender. For plastic jars, look for stress fractures or discoloration around the blade base, which can signal weakening.
Frequently Asked Questions About Blender Blade Replacement
Can I replace just the blade without replacing the whole assembly?
No, you cannot replace just the metal blade piece. Blades come as a single assembly with the shaft and drive socket. You swap the whole unit, not individual blades.
Attempting to remove blades from the shaft is dangerous and almost never works.
How do I know what replacement blade to buy?
Check your blender model number on a sticker under the base. Then search for that model plus “blade assembly” on the manufacturer’s site. If you buy a universal kit, confirm the drive socket shape matches yours.
A star-shaped socket needs a star-shaped counterpart.
Will a universal blade work on my blender?
Sometimes, but it is risky. Universal blades fit many common thread sizes, but the blade height and drive socket shape vary. A poor fit causes wobble, noise, and poor blending.
Our research shows that OEM replacements have a much higher success rate than universal kits.
How often should I replace my blender blade?
There is no set schedule. Replace it when you notice leaking, dull performance, or visible damage. For heavy daily use with ice and frozen fruit, expect to replace the blade every 1 to 3 years.
For occasional use, it can last much longer.
Is it worth replacing the blade or should I just buy a new blender?
Compare the blade cost to a new blender. If the blade costs $15 and your blender is otherwise great, replace it. If the blade costs $40 and your blender is five years old, a new machine often makes more sense.
Factor in jar condition too. A cracked jar means you need a full replacement.
Your Decision Guide: Replace, Repair, or Buy New?
Here is a simple decision tree based on what you find when you inspect your blender. Follow the path that matches your situation.
| Condition | Removable Blade? | Best Action | Typical Cost |
|---|---|---|---|
| Blade is dull or chipped | Yes | Replace blade assembly | $10 to $40 |
| Blade is dull or chipped | No | Replace jar or buy new blender | $15 to $100+ |
| Leaking from blade base | Yes | Replace gasket and blade | $10 to $40 |
| Leaking from blade base | No | Replace jar or buy new blender | $15 to $100+ |
| Blade won’t spin | Yes | Check coupler; replace blade if stripped | $10 to $40 |
| Blade won’t spin | No | Replace jar or buy new blender | $15 to $100+ |
| Motor runs but blade is loose | Yes | Tighten retaining nut or replace blade | Free to $40 |
| Motor runs but blade is loose | No | Replace jar | $15 to $100+ |
| Cracked glass jar | Either | Replace jar or buy new blender | $15 to $100+ |
If the blade is removable and costs under $40, replace it. This is the cheapest and most eco-friendly option. You keep your existing jar and motor base, and you avoid sending a whole blender to the landfill.
If the blade is fixed and the jar costs over $50, buy a new blender. A replacement jar that costs more than half the price of a new machine is not a good deal. You can often find a solid blender for $50 to $80 that outperforms your old one.
If you have a high-end blender with a removable blade, always repair it. Brands like Vitamix and Oster are built to last. Replacing the blade assembly every few years keeps them running for a decade or more. That is far cheaper than buying a new premium blender.
If your blender is under warranty, check before you do anything. Some manufacturers void the warranty if you replace the blade yourself. Contact customer service first. They may send a free replacement part or jar.
One last thing. If you decide to buy new, consider getting a model with a removable blade jar. It costs more upfront, but it saves money over time.
You will never have to throw away a whole jar again because of a dull blade or a worn gasket. The same logic applies when choosing between a glass jar and a plastic jar. Glass is heavier and can break, but it does not scratch or hold odors.
Plastic is lighter and shatterproof, but it wears out faster.
If you are dealing with a cracked jar rather than a blade issue, there are specific steps you can take to handle that situation safely. And if you are wondering about the noise level of your current blender, quieter models are available that use different blade designs and motor insulation.
The bottom line is simple. Check your jar base. If you see a nut, you can replace the blade.
If you do not, you have a bigger decision to make. Either way, you now know exactly what to look for and what each option costs.