Skip to content
If you’ve ever wondered how does a food scale work, the short answer is that it measures tiny amounts of bending in a piece of metal. That bend gets converted into the number you see on the display.
This isn’t just trivia. Knowing the mechanics helps you use a scale more accurately, avoid frustrating readings, and understand why a $15 scale can outperform a $50 one. At the heart of every digital kitchen scale is a sensor called a load cell, and the whole system is precise enough that the U.S.
National Institute of Standards and Technology (NIST) maintains calibration standards for it. As of 2026, most home scales hit an accuracy of plus or minus 1 gram, with premium models reaching 0.1 gram. Once you see what’s happening inside, you’ll never weigh flour the same way again.
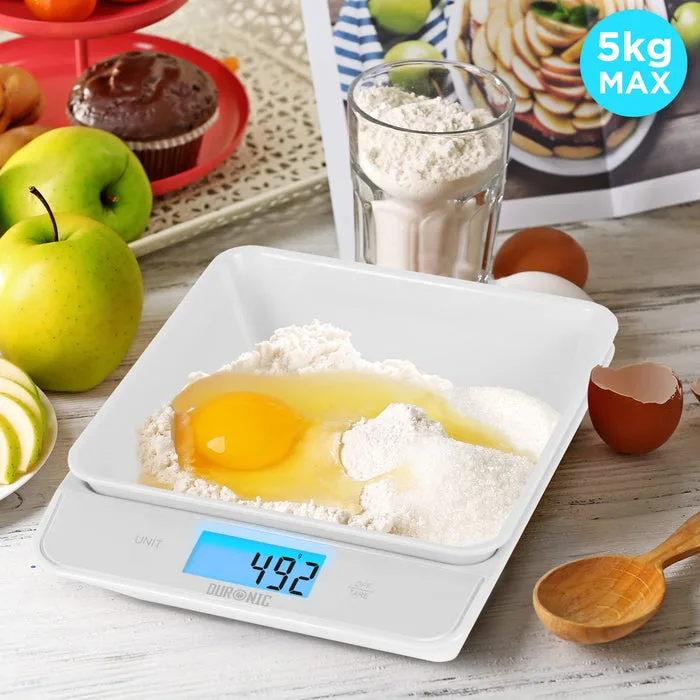
Image source: Bing (Web (fair-use with source credit))
Quick Answer
A food scale works by bending a metal sensor called a load cell. That bending changes electrical resistance inside the cell. A chip measures the change and converts it to weight.
The display shows the final number. The tare button resets the scale to zero.
Why You Can’t See How It Works, But Should Understand the Parts
Here’s the funny thing about digital scales. The most important part is completely hidden. A spring scale has a visible dial, so you can watch it move.
Digital scales look like solid flat slabs. Nothing appears to happen when you put a tomato on top.
That’s why so many people misuse them without realizing it. They set the scale on a wrinkled towel. They press the platform with their palm to check if it’s on.
They put a hot pot directly on the glass. All of these actions confuse the load cell, and the readings drift.
Understanding the parts gives you a mental picture of what the scale is actually feeling. It’s not feeling the weight like your hand does. It’s feeling a tiny physical deformation in a metal beam.
Once you picture that, the correct usage becomes obvious. Flat surface. No leaning.
No pushing.
Core Explanation: The Load Cell and Strain Gauge at the Heart of Every Digital Scale
The load cell is a small metal block, usually shaped like a rectangle with a notch cut out of the middle. It sits under the platform. When you place something on the scale, the load cell bends by a microscopic amount, usually only a few thousandths of a millimeter.
Glued to that metal block are one or more strain gauges. A strain gauge is a foil pattern that looks like a tiny folded wire. As the metal bends, the foil stretches slightly on one side and compresses on the other.
This changes the electrical resistance of the foil.
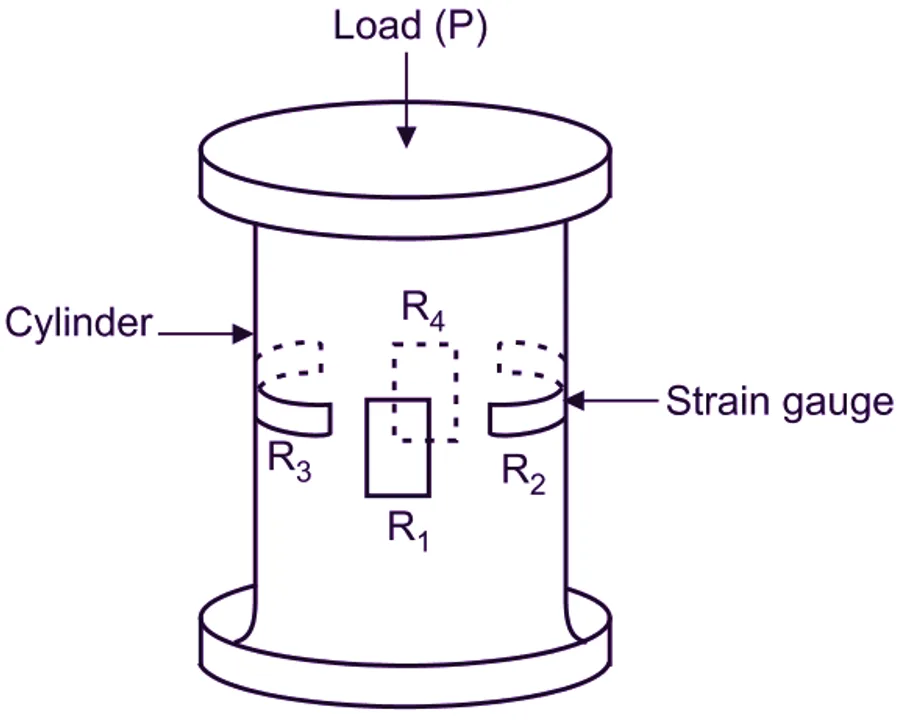
Image source: Bing (Web (fair-use with source credit))
That resistance change is tiny, so it needs amplification. The scale’s microcontroller sends a small voltage through the gauges, arranged in a Wheatstone bridge circuit. The bridge amplifies the difference between the stretched and compressed sides, turning a mechanical bend into a readable electrical signal.
The chip then uses a formula to convert that signal into weight. This all happens in milliseconds. It’s the same technology used in industrial scales, bathroom scales, and even shipping warehouses.
Just miniaturized and calibrated for your kitchen counter.
Why Calibration Matters
Every load cell is slightly different. The metal isn’t perfectly uniform. Manufacturing tolerances vary.
So scale makers install calibration values, either in firmware or via a calibration mode, that map the electrical signal to a real weight. That’s why pressing the calibration button with a known weight, like a 500-gram standard, can restore accuracy over time.
What’s Inside: Key Components and What They Do
Digital food scales have surprisingly few parts. Here are the main components you’d find after removing the housing, organized by their job.
| Component | What It Does |
|---|---|
| Load cell | Bends under weight, creating a measurable strain |
| Strain gauge | Converts strain into electrical resistance change |
| Wheatstone bridge | Measures the tiny resistance difference |
| Microcontroller / amplifier chip | Converts the signal into a weight reading |
| Display | Shows the number in grams, ounces, or pounds |
| Tare button | Zeros the scale and subtracts container weight |
| Platform | Transfers force from the food down to the load cell |
| Rubber feet | Stabilize the scale and prevent rocking |
The power source matters too. Most scales run on coin cell batteries (CR2032) or a pair of AAAs. Some newer models use USB rechargeable batteries.
As of 2026, low-end scales still rely on coin cells, but mid-range models increasingly include USB-C charging as a convenience feature.
Step-by-Step Visual Cues: How to Weigh Like a Pro
The visual cues are everything. The scale doesn’t care what the display says until it’s sitting in a stable environment. Here’s how to set up for reliable readings every time.
- Place the scale on a hard, flat surface. A cutting board or bare countertop works best. Avoid tiles with deep grout lines, wooden cutting boards that flex, or folded kitchen towels.
- Let the scale warm up for a few seconds after turning it on. Most scales display a brief timer before showing zero.
- Put an empty bowl on the platform. Press the tare button once. The display returns to zero, ignoring the container’s weight.
- Add ingredients slowly. Pour in small amounts near the end, because digital scales respond faster than your hand can stop.
- Read the number at eye level. If the scale is on a shelf above you, you might view it at an angle and misread the display.
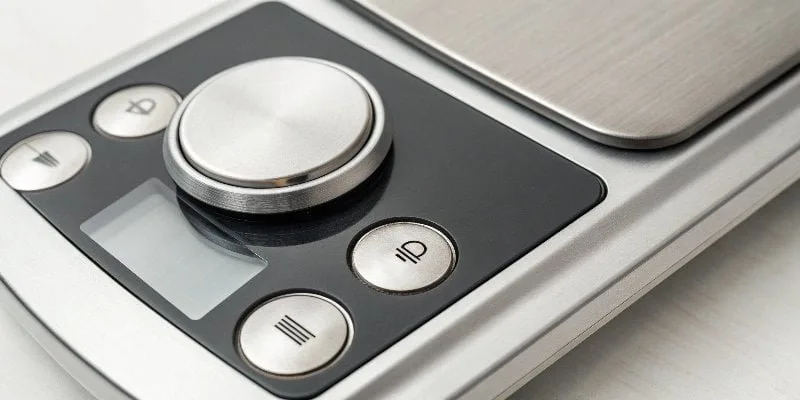
Image source: Bing (Web (fair-use with source credit))
The tare button is the most useful feature on any food scale. It’s also the most misunderstood. Pressing tare doesn’t just reset the number to zero.
It tells the scale to use the current load as the baseline. So if you tare with an empty bowl, the scale measures only what goes into the bowl afterward.
Watching the Reading Settle
Digital scales don’t stabilize instantly. Most take one to two seconds after you place an ingredient. If you’re weighing something that settles, like flour, the number may bounce around as the material compresses.
Wait for the display to stop changing before you record the weight. This small habit improves accuracy more than any other single step. If you’re weighing coffee beans for your morning brew, this patience pays off with a more consistent dose, especially if you’re following a setup like the one in our guide on how to use a coffee grinder.
Similarly, portioning chicken for meal prep becomes far more reliable when you let the scale settle, which pairs well with our method for perfectly juicy chicken in a saucepan. And if you’re measuring pasta for a cozy weeknight dinner, our easy saucepan pasta method works hand in hand with accurate dry measurements.
When you’re done, press the platform down with one finger? Don’t. That pushes the load cell past its resting position and can confuse the zero point.
Just switch the scale off or let it auto-off.
Common Visual Mistakes: Why the Reading Looks Right but Isn’t
The display shows a number, so you assume it’s correct. But several habits quietly produce inaccurate readings. Let’s run through the ones we see most often.
Weighing on a Soft Surface
A scale on a cutting board is fine. A scale on a silicone mat or folded towel is asking for trouble.
The load cell needs a rigid base to bend accurately. Any cushioning absorbs some of the force, and the scale reads lighter than reality. This is the simplest mistake to fix: set the scale directly on a flat, hard countertop.
Pressing or Leaning on the Platform
Every digital scale has a zero point. The load cell is balanced at that point, and the display shows zero.
When you lean your hand or a spoon on the platform, you push the load cell past that balance. The scale then treats your push as the new baseline. Weighing will be off for that entire session until you re-zero.
To avoid this, let the scale rest completely before adding anything.
Adding Hot or Frozen Ingredients
Temperature extremes hurt load cell accuracy. A hot pot directly on the platform can cause thermal drift, where the resistance changes because the metal is expanding, not because of added weight. Frozen items cause the opposite effect.
Let hot ingredients cool for a minute and let frozen items sit on the counter briefly before weighing. The reading will be far more trustworthy.
Ignoring the Tare Offset
The tare button is brilliant, but it only works if the display has returned to zero first. If you press tare while the scale is still drifting, you set a false baseline.
Always press tare after the display settles, then add your ingredient. This is especially useful when you’re using a bowl that’s heavier on one side, because the scale zeroes out the entire container.
Digital vs. Analog: Load Cell Scales vs. Spring Scales
Mechanical spring scales still exist, and some bakers prefer them. The difference comes down to how each one measures force.
An analog scale uses a coiled spring that compresses as you add weight. A needle moves along a numbered dial. Digital scales use a load cell, which we covered earlier.
That load cell detects deformation and converts it into a signal.
Spring scales are cheaper and never need batteries. But they’re far less accurate. Most consumer analog models have a tolerance of 3 to 5 grams, while even budget digital scales stay within 1 gram.
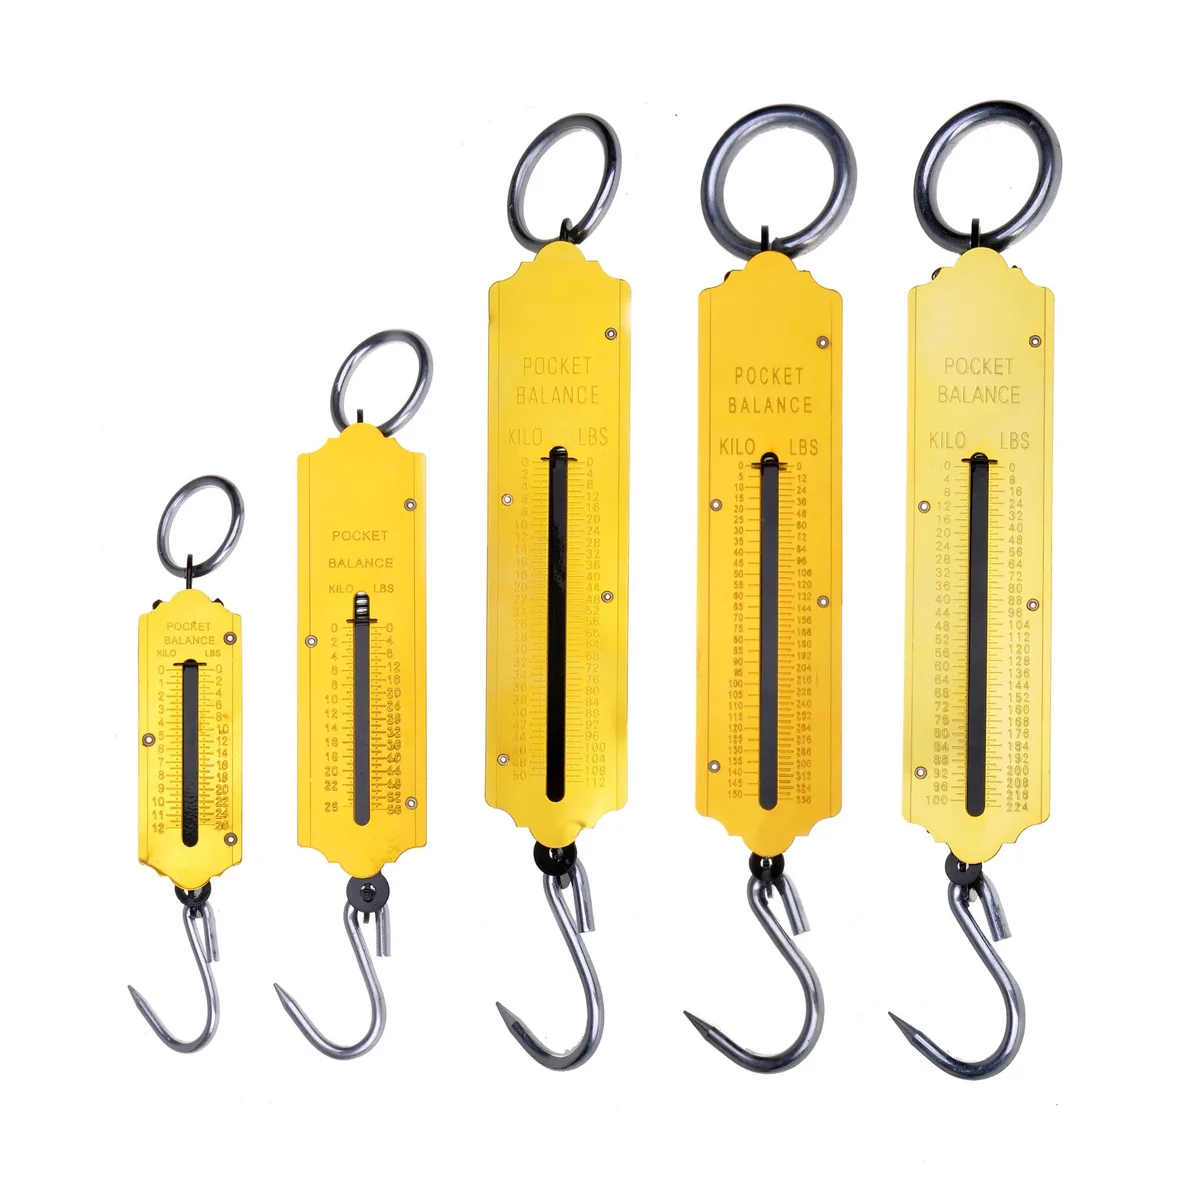
Image source: Bing (Web (fair-use with source credit))
| Feature | Digital Scale | Analog Scale |
|---|---|---|
| Sensor | Load cell with strain gauge | Coiled spring |
| Accuracy | ±0.1g to ±1g | ±3g to ±5g |
| Tare function | Yes | Rarely |
| Battery | Yes | No |
| Calibration | Adjustable | Not possible |
| Durability | Sensitive to impacts | More forgiving |
For baking and macro tracking, digital wins every time. The precision matters, and the tare button alone saves serious cleanup time. Analog scales do have one advantage: they work forever without power.
If you’re weighing things in a survival situation, fine. For a kitchen, go digital.
Smart Scales vs. Standard Scales: A Quick Comparison
Smart scales add Bluetooth or Wi-Fi, connecting to a phone app that records every measurement. The internal mechanism is identical. They still use a load cell, strain gauges, and a microcontroller.
The difference is the software. Smart scales track your intake over time, sync with fitness apps, and recognize different ingredients. Some even show a graph of weight trends.
Standard scales simply weigh things. No app, no setup, no data leaving your kitchen. For most home cooks, that’s all they need.
For someone serious about calorie tracking or consistent baking, the extra data can justify the higher price.
One note: smart scale readings are only as good as the scale’s physical accuracy. The fancy app won’t fix a wobbly platform or a drifting load cell. Weighing on a proper surface matters just as much with a smart scale.
Specs That Actually Matter: Resolution, Capacity, and Calibration
Not all digital scales are equal. Three specifications decide whether a scale suits your needs, and they’re easy to overlook.
Resolution
Resolution is the smallest weight change the scale can display. A 1-gram scale is fine for portion control and general cooking. A 0.1-gram scale is essential for precise baking, coffee dosing, or working with yeast and salt.
Manufacturer specifications confirm that 0.1g scales use more sensitive load cells, which is why they cost more. If you only need to weigh a pound of potatoes, don’t waste money on high resolution.
Capacity
Capacity is the maximum weight the scale can handle before the sensor overloads. Most home food scales top out between 5 kilograms (11 pounds) and 10 kilograms (22 pounds).
Exceeding capacity doesn’t just break the reading. It can permanently bend the load cell, ruining accuracy even for light weights. Check your scale’s limit before weighing large mixing bowls or bulk ingredients.
Calibration
Load cells drift over time. Heat, humidity, and simple aging change their electrical properties. That’s why most digital scales have a calibration mode.
Place the scale on a flat surface, enter calibration mode, and add a precise weight, usually 100g, 500g, or 1kg. The scale adjusts its internal mapping to match. The National Institute of Standards and Technology maintains official standards for these weights, which is why we trust the process.
You can learn more about their measurement standards at NIST.
Pro Tips for Accurate Readings Every Time
You don’t need an expensive lab scale to get reliable numbers. You just need good habits.
Let the Scale Warm Up
Most scales need a few seconds to stabilize after powering on. The display often flashes or shows a countdown. Skip that step and you might see drift for several seconds.
Wait for a solid zero.
Use the Right Bowl
A bowl that’s too wide can block the display. A bowl that’s too heavy can eat up your capacity. For small amounts, use a narrow container so you can see the number as it climbs.
Weigh Ingredients Gradually
Pouring flour from a bag with a heavy hand is a recipe for overshooting. Add in small increments, especially near the final weight. You can always add more, but removing is messy.
Calibrate Twice a Year
Household scales are sturdy, but they’re not permanent. If a recipe suddenly tastes off or your morning coffee weight looks wrong, it might be calibration drift. Check against a known weight twice a year to stay confident.
Keep It Clean
Crumbs under the platform can block movement and affect readings. A quick wipe after each use prevents buildup. If you’re weighing coffee beans for a pour-over, consistent dosing is easy when the scale stays clean, and that pairs well with freshly ground beans from a proper grinder.
Similarly, portioning pasta for a small batch is simpler when your scale reads true, like the approach we use for easy saucepan pasta.
Maintenance and Long-Term Care: Extending Your Scale’s Life
A digital scale is a precision instrument. Treat it with basic care and it will stay accurate for years.
Wipe the platform after each use with a damp cloth. Never submerge the scale in water. Moisture can corrode the load cell contacts and ruin the electronics.
For tough spills, a gentle dish soap on a cloth works fine. If you’re already cleaning up after baking, proper cleaning habits for your bakeware help the whole kitchen work better.
Remove the batteries if you’re storing the scale for months. Battery acid leaks slowly eat through the circuit board. Store the scale in a dry drawer, away from heat and direct steam.
Never drop it, since a hard impact can permanently bend the load cell.
Quick Troubleshooting Guide: Fixing Drift, Lag, and Zeroing Errors
Scales misbehave in predictable ways. Here’s a quick reference for the most common issues.
| Problem | Likely Cause | Quick Fix |
|---|---|---|
| Reading drifts upward | Scale still warming up | Wait for a stable zero |
| Display lags or flickers | Low battery | Replace the batteries |
| Won’t zero properly | Debris under the platform | Clean the feet and platform |
| Overload error | Weight exceeds capacity | Remove weight immediately |
| Inconsistent readings | Surface is soft or uneven | Move to a hard, flat counter |
If the scale shows erratic numbers after all that, try recalibrating. Enter calibration mode and use a known weight, like a 500g standard. If it’s still off, the load cell might be damaged.
In that case, replacement is usually cheaper than repair.
For other small kitchen appliance headaches, our guide on fixing an automatic trash can covers similar troubleshooting logic. The same principle applies: check the power source, clean the sensor, and look for obstructions.
Frequently Asked Questions
Can I weigh liquids on a food scale?
Yes, and it’s more accurate than a measuring cup. Place a container on the scale, press tare to zero it, then pour. Use grams for the most reliable results, since fluid ounces vary by ingredient density.
How often should I calibrate my scale?
Every six months is a good rule of thumb. If you measure something and the weight seems suspicious, verify with a known standard right away. Calibration drift is gradual, so you won’t notice it until a recipe goes wrong.
What does 0.1g resolution mean?
Resolution is the smallest weight change the display can show. A 0.1g scale can detect one-tenth of a gram. That’s useful for espresso dosing, yeast, salt, or any recipe where precision matters.
Why does my scale give different readings on different surfaces?
Soft surfaces absorb some of the force. A folded towel, silicone mat, or flexing cutting board can make the scale read light. Always use a hard, flat surface for consistent numbers.
Is tare the same as resetting the scale?
Not quite. Tare sets the current load as the new zero. So an empty bowl reads 0, and you measure only what you add.
A reset just powers the scale off and on, returning to the factory zero.
Final Verdict: What to Look for Next Time You Buy
A food scale is a simple tool, but it rewards attention. Look for 0.1g resolution if you bake or brew espresso. Make sure the tare button is large and responsive.
A flat, stainless steel platform is easier to clean than a textured one.
Rugged construction matters more than smart features. An app can’t fix a weak load cell. Spend your money on solid hardware, solid calibration, and a brand that publishes its accuracy specs.
Then weigh with confidence.