Skip to content
Keeping your electric skillet clean is more than just a matter of looks—it’s about safety, taste, and making your favorite kitchen tool last longer. Grease and food bits can build up over time, causing uneven heating or even smoke. But with the right approach, cleaning an electric skillet is simple, safe, and doesn’t take much time.
Whether you’re a busy parent, a college student, or someone who just loves a good breakfast, knowing how to clean your electric skillet can make all the difference.
Why Clean Your Electric Skillet Regularly?
Cleaning your electric skillet after every use keeps your food tasting fresh and prevents unwanted smells. Grease buildup can also damage the nonstick surface and heating elements. Over time, dirty skillets can become unsafe—bacteria and old food particles stick around and can get into your next meal.
Plus, regular cleaning helps you spot any damage or issues early, saving you money and hassle.
What You Need Before You Start
To make cleaning easier, gather a few simple items:
- Soft sponge or dishcloth
- Mild dish soap
- Non-abrasive scrubber (for stubborn spots)
- Plastic spatula (helps lift stuck-on food)
- Paper towels or soft drying towel
- Baking soda (for deep cleaning)
- White vinegar (optional, for tough stains)
Never use steel wool or harsh scouring pads, as these can scratch the nonstick surface and ruin your skillet.
Safety First: Unplug And Cool Down
Before you even think about cleaning, always unplug your electric skillet. Water and electricity are a dangerous mix. Let the skillet cool completely. Cleaning while hot risks burns and can warp some parts. If there’s leftover oil, carefully pour it out into a safe container before wiping down the skillet.
Step-by-step: How To Clean An Electric Skillet
Here’s a simple, effective process for everyday cleaning:
1. Remove Food And Oil
After your meal, use a plastic spatula to scrape off any food bits. Pour out extra grease or oil into a container—never down the sink, since it can clog your pipes.
2. Wipe Off Loose Debris
Use a paper towel or soft cloth to wipe away crumbs and loose bits. This makes the main wash much easier.
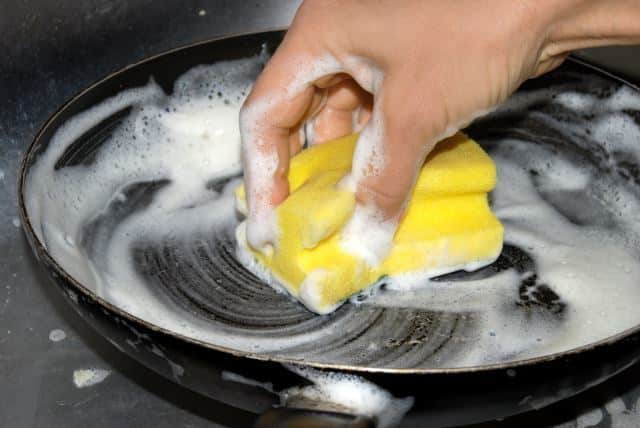
3. Wash The Cooking Surface
Add a few drops of mild dish soap to a damp sponge. Gently clean the skillet’s cooking surface in circles. Pay attention to the corners and edges, where grease often hides. Avoid submerging the skillet in water—most electric skillets have built-in electrical parts that should never get wet.
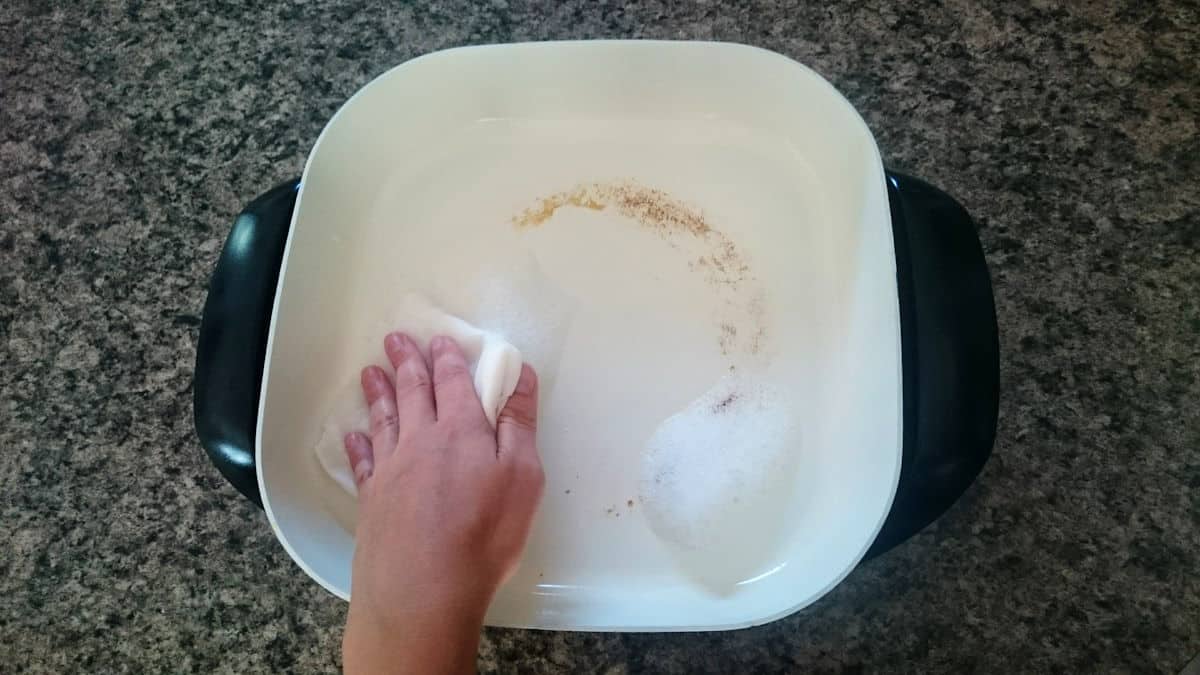
4. Clean The Exterior
Wipe down the outside with a damp cloth. Some oil and splatters land here too. If needed, use a bit of dish soap, then wipe again with a clean, wet cloth to remove soap residue.
5. Rinse And Dry
Use a clean, damp cloth to wipe away any soap from the cooking surface. Dry everything well with a soft towel. Moisture left behind can cause rust or damage electrical parts.
Dealing With Tough Stains And Burnt-on Food
Sometimes, regular cleaning isn’t enough. Here’s how to handle stubborn messes:
Baking Soda Paste
Mix 2 tablespoons of baking soda with a little water to make a paste. Spread it over burnt spots and let it sit for 15-20 minutes. Gently scrub with a non-abrasive pad, then wipe clean.
Vinegar Solution
For hard water spots or sticky residue, dampen a cloth with white vinegar and wipe the surface. Rinse with water and dry thoroughly. Vinegar is safe for most nonstick surfaces but always check your manufacturer’s guidelines.
Avoid Soaking The Whole Skillet
Never put the whole electric skillet in the sink or dishwasher. Water can reach the electrical connections and cause permanent damage.
Cleaning The Power Cord And Controls
Electric skillets usually have a removable power cord with a temperature control unit. Here’s how to safely clean these parts:
- Unplug and let cool.
- Wipe with a dry or slightly damp cloth—never immerse in water.
- Check for food splatters near the connection point.
If you notice any loose wires or damage, stop using the skillet and get it inspected or replaced.
How Often Should You Deep Clean?
For most users, a simple cleaning after each use is enough. However, it’s smart to do a deeper clean once a month, or if you notice food sticking more than usual. Deep cleaning removes hidden grease and keeps your skillet working at its best.
Quick Comparison: Electric Skillet Vs. Traditional Skillet Cleaning
Using an electric skillet is convenient, but the cleaning process has some unique rules. This side-by-side look helps highlight the differences:
| Feature | Electric Skillet | Traditional Skillet |
|---|---|---|
| Can Submerge in Water? | No | Yes (if not electric) |
| Dishwasher Safe? | Rarely | Often |
| Has Electric Parts? | Yes | No |
| Cleaning Frequency | After every use | After every use |
Credit: inthekitch.net
Common Mistakes To Avoid
Even experienced cooks sometimes make cleaning errors. Watch out for these:
- Submerging the skillet: Water can damage the heating element and controls.
- Using harsh cleaners: Steel wool, metal scrubbers, or strong chemicals will scratch and wear out the nonstick surface.
- Not drying well: Moisture can lead to rust, especially on the edges or screws.
- Ignoring the power cord: Grease buildup here can cause electrical problems.
- Skipping regular cleaning: Old oil and food can become almost impossible to remove.
How To Clean Around The Handles And Edges
Food and oil often hide near the handles and edges. Use a toothbrush or a cotton swab dipped in soapy water to reach these tight spots. Rinse with a damp cloth and dry completely. Don’t forget to check underneath the handles if your skillet allows.
Extra Tips For A Longer-lasting Electric Skillet
- Season the nonstick surface: Some skillets benefit from a light wipe of cooking oil after cleaning, especially if the nonstick coating looks worn.
- Store with lid off: Letting air circulate prevents musty smells or moisture buildup.
- Use plastic or wooden utensils: Metal tools can scratch the surface, making cleaning harder.
- Check the manufacturer’s guide: Some brands have specific cleaning advice or warnings.
When To Replace Your Electric Skillet
No matter how well you clean, skillets don’t last forever. Here are signs it’s time for a new one:
- Cracked or peeling nonstick surface
- Heating unevenly or not reaching temperature
- Loose or damaged power cord
- Visible rust or pitting
- Strange smells even after cleaning
If you see these issues, it’s safer and often cheaper to buy a new skillet than to repair an old one.

Credit: themontessoritwinmama.com
Real-world Example: Cleaning A Burnt Electric Skillet
Imagine you accidentally left your skillet on too long and now there’s a black, sticky mess. Here’s a practical way to fix it:
- Unplug and let cool completely.
- Remove loose bits with a plastic spatula.
- Make a baking soda paste and spread it on the burned area.
- Let sit for 20 minutes, then gently scrub.
- Wipe with a damp cloth. Repeat if needed.
- Dry thoroughly before using again.
This method avoids damaging the nonstick surface and gets your skillet ready for your next meal.
Quick Reference: Cleaning Steps At A Glance
Here’s a fast way to remember the key steps:
| Step | What to Do |
|---|---|
| 1 | Unplug and cool the skillet |
| 2 | Remove food and oil |
| 3 | Wipe away loose debris |
| 4 | Wash with soapy sponge |
| 5 | Clean the exterior |
| 6 | Rinse and dry |
You can print these steps and keep them near your kitchen for a quick reminder.
Credit: inthekitch.net
What Beginners Usually Miss
Many new users don’t realize that even small amounts of leftover oil or food can quickly turn into sticky, hard-to-clean messes if not wiped away right after cooking. Another common mistake is forgetting about the power connection area—grease and crumbs can build up here, causing electrical issues or even bad smells. It’s smart to check this spot every time you clean.
Also, some people think nonstick skillets never need oil or seasoning. But a quick wipe of oil after drying can help keep the surface smooth and make future cleaning easier.
Environmental Tips
Don’t pour used oil down your sink. Instead, let it cool and pour it into a sealed container, then throw it in the trash or find a local oil recycling program. This protects your plumbing and the environment.
Benefits Of A Clean Electric Skillet
A well-cleaned skillet heats more evenly and makes food taste better. It also lasts longer, saving you money. Most important, it’s safer—no more worries about old food or bacteria spoiling your next meal.
Where To Learn More
For more tips on kitchen appliance care and cleaning, you can visit Good Housekeeping.
Frequently Asked Questions
How Do I Clean A Really Sticky Or Burnt Area In My Electric Skillet?
Apply a baking soda paste (baking soda and water) to the area, let it sit for 15-20 minutes, then gently scrub with a non-abrasive pad. Repeat if needed and always dry well before the next use.
Can I Put My Electric Skillet In The Dishwasher?
No, you should not put the whole electric skillet in the dishwasher. Water can reach the electrical parts and cause damage. Some removable pans or lids may be dishwasher-safe—check your manual.
Is It Safe To Use Vinegar On A Nonstick Electric Skillet?
Yes, vinegar is generally safe for cleaning nonstick surfaces, but always rinse it off well. For deep cleaning or unusual stains, check your manufacturer’s recommendations first.
What Should I Do If Water Gets Into The Electrical Connection?
Immediately stop using the skillet. Let it dry completely for at least 24 hours in a warm, dry place. If you see any sign of rust, corrosion, or if it doesn’t work properly, have it checked by a professional or replace it.
How Often Should I Deep Clean My Electric Skillet?
Do a basic clean after every use. Deep clean (removing stubborn stains, cleaning handles and edges) once a month or if you notice food sticking more often.
A clean electric skillet doesn’t just look better—it works better and keeps your food tasting great. With these simple steps, you’ll spend less time cleaning and more time enjoying your meals.