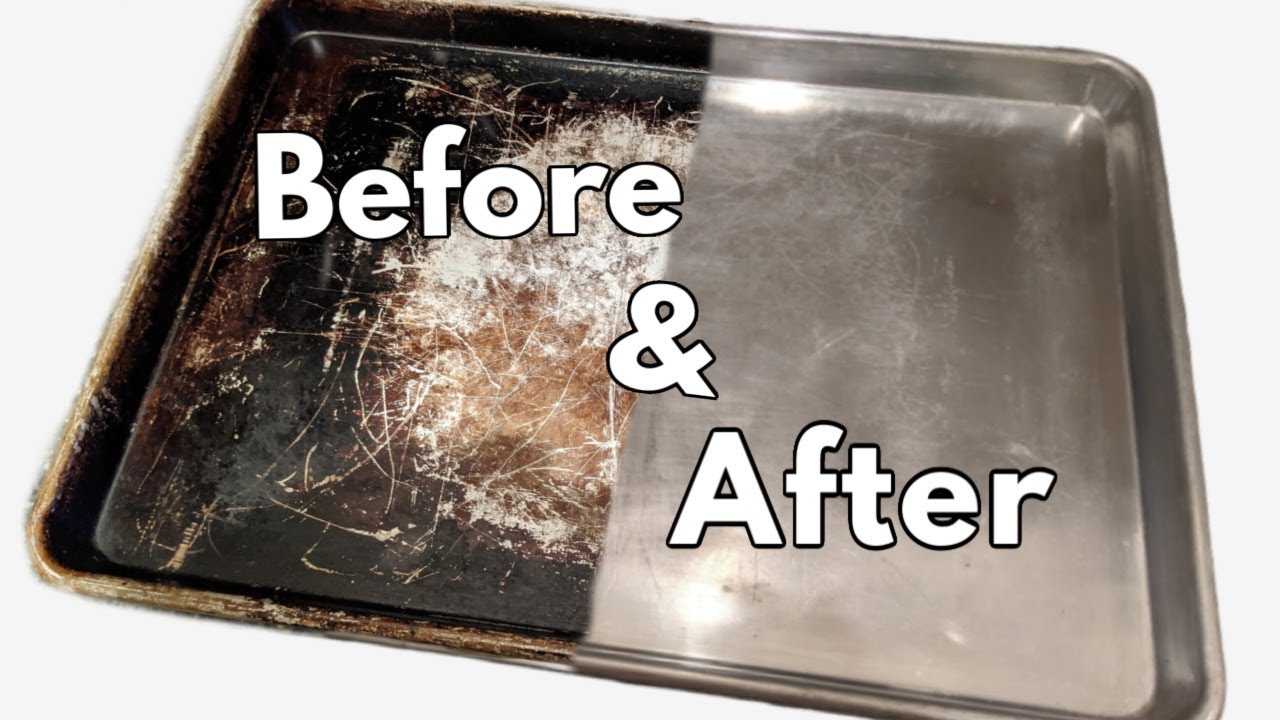
If you love to bake, you know the magic of a good baking sheet. Cookies come out golden, vegetables crisp perfectly, and even frozen fries taste better. But after a few uses, those shiny pans can look rough—stained, sticky, and sometimes even rusty. It’s tempting to toss them or hide them away. Before you do, there’s good news: most baking sheets can be cleaned and made almost new with the right methods.
Cleaning baking sheets isn’t just about looks. Built-up grime can affect how your food cooks, cause unwanted flavors, and even shorten the life of your pans. Some stains are stubborn, but with patience and the right products, you can get impressive results. This guide breaks down the best ways to clean baking sheets—from quick daily upkeep to deep cleaning for the toughest stains. Whether your pans are aluminum, stainless steel, or nonstick, you’ll learn what works, what to avoid, and a few tricks most people miss.
Why Baking Sheets Get So Dirty
It’s easy to blame burnt-on food, but there’s more happening on your pans. Cooking oils break down at high heat and leave a sticky residue. Sugars and syrups caramelize and harden. Even the metal itself can react with food or dish soap, causing discoloration or rust. Over time, these layers build up and become harder to remove.
A clean baking sheet isn’t just about appearance. Greasy residue can cause uneven cooking, make food stick, and transfer off-flavors to your next batch. For people with allergies or food sensitivities, old residue can even be a health risk. Knowing why pans get dirty helps you choose the best cleaning strategy—and avoid making things worse.
Understanding Your Baking Sheet Material
Not all baking sheets are the same. The material affects how you clean them, how stains form, and what products are safe to use. Here’s a quick comparison:
| Type | Main Features | Cleaning Cautions |
|---|---|---|
| Aluminum | Lightweight, heats evenly, affordable | Can discolor with harsh cleaners; avoid dishwasher |
| Stainless Steel | Rust-resistant, durable, shiny | Resists stains but can get streaks; abrasive pads may scratch |
| Nonstick | Easy release, less oil needed | Scratches easily; avoid metal utensils and harsh scrubs |
| Enamel-Coated | Colorful, often more decorative | Can chip; avoid strong impacts and rough scrubbing |
Knowing your pan’s material is key to choosing the right cleaning products and preventing damage.
Everyday Cleaning: Simple Steps For Busy Cooks
Cleaning your baking sheets after every use is the best way to keep them in good shape. Here’s a quick routine that works for most pans:
- Let the pan cool before cleaning. Putting a hot pan in water can warp the metal.
- Wipe off crumbs and loose bits with a paper towel or soft cloth.
- Soak in warm, soapy water for 10–15 minutes. This helps loosen stuck-on residue.
- Use a soft sponge or nylon scrubber to clean the surface. Avoid steel wool or metal brushes, especially for nonstick and aluminum.
- Rinse thoroughly and dry with a clean towel.
Most daily messes—like oil splatters or cookie crumbs—come off with this method. Avoid leaving pans soaking for hours, as it can promote rust or damage nonstick coatings.
Deep Cleaning: Removing Tough Stains And Baked-on Grease
Sometimes, regular washing isn’t enough. Burnt sugar, dark brown patches, or sticky oil need extra effort. Here are the most effective deep-cleaning methods, with tips for each type of pan.
Baking Soda And Vinegar Method
This is a classic for a reason. Baking soda is a gentle abrasive, and vinegar helps break down tough stains.
- Sprinkle a generous layer of baking soda over the dirty spots.
- Pour a small amount of white vinegar over the baking soda. The mixture will fizz—this helps lift grime.
- Let it sit for 30 minutes.
- Scrub gently with a damp sponge or nylon pad.
- Rinse well and dry.
This method is safe for most pans but skip it on nonstick surfaces if your manufacturer warns against abrasive cleaners.
Hydrogen Peroxide And Baking Soda Paste
For older, stubborn stains, try a paste:
- Mix baking soda and hydrogen peroxide to form a thick paste.
- Spread the paste over stains and let it sit for at least 2 hours (overnight for really tough spots).
- Scrub gently, rinse, and dry.
Hydrogen peroxide is a mild oxidizer that breaks down organic stains without harsh fumes.
Cream Of Tartar Trick
Cream of tartar is another gentle option, especially for aluminum pans:
- Mix 1 tablespoon cream of tartar with a few drops of water to make a paste.
- Rub onto stains, let sit 10–15 minutes, then scrub and rinse.
Cream of tartar is less abrasive than baking soda and won’t discolor aluminum.
Commercial Cleaners: When To Use Them
If home remedies don’t work, commercial oven cleaners can help. They’re strong and should be used with caution:
- Wear gloves and work in a well-ventilated space.
- Follow label instructions carefully.
- Rinse pans several times to remove all cleaner.
Never use oven cleaner on nonstick or enamel-coated pans—these surfaces can be damaged or ruined.
Special Care For Nonstick Baking Sheets
Nonstick pans require extra care to avoid scratching or peeling the coating. Here’s how to keep them clean and functional:
- Use only soft sponges or cloths—never steel wool or abrasive pads.
- Wash with mild dish soap and warm water after every use.
- For stubborn stains, make a paste with baking soda and water, apply gently, and rinse.
- Avoid soaking nonstick pans for long periods, as water can seep under the coating.
If the nonstick layer starts to peel or chip, it’s best to replace the pan. Damaged nonstick can release particles into your food.
Rust Removal And Prevention
Rust is common on older baking sheets, especially aluminum and steel pans. While small spots aren’t dangerous, they can grow if ignored.
Removing Rust
- Scrub the area with a paste of baking soda and water using a nylon pad.
- For tough rust, use a mix of equal parts lemon juice and baking soda.
- Rinse and dry thoroughly.
Preventing Rust
- Always dry pans completely before storing.
- Avoid soaking for long periods.
- Store pans in a dry place, not stacked with wet dishes.
Some baking sheets have a natural patina (a dark, seasoned look). This isn’t rust and can actually protect your pan. Only remove true orange or red rust spots.
When To Replace Your Baking Sheets
No cleaning method can fix a warped, deeply scratched, or heavily rusted pan. Here are signs it’s time to buy new:
- Warped shape that doesn’t sit flat
- Deep scratches or gouges, especially on nonstick
- Rust that keeps coming back after cleaning
- Peeling nonstick coating
New pans cook more evenly and are safer for your food. If you bake often, expect to replace basic baking sheets every 2–3 years.
Comparing Cleaning Methods: Efficiency And Safety
Choosing a cleaning method depends on the stain type, your pan’s material, and your time. Here’s a quick comparison to help you decide:
| Method | Best For | Time Needed | Risks |
|---|---|---|---|
| Baking Soda & Vinegar | General stains, grease | 30–45 min | Can dull nonstick if overused |
| Hydrogen Peroxide & Baking Soda | Old, tough stains | 2–8 hours | Not for colored/enamel pans |
| Cream of Tartar | Aluminum, light stains | 15–20 min | None for most pans |
| Oven Cleaner | Severe, baked-on grease | 1–2 hours | Damages nonstick/enamel, strong fumes |
When in doubt, start with the gentlest method. It’s safer for your pans and your hands.
Common Cleaning Mistakes And How To Avoid Them
Even experienced cooks sometimes damage their baking sheets by mistake. Here are the top errors—and how to avoid them:
- Using steel wool on nonstick or aluminum. This causes scratches that trap more dirt and can ruin the finish.
- Putting pans in the dishwasher. Detergents and high heat can discolor aluminum and remove seasoning.
- Soaking for too long. Water can cause rust, especially if pans aren’t dried quickly.
- Using harsh chemical cleaners on coated pans. This can make coatings peel or bubble.
- Storing pans while damp. Always dry completely before stacking or storing.
One non-obvious tip: If you regularly line pans with parchment paper or silicone mats, you’ll reduce stuck-on messes and stains—a simple prevention method many overlook.
How To Keep Your Baking Sheets Looking Like New
A little routine care goes a long way. Here are easy habits that make a big difference:
- Line pans with parchment or silicone baking mats. These create a barrier and reduce cleaning.
- Rotate pans during baking. This prevents hot spots and uneven discoloration.
- Let pans cool naturally before washing to prevent warping.
- Store pans upright or with a towel in between to avoid scratches.
It’s also smart to keep a separate pan for messy jobs like roasting vegetables with a lot of oil, or broiling meat. That way, your “good” pans stay cleaner for longer.
Diy Cleaning Solutions: Safe And Effective Recipes
You don’t need expensive cleaners. Most effective solutions use items you probably have at home. Here are a few safe recipes:
Simple Degreaser
- Mix 1 part white vinegar with 1 part warm water in a spray bottle.
- Spray on greasy pans, let sit 5 minutes, then wipe and rinse.
Heavy-duty Paste
- Combine 3 tablespoons baking soda with enough hydrogen peroxide to make a paste.
- Spread on stains, let sit 2 hours, scrub gently, and rinse.
Lemon Salt Scrub
- Cut a lemon in half, dip in coarse salt, and rub over rust spots.
- Rinse and dry.
These homemade solutions are non-toxic and safe for most surfaces. Just remember: always spot-test on a small area first.
Quick Reference: What To Use And Avoid By Pan Type
To help you remember which tools and cleaners are safe, here’s a simple guide:
| Pan Type | Safe Tools | What to Avoid |
|---|---|---|
| Aluminum | Nylon scrubber, baking soda, cream of tartar | Dishwasher, steel wool, acidic cleaners |
| Stainless Steel | Soft sponge, baking soda, vinegar | Metal scrubbers (can scratch) |
| Nonstick | Soft cloth, mild soap, baking soda paste | Abrasives, oven cleaner, dishwasher |
| Enamel-Coated | Soft sponge, baking soda, gentle cleaners | Metal utensils, harsh chemicals |
This simple chart helps you choose the right cleaning method every time.
When Professional Cleaning Is Needed
Most baking sheets can be cleaned at home, but if you have commercial-grade pans or ones with heavy carbon build-up, professional cleaning might be worth it. Some bakeries use decarbonizing solutions that are not safe for home use. For home cooks, it’s usually more cost-effective to replace an old pan than to pay for specialized cleaning.
If you bake for a living, consider investing in higher-quality pans that resist staining and are easier to clean. Commercial-grade stainless steel pans, for example, stand up to frequent use and cleaning much better than budget options.
Eco-friendly Cleaning And Disposal
If you want to reduce your impact on the environment, stick to simple ingredients like baking soda, vinegar, and lemon. These are biodegradable and safe for your home. Avoid harsh chemical oven cleaners unless absolutely necessary.
When your baking sheet is beyond saving, check if it can be recycled. Most aluminum and steel pans are accepted at local recycling centers, but nonstick and enamel-coated pans often are not. Call your local facility for guidelines.
To learn more about recycling kitchenware, visit the EPA’s recycling resource.
Credit: www.youtube.com
Frequently Asked Questions
How Often Should I Deep Clean My Baking Sheets?
Deep cleaning is recommended every 1–2 months if you bake frequently. For light use, every 3–4 months is enough. If you notice sticky residue, stains, or uneven cooking, it’s time for a deep clean.
Can I Clean Baking Sheets In The Dishwasher?
Most aluminum and nonstick baking sheets should not go in the dishwasher. Dishwasher detergents and heat can cause discoloration, warp pans, or damage nonstick coatings. Stainless steel pans are usually safe, but check the manufacturer’s instructions.
What Is The Safest Way To Clean Nonstick Baking Sheets?
Use mild dish soap and a soft sponge. For stubborn stains, apply a paste of baking soda and water, let sit, then wipe gently. Never use abrasive pads, steel wool, or oven cleaner on nonstick surfaces.
Why Do My Baking Sheets Warp In The Oven?
Warping happens when pans heat up or cool down too quickly. To prevent this, let pans come to room temperature before washing, and avoid sudden temperature changes. Thicker pans are less likely to warp than thin, budget models.
Is It Okay To Use Aluminum Foil On My Baking Sheets?
Yes, aluminum foil can protect your baking sheets from messy foods and make cleaning easier. However, acidic foods (like tomatoes) can react with aluminum. For best results, use parchment paper or a silicone baking mat for most baking jobs.
A clean baking sheet is the secret to better baking and a happier kitchen. With these methods, you’ll get more life from your pans and better results from your recipes. Don’t let stains or rust spoil your next batch—clean smart, and your baking sheets will serve you well for years.