Skip to content
Cleaning your microwave can feel like a tough job, especially when food splatters and stains build up over time. Many people use strong chemicals, but these can leave smells or even harm the appliance. There’s a simpler, safer way: vinegar. This common kitchen ingredient works wonders for cleaning, removing odors, and loosening tough grime. With vinegar, you get a clean microwave without harsh chemicals. In this guide, you’ll learn exactly how to use vinegar to clean your microwave, why it works, and tips for keeping your microwave fresh. Whether your appliance is lightly dirty or covered in stubborn stains, these steps will help you get results.
Why Use Vinegar To Clean A Microwave?
Vinegar is more than just a cooking ingredient. It’s a powerful cleaner that’s safe for both your microwave and your health. Here’s why vinegar is the best choice:
- Natural disinfectant: Vinegar kills many germs and bacteria.
- Loosens tough stains: The acid in vinegar breaks down food residues.
- Removes odors: It neutralizes bad smells, leaving your microwave fresh.
- Affordable and accessible: Almost every kitchen has vinegar. It’s cheap and easy to find.
Many commercial cleaners contain chemicals that can linger or cause allergic reactions. With vinegar, you avoid those risks. Plus, vinegar doesn’t damage the inside of the microwave, so it’s safe for regular cleaning. You’ll also notice that vinegar works quickly, saving time compared to scrubbing with soap.
What You Need: Supplies And Preparation
Before you start, gather these items:
- White vinegar (most effective for cleaning)
- Water
- Microwave-safe bowl
- Sponge or soft cloth
- Toothpick or wooden spoon (optional, for safety)
- Paper towels (for wiping and drying)
- Gloves (optional, for sensitive skin)
White vinegar is preferred because it’s clear and doesn’t leave stains. If you only have apple cider vinegar, it will work, but may leave a slight odor.
A microwave-safe bowl is important. Glass or ceramic bowls are safest. Avoid plastic if possible, as it can melt or warp.
For scrubbing, a soft sponge or cloth prevents scratches on the inside of the microwave. Paper towels help with drying and removing loosened debris.
If your skin is sensitive, wear gloves. Vinegar is mild, but some people get dry skin from repeated contact.
Step-by-step: Cleaning Your Microwave With Vinegar
Cleaning your microwave with vinegar is easy. Follow these steps for best results.
Step 1: Mix Vinegar And Water
- Pour one cup of water into the microwave-safe bowl.
- Add two tablespoons of white vinegar.
- Mix gently.
This ratio is effective for loosening stains and neutralizing odors. If your microwave is very dirty, add an extra tablespoon of vinegar.
Step 2: Prepare The Bowl For Safety
- Place a toothpick or wooden spoon in the bowl.
- This prevents superheating, which can cause water to boil explosively.
Microwaves heat water quickly. If there’s nothing in the bowl, sometimes water can “explode” when disturbed. The toothpick or spoon gives bubbles a place to form, making it safer.
Step 3: Heat The Vinegar Solution
- Place the bowl in the center of the microwave.
- Set the microwave to high power.
- Heat for 5–10 minutes, depending on how dirty your microwave is.
For light cleaning, 5 minutes is enough. For tough stains, 10 minutes works better.
You’ll see steam filling the microwave. This steam softens grime and loosens food particles.
Step 4: Let The Steam Work
- Leave the microwave closed for 2–3 minutes after heating.
- The steam continues to work, making cleaning easier.
Don’t open the door right away. The hot steam is still working, and it needs a few minutes to soften the dirt. Waiting also lets the bowl cool slightly, so you won’t burn yourself.
Step 5: Remove The Bowl Carefully
- Open the microwave door.
- Use oven mitts or a towel to remove the bowl (it will be hot).
Be cautious—hot bowls and steam can cause burns. Always use protection.
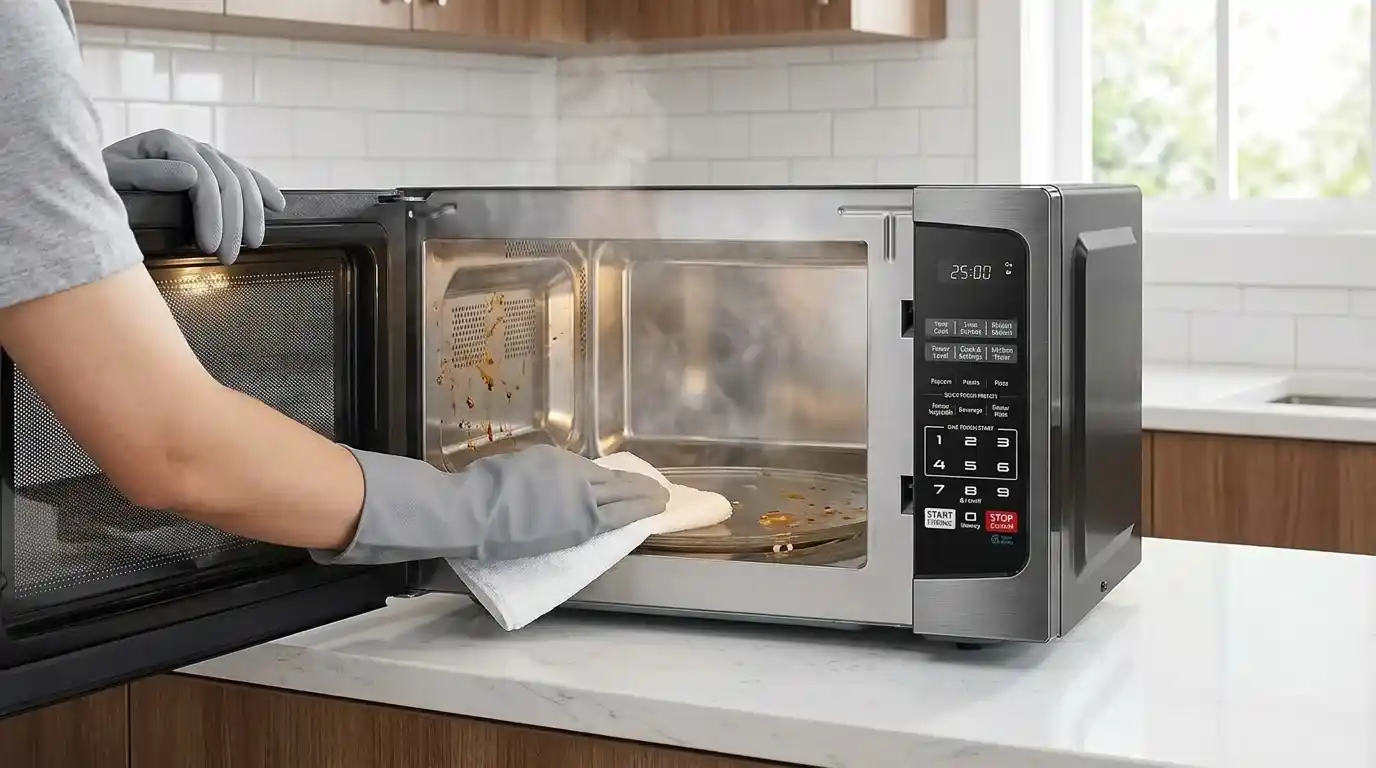
Step 6: Wipe The Microwave Interior
- Use a sponge or soft cloth to wipe the inside.
- Start with the ceiling and sides, then clean the turntable and floor.
- For tough spots, dip your cloth in the vinegar solution and scrub gently.
Most stains and splatters will wipe away easily. If some spots remain, repeat the heating process or scrub with extra vinegar.
Step 7: Dry And Finish
- Use paper towels to dry the interior.
- Leave the microwave door open for a few minutes to air out.
Drying prevents new smells and keeps your microwave fresh. Leaving the door open also lets any remaining vinegar odor escape.
Practical Tips For Better Results
Cleaning with vinegar is simple, but a few tricks can make it even more effective.
- Repeat for heavy build-up: If stains are tough, run the vinegar heating process twice.
- Add lemon juice: Mix a tablespoon of lemon juice with vinegar for extra cleaning power and a fresh scent.
- Clean the microwave turntable separately: Remove it and wash with soap and water.
- Use a toothbrush for corners: A soft brush reaches tight spots.
- Check for hidden grime: Look under the turntable and in vents.
Many people miss the corners or the area under the turntable. These spots collect food, leading to bad smells or even mold. Always check and clean them.
If your microwave has a strong odor, add baking soda after cleaning. Place an open box inside for a few hours to absorb smells.
How Vinegar Works: The Science Behind Cleaning
Vinegar contains acetic acid, which is strong enough to break down food residues, grease, and some bacteria. When heated, vinegar turns into steam, spreading throughout the microwave. This steam softens dried food, making it easy to wipe away.
Here’s a quick comparison between vinegar and commercial cleaners:
| Cleaning Method | Effectiveness | Safety | Cost |
|---|---|---|---|
| White Vinegar | High | Very Safe | Low |
| Commercial Cleaner | High | Moderate (chemicals) | Medium to High |
| Baking Soda | Moderate | Very Safe | Low |
Vinegar is both effective and safe. It’s also much cheaper than buying specialized cleaners. You don’t need to worry about dangerous fumes or residue.
Common Mistakes To Avoid
Even with vinegar, some mistakes can make cleaning harder or unsafe.
- Using too much vinegar: More is not always better. Excess vinegar can cause strong odors and may leave a sticky residue.
- Forgetting the toothpick or spoon: Always use one to prevent superheating and possible boiling explosions.
- Using a plastic bowl: Plastic can melt or warp, especially during long heating. Use glass or ceramic.
- Not letting the steam work: Opening the door too soon stops the steam from loosening grime.
- Scrubbing too hard: Vigorous scrubbing can scratch the microwave interior. Use gentle pressure.
- Skipping the turntable: The turntable collects spills. Remove and wash it separately.
Many beginners overlook the importance of letting steam sit after heating. The extra 2–3 minutes make cleaning much easier. Some also forget to clean under the turntable, leading to hidden dirt and smells.
:max_bytes(150000):strip_icc()/How-to-Clean-Microwave-Main-Image-2000-eebff6c60028494d998ed6a646550ec1.jpg)
Credit: www.allrecipes.com
Comparing Cleaning Methods For Microwaves
How does vinegar cleaning compare to other popular methods? Here’s another useful comparison:
| Method | Time Needed | Odor Removal | Best For |
|---|---|---|---|
| White Vinegar | 10–15 min | Excellent | Stains, odors, routine cleaning |
| Lemon Juice | 10–15 min | Good | Fresh scent, light stains |
| Baking Soda Paste | 20 min | Moderate | Heavy stains |
| Commercial Spray | 10–20 min | Variable | Heavy grime, quick cleaning |
Vinegar stands out for routine cleaning, odor removal, and stain softening. Lemon juice is helpful if you want a fresh scent. Baking soda is good for tough stains, but takes longer. Commercial sprays work fast, but can leave chemical smells.
How Often Should You Clean Your Microwave?
Microwaves should be cleaned once a week if used daily. If you only use it occasionally, clean it every two weeks. Wipe up spills immediately to prevent stains.
Frequent cleaning keeps your microwave safe and extends its life. Food left inside can attract bacteria and even cause smoke or fire. Regular vinegar cleaning prevents these problems.
If your microwave smells bad or looks dirty, clean it right away. Waiting makes stains harder to remove.
Extra Benefits: Vinegar Beyond Cleaning
Vinegar offers more than just cleaning. Here are extra benefits:
- Deodorizing: Vinegar neutralizes strong food smells.
- Disinfecting: It kills germs, making your microwave safer.
- Preventing mold: Regular use keeps mold from forming in damp corners.
Some people even use vinegar steam to freshen the whole kitchen. After cleaning, the air smells cleaner, and food odors disappear.
Troubleshooting: What If Stains Don’t Come Off?
Sometimes, microwaves have burnt-on stains or old spills. If vinegar alone doesn’t work, try these steps:
- Mix baking soda with water to make a paste.
- Spread the paste on tough stains.
- Let sit for 10 minutes.
- Scrub gently with a sponge.
If stains are still there, repeat the vinegar steam process. For very stubborn spots, use a lemon juice and vinegar mix.
Don’t use metal scrubbers or harsh chemicals. They can damage the microwave’s surface.
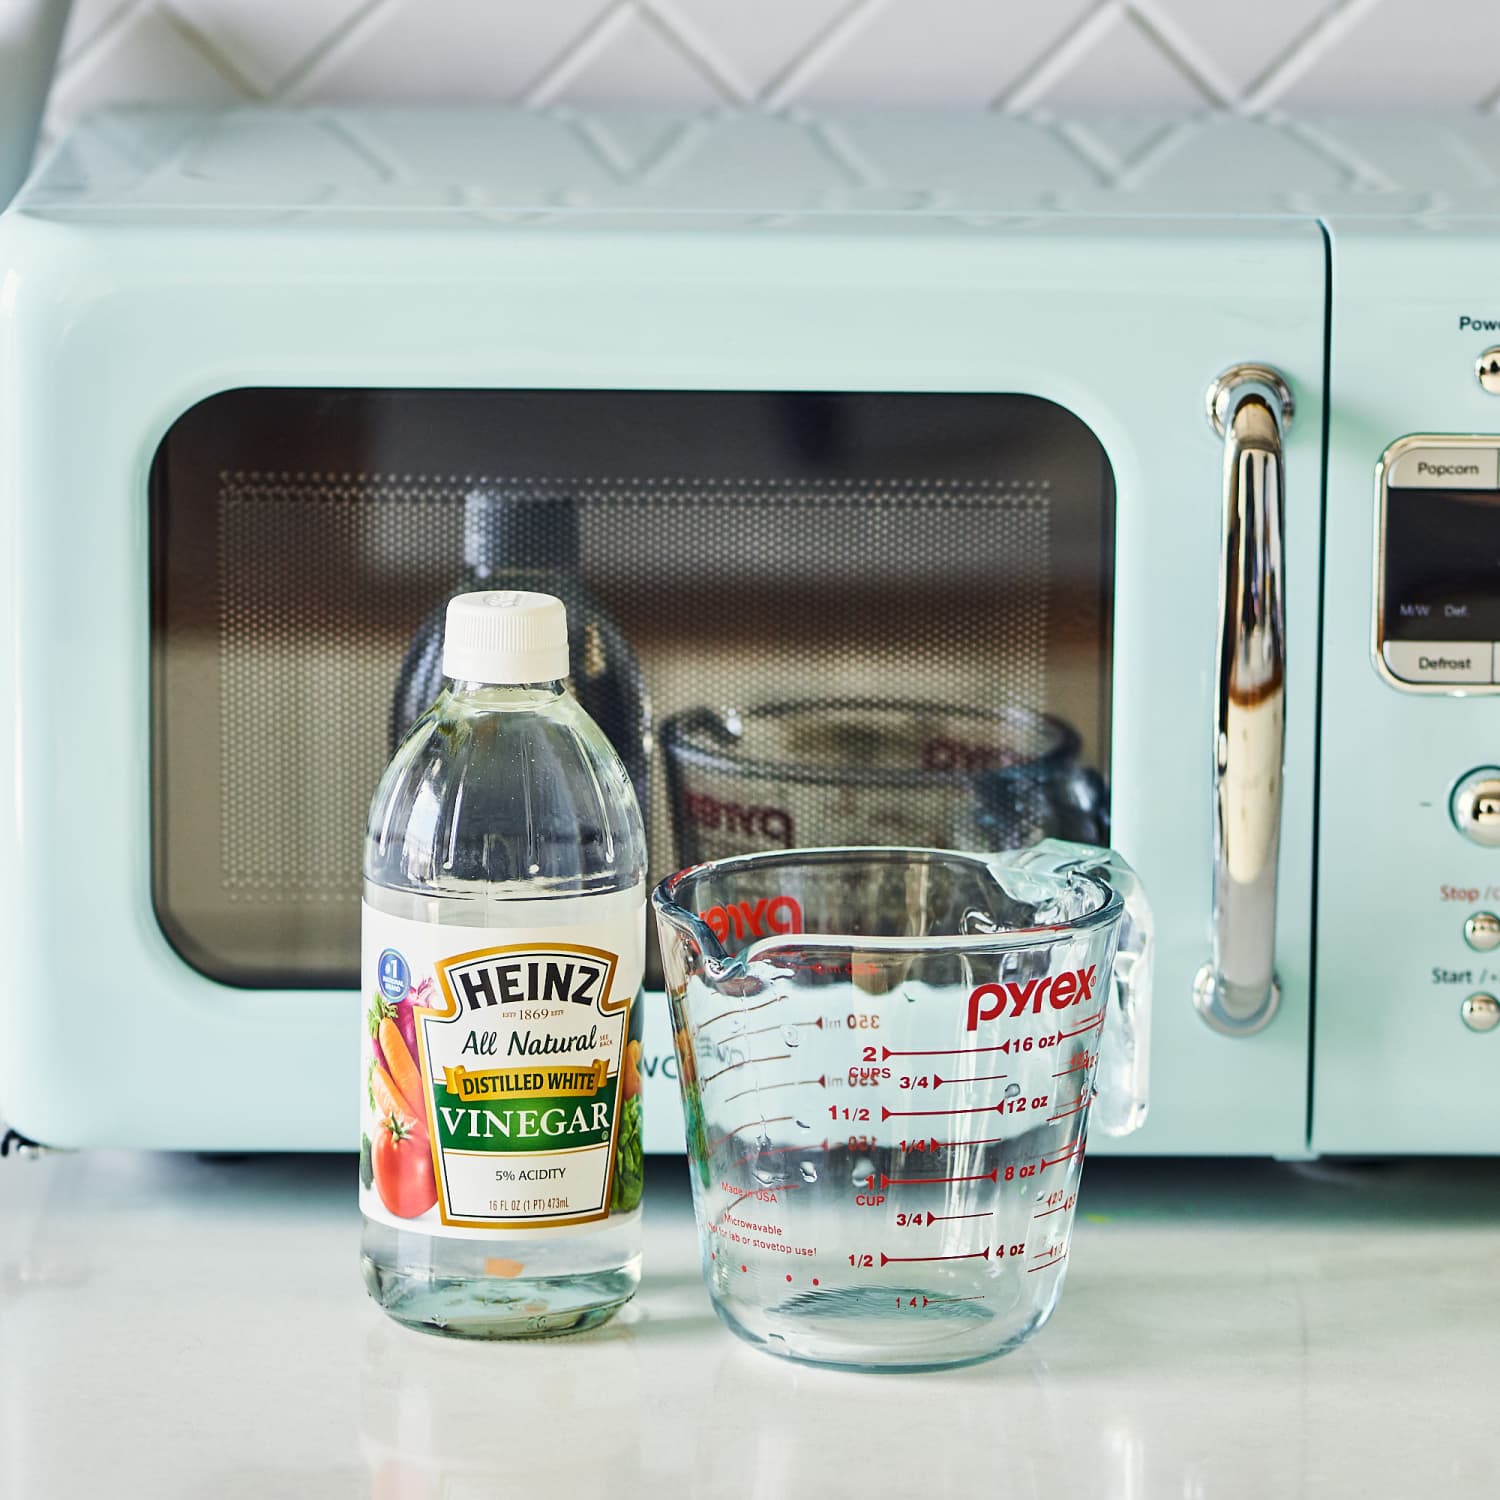
Credit: www.thekitchn.com
Data: Microwave Cleaning Habits
A survey by the American Cleaning Institute found:
- 65% of households clean their microwave monthly or less.
- Only 30% use natural cleaners like vinegar.
- 58% reported food odors as the main reason for cleaning.
This shows that most people clean their microwaves less than needed. Using vinegar can encourage more frequent, safer cleaning.
Safety Tips For Microwave Cleaning
Cleaning a microwave is easy, but safety matters.
- Always use oven mitts when removing hot bowls.
- Keep children away during cleaning.
- Don’t use metal inside the microwave.
- Make sure the bowl is microwave-safe.
If you have allergies, ventilate the kitchen after cleaning. Vinegar is safe, but strong odors can bother sensitive people.
Keeping Your Microwave Clean Longer
After cleaning, you can keep your microwave fresh by:
- Covering food: Use lids or microwave-safe covers to prevent splatters.
- Wiping spills immediately: Don’t let food dry inside.
- Using baking soda: Place an open box inside to absorb odors.
- Cleaning weekly: Regular cleaning stops stains from building up.
Most people wait until their microwave is very dirty. Instead, clean a little each week. This prevents tough stains and bad smells.
Vinegar Cleaning For Different Microwave Types
Microwaves come in many shapes and sizes. The vinegar method works for:
- Countertop microwaves
- Over-the-range microwaves
- Built-in microwaves
The steps are the same for all types. Just check your manual for any special instructions. Some microwaves have sensitive surfaces or hidden vents—clean these carefully.
If your microwave is very old, test vinegar on a small area first. Rarely, older models may react to acid.
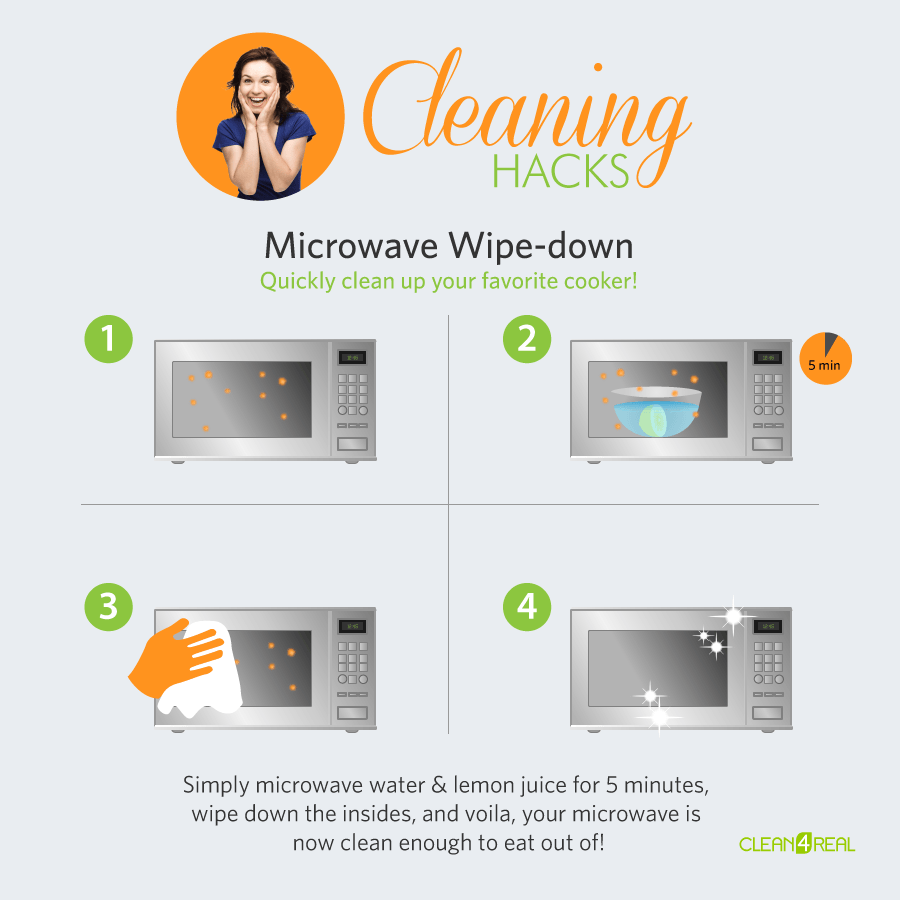
Credit: www.clean4real.com
Eco-friendly Cleaning: The Environmental Impact
Using vinegar is not only good for your microwave, it’s also good for the planet.
- Biodegradable: Vinegar breaks down naturally.
- No toxic waste: Unlike commercial cleaners, vinegar doesn’t pollute.
- Low packaging waste: Buy vinegar in bulk to reduce plastic.
Many people don’t realize that cleaning products can harm the environment. Vinegar is safe for drains and doesn’t leave harmful residues.
Real-life Example: How Vinegar Saved A Microwave
A college student spilled spaghetti sauce in her microwave and left it for weeks. The stains were tough and the smell was terrible. She tried scrubbing with soap, but nothing worked. After using the vinegar steam method, the stains wiped away easily, and the smell disappeared.
This example shows that even neglected microwaves can be cleaned with vinegar. It’s a reliable solution for busy people.
Comparing Vinegar Types For Cleaning
Not all vinegars work the same. Here’s a quick guide:
| Type of Vinegar | Cleaning Strength | Odor | Cost |
|---|---|---|---|
| White Vinegar | High | Low | Low |
| Apple Cider Vinegar | Moderate | Moderate | Medium |
| Wine Vinegar | Low | High | High |
White vinegar is best for cleaning. Apple cider vinegar works, but may leave a stronger smell. Wine vinegar is not recommended—it’s expensive and less effective.
Where To Learn More About Natural Cleaning
If you want to learn more about natural cleaning methods and safety, check out the Environmental Protection Agency website: EPA Safer Choice. This resource helps you find safe products and tips for eco-friendly cleaning.
Frequently Asked Questions
How Often Should I Clean My Microwave With Vinegar?
For daily use, clean your microwave with vinegar once a week. If you only use it occasionally, clean every two weeks. Always wipe up spills right away to prevent tough stains.
Can I Use Apple Cider Vinegar Instead Of White Vinegar?
Yes, you can use apple cider vinegar. It works almost as well, but may leave a stronger odor. White vinegar is preferred for its mild scent and better cleaning power.
Is It Safe To Clean A Microwave With Vinegar?
Absolutely. Vinegar is safe for both you and your microwave. Just use a microwave-safe bowl and avoid metal. Always let the steam sit before opening the door to prevent burns.
What If My Microwave Still Smells After Cleaning?
If the smell remains, place an open box of baking soda inside for a few hours. Baking soda absorbs odors. You can also repeat the vinegar steam process or add lemon juice for a fresh scent.
Can I Use Vinegar To Clean Other Kitchen Appliances?
Yes, vinegar is great for cleaning coffee makers, refrigerators, and dishwashers. Always check the manual before using vinegar on sensitive surfaces.
Cleaning your microwave with vinegar is simple, safe, and effective. With these steps, you’ll enjoy a spotless appliance and a fresher kitchen. Regular vinegar cleaning prevents tough stains, bad smells, and even extends the life of your microwave. Try this method today and discover how easy kitchen cleaning can be.