Deep cleaning your floors with a mop is more than just a quick swipe. It’s a methodical process that can transform dull, dirty surfaces into sparkling clean spaces. Whether you have tile, hardwood, laminate, or vinyl, a proper deep clean removes hidden grime, bacteria, and allergens.
Many people mop without much thought, but with the right approach, your floors can look and feel truly fresh.
In this guide, you’ll learn how to deep clean floors step-by-step, discover tips for different floor types, and understand the best tools and cleaning solutions. You’ll also find practical advice on avoiding mistakes and maintaining your floors after cleaning. With some attention and the right strategy, you can make your floors shine like new and enjoy a healthier, more pleasant home.
Why Deep Cleaning Floors Matters
Everyday mopping only removes surface dirt. Over time, dust, grease, and bacteria build up in cracks and grout lines. Deep cleaning:
- Removes stubborn stains that regular mopping can’t handle.
- Eliminates bacteria and allergens hidden in corners and seams.
- Extends floor life by preventing build-up that wears down surfaces.
- Improves appearance and shine, making your home feel fresher.
According to the EPA, indoor air quality can be affected by floor contaminants. Regular deep cleaning helps keep your environment healthier. For families with young children who play on the floor, or people with allergies, this step is especially important.
Floors that look clean can still hide invisible irritants, so periodic deep cleaning isn’t just about looks—it’s about health and comfort, too.
Essential Tools And Supplies
Before you start, gather the right tools. Using the proper equipment makes deep cleaning faster and more effective. Investing in good-quality tools can save time and effort, and also protects your floors from accidental damage.
Recommended Tools
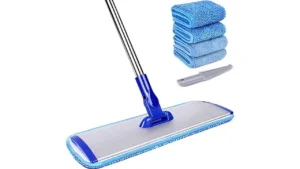
- Microfiber mop – Traps dirt better than cotton and is less likely to scratch surfaces.
- Bucket – Preferably with two compartments (clean/dirty water) to avoid spreading dirt.
- Scrub brush – For grout, corners, and stubborn spots that need extra attention.
- Vacuum or broom – Removes loose debris, pet hair, and dust before mopping.
- Floor cleaner – Choose based on floor type for best results.
- Gloves – Protect your hands from harsh chemicals and hot water.
Some people also use knee pads for comfort if scrubbing by hand, and a small detail brush for tight spaces. Don’t underestimate the value of good lighting—being able to see grime in corners makes a big difference.
Choosing The Right Mop
Different mops suit different floors. Here’s a quick comparison:
| Mop Type | Best For | Advantages | Disadvantages |
|---|---|---|---|
| Microfiber Flat Mop | Hardwood, laminate | Efficient, washable pads | Not ideal for heavy grime |
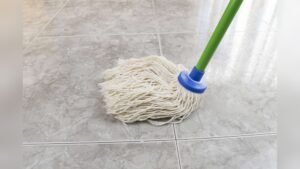
| String Mop | Tile, vinyl | Good for scrubbing | Harder to wring out |
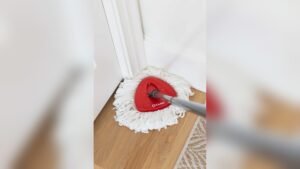
| Sponge Mop | Tile, linoleum | Absorbs spills well | Can leave streaks |
If you have a large area, consider a mop with a telescopic handle to reduce strain. For people with limited mobility, spray mops can be helpful, but check that the cleaning solution is suitable for your floors.
Cleaning Solutions
Choose a cleaning solution that’s safe for your floors. Always check the label. For hardwood, avoid harsh chemicals. For tile, you can use stronger cleaners. A homemade mix (warm water and a few drops of dish soap) works for most types.
For tough stains on vinyl or tile, a mix of water, dish soap, and a splash of white vinegar can help. However, always spot test first to avoid damage. Avoid bleach unless dealing with mold, and never mix cleaning chemicals.
If you’re sensitive to fragrances, look for unscented or plant-based solutions.
Credit: ecoactions.homedepot.com
Step-by-step Deep Cleaning Process
Let’s break down the deep cleaning process. Each step ensures maximum cleanliness and care. Take your time with each phase—the results are worth the effort.
1. Clear And Prepare The Area
Remove furniture, rugs, and objects. Sweep or vacuum the floor thoroughly. This prevents dirt from spreading during mopping.
Don’t forget to check under tables and behind doors for forgotten debris. Small items like toys, paper clips, or coins can scratch floors if caught under a mop. If you have baseboards, give them a quick dusting with a dry cloth.
Preparation takes a few extra minutes but makes mopping far more effective.
2. Mix Your Cleaning Solution
Fill your bucket with warm water and the right cleaner. Follow the instructions for dilution. Too much soap can leave residue.
If your water is hard (contains lots of minerals), consider using distilled water for the final rinse to prevent streaks. Mix only as much solution as you’ll use in one session—old water can breed bacteria.
3. Pre-treat Stains And Grime
Look for sticky spots or stains. Apply a small amount of cleaner directly and let it sit for a few minutes. Use a scrub brush for tough areas, especially grout lines or corners.
For dried spills, a plastic scraper can help lift residue without scratching. In kitchens, greasy spots might need a degreasing solution. Don’t rush this step—letting the cleaner soak in loosens dirt, making mopping much easier.
4. Mop Using The Correct Technique
Dip the mop in the solution, wring it out well. Start at one corner and work toward the exit. Mop in small sections and rinse the mop often.
For best results:
- Mop in an S-shaped pattern to cover more area and avoid pushing dirt.
- Avoid soaking the floor, especially on wood or laminate.
- Change water when dirty—if it looks cloudy, it’s time to refresh.
For large rooms, work in grids to avoid missing spots. Overlap strokes slightly so you don’t leave streaks or residue. If you find your mop isn’t picking up dirt, switch to a fresh pad or rinse thoroughly.
5. Rinse And Remove Residue
After mopping, refill your bucket with clean water. Go over the floor again to remove any soap residue. This is especially important for tile and laminate.
If you skip this step, sticky floors can attract more dirt quickly. For textured tiles, a second rinse with a microfiber cloth works wonders. If you use a homemade cleaner, rinsing also helps protect the floor’s finish.
6. Dry The Floor
Use a clean, dry mop or towel to absorb excess moisture. For hardwood, drying is crucial to avoid warping.
Open windows or use fans to speed up drying. On humid days, take extra care—dampness can linger. If cleaning in winter, ensure heated air circulates to prevent floor damage. Walking on damp floors can leave footprints, so keep the area clear until completely dry.
Tips For Different Floor Types
Not all floors need the same care. Here are practical tips for deep cleaning various surfaces.
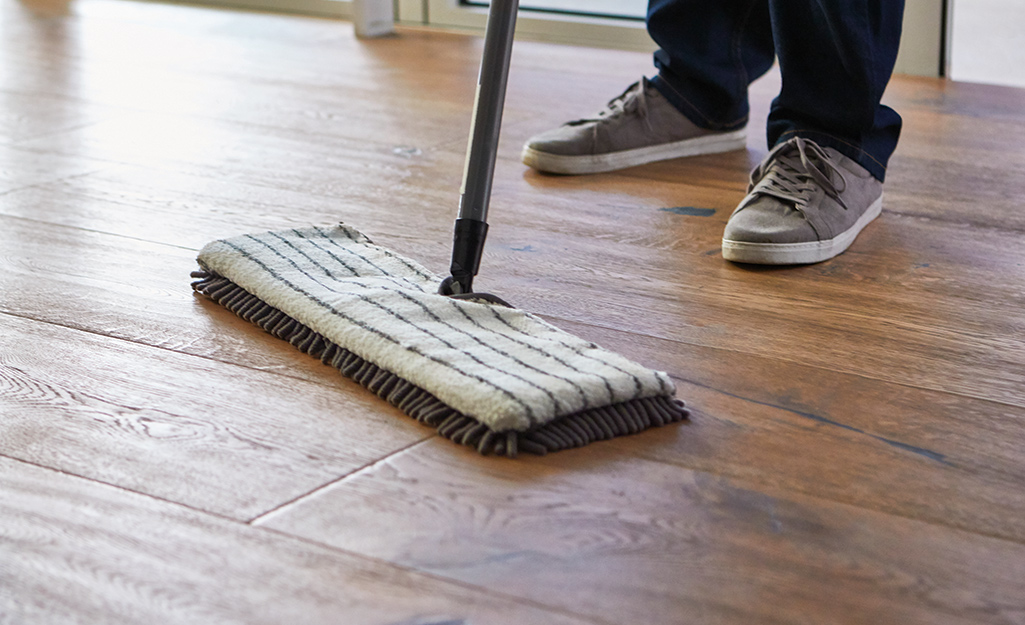
Hardwood Floors
- Use minimal water to prevent damage—damp, not wet, is key.
- Microfiber mops are safest for protecting the finish.
- Avoid vinegar or harsh chemicals, which can dull the surface.
- If you have waxed wood, use only products labeled as safe for waxed floors.
Tile Floors
- Scrub grout lines with a brush to remove stains and prevent mold.
- Use a stronger cleaner for tough stains, but rinse well to avoid chemical residue.
- Rinse well to prevent streaks and keep tiles shiny.
- Seal grout lines once or twice a year for easier future cleaning.
Laminate Floors
- Avoid excessive water; moisture can cause swelling and warping.
- Use gentle cleaners—strong chemicals can strip the finish.
- Dry quickly to prevent swelling.
- For scuff marks, a pencil eraser can sometimes remove them without scratching.
Vinyl Floors
- Mop with warm water and mild soap for regular maintenance.
- Avoid abrasive tools, which can scratch soft vinyl.
- Rinse to prevent dullness and streaks.
- For dents or impressions, use a hairdryer on a low setting to gently warm and lift the area.
Here’s a comparison of cleaning frequency for each floor type:
| Floor Type | Deep Clean Frequency | Special Considerations |
|---|---|---|
| Hardwood | Every 1–2 months | Protect finish, dry fast |
| Tile | Monthly | Scrub grout |
| Laminate | Every 2 months | Limit water |
| Vinyl | Monthly | Gentle soap |
If you’re unsure about your floor type, check with the manufacturer or installer before using new products or tools.
Common Mistakes To Avoid
Even experienced cleaners make errors that can damage floors or waste effort. Here are mistakes to watch out for:
- Using too much water – Can cause warping, especially on wood and laminate.
- Skipping pre-cleaning – Dirt gets smeared instead of removed, reducing cleaning power.
- Wrong cleaning solution – Damages finish or leaves residue that attracts more dirt.
- Not rinsing the mop – Spreads dirty water back onto the floor.
- Ignoring corners – Bacteria hides in edges and under cabinets.
Many beginners overlook rinsing after mopping, which leaves floors sticky or dull. Another common oversight is not changing the water frequently; dirty water just spreads grime. Using the same mop pad for too long is also a mistake—once it’s saturated, it can’t clean effectively.
How To Maintain Floors After Deep Cleaning
To keep your floors clean longer, adopt simple habits:
- Sweep or vacuum daily to pick up crumbs, dust, and pet hair.
- Wipe spills immediately to prevent stains and water damage.
- Use doormats at entrances to trap dirt and moisture.
- Mop high-traffic areas weekly to avoid heavy buildup.
For hardwood, consider applying a floor polish every few months to restore shine. Tile floors benefit from periodic grout sealing. These steps reduce the need for frequent deep cleaning.
Here’s a quick comparison of mop maintenance tips:
| Tip | Benefit | How Often |
|---|---|---|
| Wash mop pads | Removes bacteria | After each use |
| Replace mop head | Improves cleaning | Every 3–6 months |
| Clean bucket | Prevents mold | Weekly |
Store cleaning products out of reach of children and pets. Hang mops to air-dry—leaving them in the bucket can cause mildew and odors.
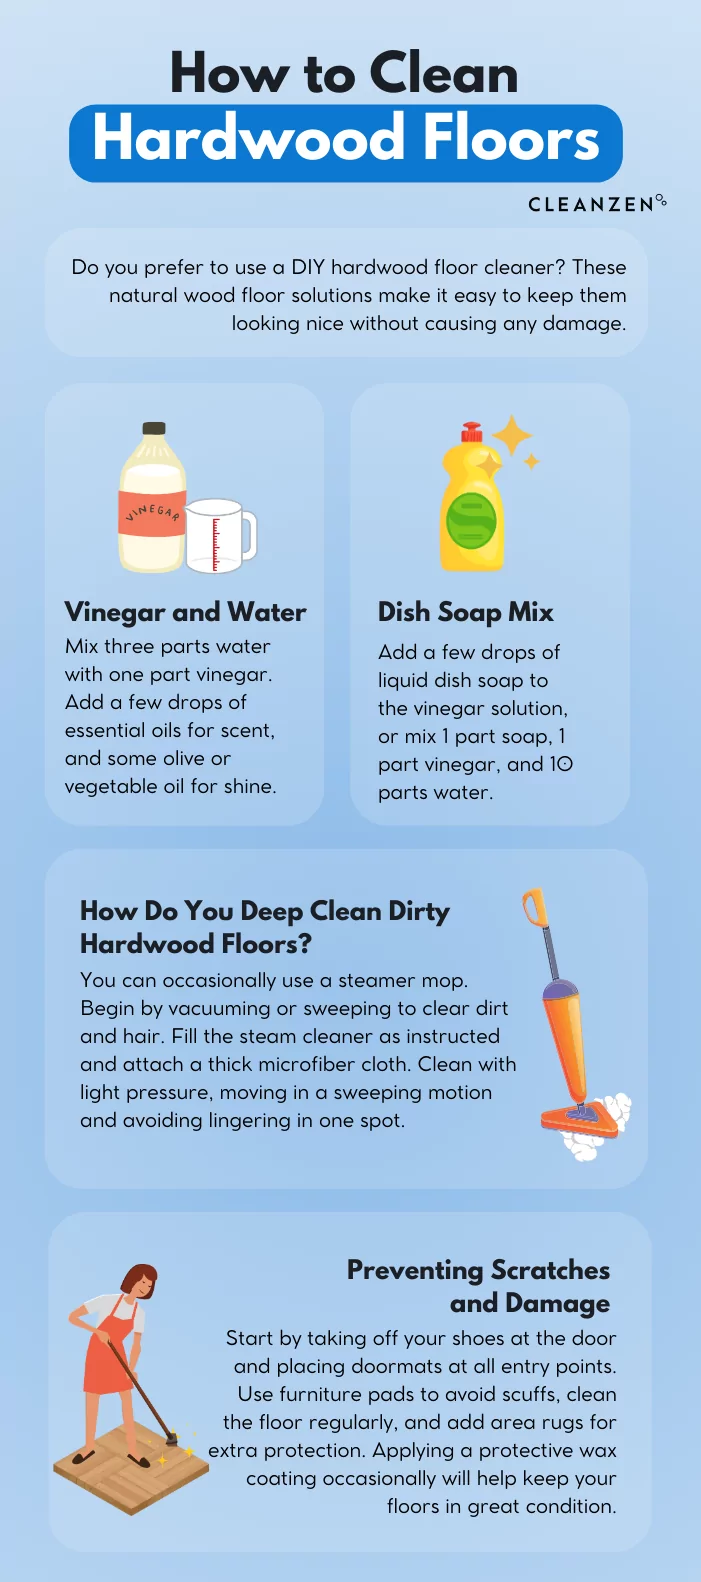
Credit: cleanzen.com
Non-obvious Insights For Better Floor Cleaning
Many people miss these advanced tips:
- Mop with hot water for grease removal, but only if the floor can handle it (avoid on laminate).
- Add a splash of rubbing alcohol for faster drying and shine, especially on tile and vinyl.
- Rotate mop pads during cleaning for larger areas; this keeps the mop effective and avoids spreading dirt.
If you have pets, use an enzyme-based cleaner for accidents. It removes odors and bacteria more effectively than regular soap. Also, cleaning in natural daylight can help you see spots you might miss under artificial lighting.
Another trick: For heavy-traffic areas, use two buckets—one for rinsing and one for fresh solution. This prevents dirt from mixing with clean water and improves overall results.
Safety Precautions
Cleaning products can sometimes irritate skin or cause respiratory issues. Always wear gloves, and ensure good ventilation. If you use strong chemicals, keep children and pets away from the area until the floor is dry.
If you’re sensitive to fumes, choose unscented or low-VOC products. Avoid mixing different cleaners, as some combinations can produce harmful gases.

Credit: us.e-cloth.com
When To Call A Professional
Some deep stains or damaged floors may require expert help. Professional cleaners use steam, industrial scrubbers, or special chemicals. If you notice mold, deep scratches, or stubborn stains, consider calling a service.
Older homes may have floors with finishes that need special care. Professionals can often restore shine and cleanliness without risking damage.
Frequently Asked Questions
How Often Should I Deep Clean My Floors With A Mop?
Most homes need deep cleaning every 1–2 months, depending on foot traffic and floor type. Kitchens and entryways may need monthly cleaning, while bedrooms can go longer. Families with pets or young children may need to clean more often.
Can I Use Vinegar To Clean All Floors?
Vinegar is safe for tile and vinyl but can damage hardwood and laminate. It’s best to use a floor-specific cleaner for each material. If unsure, always spot test in a hidden area.
What’s The Best Way To Remove Sticky Stains?
Pre-treat the area with a little dish soap or specialized cleaner. Let it sit for 5–10 minutes, then scrub gently with a brush before mopping. For stubborn gum or wax, freeze the spot with an ice cube first, then gently scrape.
Is It Okay To Use A Steam Mop For Deep Cleaning?
Steam mops work well for tile and some vinyl. Avoid using them on hardwood and laminate, as heat and moisture can cause damage. Always check manufacturer guidelines before using steam.
How Can I Prevent Streaks After Mopping?
Rinse the floor with clean water after mopping. Use a microfiber mop and avoid too much soap. Dry the floor quickly with a clean towel or mop. For extra shine on tile, buff lightly with a soft cloth once dry.
Deep cleaning your floors with a mop isn’t difficult, but it requires attention to detail. With the right tools and a careful approach, you can remove hidden dirt, protect your floors, and create a healthier home. Remember to adjust your method for your floor type, avoid common mistakes, and maintain your equipment. If you want more guidance, check resources like EPA Indoor Air Quality for more information on keeping your home clean and safe.
Now, enjoy the feeling of clean, shining floors under your feet!