If you’ve ever found your kitchen smelling bad or your sink draining slowly, your garbage disposal might be the cause. Many people think garbage disposals are self-cleaning, but that’s not always true. Small food particles, grease, and even non-food items can get stuck inside, causing blockages and unpleasant odors. Learning how to empty a garbage disposal the right way can keep your kitchen clean and your system working smoothly.
Most homeowners only pay attention to their disposal when it stops working. But regular emptying and cleaning can prevent major problems and expensive repairs. This guide explains how to empty a garbage disposal safely, quickly, and effectively—even if you’ve never done it before.
Understanding Your Garbage Disposal
Before you get started, it helps to know how your garbage disposal works. A standard disposal sits under your sink, connected to the drain. When you turn it on, it grinds up food waste into small pieces that wash down the pipes.
But not everything breaks down easily. Items like eggshells, coffee grounds, potato peels, and even bones can build up over time. Grease is another hidden problem—it can harden and trap other debris. These blockages eventually stop your disposal from draining well and can damage the motor.
There are two main types of garbage disposals:
| Type | How It Works | Common in Homes? |
|---|---|---|
| Continuous Feed | Runs as long as the switch is on | Very common |
| Batch Feed | Runs only when a cover is in place | Less common |
The steps for emptying both types are similar, but batch feed models have extra safety features.
When Should You Empty A Garbage Disposal?
You don’t need to empty your disposal every day. But certain signs mean it’s time for a good clean-out:
- Bad smells from the sink, even after rinsing
- Slow draining or water backing up
- Grinding sounds that are louder than normal
- You dropped a spoon, ring, or other object inside
For most households, emptying the disposal once a month is enough. If you use it often, you might need to do this every two weeks.
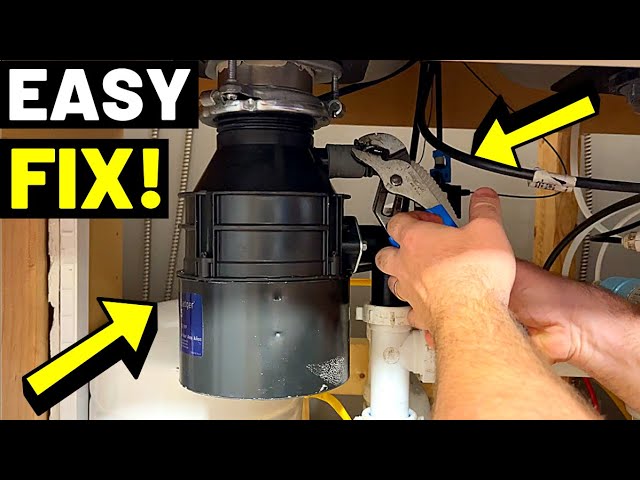
Credit: www.youtube.com
What You’ll Need
You don’t need fancy tools, but having the right items will make the job safer and easier.
- Heavy-duty rubber gloves
- Long-handled tongs or pliers
- Flashlight
- Baking soda and vinegar
- Ice cubes
- Salt
- Dish soap
- Bucket or bowl
- Old toothbrush or small scrub brush
- Allen wrench (usually 1/4 inch, for clearing jams)
- Old towels (for spills)
Never use your fingers to reach inside the disposal, even if it’s unplugged.
Safety First: Before You Start
Dealing with a garbage disposal means working around sharp blades and electricity. Here’s how to stay safe:
- Turn off the power. Unplug the disposal under the sink, or switch off the circuit breaker. Never trust just the wall switch.
- Test the switch. Try turning the disposal on to be sure it’s off. If it doesn’t make a noise, you’re safe to continue.
- Wear gloves. This keeps your hands clean and protects you from sharp objects.
A surprising fact: even when unplugged, the blades can be sharp enough to cut skin. Always use tools, not hands, when reaching inside.

Credit: sepurahome.com
How To Empty A Garbage Disposal: Step-by-step
Follow these steps for a thorough clean-out and safe removal of debris.
1. Remove Visible Objects
Shine a flashlight into the disposal. If you see large pieces of food, metal, or other objects, use tongs or pliers to lift them out. Never reach in with your fingers—even if you’re sure the power is off.
If you’ve dropped something valuable (like a ring), work slowly. Sometimes, a magnet tied to a string can pull out metal objects.
2. Flush Out Loose Debris
Put the sink stopper in and fill the sink with 2-3 inches of warm water. Add a squirt of dish soap. Remove the stopper and let the water rush through the disposal. This helps push out small particles.
Tip: If the water drains slowly, this suggests a larger clog. In this case, wait for the water to fully drain before moving to the next step.
3. Use Ice And Salt To Dislodge Stuck-on Gunk
Pour 1-2 cups of ice cubes and a handful of coarse salt (like kosher salt) into the disposal. Turn the power back on briefly and run the disposal for 10–15 seconds with cold water running. The ice and salt act as a natural scrubber, breaking up debris on the blades.
Why does this work? The hard ice chips away at build-up, and the salt helps scrub the grinding chamber.
4. Neutralize Odors With Baking Soda And Vinegar
Pour 1/2 cup of baking soda into the disposal, then slowly add 1 cup of white vinegar. You’ll hear fizzing—this reaction helps break down grease and kills odor-causing bacteria.
Let the mixture sit for 10–15 minutes. Rinse with hot water for 1 minute.
5. Scrub The Rubber Splash Guard
The black rubber piece at the top of your disposal (called the splash guard or baffle) is a hidden source of smells. Food particles stick here and rot.
Pull up the edges of the rubber, and scrub both sides with an old toothbrush and dish soap. Rinse well. Some splash guards can be removed for easier cleaning—check your manual.
6. Check For And Clear Jams
If the disposal still sounds jammed or won’t run, you may need to manually turn the blades.
- Find the hex socket at the bottom of the disposal unit.
- Insert the Allen wrench and turn it back and forth.
- If it moves freely, the jam is gone. If not, repeat the process until it loosens.
Never force the wrench. If the blades won’t turn, call a plumber.
7. Final Flush
Run cold water through the disposal for 1-2 minutes while turning it on. This clears out any remaining particles.
You can also add a few lemon peels for a fresh scent.
Common Mistakes To Avoid
Many people make the same errors with their garbage disposals. Avoid these to keep your system working:
- Using hot water to flush grease. Hot water melts grease, but it can cool and harden farther down the pipes, causing clogs.
- Pouring chemical drain cleaners. These can damage your disposal and pipes.
- Grinding fibrous foods. Celery, corn husks, and onion skins can wrap around blades.
- Putting hands inside. Even when unplugged, this is risky.
Here’s a quick comparison of what you should and shouldn’t put down the disposal:
| Safe to Grind | Never Grind |
|---|---|
| Soft fruit peels | Potato peels |
| Small amounts of cooked meat | Eggshells |
| Vegetable scraps | Grease/fat |
| Citrus peels | Coffee grounds |
Troubleshooting: What If It’s Still Clogged?
Sometimes, a garbage disposal remains clogged even after cleaning. Here’s what to try:
- Check the reset button. Most disposals have a red reset button on the bottom. If it’s popped out, press it back in.
- Inspect the drain trap (P-trap). Place a bucket under the U-shaped pipe under the sink. Loosen the slip nuts and remove the trap. Clear out any debris inside, then reattach.
- Look for a main line clog. If water backs up in other drains, the problem is likely deeper in your plumbing. In this case, professional help is safest.
How To Maintain Your Garbage Disposal
Emptying the disposal is important, but regular care can prevent most problems. Here are three expert tips:
- Run cold water before, during, and after use. This keeps food moving and prevents overheating.
- Cut up large scraps. Feed waste in small amounts to avoid overloading the system.
- Clean with ice and salt monthly. This simple routine can double the life of your disposal.
And here’s a useful comparison of DIY maintenance vs. professional cleaning:
| DIY Maintenance | Professional Cleaning |
|---|---|
| Cost: $0–$5 (household items) | Cost: $100–$250 (service fee) |
| Time: 20–30 minutes | Time: 1–2 hours |
| Good for: Routine care | Good for: Deep blockages, repairs |
When To Call A Professional
Sometimes, a garbage disposal problem is too big to fix at home. Call a plumber if:
- The disposal won’t turn on, even after resetting
- You hear grinding or metal-on-metal sounds
- Water leaks from the unit or under the sink
- You smell burning or see smoke
Trying to repair complex issues yourself can cause more damage. It’s cheaper and safer to get help when needed.
Real-world Example: A Clogged Disposal Story
Maria, a busy mom in Chicago, noticed her kitchen sink was draining slowly and had a sour odor. She tried running water and grinding lemon peels, but the smell stayed. Following the steps above, she unplugged the disposal, removed a buildup of potato skins with tongs, and cleaned the splash guard.
After flushing with ice, salt, baking soda, and vinegar, her sink was fresh and draining perfectly again.
A key insight: Maria discovered the importance of cleaning the rubber splash guard—something most people skip. This simple step made the biggest difference.

Credit: sepurahome.com
Frequently Asked Questions
How Often Should I Empty My Garbage Disposal?
For most homes, once a month is enough. If you use the disposal daily or cook large meals, consider cleaning every two weeks. Odors or slow draining are signs you need to empty it sooner.
Can I Use Bleach To Clean My Garbage Disposal?
It’s best to avoid bleach. Bleach can damage the rubber and metal parts inside your disposal over time. Instead, use baking soda and vinegar or dish soap for safe, effective cleaning.
What Should I Do If Something Valuable Falls Into The Disposal?
First, turn off the power at the breaker. Use tongs or pliers to gently remove the item. Never use your fingers. If you can’t reach it, try a magnet on a string for metal objects, or call a plumber for help.
Why Does My Disposal Smell Bad Even After Cleaning?
Odors often come from buildup under the splash guard or deep in the grinding chamber. Pull back the rubber guard and scrub both sides. If smells persist, try running ice and salt, then baking soda and vinegar. Persistent odors may signal a deeper clog or plumbing issue.
Are Garbage Disposals Safe For Septic Systems?
Most experts advise caution. Disposals add extra solids to septic tanks, which can shorten their lifespan. If you have a septic system, limit disposal use and never grind grease, bones, or fibrous foods. For more details, see the EPA’s guidance on septic systems.
Keeping your garbage disposal empty and clean isn’t just about convenience—it’s about protecting your home and plumbing investment. With regular care, you’ll enjoy a fresher, more efficient kitchen for years to come.