Skip to content
A blender is one of the most useful appliances in any kitchen. It helps you make smoothies, sauces, soups, and more with just the push of a button. But when the blender blade becomes loose, things can go wrong fast. You might hear strange noises, see leaks, or find your ingredients aren’t blending well. Even worse, a loose blade can be dangerous—if the problem gets worse, it can damage your blender or even cause injuries. The good news is, you can usually fix a loose blender blade yourself, without needing to buy a new blender.
In this guide, you’ll learn why blender blades get loose, how to spot the warning signs, and step-by-step instructions to safely and effectively fix the problem. Whether you have a classic countertop blender, a bullet-style blender, or a high-powered brand, this article will help you get back to smooth blending.
Plus, you’ll pick up tips to prevent future problems and discover when it’s time to call in a professional or replace your blender. If you’ve ever been frustrated by a wobbly blade or worried about leaks, keep reading—you’re about to solve the problem for good.
Why Blender Blades Become Loose
Understanding what causes a loose blender blade helps you fix it better and avoid the problem in the future. Here are the most common reasons:
- Regular Wear and Tear: Blenders work hard. Over time, the constant spinning and grinding can loosen screws, nuts, or gaskets holding the blade in place.
- Overloading the Blender: Putting too much food or ice into the blender puts extra strain on the blade assembly. This stress can cause the blade to loosen.
- Improper Assembly: If the blade was not properly attached after cleaning, or if parts were put back in the wrong order, the blade might not fit tightly.
- Worn-Out Gasket or Seals: The gasket (a rubber or silicone ring) keeps the blade tight and prevents leaks. If it wears out or is damaged, the blade can move.
- Corrosion or Rust: Liquid can sometimes get into the base and cause metal parts to rust. Rust weakens the blade’s attachment, making it loose.
- Using the Wrong Parts: Sometimes, people use non-original parts or mix pieces from different blenders. This can prevent the blade from fitting tightly.
- Accidental Drops or Hits: Dropping the jar or hitting the base can shake the blade loose.
A key insight: Most people focus only on the blade itself, but often the issue is with the gasket or the part that locks the blade to the jar. Always check these parts too.
Signs Your Blender Blade Is Loose
You can often spot a loose blade before it becomes a major problem. Watch for these warning signs:
- Leaking from the bottom: If you see liquid dripping from the base, your blade assembly may be loose or the gasket might be worn out.
- Unusual noises: Grinding, rattling, or clunking sounds mean the blade isn’t spinning smoothly.
- Wobbling blade: When you touch the blade (with the blender unplugged), it moves up and down or side to side.
- Poor blending performance: Ingredients aren’t being mixed well, or the motor struggles.
- Difficulty attaching or removing the jar: The base feels uneven or doesn’t tighten as it should.
Ignoring these signs can lead to bigger problems, including permanent damage to your blender’s motor or leaks that could short-circuit the machine.
Safety Precautions Before Repair
Before you start fixing your blender, safety comes first. A blender blade is extremely sharp and the motor can cause injury if accidentally turned on. Follow these steps:
- Unplug the blender: Never work on a plugged-in appliance.
- Remove the jar from the base: Work with the jar upside down on a stable surface.
- Use gloves: Protect your fingers from the sharp blade edges.
- Check the instruction manual: Some blenders have special parts or require unique steps—always check if you’re unsure.
- Dry hands and work area: Water and electricity don’t mix. Make sure everything is dry.
Taking a few minutes for safety can prevent serious injuries.
Tools And Materials You’ll Need
Having the right tools makes the repair easier and safer. Here’s what you’ll need for most blender models:
- Rubber gloves (for grip and safety)
- Screwdrivers (Phillips or flathead, depending on your blender)
- Adjustable wrench or pliers (for tightening nuts)
- Replacement gasket or seal (if needed)
- Cleaning brush (for removing debris or old gasket material)
- Food-safe lubricant (optional, for metal parts)
- Soft cloth (for drying and cleaning)
Most of these tools are probably already in your kitchen or toolbox. If you need a new gasket or blade assembly, check your blender’s brand website or a trusted parts supplier.
Step-by-step: How To Fix A Loose Blender Blade
Ready to get started? Follow these steps to tighten and secure your blender blade. The process is similar for most brands, but always check your manual for special instructions.
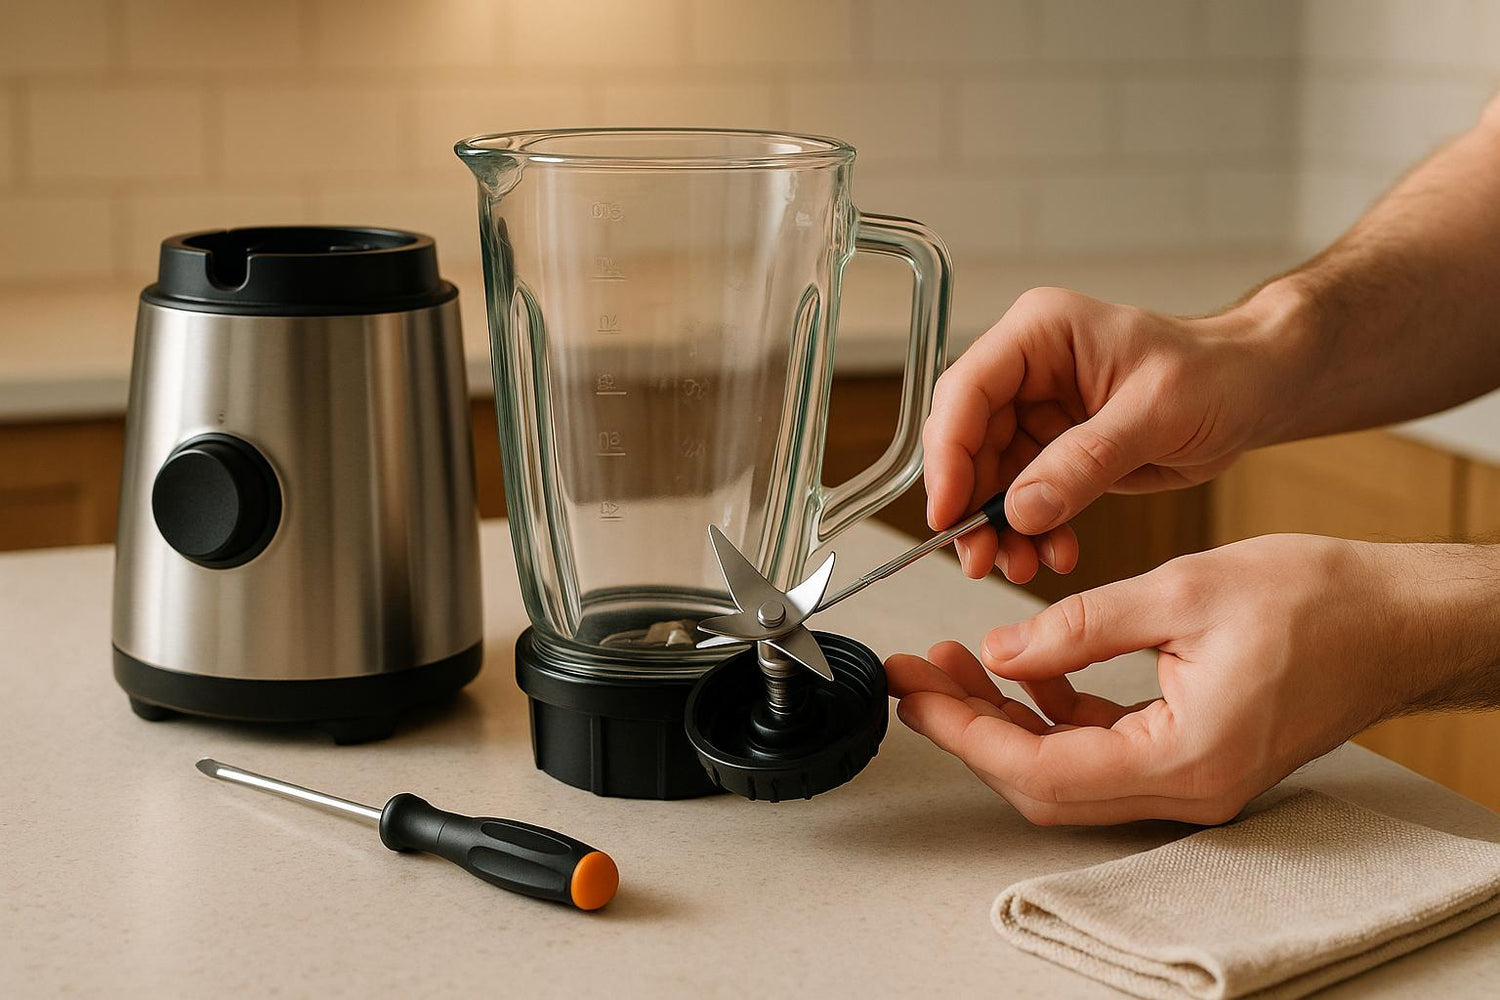
1. Disassemble The Blender Jar
- Remove the jar from the base.
- Turn the jar upside down.
- Carefully unscrew or unlock the blade assembly from the bottom. Most blenders have a removable base that holds the blade. Some require a twist, others need a screwdriver or wrench.
- Take out the gasket (the rubber or silicone ring) and blade assembly.
2. Inspect All Parts
- Check the blade for damage or dullness.
- Inspect the gasket for cracks, tears, or signs of wear.
- Look at the jar base and the threads where parts connect.
- If anything looks damaged, consider replacing it.
3. Clean The Parts
- Wash the blade, gasket, and jar base with warm soapy water.
- Use a brush to remove any stuck-on food.
- Dry everything completely before reassembling.
4. Replace Or Reposition The Gasket
- A worn or misplaced gasket is a common cause of loose blades.
- If your gasket is damaged, replace it with a new one designed for your blender model.
- Place the gasket between the blade assembly and the jar. Make sure it sits flat and covers the entire edge.
5. Reattach The Blade Assembly
- Insert the blade through the bottom of the jar.
- Hold the blade from inside the jar (wear gloves).
- Screw or lock the base tightly onto the jar. Use a wrench or pliers for extra tightness if needed, but don’t over-tighten—too much force can crack plastic parts.
- Make sure the blade spins smoothly and does not wobble.
6. Test For Leaks And Tightness
- Fill the jar with a little water.
- Attach it to the base (without plugging it in).
- Tip it gently or shake slightly to check for leaks.
- If water leaks, check the gasket and tighten again.
7. Reassemble And Test
- Put the jar back on the blender base.
- Plug in the blender.
- Run it for a few seconds with water to check for smooth operation and no leaks.
If the blade still feels loose, repeat the process. If you notice broken or stripped threads, you may need to replace the entire blade assembly or jar base.
Real-world Example
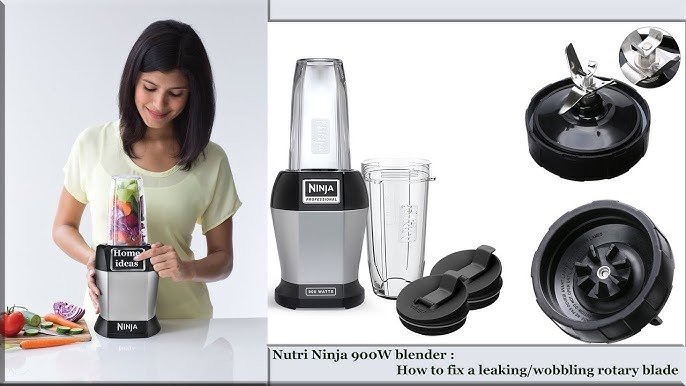
A user with a Ninja blender noticed leaking and a wobbly blade. After removing the base, they found the gasket was twisted and partially out of place. Simply resetting the gasket, tightening the base, and testing stopped the leak and fixed the loose blade.
Special Tips For Different Blender Types
Not all blenders are built the same. Here’s how to handle different models:
Bullet-style Blenders (like Nutribullet, Magic Bullet)
- The blade unit is usually part of a screw-on lid.
- Check for worn gaskets and make sure the blade base is screwed on tightly.
- Don’t overfill the cup—pressure from too much food can push the gasket out of place.
High-powered Blenders (like Vitamix, Blendtec)
- These often have more complex blade assemblies.
- Some brands recommend only factory service for blade repairs. If you see special screws or rivets, don’t try to force them—contact the manufacturer.
- Always use official replacement parts.
Classic Countertop Blenders
- Usually have a removable blade and gasket at the bottom.
- Parts are often easier to find and replace.
- Regular cleaning helps prevent buildup that can loosen the blade.
Personal Blenders
- Smaller and simpler, but the blade base can wear out quickly if used daily.
- Check for cracks in the plastic near the blade.
Credit: blendiblender.com
Preventing Future Blender Blade Problems
Once you’ve fixed your loose blade, you’ll want to avoid repeating the problem. Try these tips:
- Don’t overfill the jar: Leave space for food to move. Overfilling strains the blade assembly.
- Cut large items into smaller pieces: Less stress on the blade means less chance of loosening.
- Clean after each use: Old food can clog and damage the gasket and blade.
- Dry all parts before reassembling: Moisture can cause rust.
- Check the gasket regularly: Replace it at the first sign of wear.
- Use official replacement parts: Off-brand parts often fit poorly and may cause leaks.
- Tighten after cleaning: Always check that the blade assembly is secure after washing.
A useful insight: Many blender owners forget to check the gasket, focusing only on the blade. In reality, a new gasket solves more than half of all “loose blade” problems.
When To Replace Blender Parts Or The Whole Blender
Sometimes, fixing a loose blade isn’t enough. Here’s how to know when to replace parts—or your whole blender:
- The blade is bent, chipped, or rusted: Damaged blades can be dangerous and won’t blend well.
- The gasket won’t seal even after replacement: The jar or base threads might be damaged.
- The jar or base is cracked: Leaks will keep happening.
- Motor struggles or smells burnt: The problem may be bigger than the blade.
- You’ve made multiple repairs: If problems keep coming back, a new blender is usually a better investment.
Most blender parts cost between $5 and $30, while a new blender starts around $30 and can go much higher for premium brands. Compare prices before deciding to repair or replace.

Credit: www.reddit.com
Comparing Blender Blade Assembly Types
Understanding how different blenders attach their blades helps you identify and fix problems faster. Here’s a quick comparison:
| Blender Type | Blade Attachment | Ease of Repair |
|---|---|---|
| Classic Countertop | Screw-on base with gasket | Easy |
| Bullet-Style | Twist-on blade lid | Moderate |
| High-Powered (Vitamix, Blendtec) | Fixed or riveted blade | Difficult |
| Personal Blender | Twist or snap-on blade | Easy |
Common Mistakes To Avoid
When repairing a loose blender blade, some mistakes can make things worse. Here’s what NOT to do:
- Forcing parts together: If something doesn’t fit, check for the correct assembly order. Forcing it can crack plastic or strip threads.
- Using the wrong tools: A knife or fork isn’t a substitute for a wrench or screwdriver.
- Ignoring the gasket: Skipping the gasket is the fastest way to get leaks.
- Over-tightening: Too much force can break the jar or strip the blade assembly.
- Mixing parts from different brands: Even if they look similar, small differences can cause leaks and looseness.
- Not testing with water first: Always check for leaks with water before blending food.
- Trying to repair a running blender: Never work on the blender while it’s plugged in.
An easy mistake to overlook: Sometimes the blade base itself is cracked. If you only replace the gasket or blade, the problem will return. Check all parts for hidden cracks.
Credit: www.youtube.com
Data: Blender Repair Vs. Replacement Costs
Here’s a comparison of typical costs to help you decide between repairing and replacing your blender:
| Repair Type | Average Cost (USD) | Worth It? |
|---|---|---|
| Replace Gasket | $5–$10 | Yes |
| Replace Blade Assembly | $10–$25 | Yes, if motor is good |
| Replace Blender Jar | $15–$40 | Depends on blender value |
| Buy New Blender | $30–$400+ | Yes, if repairs are costly |
This shows most loose blade problems can be fixed for under $25.
Quick Maintenance Checklist
Use this easy checklist to keep your blender blade secure and working well:
- Check blade tightness monthly.
- Inspect and clean the gasket after every use.
- Use only official replacement parts.
- Avoid overfilling and overloading.
- Store the blender with the jar and blade dry.
Simple habits can extend your blender’s life by years.
When To Call A Professional
If you’ve tried all the steps and your blade is still loose, or if the motor struggles and smells burnt, it’s time for expert help. Some high-end blenders like Vitamix or Blendtec require special tools to repair. These brands often offer professional repair services or warranties. If your blender is still under warranty, contact the manufacturer before trying repairs yourself. You can find more information about warranties and repairs on the Consumer Reports website.
If your blender is old and parts are no longer available, a new model is often safer and more cost-effective.
Frequently Asked Questions
Why Does My Blender Blade Keep Coming Loose After I Tighten It?
This often happens if the gasket is worn out, missing, or not seated correctly. Replacing the gasket usually solves the issue. If the threads on the jar or blade base are stripped, the assembly won’t stay tight and may need to be replaced.
Can I Use My Blender If The Blade Is A Little Loose?
No, using a blender with a loose blade can cause leaks, poor blending, and even injury. Always fix the problem before using the blender again.
How Often Should I Replace The Blender Gasket?
Most gaskets last between 6 months to 2 years depending on use. If you notice cracks, stretching, or leaks, replace it immediately. Regular inspection helps catch problems early.
Is It Safe To Tighten The Blade With Pliers Or A Wrench?
Yes, but use gentle pressure. Over-tightening can crack the jar or strip the threads. Always protect your hands with gloves and make sure the blender is unplugged.
What If My Blender Blade Is Rusted?
If you see rust on the blade, it’s time to replace it. Rust can contaminate your food and weaken the blade, making it more likely to become loose or break.
A well-maintained blender can last many years. By understanding the causes of a loose blade and how to fix it, you’ll save money, avoid frustration, and keep your kitchen running smoothly. Whether you’re blending breakfast smoothies or pureeing soups, a secure blade is the key to safe, reliable blending.
Now, you’re ready to tackle the problem with confidence—and enjoy smooth results every time.