Skip to content
Installing an undermount sink can give your kitchen or bathroom a modern, seamless look. Unlike drop-in sinks, undermount models are attached below the countertop, making cleaning easier and surfaces more attractive. But this upgrade takes careful planning and accurate installation. If you want to do it yourself, understanding the process step-by-step will help you avoid common mistakes and achieve a professional result.
This guide covers everything you need: tools, materials, preparation, installation, and sealing. You’ll also find useful tables comparing sink types and adhesives, plus answers to common questions. Whether you’re replacing an old sink or fitting a new countertop, these instructions will help you get the job done right.
Tools And Materials You Need
Before starting, gather all necessary tools and materials. Having everything ready will save time and reduce errors.
Essential Tools
- Drill with appropriate bits
- Screwdrivers
- Wrenches and pliers
- Caulking gun
- Tape measure and ruler
- Utility knife
- Putty knife
- Clamps (C-clamps or bar clamps)
- Painter’s tape or masking tape
- Level
Materials
- Undermount sink (stainless steel, porcelain, or composite)
- Mounting clips/brackets (often included with the sink)
- Silicone sealant (100% waterproof, mold-resistant)
- Denatured alcohol or acetone (for cleaning)
- Wood support braces (optional for heavy sinks)
- Fasteners (screws and anchors, as required)
- Plumber’s putty (for drain assembly)
- Cleaning cloths
It’s important to use high-quality silicone for sealing. Cheaper options may shrink or crack over time, leading to leaks.
Understanding Undermount Sinks
Not every countertop can support an undermount sink. Here’s what you need to know about compatibility and why these sinks are popular.
Countertop Compatibility
Most undermount sinks require solid surface countertops like granite, quartz, or marble. Laminate or tile countertops may not provide enough strength for secure mounting. Always check with your countertop manufacturer or supplier before cutting or drilling.
Benefits Of Undermount Sinks
- Easy cleaning: Wipe crumbs directly into the sink.
- Modern look: No visible rim above the counter.
- More counter space: Rimless design maximizes usable area.
Sink Material Comparison
Here’s a quick comparison of popular undermount sink materials:
| Material | Durability | Maintenance | Cost (avg.) |
|---|---|---|---|
| Stainless Steel | High | Easy | $$ |
| Porcelain | Moderate | Medium | $$$ |
| Composite Granite | Very High | Easy | $$$ |
Stainless steel is most popular for its balance of price, durability, and ease of installation.
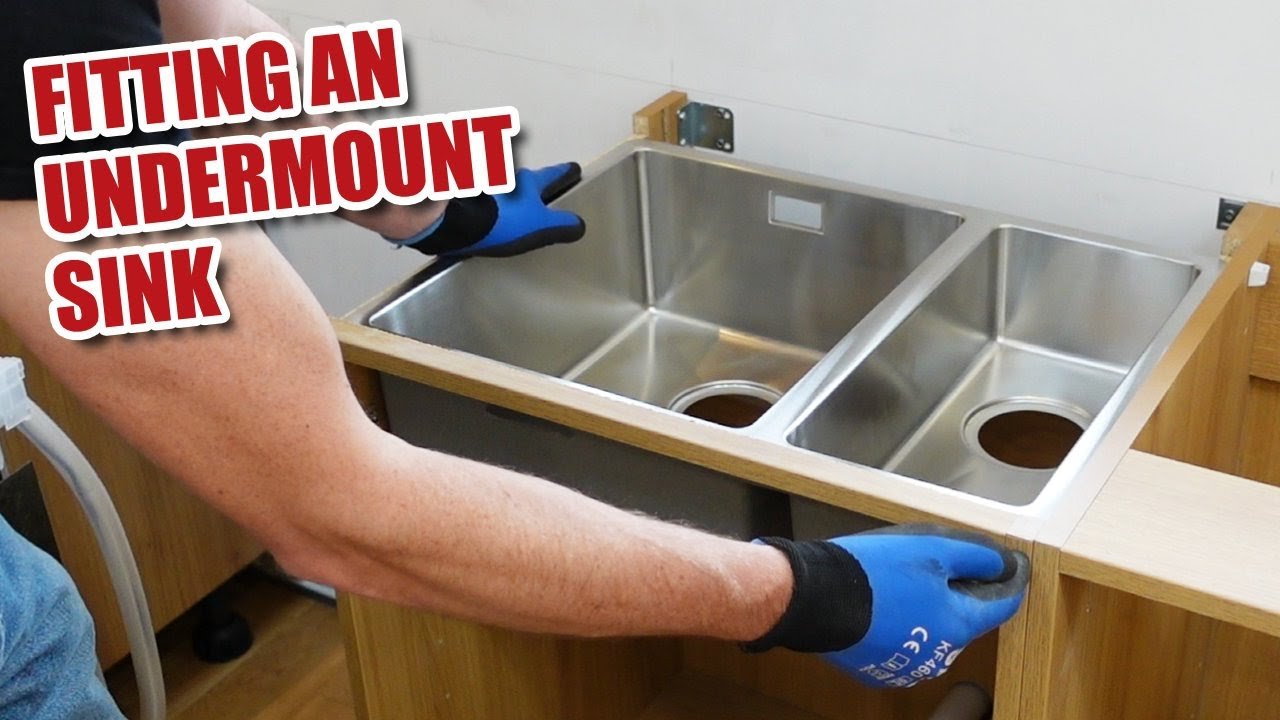
Credit: www.youtube.com
Preparing For Installation
Good preparation is essential. It helps you avoid damaging the countertop or causing leaks later.
Check Sink And Countertop Fit
Test-fit your sink in the opening. The rim should sit evenly below the countertop. Check that the mounting hardware fits, and the sink is not too large or small for the cutout.
Clean The Surface
Wipe the underside of the countertop and the edge of the sink with denatured alcohol. Remove all dust, oil, or debris. This helps the silicone sealant bond well.
Dry-fitting And Marking
Position the sink under the countertop. Use painter’s tape to mark where the sink edge meets the counter. Mark drilling points for mounting clips, keeping them evenly spaced.
Safety Precautions
- Wear safety glasses and gloves.
- Support heavy sinks with wooden braces or a helper.
- Disconnect plumbing if replacing an old sink.
Step-by-step Installation Guide
Follow these steps for a secure and watertight installation. Rushing or skipping steps can lead to leaks or a loose sink.
1. Attach Mounting Clips
Most undermount sinks use clips or brackets for support. Attach the clips to the sink or countertop as specified by the manufacturer. Do not overtighten yet.
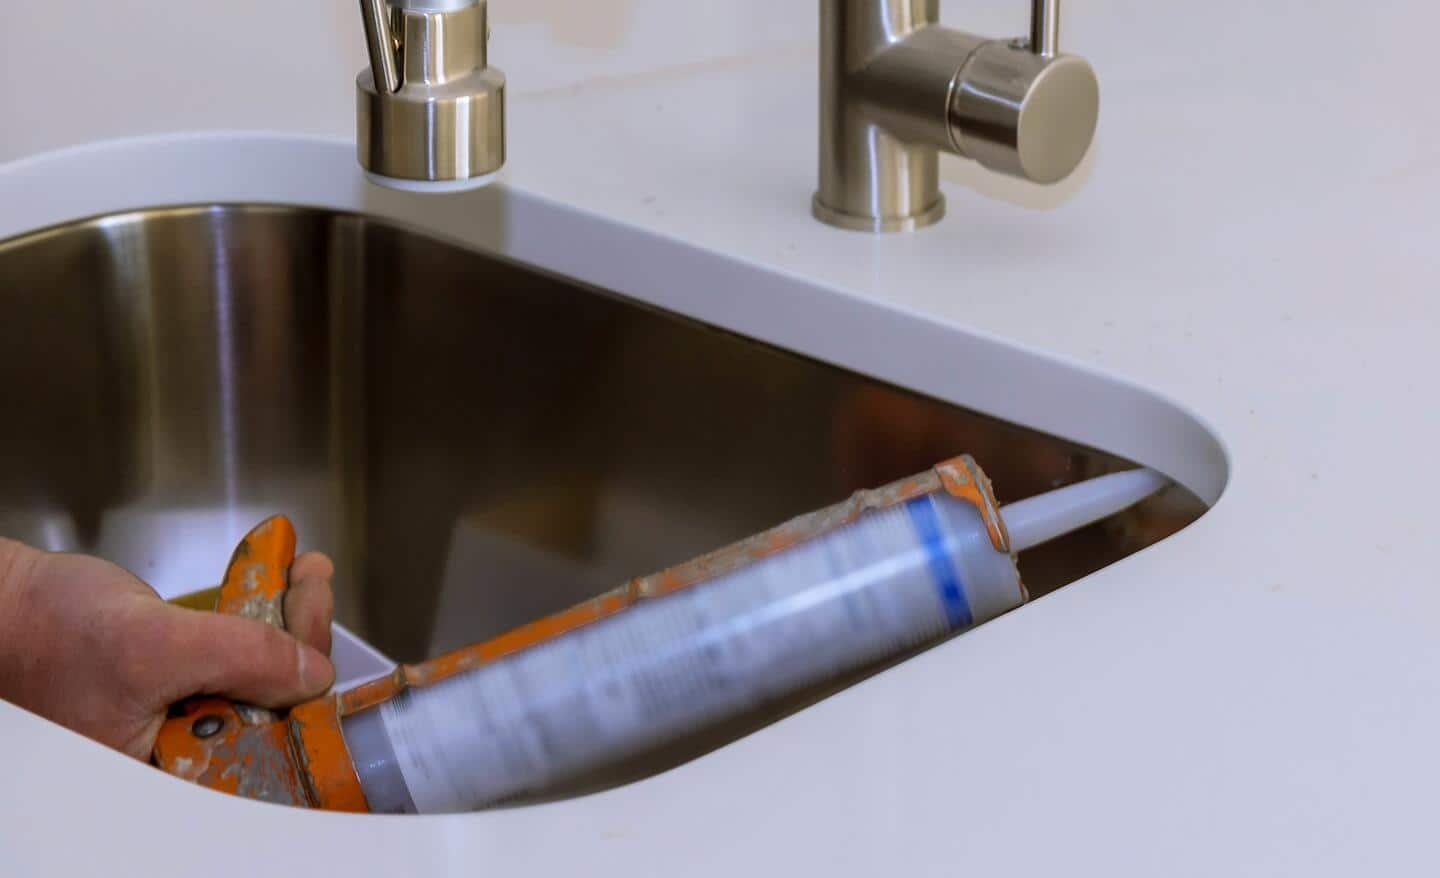
2. Apply Silicone Sealant
Run a generous bead of 100% silicone sealant around the rim of the sink. Avoid plumber’s putty for undermount sinks, as it does not bond well to stone or composite surfaces.
3. Position The Sink
With the help of a friend or temporary braces, lift the sink into place under the countertop. Align the sink with your tape marks, making sure it sits evenly.
4. Clamp And Secure
Use clamps to hold the sink tightly against the countertop. Adjust until perfectly centered and level. Then, tighten the mounting clips to secure the sink. Avoid overtightening, which can crack some materials.
5. Remove Excess Sealant
Wipe away any silicone that squeezes out with a damp cloth or paper towel. Do this before it cures for a neat finish.
6. Let The Sealant Cure
Leave the clamps and supports in place for at least 24 hours, or as recommended by the silicone manufacturer. This step is crucial for a strong, lasting bond.
7. Install The Drain And Plumbing
Once the sealant has cured, install the sink drain using plumber’s putty around the flange. Connect the plumbing, ensuring all fittings are tight and leak-free.
8. Test For Leaks
Fill the sink with water and check for leaks around the rim and drain. Tighten connections if needed.
Practical Tips For A Professional Result
Even experienced DIYers can miss important details. Here are two non-obvious tips:
- Check for Countertop Overhang: Many countertops have a slight overhang (1/8″–1/4″) over the sink edge. This makes cleaning easier but requires you to adjust the sink’s positioning so the bowl is evenly revealed on all sides.
- Support Heavy Sinks During Curing: For large or stone sinks, use wooden braces from the floor to the underside of the sink. This prevents sagging before the silicone sets.
Common Mistakes To Avoid
- Using the wrong sealant (regular caulk instead of silicone)
- Not cleaning surfaces before sealing
- Forgetting to check that the sink is level before silicone cures
- Overtightening clips, leading to cracks
Comparing Undermount And Drop-in Sinks
If you’re still deciding between undermount and drop-in sinks, consider the following differences:
| Feature | Undermount | Drop-In |
|---|---|---|
| Installation Complexity | Moderate to High | Easy |
| Cleaning | Very Easy | Somewhat Harder |
| Counter Compatibility | Solid Surface Only | All Types |
| Look | Modern | Traditional |
Undermount sinks are more work to install, but the benefits in cleaning and style are clear.
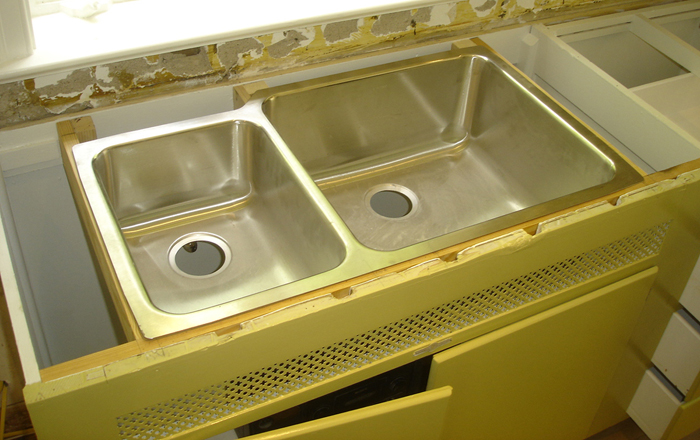
Credit: concretecountertopinstitute.com
Choosing The Right Adhesive
Not all sealants are equal. The wrong choice can cause leaks or separation. Here’s how top adhesives compare:
| Adhesive Type | Waterproof | Mold Resistance | Best For |
|---|---|---|---|
| 100% Silicone | Yes | Yes | Undermount Sinks |
| Plumber’s Putty | No | No | Drain Flanges |
| Epoxy | Yes | Varies | Heavy Sinks |
100% silicone is always the best choice for sealing the rim.
Aftercare And Maintenance
Once your sink is installed, regular maintenance will keep it looking and working like new.
- Wipe the edge of the sink and counter regularly to prevent mold.
- Reseal with silicone every few years, especially if you notice gaps or leaks.
- Use non-abrasive cleaners for stainless steel or composite sinks.
- Check mounting clips yearly for tightness.
Credit: www.homedepot.com
Troubleshooting Common Problems
If you notice leaks, sagging, or mold, act quickly.
- Leak at Rim: Remove old silicone, clean, and reseal. Make sure the sink is supported during curing.
- Sink Sagging: Tighten mounting clips or add support braces.
- Mold Growth: Clean with diluted vinegar and reseal with mold-resistant silicone.
Frequently Asked Questions
How Long Does It Take To Install An Undermount Sink?
Most installations take 3–4 hours, plus 24 hours for silicone curing. If you are replacing an old sink, allow extra time for removal and cleaning.
Can I Install An Undermount Sink With A Laminate Countertop?
No, most laminate countertops are not strong enough. Undermount sinks need a solid surface like granite or quartz for secure attachment.
What Is The Best Sealant For Undermount Sinks?
100% silicone sealant is the best choice. It is waterproof, flexible, and bonds well to stone and metal. Avoid standard caulks or construction adhesives.
Do Undermount Sinks Need Special Supports?
Heavy sinks (like stone or cast iron) may need temporary braces during installation. Lightweight stainless steel sinks usually do not, as long as clips are used correctly.
How Do I Keep The Rim Clean And Mold-free?
Wipe the area dry after use and clean weekly with a mild cleaner. If you spot mold, clean it with diluted vinegar and check the silicone seal for gaps.
Installing an undermount sink is a rewarding project that can make your kitchen or bathroom more attractive and easier to clean. With careful preparation, the right materials, and attention to detail, you can achieve a result that rivals professional work. If you want to see an expert demonstration, check out this Family Handyman step-by-step guide.
Take your time, follow each step, and your new undermount sink will serve you beautifully for years to come.