Your blender used to turn frozen fruit into a perfectly smooth smoothie. Now it leaves chunks, makes an odd whine, and takes twice as long. Most people assume the recipe is the problem. In practice, the cause is usually the same: the blades have gone dull.
Sharpening a blender blade is a straightforward repair that restores performance, protects the motor, and helps you avoid buying a new machine. Whether you own a full-size jug model or a smaller portable blender, the same principles apply. You can also read our guide on how many watts should a good blender have.
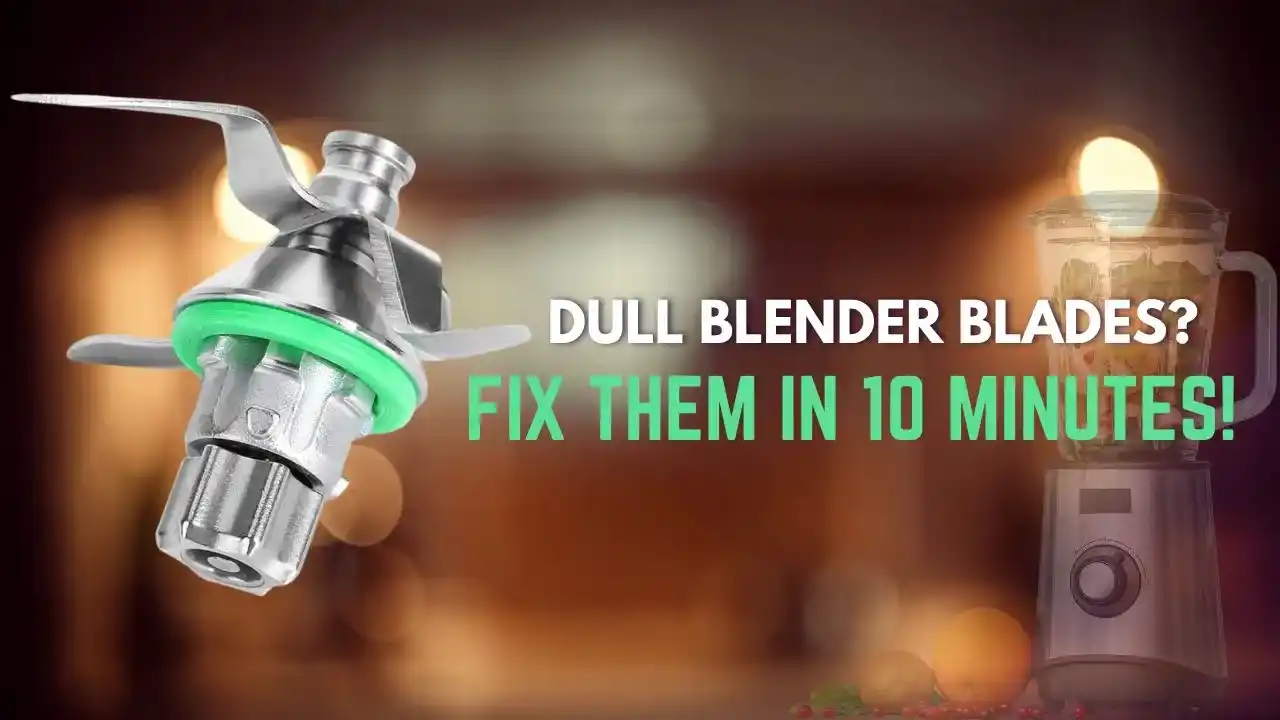
Inspect the cutting edges before you reach for a sharpening stone.
Why Sharp Blades Matter
Sharpness changes how a blender treats food. A sharp edge cuts cleanly through fruit, vegetables, and ice. A dull edge crushes and smashes instead. That difference shows up in texture, noise, heat, and how hard the motor has to work.
A sharp blade also creates a better vortex inside the jar. Ingredients are pulled down toward the blade and circulated more efficiently, so you get a silkier result with less scraping and stirring. Dull blades force the motor to run longer and hotter. If you have already seen the motor shut down mid-blend, understanding the reset process can help you avoid a service call.
Dull blades crush food instead of cutting it cleanly.
6 Signs Your Blender Blades Are Dull
You do not need a special tool to diagnose dull blades. You need to pay attention to how the blender behaves.
- Uneven texture. Smoothies come out with visible fruit bits, seeds, or fibrous string.
- Longer blend time. A recipe that used to take 30 seconds now takes a minute or more.
- High-pitched or straining motor noise. The motor sounds labored even with soft ingredients.
- Excess heat. The jar and the base feel unusually warm after a short blend.
- Frequent scraping. You have to stop and push food back down because the vortex is weak.
- Visible edge damage. Under bright light, the cutting edges look rounded, chipped, or burred.
Never test sharpness with your finger. Instead, wipe the blade assembly dry and look for a thin reflective line along the edge. That line means the metal has rolled over or rounded off.
If you regularly blend ice, also check how the blade handles proper pulse sequence. Ice is one of the fastest ways to reveal a weak edge.
What You Need to Sharpen Blender Blades
You do not need a dedicated blender-blade sharpener. Most of the tools are already in your kitchen or toolbox.
| Tool | Why You Need It |
|---|---|
| Whetstone, 1000-grit | Removes dull metal and creates a fresh edge |
| Fine whetstone or 4000-grit stone | Polishes the edge and removes burrs |
| Wet/dry sandpaper, 600-grit | Budget alternative to a whetstone |
| Screwdriver or wrench | Helps remove the blade assembly |
| Cut-resistant gloves | Protects your hands while handling blades |
| Soft towel | Gives you grip and protects the blade |
| Dish soap and small brush | Cleans the blade before sharpening |
| Bowl of water | Keeps the stone lubricated |
A 1000-grit whetstone is a good starting point for most blade shapes.
Safety Tips Before You Start
Blender blades are sharper than they look, and thin metal edges are easy to cut yourself on. Take a few precautions before you begin.
- Unplug the blender. Do not rely on the power switch.
- Remove the jar from the motor base before touching anything.
- Work with the blade assembly over a folded towel.
- Wear cut-resistant gloves if you have them.
- Keep children and pets out of the workspace.
- Never test the edge with a bare finger.
How to Sharpen Blender Blades: 10 Proven Steps
Follow these steps in order. If you skip the cleaning or inspection steps, you may sharpen a blade that should have been replaced.
Step 1: Unplug the Blender and Take Apart the Jar
Start by unplugging the blender. Remove the pitcher from the motor base, then remove the lid.
Turn the jar upside down and inspect the underside. On many models, the blade assembly unscrews counterclockwise from the bottom. On others, a retaining nut holds it in place. If the assembly is jammed, rinse the underside with warm water to loosen dried food. Forcing it with pliers on plastic parts can crack the jar. A stuck blade assembly usually responds better to gentle pressure than to brute force.
Step 2: Remove the Blade Assembly Safely
Set the jar on a folded towel so it cannot slide. Grip the blade hub from inside the jar or the locking ring from underneath, depending on your model, and turn it counterclockwise.
As the assembly comes free, keep the cutting edges pointed away from your hands. Place the blade on the towel and take a moment to study its shape. Most blenders have multiple cutting edges, and each one will need the same treatment.
Step 3: Clean and Dry the Blades
Wash the blade assembly in warm, soapy water. Use a small brush to dislodge food stuck near the hub, then rinse thoroughly. Dry every part completely before sharpening. A slippery or dirty blade is harder to control, and leftover food can scratch the metal.
This step matters for health too. Food-contact surfaces can spread bacteria if they are not washed properly, which is why food-safety advice from the USDA makes cleaning such surfaces a priority. The CDC’s kitchen-safety guidance says the same. A clean blade is also easier to inspect.
Step 4: Inspect for Damage Before Sharpening
Hold the blade assembly under bright light and examine every edge. Look for nicks, chips, rust pitting, or bending. A blade that is cracked or bent will never sharpen evenly, and a damaged edge can break off during blending.
If you see serious damage, do not sharpen it. Order a replacement blade assembly or replace the blender. Sharpening a damaged blade is a waste of time and can be unsafe.
Step 5: Choose the Right Sharpening Tool
A 1000-grit whetstone is the safest choice for most home blenders. It removes enough metal to restore an edge without taking off too much material. You can also use 600-grit wet/dry sandpaper as a budget option.
Avoid pull-through knife sharpeners and electric knife sharpeners. They are designed for straight knife edges and rarely fit curved blender blades. Avoid metal files too; they are too coarse and can leave an irregular edge.
Step 6: Find the Existing Bevel Angle
Every blade edge has a factory-set bevel. The bevel is the angled surface that meets the cutting edge. With the blade upside down or tilted slightly, you can see this angle as a clear change in the metal surface.
Your job is to match that angle, not create a new one. A common mistake is holding the blade too steep or too shallow. That changes the geometry of the edge and makes the blade worse. When in doubt, start with the existing angle and keep the blade steady.
Step 7: Sharpen the Edges on a Whetstone
Lightly wet the whetstone with water and place it on a damp towel so it does not slide. Hold the blade assembly by the hub, not by the cutting edge.
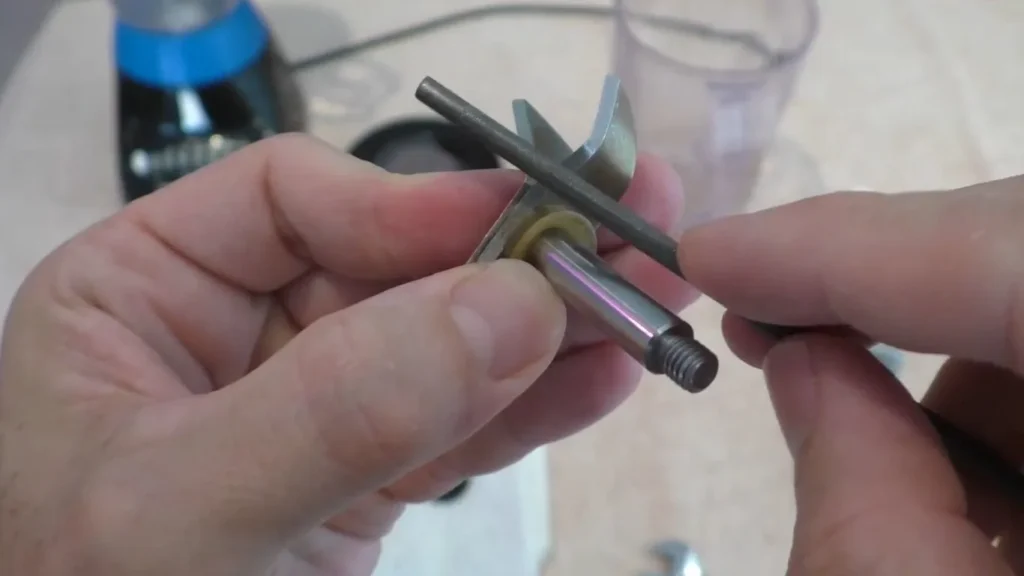
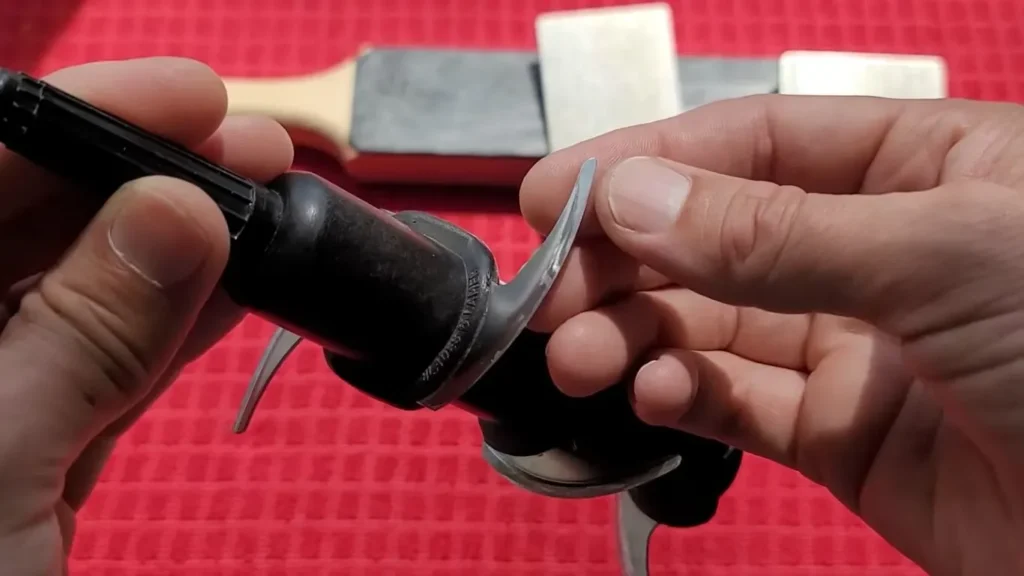
Lay the bevel flat against the stone. Sweep the edge across the stone in one smooth direction, then lift and reset for the next pass. Use moderate pressure and keep the angle constant. Give each edge five to ten passes before moving to the next one, and try to give each edge the same number of strokes.

Run each edge across the stone in smooth, even strokes.
Credit: www.instructables.com
Step 8: Remove the Burr with a Fine Stone
After sharpening, you will feel a thin ridge of metal along the back side of the edge. This burr is normal; it is the displaced metal that the coarse stone pushed over. It makes the blade seem sharp but actually fragile.
Switch to a 4000-grit stone or lay a sheet of 600-grit sandpaper flat on the counter. Hold the blade as before and make three or four light passes on each edge. This polishes the edge, removes the burr, and makes the blade last longer between sharpenings.
Step 9: Reassemble the Blender
Dry the blade assembly completely. Insert it back into the jar and tighten the retaining nut or locking ring clockwise. It should feel snug, but do not overtighten plastic parts. Reattach the jar to the motor base, plug the blender in, and run a test blend with water and a few ice cubes.
If the blender is quieter and finishes the ice in fewer pulses, the sharpening worked. If it still strains, repeat the sharpening process on each edge. Before you run that test, clean the blender jar thoroughly.
Step 10: Clean the Jar Before Your Next Blend
Sharp blades will not help if the jar is dirty. Wash the pitcher with warm, soapy water and rinse thoroughly. A clean jar prevents bacterial growth and keeps the motor from straining on stuck-on residue. Regular dishwasher and hand-cleaning habits make a visible difference in how well the whole unit performs.
How to Maintain Sharp Blender Blades
Sharpening is a quick fix, but maintenance is what keeps an edge holding. A few routines make a big difference.
- Rinse the jar immediately after use. Letting food dry onto the blades makes them dull faster and hardens residue in the hub.
- Store the jar upside down. That allows moisture to drain away instead of pooling around the blade assembly.
- Use a blade cover. If yours came with one, use it. If not, keep the blade assembly in a separate drawer or wrap it in a cloth to protect it from knocking against metal utensils.
- Blend ice the right way. Add liquid before ice, use the pulse function, and never fill the jar above the max line. The right method protects both the blade and the motor.
- Check the gasket or O-ring. A worn seal lets liquid leak into the base, which can damage the motor over time. Replace it if it looks cracked or flattened.
- Avoid the dishwasher for the blade assembly. The high heat and water pressure can blunt edges and rust the hub. Hand-wash instead.
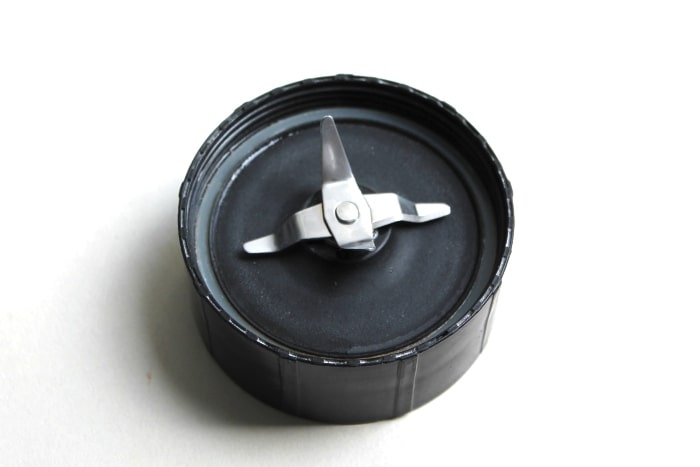
Store blades dry and separated from other utensils to preserve the cutting edge.
Credit: riseandblend.com
When to Replace Blender Blades Instead of Sharpening
Sharpening is not always the right answer. If you run into any of these problems, replace the blade assembly rather than spending time on the stone.
- Visible chips or cracks. A chipped edge can break off mid-blend and end up in your food.
- Rust on the cutting edge. Rust creates tiny pits that will not sharpen out.
- A bent blade. One edge higher than the others creates vibration and uneven blending.
- A loose hub. If the center hub wobbles on the drive shaft, sharpening will not fix it.
Replacement blade assemblies are widely available for the most common blender brands. A new set of blades typically costs a fraction of a new blender and installs in under five minutes.
Common Mistakes to Avoid When Sharpening Blender Blades
These errors come up again and again in home kitchens. Skip them, and you will get better results on the first attempt.
- Using a pull-through knife sharpener. It is built for straight knife edges and will ruin a curved blender blade.
- Sharpening at the wrong angle. Tilting the blade too steep or too shallow changes its geometry and makes it cut worse.
- Applying too much pressure. Heavy pressure removes too much metal and shortens the blade's life.
- Skipping the burr removal. A burr left behind feels sharp but collapses quickly, leaving you with a dull blade soon after.
- Forgetting to check for damage first. Sharpening a cracked blade wastes effort and creates a safety risk.
- Trying to sharpen from the wrong side. You sharpen the bevel, not the flat back of the blade. Check which side has the angled face.
If the edge is chipped or pitted, sharpening will not fix it — replacement is safer.
FAQs About Sharpening Blender Blades
How do I know if my blender blades are dull? Blending takes noticeably longer, results come out uneven, the motor sounds strained, and the jar heats up faster than usual. Those four signs together point to dull blades.
Can I sharpen blender blades at home without a whetstone? Yes. Wet/dry sandpaper at 600-grit or finer works on most straight-edge blades. Place the sandpaper flat on the counter, wet it lightly, and slide the blade edge across it at the original bevel angle.
How often should blender blades be sharpened? Every three to four months for daily use, twice a year for occasional blending. Heavy use with ice or frozen fruit means more frequent sharpening.
Will sharpening blades damage my blender? No, if you match the original bevel angle and use a fine enough stone. Sharpening the wrong side or at the wrong angle can make blades worse, so follow the steps carefully.
Is it cheaper to replace blades than to buy a new blender? Almost always. Replacement blade assemblies are usually a fraction of the cost of a new blender and install in minutes. Check your model number before ordering.
What about professional sharpening services? Professional services exist for knife and tool sharpening, and they can handle blender blades. They are usually worthwhile if you have a very expensive blender, but for most home machines, an hour with a whetstone gets the same result at no cost.
Final Thoughts
Sharp blender blades transform your blender from a noisy machine that smashes food into a precise tool that cuts cleanly through everything. The whole job takes about twenty minutes, costs almost nothing, and protects the motor from the strain of overworking.
Start by removing the blade assembly, cleaning it, and inspecting the edges. Sharpen each edge on a whetstone at the original bevel angle, remove the burr with a finer stone, and reassemble the jar. Done properly, this simple maintenance keeps your blender performing like new for years.
If you have tried sharpening and the blender still feels weak, the motor protection systems on modern machines can sometimes give you a clue about what is wrong. And if you are shopping for a new machine anyway, it is worth reading how the best models handle daily kitchen use before you choose.
Your next smoothie deserves better. Fix those dull blades today, and feel the difference from the very first spin.