If you love homemade bread but don’t have time to knead, rise, and bake by hand, a bread maker machine can be your best kitchen friend. These machines take the hard work out of baking, making it easy for anyone to create fresh bread at home.
But for many beginners, using a bread maker can feel confusing. There are buttons, cycles, and recipes—where should you start? This guide will show you how to use a bread maker machine step by step, with practical advice, clear examples, and real tips that most manuals skip.
By the end, you’ll feel confident to bake bread like a pro, avoid common mistakes, and get creative with your own recipes.
Understanding Your Bread Maker
Bread makers come in many shapes and sizes. Some are simple, with just a few settings, while others have advanced features like gluten-free cycles or jam modes. The main parts are usually a bread pan, kneading blade, control panel, and a lid with a viewing window.
Basic Components
- Bread Pan: Where you put all ingredients. It’s removable for easy cleaning.
- Kneading Blade: Mixes and kneads dough. Usually sits at the bottom of the pan.
- Control Panel: Lets you choose cycles (basic, whole wheat, French, etc. ), crust color, and loaf size.
- Lid: Keeps heat inside and may have a window to check progress.
Some models also have fruit and nut dispensers for adding ingredients automatically.
Common Features
Most bread makers offer:
- Loaf size selection: Choose from 1, 1.5, or 2-pound loaves.
- Crust color: Light, medium, or dark.
- Delayed start: Add ingredients and set a timer to bake later.
- Specialty cycles: Gluten-free, dough, jam, cake, and more.
If you’re unsure about your machine’s features, check the instruction booklet or search for your model online.
Choosing Ingredients For Bread Maker Recipes
Bread makers work best with precise measurements. Even small mistakes can affect bread texture and taste. Here’s what you need to know about choosing and measuring ingredients.
Key Ingredients
- Flour: Bread flour gives better structure and rise. All-purpose flour works for some recipes, but bread flour is preferred.
- Yeast: Use bread machine yeast or instant yeast. Never use cake yeast.
- Liquid: Water, milk, or plant-based milk. The temperature matters—too hot can kill yeast, too cold slows rising.
- Salt: Controls yeast and adds flavor. Measure carefully.
- Sugar: Feeds yeast and sweetens bread.
- Fat: Butter, oil, or margarine. Makes bread softer.
- Add-ins: Seeds, nuts, dried fruit, cheese, herbs.
Ingredient Measurement Tips
- Always measure flour with the spoon-and-level method. Don’t scoop—this packs flour and causes dry bread.
- Liquids should be measured in a clear cup at eye level.
- Use a digital scale for accuracy, especially for recipes that list grams.
- Never guess yeast amounts. Too much yeast leads to collapsed bread; too little causes poor rise.
Example Recipe Ingredients
For a basic white bread (1.5-pound loaf):
- 3 cups bread flour
- 2 teaspoons instant yeast
- 1¼ cups warm water (about 100°F)
- 2 tablespoons sugar
- 2 tablespoons butter or oil
- 1½ teaspoons salt
Preparing Your Bread Maker For Baking
Before you start, make sure your bread maker is clean and ready. Even a small amount of old dough or crumbs can spoil your new loaf.
Step-by-step Preparation
- Remove the bread pan and kneading blade. Wash with mild soap and dry completely.
- Reinsert the kneading blade into the pan. Make sure it clicks into place.
- Place the bread pan inside the machine, locking it if needed.
- Plug in the machine and check the control panel for errors or loose parts.
Checking Ingredients
- Set out all ingredients before you begin.
- Double-check expiration dates, especially yeast.
- If using nuts, seeds, or dried fruit, chop or measure them beforehand.
Adding Ingredients To The Bread Maker
The order you add ingredients matters. Most bread makers recommend:
- Liquids first (water, milk, melted butter)
- Dry ingredients (flour, salt, sugar)
- Yeast last (make a small well in the flour, add yeast, keep it separate from liquids)
Why? Yeast activates when it touches liquid. Keeping it separate until kneading starts ensures proper rising.
If your machine has a dispenser for nuts or fruit, add them to the tray. If not, you may need to add these ingredients manually when the machine beeps (usually during kneading).
Selecting The Right Bread Maker Cycle
Bread makers have several baking cycles. Picking the right one is key for good results.
Popular Bread Cycles
- Basic/White: For simple white or wheat bread.
- Whole Wheat: Longer kneading and rising for dense flour.
- French: Crisp crust, airy inside.
- Sweet: For breads with sugar, eggs, or milk.
- Gluten-Free: Special cycle for gluten-free flour.
- Dough: Mixes and kneads but doesn’t bake; use for pizza or rolls.
- Jam: Makes fruit jam.
How To Choose
- Read your recipe and match it to the closest cycle.
- If unsure, start with the basic cycle; it works for most recipes.
- For gluten-free, always use the dedicated cycle. Gluten-free dough needs different handling.
Customizing Settings
Most machines let you adjust:
- Crust color: Light, medium, or dark. If you prefer softer bread, choose light.
- Loaf size: Choose the size that matches your recipe. Too small, and bread may overflow; too large, and it may be flat.
Some advanced machines let you program custom cycles. Beginners should stick to preset cycles.
Baking Bread: What Happens Inside The Machine
Once you press start, the bread maker takes over. Here’s what happens during each stage.
Stages Of Bread Baking
- Kneading: The machine mixes and kneads the dough with the blade.
- Resting: Dough rests and relaxes.
- First Rise: Yeast makes dough expand.
- Second Kneading: Some recipes need a second knead.
- Second Rise: Dough rises again.
- Baking: Heating element bakes the bread.
Most machines beep before the final bake. This is your chance to add extras like seeds or nuts. Don’t open the lid too often—heat loss can affect rising.
How Long Does It Take?
A basic bread cycle usually takes 3–4 hours. Whole wheat or gluten-free cycles can take longer.
Common Mistakes To Avoid
- Opening the lid during rising: Can cause collapsed bread.
- Using cold ingredients: Slows yeast activity.
- Incorrect cycle selection: May cause dense or underbaked bread.

Credit: cultured.guru
Removing And Cooling Your Bread
When the baking cycle ends, the machine will beep. Don’t leave bread inside too long—steam can make crust soggy.
Removing Bread Safely
- Wear oven mitts. Bread pan is hot.
- Lift out bread pan and shake gently to release loaf.
- Remove kneading blade from the bottom (may be stuck inside loaf).
- Place bread on a wire rack to cool for at least 30–40 minutes. Cutting too soon can cause gummy texture.
Storage Tips
- Store bread in a paper bag for crisp crust, or in a plastic bag for softer crust.
- Homemade bread has no preservatives. Eat within 2–3 days or freeze slices for longer storage.
Cleaning Your Bread Maker
Proper cleaning keeps your bread maker working well and prevents bad smells or mold.
Cleaning Steps
- Unplug the machine and let it cool.
- Remove the bread pan and kneading blade.
- Wash pan and blade with warm water and mild soap. Avoid harsh scrubbers.
- Wipe inside the machine with a damp cloth. Never immerse in water.
- Dry all parts fully before reassembling.
Extra Cleaning Tips
- If dough spills, clean right away. Dried dough is hard to remove.
- Every few weeks, check for crumbs under the heating element.
- If the viewing window is foggy, wipe with a soft cloth.
Experimenting With Bread Maker Recipes
Once you master basic bread, try new recipes. Bread makers can handle sweet breads, savory loaves, gluten-free recipes, and even jam.
Creative Recipe Ideas
- Raisin cinnamon bread: Add raisins and cinnamon during kneading.
- Cheese and herb bread: Mix shredded cheese and herbs into the dough.
- Gluten-free bread: Use gluten-free flour and dedicated cycle.
Adjusting Recipes
- For softer bread, add more fat or milk.
- For a crispier crust, reduce fat and use the French cycle.
- To make vegan bread, swap milk for plant-based milk and butter for oil.
Example: Gluten-free Bread Maker Recipe
Ingredients:
- 2 cups gluten-free all-purpose flour
- 1½ teaspoons instant yeast
- 1 cup warm water
- 2 tablespoons oil
- 2 tablespoons sugar
- 1 teaspoon salt
Steps:
- Add water and oil to the bread pan.
- Add flour, sugar, and salt.
- Make a small well in flour, add yeast.
- Select gluten-free cycle and loaf size.
- Press start. Remove bread when done, cool fully.
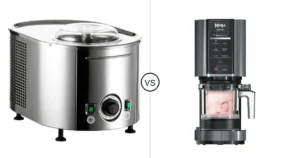
Comparing Bread Maker Models
Choosing the right bread maker matters. Here’s a simple comparison of popular models:
| Model | Loaf Sizes | Special Cycles | Price Range |
|---|---|---|---|
| Zojirushi Home Bakery | 1, 2 lb | Gluten-free, jam, cake | $250–$350 |
| Hamilton Beach Bread Maker | 1, 1.5, 2 lb | Basic, whole wheat, dough | $60–$100 |
| Breville Custom Loaf | 1, 1.5, 2.5 lb | 13 cycles, nut dispenser | $250–$300 |
When choosing, look for:
- Easy-to-clean bread pan
- Reliable kneading blade
- Clear control panel
- Timer/delay function
:max_bytes(150000):strip_icc()/ses-tier-3-primary-best-bread-machines-nsimpson-3351-e24c64fa567e419a822fa17440ff1c53.jpeg)
Credit: www.thespruceeats.com
Bread Maker Vs. Traditional Baking
How does bread maker bread compare to oven-baked bread? Here’s a quick look:
| Bread Maker | Traditional Oven |
|---|---|
| Hands-off process | Manual kneading, rising, baking |
| Consistent results | More room for mistakes |
| Standard loaf shape | Any shape, more crust options |
| Less flexibility for add-ins | Can add extras anytime |
| 3–4 hours total | 4–6 hours (depends on recipe) |
If you want convenience and consistency, bread makers are ideal. For artistic shapes and custom crusts, traditional baking wins.
Troubleshooting Common Bread Maker Problems
Even with careful measuring and cycles, problems happen. Here are solutions to common issues:
Bread Doesn’t Rise
- Check yeast freshness.
- Use warm (not hot) liquids.
- Avoid salt touching yeast.
Dense Or Heavy Bread
- Too much flour or not enough liquid.
- Incorrect cycle selection.
- Expired yeast.
Collapsed Loaf
- Too much yeast.
- Opening lid during rise.
- Overproofing.
Gummy Or Wet Bread
- Cut bread too soon after baking.
- Too much liquid in recipe.
- Wrong cycle used.
Burnt Crust
- Use lighter crust setting.
- Remove bread quickly after baking ends.

Credit: www.youtube.com
Tips For Better Bread Maker Results
Most manuals skip these tips, but they make a big difference:
- Room Temperature Ingredients: Cold butter or milk slows yeast and causes uneven rise.
- Sift Flour: Sifting prevents lumps and gives lighter bread.
- Check Dough Texture: After 10 minutes of kneading, open lid briefly. Dough should be smooth, not sticky or dry. If needed, add a teaspoon of water or flour.
- Oil the Kneading Blade: Lightly oil blade to prevent sticking.
- Use Bread Flour: For best rise and chewy texture.
- Keep Machine Level: Uneven surfaces can cause lopsided loaves.
Bread Maker Safety And Maintenance
Bread makers are safe, but a few precautions matter.
- Always unplug before cleaning.
- Don’t use metal tools in bread pan—can scratch non-stick coating.
- Keep machine away from water when plugged in.
- If machine has a burning smell, stop and check for dough spills.
Regular maintenance keeps your machine working for years. Once a month, check screws and moving parts. If you notice loud noises or uneven kneading, contact support.
Nutritional Benefits Of Homemade Bread
Bread made in a bread maker is often healthier than store-bought bread. You control what goes in—no hidden preservatives or excess sugar.
- Use whole wheat flour for more fiber.
- Add seeds (flaxseed, chia) for omega-3.
- Reduce salt for heart health.
- Use honey or molasses instead of sugar for natural sweetness.
Most store-bought breads have additives. Homemade bread is fresher and can be tailored to your diet.
Advanced Bread Maker Techniques
Once you feel comfortable, try these advanced tricks:
- Sourdough Starter: Some machines allow you to ferment dough for sourdough flavor.
- Custom Cycles: Program kneading and baking times for unique recipes.
- International Breads: Try Japanese milk bread, French brioche, or Italian focaccia.
If you want detailed recipes for world breads, check sites like King Arthur Baking.
Frequently Asked Questions
How Do I Prevent Bread From Sticking To The Pan?
Lightly oil or butter the bread pan and kneading blade before adding ingredients. Make sure pan is dry before greasing. If sticking still happens, let bread cool for a few minutes, then loosen edges with a plastic spatula.
Can I Use Regular Yeast Instead Of Bread Machine Yeast?
You can use instant yeast or active dry yeast, but avoid cake yeast. Instant yeast works best because it activates quickly. If using active dry yeast, dissolve it in liquid first for reliable results.
Why Does My Bread Sometimes Have A Hole At The Bottom?
The kneading blade often stays inside the loaf during baking, creating a small hole. This is normal. To minimize, remove blade after kneading (if your machine allows), or use recipes with less sticky dough.
How Can I Make Gluten-free Bread In My Bread Maker?
Use gluten-free flour and the dedicated gluten-free cycle. Gluten-free dough is sticky and needs less kneading. Also, add xanthan gum or psyllium husk for better structure, as gluten-free flour lacks protein.
Is It Possible To Bake Cakes Or Jam In A Bread Maker?
Yes, many bread makers have cake and jam cycles. For cakes, use recipes with less yeast and more sugar. For jam, follow your machine’s instructions for fruit and sugar quantities. Always clean the machine well after making jam to prevent sticking.
With these steps, tips, and troubleshooting advice, you can use your bread maker machine confidently. Whether you’re baking daily bread or trying new recipes, you’ll enjoy the fresh taste and convenience of homemade bread. Experiment, learn, and soon you’ll be creating bakery-quality loaves right in your kitchen.