Skip to content
The moka pot is one of the most rewarding ways to make coffee at home. This stovetop brewer, invented in Italy in 1933, uses steam pressure to push hot water through coffee grounds and produce a strong, aromatic concentrate. It won't make true espresso — there isn't enough pressure — but it delivers a bold, rich cup that rivals what many cafés serve, for pennies per brew. In this guide, you'll learn exactly how to use a moka pot: how to choose one, prepare it, fill it, dial in the grind, manage the heat, and clean it so every batch tastes its best.
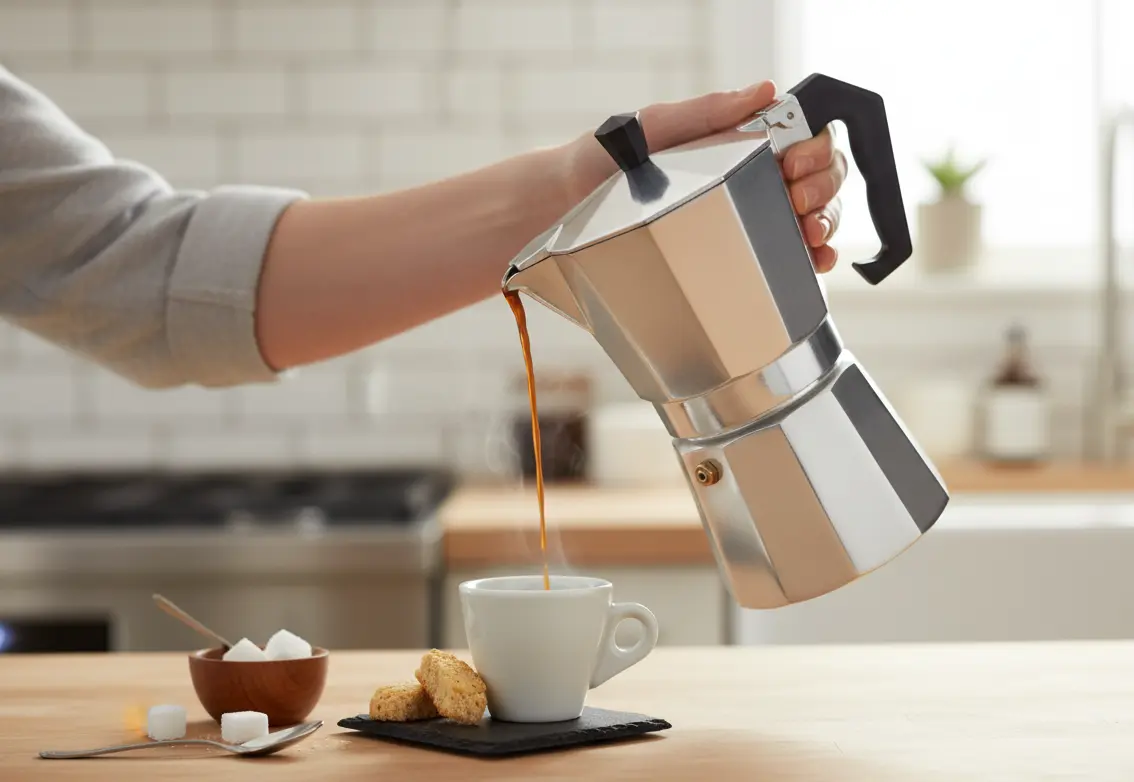
Freshly brewed moka pot coffee flowing into the upper chamber.
What a Moka Pot Does (and Doesn't) Do
A moka pot is essentially a three-part pressure brewer. Water goes in the bottom chamber, coffee sits in a funnel-shaped basket above it, and heat turns the water into steam. That steam builds up just enough pressure to push the water upward through the coffee and into the top chamber. You can also read our guide on best moka pot for induction stove.
The result is a concentrated, espresso-style drink with more body than drip coffee and a rich layer of light foam on top. But it is not espresso. Pump espresso machines force water through coffee at around nine times the pressure a moka pot can manage, which creates true crema. The moka pot instead produces a softer, golden foam that tastes excellent but behaves differently. Keep that expectation in mind: use a moka pot for strong, satisfying coffee, not as a replacement for a commercial espresso bar.
The iconic eight-sided aluminum pot is still made by the company that invented it, and you can find official care guidance from Bialetti. A well-used moka pot can last decades if you treat it properly. You can also read our guide on moka pot vs espresso.
Why the Moka Pot Deserves a Spot on Your Stove
The moka pot has survived nearly a century for one simple reason: it makes exceptional coffee with minimal equipment. You don't need a machine that costs hundreds of dollars, a complicated grinder setup, or special filters. Just a pot, hot water, and good coffee.
What's more, the moka pot gives you control. Every variable — the bean, the grind, the heat, the water — is in your hands. That hands-on approach is exactly why so many coffee enthusiasts return to it even after owning expensive espresso machines. The ritual is part of the appeal. And with coffee shop prices climbing every year, the ability to produce café-quality drinks at home has never felt more valuable. You can also read our guide on how to fix bitter espresso.
Choosing the Right Moka Pot
Aluminum vs. Stainless Steel
The two most common moka pot materials behave differently in the kitchen, so picking one is about your stove, your routine, and your taste.
| Material | Heating | Flavor | Care | Best For |
|---|---|---|---|---|
| Aluminum | Heats fast and evenly | Classic; can develop a thin patina over time | Hand-wash only; no harsh dish soap | Traditionalists, gas and electric stoves |
| Stainless Steel | Heats a bit slower | Neutral; won't react with coffee | Hand-wash; more forgiving of soap | Induction cooktops, durability, heavy daily use |
In practice, aluminum is the traditional choice and the most affordable. Its downside is that coffee is mildly acidic, and aluminum can gradually develop a metallic taste — a common reason someone says "moka coffee tastes tinny." Stainless steel removes that issue entirely and is the only type that works directly on induction cooktops. The same reasoning that leads you to choose well-built cookware for other meals applies here: a thicker base means steadier heat and a more forgiving brew.
Sizing: A "Cup" Is Not a Mug
Moka pot sizes are labeled in cups, but each "cup" is the tiny espresso-like serving the pot was designed for — roughly 50 ml, about two to three large sips.
| Pot Size | Approximate Yield | Ideal For |
|---|---|---|
| 1 cup | 50 ml | A single short, intense coffee |
| 2 cups | 100 ml | One person who wants a real mug |
| 3 cups | 150 ml | One strong mug or two small cups |
| 6 cups | 300 ml | Couples or two generous mugs |
| 9 cups | 450 ml | Families, guests, batch brewing |
A common mistake is buying a huge pot "so there's enough." Bigger pots extract more slowly, and if you under-fill them, the ratio goes wrong. A 3-cup pot is the sweet spot for most solo drinkers. If you regularly make drinks for others, size up to a 6-cup — not a 9-cup, which can be finicky to brew in small batches. Match the pot to your daily volume, not your parties.
Features Worth Checking Before Buying
- Safety valve: Never buy a moka pot without one. This small spring-loaded valve on the bottom chamber releases excess pressure if something gets clogged.
- Heat-resistant handle: The handle should stay cool on the stove. Plastic or reinforced nylon handles do this job best.
- Induction compatibility: If you have an induction cooktop, you need a stainless steel pot or a separate induction adapter plate.
- Replacement parts: Good gaskets and filter plates should be easy to find. A pot with obscure parts becomes a paperweight when the gasket wears out.
- Lid that opens fully: A hinged lid that opens to at least 90 degrees makes pouring and rinsing far easier.
Preparing a New Moka Pot: First-Time Setup
Clean It Before the First Brew
Manufacturing leaves behind oils and metal dust inside a new pot. Skipping the first wash can ruin your first few cups and create a lingering metallic flavor.
- Disassemble the pot into its boiler, funnel, gasket, filter plate, and top chamber.
- Wash the aluminum parts in warm water with a tiny drop of mild dish soap.
- Rinse every piece thoroughly — soap residue is the real enemy of moka coffee.
- Dry everything completely before assembling.
- Do not run any part through the dishwasher. It's too harsh for aluminum and can damage the gasket.
Many long-time moka pot owners also brew and throw away the first two or three batches of coffee to "season" the metal. It feels wasteful, but it does settle the flavor, especially on aluminum pots. Try one batch first — if the coffee tastes clean, you're ready.
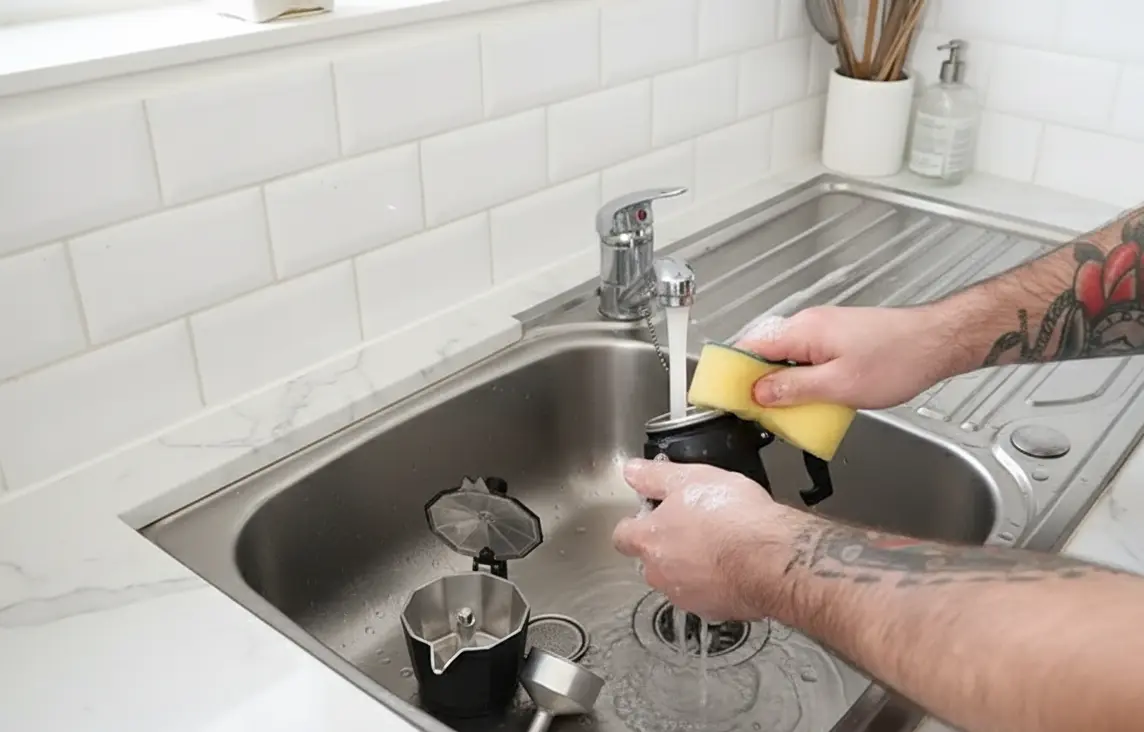
The pot disassembled into its boiler, funnel, filter plate, and gasket.
Assemble the Pot Correctly
The moka pot has few parts, but alignment matters.
- Fill the bottom chamber with water (details below).
- Drop the funnel-shaped filter basket into place. It should sit snugly on the floor of the chamber.
- Fill the basket with coffee and level it — don't tamp.
- Pop the gasket into the top chamber's rim, then lay the metal filter plate on top of it.
- Screw the top chamber onto the bottom chamber hand-tight. Don't force it.
The gasket must sit flat. If it's twisted or pinched, steam will escape, and the coffee will brew weak or leak — no amount of tightening fixes a misaligned gasket. If the top screw cap of the boiler is the old two-handled style, grip the boiler body instead of the cap when opening; the whole base can twist loose.
Coffee and Grind Basics
Best Beans for a Moka Pot
The moka pot amplifies a coffee's strengths and flaws. Because brew water stays in contact with the grounds for only a short time, bold, low-acidity roasts usually perform best. Dark roasts with chocolate, caramel, or even slightly smoky notes are the classic match. Medium roasts also work beautifully and keep more of the bean's original character.
- Buy whole beans with a recent roast date when possible.
- Avoid pre-ground supermarket coffee if you want the full effect.
- If your beans are very oily on the outside — common with syrupy dark roasts — let the grind lean slightly coarser, or the oils can clog the filter plate.
The Ideal Grind Size
Grind size is the single biggest factor between a great moka pot brew and a bitter, muddy one.
| Grind | Texture | Result in a Moka Pot |
|---|---|---|
| Fine (espresso) | Powdery, like flour | Clogs the filter; bitter, over-extracted |
| Medium-fine | Table salt or fine sand | Balanced extraction — the target |
| Medium-coarse | Granulated sugar | Weak, watery, sour |
Use a burr grinder if you have one; blade grinders produce uneven particles that over-extract and under-extract at the same time. For the fundamentals of grinding and extraction, the Specialty Coffee Association publishes widely used best practices.
A good starting rule: dial in the grind until a 3-cup pot takes about 3 to 5 minutes to brew. Choose a brew that runs too fast, grind finer. Brews slowly and tastes harsh, grind coarser. Make one small adjustment at a time.
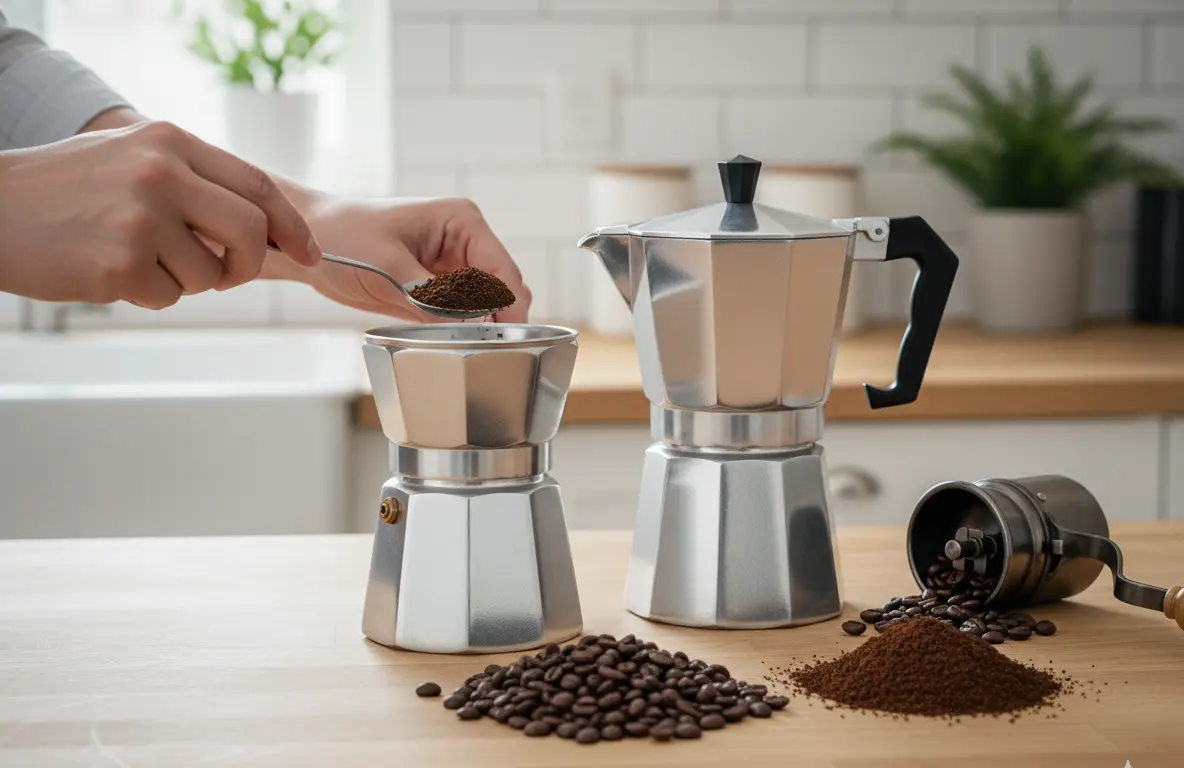
Fill the basket to the rim and level it with a finger — no tamping.
How to Fill a Moka Pot Correctly
The Water Level
Remove the top chamber and fill the bottom boiler with water. The fill line is the safety valve — that small raised button on the inside or outside of the chamber.
- Stop the water just below the valve's level.
- Never cover the valve.
- Don't fill with hot or boiling water if you want maximum control; cold water is traditional and gives a slower, gentler extraction.
- Hot water from a kettle speeds things up and can reduce bitter notes, but it also makes assembly more stressful — the pot is slippery and hot.
A common mistake is overfilling "to be sure there's enough." Extra water dilutes the brew and forces a longer, more bitter extraction. If you want a stronger cup, use slightly less water — but stay at or below the valve.
The Coffee Dose
Fill the filter basket completely and level it off with a finger. The rule is simple: fill, don't tamp.
- Too little coffee means weak, hollow coffee.
- Tamping compacts the grounds and blocks water flow, causing the safety valve to hiss and the coffee to taste scorched.
- A rounded mound is fine only if it doesn't touch the top chamber's filter plate — better to level it.
The right dose is "full but loose." Water should be able to travel through the coffee evenly, extracting oils and dissolved solids along the way.
Water Quality Matters More Than You Think
The moka pot concentrates flavor, which means it also concentrates whatever is in your water. If your tap water is heavily chlorinated or high in minerals, those flavors will land directly in your cup. Filtered or bottled spring water is a simple upgrade that can transform your results.
Hard water also creates scale inside the boiler faster, which affects brewing time and requires more frequent descaling. If you notice your brew slowing down, mineral buildup is often the culprit. For an in-depth look at how water chemistry affects your daily coffee, understanding what you're really pouring in your kettle foundation can help.
Brewing Step by Step: Heat, Watch, Stop
Heat Settings
Moka pots are designed for low, steady heat. A common beginner mistake is cranking the burner to "make it go faster." High heat causes the water to flash to steam too quickly, producing scorched, bitter coffee — and sometimes an angry sputter across the stove.
- Set the burner to medium-low.
- For gas stoves, keep the flame inside the base of the pot.
- For electric coils, start on medium and drop to low once you hear the first gurgle.
- On induction, use a medium setting; stainless steel pots respond quickly.
The ideal is a gentle, continuous flow of coffee into the top chamber. If the stream is violent or spitting, the heat is too high.
What "Done" Looks and Sounds Like
Brewing a moka pot is an audio-visual experience. Around 3 to 6 minutes in — depending on the pot size, water temp, and grind — the top chamber fills with dark coffee. As it nears the end:
- The steady stream turns lighter in color.
- A soft foam appears at the spout.
- The flow becomes a distinct, gurgling sputter.
Remove the pot from the heat the moment that sputtering starts. Yes, there is a little coffee left in the boiler. Leave it there. That final tail is over-extracted and bitter, and letting the pot sputter on the burner for another minute is how most people ruin a perfectly good brew.
Light golden foam on top is a sign of a well-managed extraction — stop the brew before loud sputtering.
Once off the heat, give the coffee a quick stir in the top chamber. The first coffee to arrive is stronger than the last; a brief stir evens out the flavor so your first sip tastes like your last.
If you travel a lot, a tiny electric kettle turns any hotel room into a coffee corner — just combine the kettle with a stovetop-style moka pot that works on a hot plate, or an electric version if your accommodation allows it.
Common Mistakes Beginners Make (and How to Avoid Them)
Even experienced home cooks stumble with the moka pot at first. Here are the most common errors and exactly how to fix them:
Using the wrong grind size. Pre-ground espresso grinds are usually too fine for a moka pot. If your brew tastes bitter and takes forever, go coarser.
Tamping the grounds. This is not espresso. Pressing down on the coffee blocks the water and creates a sluggish, burnt result. Fill the basket and level it.
Leaving the pot on the heat during the sputter phase. The moment you hear that gurgling change, the pot is done. Leaving it running only adds bitter compounds.
Replacing the gasket too late. A worn-out gasket causes leaks, weak pressure, and mess on your stovetop. If the pot starts dribbling at the seam, that's your cue to order a replacement.
Remember that your moka pot is a precision tool, not a magic machine. Each mistake is a learning opportunity — and fixable on the next brew.
Serving and Turning Moka Coffee Into Drinks
Pouring Tips
Moka pot coffee is best served immediately, while the foam is still alive.
- Warm your cups first with a splash of hot water — it keeps the coffee hot longer.
- Pour slowly and steadily; the concentrated liquid is prone to splashing.
- Stop before the last dark drops in the top chamber. That final residue is bitter sludge.
Drink Ideas
Moka pot coffee is a concentrate. A 50 ml serving is intense on its own but shines when stretched into a familiar drink:
- Americano: Pour hot water over one or two shots of moka coffee for a smooth, full-bodied black coffee.
- Café con leche: Equal parts moka coffee and warm milk, slightly sweet — the classic Spanish way.
- Cappuccino-style: Froth warm milk and spoon some foam on top. It won't have the dense microfoam of a pump machine, but it's genuinely good.
- Iced version: Brew the coffee, cool it slightly, and pour over ice with milk.
Warm milk gently in the right cookware rather than nuking it in the microwave; a slow, low-heat warm-up keeps the milk creamy and sweet.
When you're hosting brunch or a get-together, don't run one giant pot on the stove while your guests wait. Brew two or three batches ahead of time, combine them in a pre-heated carafe, and keep it warm. The same logic behind serving drinks to a crowd applies to coffee: have it ready before people arrive, and let them pour their own.
Cleaning and Maintenance: Keep the Flavor Clean
After Every Brew
- Let the pot cool completely.
- Disassemble all parts and rinse the inside with hot water.
- Use a soft brush to remove grounds from the filter and funnel. The tap is usually blocked by a stuck particle, not a broken pot.
- Dry the parts thoroughly before storing. Moisture in a closed pot breeds stale odors and can corrode aluminum.
For aluminum pots, skip soap in the daily routine. Coffee oils build a natural seasoning that protects the metal and adds depth; soap strips it and leaves a film that can taint the next cup. Stainless steel can handle a drop of mild soap when needed, but water-only rinsing still works fine.
Descaling Every Few Weeks
Hard water leaves white scale inside the boiler, which slows brewing and eventually damages the pot. When your brew time creeps longer than usual, descale.
- Mix one part white vinegar with two parts water in the boiler.
- Assemble the pot with no coffee in the funnel.
- Brew the mixture as if making coffee.
- Let the pot sit for 15 minutes, then dump the liquid.
- Run two or three full pots of clean water through it to rinse away any vinegar.
Scaling is a "when it's slow, do it" job. With soft water, every few months is enough; with hard water, it's worth doing monthly.
Replacing the Gasket and Filter
The rubber gasket and the small metal filter inside it don't last forever. Under regular use, plan on replacing the gasket every 6 to 12 months — or sooner if the pot starts leaking. A quick check now and then is smart: the gasket should be supple, not cracked or brittle, and the filter plate should be free of holes and heavy staining.
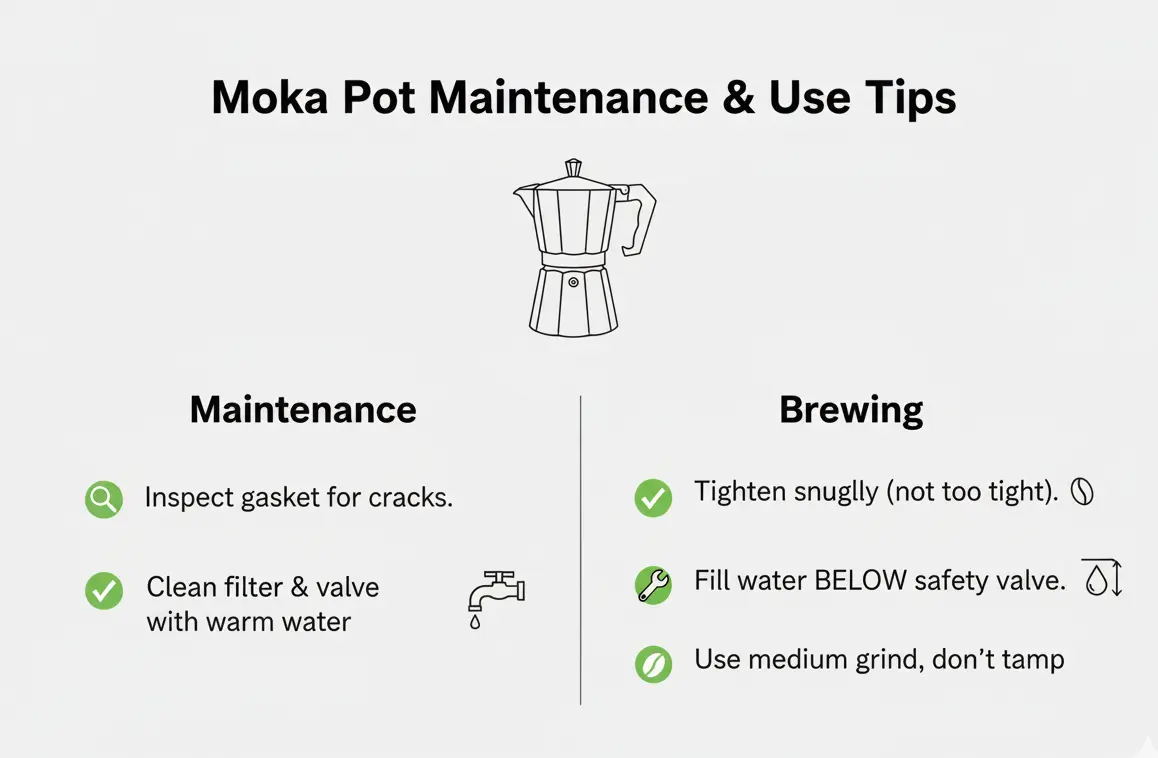
A worn gasket is the most common reason a moka pot starts leaking around the seams.
Troubleshooting Common Moka Pot Problems
| Problem | Likely Cause | Fix |
|---|---|---|
| Weak, watery coffee | Grind too coarse; basket under-filled; heat too low | Grind finer; fill the basket to the rim; use a steady medium-low heat |
| Bitter, burnt coffee | Grind too fine; heat too high; left on the stove during the sputter phase | Grind coarser; lower the heat; remove the pot when sputtering begins |
| Sour, sharp taste | Under-extraction from very low heat or a coarse grind; stale beans | Raise heat slightly, grind finer, and buy fresh beans |
| Leaking around the seam | Worn gasket; misaligned gasket; overfilled water; overtightened threads | Inspect and realign the gasket; keep water below the valve; hand-tighten only |
| Hissing from the safety valve | Pressure problem: clogged filter, tamped grounds, or too much heat | Clean the filter; don't tamp; lower the heat |
| Coffee spits and splashes | Heat too high; leaving the pot on too long | Remove from heat earlier; let it rest a few seconds before pouring |
| Metallic taste | New unseasoned pot; soap residue; old aluminum | Run a few seasoning batches; rinse with plain water; consider stainless steel |
Frequently Asked Questions
Is moka pot coffee the same as espresso?
No. Espresso uses high-pressure water (typically nine bars), giving a denser crema and different body. Moka pot coffee is a strong, espresso-style concentrate, and it works well in drinks that normally call for espresso, but it is a different drink.
What grind size is best for a moka pot?
Medium-fine — the texture of table salt. Finer than drip coffee, coarser than espresso. This lets water move through the grounds steadily without clogging the filter.
How much water should I add?
Fill the bottom chamber just below the safety valve, never covering it. That fixed volume is part of the design. Don't top it up "by eye" beyond the valve.
When do I know the coffee is done?
Watch the top chamber: when the stream changes from dark liquid to pale foam and the pot starts to gurgle loudly, remove it from the heat. The whole brew usually takes 3 to 6 minutes.
Can I use a moka pot on an induction stove?
Only if your pot has a magnetic stainless steel base, or if you use an induction adapter plate. Pure aluminum moka pots do not work on induction cooktops.
Final Thoughts
A moka pot rewards patience and punishes shortcuts. Use freshly roasted beans, grind them medium-fine, fill the basket without tamping, keep the water below the valve, brew on gently, and stop the moment the sputtering starts. Do that, and you'll get a rich, honest cup of coffee for a fraction of the price of café drinks.
The first brew might be average. The third will be excellent. Once the basics become second nature, you can experiment with roasts, water ratios, and drink recipes until the routine feels like yours. Master the moka pot first, then browse more kitchen guides for other small upgrades that make daily cooking faster and more enjoyable — like mastering the art of air-fried steak or understanding your immersion blender's full potential.