Skip to content
Making your own ice cream at home is more popular than ever. With an ice cream maker, you can enjoy fresh, creamy desserts anytime, using your favorite flavors and healthy ingredients. Many people buy these machines, but they don’t always know how to get the best results.
Some struggle with icy texture, others with long waiting times, or even messy clean-ups. But with a little guidance, anyone can master the art of homemade ice cream.
This guide walks you through every step of using an ice cream maker—whether you have a simple manual machine or a high-tech electric one. You’ll learn how to prepare, mix, churn, and store your ice cream. Along the way, you’ll find helpful tips, practical examples, and answers to questions beginners often ask.
Let’s explore how to use an ice cream maker and create treats that impress your family and friends.
Understanding Different Types Of Ice Cream Makers
Before you start, it’s important to know which type of ice cream maker you have. The process can vary depending on the machine.
| Type | How It Works | Pros | Cons |
|---|---|---|---|
| Manual (Hand-Crank) | Uses salt and ice around a mixing bowl; you turn the crank | Classic method, no electricity needed | Labor-intensive, can be messy |
| Freezer Bowl (Electric) | Bowl is pre-frozen; electric motor churns the mixture | Easy to use, affordable | Bowl must be frozen ahead; limited batches |
| Compressor (Self-Freezing) | Built-in freezer chills and churns automatically | Fast, multiple batches possible | Expensive, larger size |
Freezer bowl models are the most common for home use. If you’re not sure what type you have, check the user manual or look at the machine’s design.
Preparing For Ice Cream Making
Getting ready is more than just pulling the machine out of the cupboard. Good preparation leads to better ice cream.
Chill The Bowl Or Canister
Most machines need the freezer bowl or canister to be cold before starting. Place it in your freezer for at least 12-24 hours. Some freezers need even longer to reach the right temperature (0°F or -18°C). A common beginner mistake is not freezing the bowl long enough, which causes soupy ice cream.
Gather Your Ingredients
Classic ice cream uses a few main ingredients:
- Milk
- Cream
- Sugar
- Flavorings (like vanilla, chocolate, fruit)
- Eggs (optional, for custard-style)
Measure everything before you start. It’s best to use high-quality, full-fat dairy for a creamier texture. Skim or low-fat milk can make the ice cream icy.
Prepare The Ice Cream Base
There are two main styles:
- Philadelphia-Style: No eggs, just mix milk, cream, sugar, and flavorings.
- Custard-Style: Cook egg yolks with milk and sugar to make a thick base.
Custard-style is smoother but takes more time. Always chill your ice cream base in the fridge for a few hours before churning. This step is often skipped, but it’s key for better texture.

Credit: bydash.com
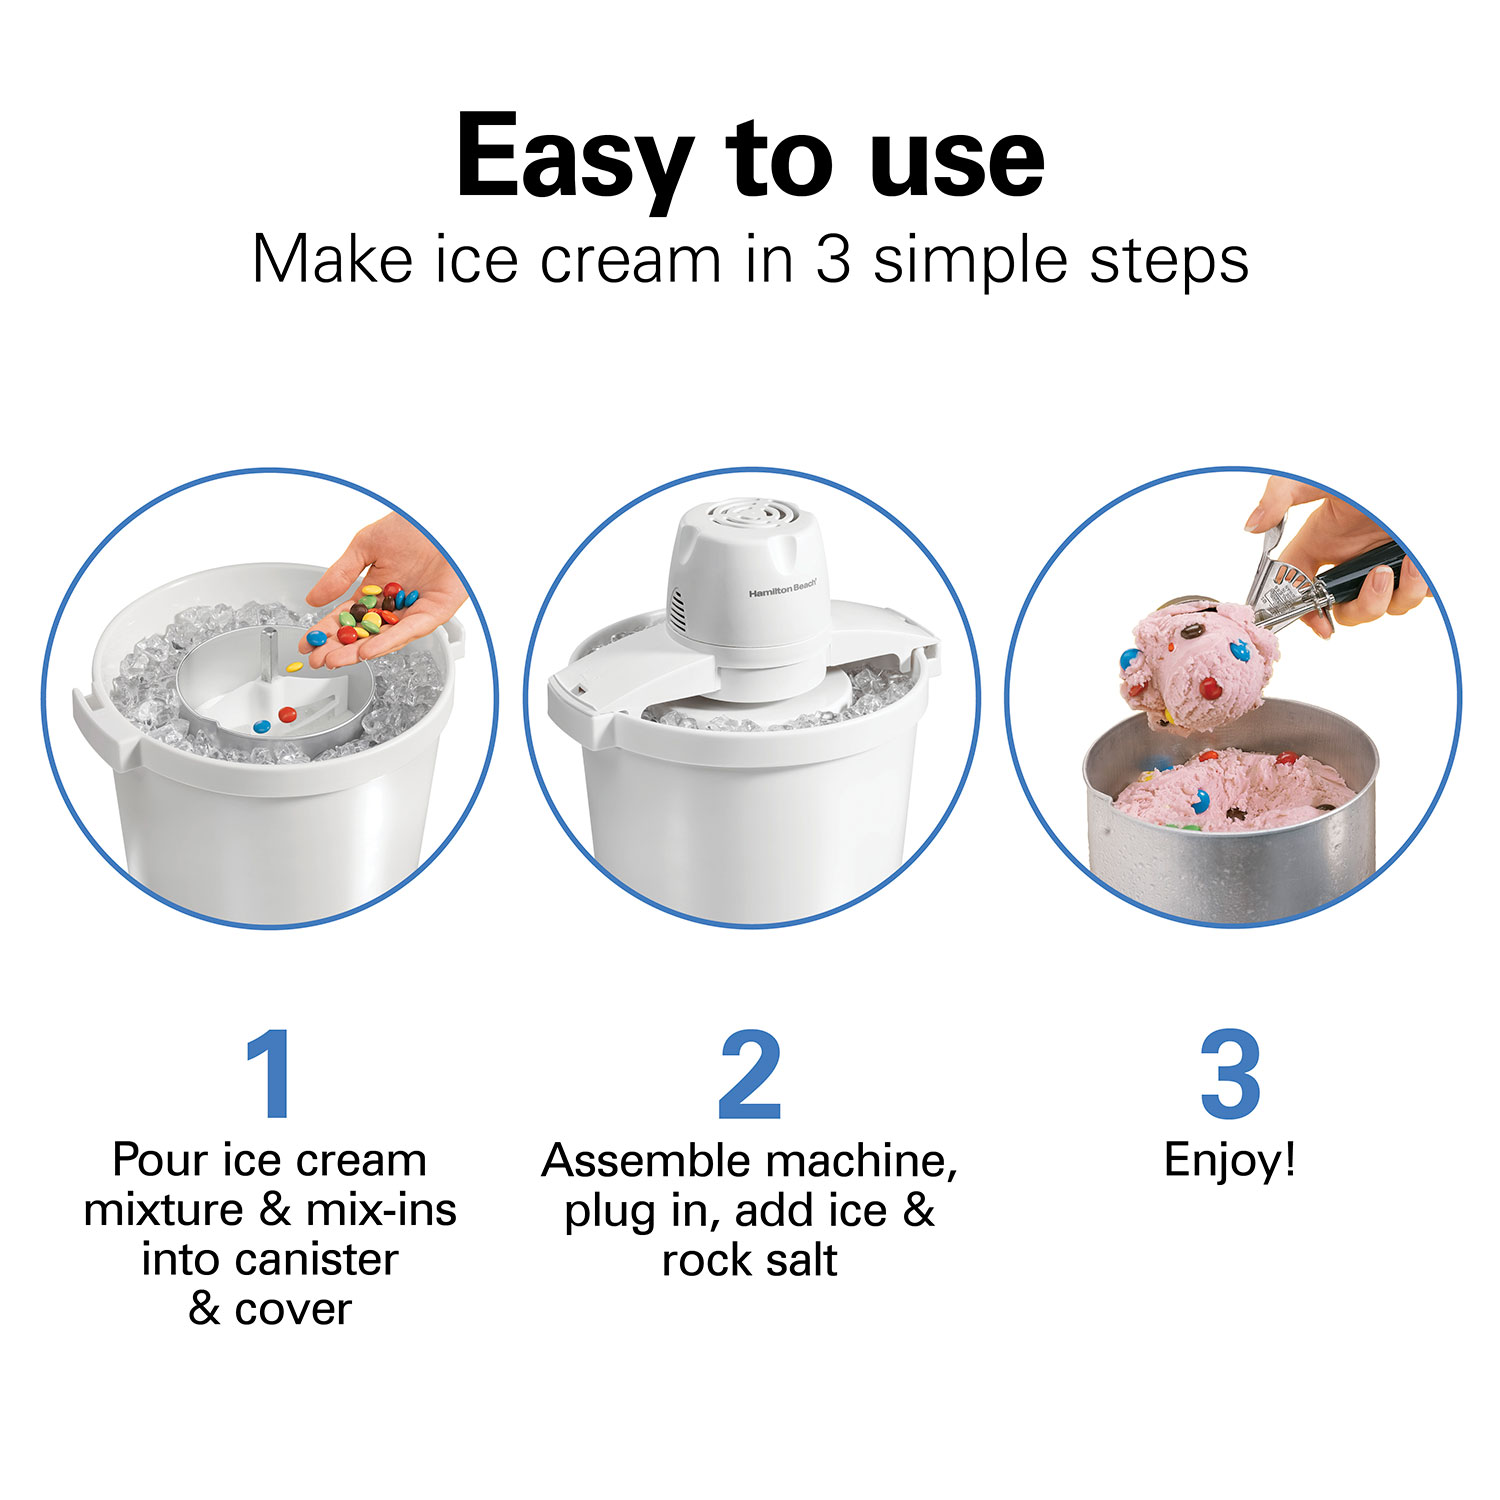
How To Use An Ice Cream Maker: Step-by-step
The main process is similar for most machines, with a few small differences.
1. Assemble The Machine
Put the frozen bowl or canister into the machine. Attach the paddle (also called a dasher) and the lid. Make sure everything fits tightly—if it’s loose, ice cream may freeze unevenly.
2. Start The Machine
Turn on the motor (for electric machines) or get ready to crank (for manual). The machine should be running before you pour in the ice cream base. This keeps the mixture moving and prevents it from freezing solid on the sides.
3. Pour In The Ice Cream Base
Slowly pour the chilled mixture into the bowl while the machine is running. Don’t overfill—most machines work best when filled up to two-thirds. Extra space helps the mixture expand as it freezes.
4. Churn And Freeze
The machine will churn for 15–40 minutes, depending on the model and recipe.
- Manual machines: Turn the crank steadily. If you stop, the ice cream can freeze too hard.
- Electric machines: Just watch and wait. The sound may change as the ice cream thickens.
You’ll know it’s ready when the mixture looks like soft-serve ice cream and the paddle slows down.
5. Add Mix-ins
If you want to add chocolate chips, nuts, or fruit, do it in the last 5 minutes of churning. Adding these too early can cause them to sink to the bottom or break apart.
6. Transfer And Harden
Scoop the soft ice cream into a container. Cover it with wax paper or plastic wrap touching the surface to prevent ice crystals. Freeze for 2–4 hours for a firmer texture.
| Step | What to Do | Tips |
|---|---|---|
| Assemble Machine | Insert bowl, paddle, lid | Double-check fit |
| Start Machine | Turn on before pouring base | Prevents freezing to sides |
| Pour Base | Pour slowly, don’t overfill | Leave space for expansion |
| Churn | 15–40 min, until thick | Listen for motor slowing |
| Add Mix-Ins | Last 5 min of churning | Pre-chop hard ingredients |
| Harden | Freeze 2–4 hours | Cover to avoid ice crystals |
Troubleshooting Common Problems
Even with the best recipe, things can go wrong. Here are some issues and how to fix them.
Ice Cream Is Too Soft
- The bowl was not cold enough. Freeze it longer next time.
- Too much sugar or alcohol in the recipe. These lower the freezing point.
- Not enough churning time.
Ice Cream Is Icy
- The base was not chilled before churning.
- Low-fat milk or poor mixing.
- Ice crystals form if the machine stops during churning.
Machine Stops Or Struggles
- Too much mixture in the bowl.
- Hard mix-ins added too early—wait until the end.
Ice Cream Won’t Thicken
- Check if the paddle is attached correctly.
- The room or kitchen may be too hot—keep the machine away from heat.
A non-obvious tip: Always store your freezer bowl in the freezer, so it’s ready for your next batch. Many people forget and have to wait another day to make more ice cream.
Cleaning And Maintenance
After enjoying your ice cream, proper cleaning keeps your machine working well.
- Unplug the machine before cleaning.
- Allow the bowl to reach room temperature before washing (sudden heat can crack it).
- Hand wash the bowl, paddle, and lid with mild soap and water. Avoid dishwashers unless the manual says it’s safe.
- Dry all parts completely before storing.
A practical insight: If your bowl gets a build-up of frost or odor, let it warm up, clean with baking soda, and refreeze. This step helps prevent off-flavors in your next batch.
Creative Ideas And Variations
Using an ice cream maker is not just for classic vanilla. Try these ideas to make your dessert unique:
- Non-dairy ice cream: Use coconut milk, almond milk, or oat milk.
- Sorbet and gelato: Most machines can make these with fruit puree or less cream.
- Mix-in bar: Set out bowls of chopped cookies, candies, or sauces and let everyone customize their scoop.
You can even add a swirl of jam or caramel during the last few minutes of churning for a marbled effect.
Comparing Home-made Vs. Store-bought Ice Cream
Is it worth making your own? Here’s a quick comparison to help you decide.
| Feature | Home-Made | Store-Bought |
|---|---|---|
| Flavor Choices | Unlimited, you control ingredients | Limited to available brands |
| Cost per Pint | $2–$4 | $4–$7 (premium) |
| Freshness | Made to order, no preservatives | May contain stabilizers |
| Texture | Creamier, customizable | Consistent, but may be icy |
| Effort | Requires prep and cleaning | Ready to eat |
Homemade ice cream gives you complete control but takes more time. Many people find the taste and experience worth the effort.
Tips For Best Results
A few expert tips can take your ice cream to the next level:
- Use high-fat cream for a smoother mouthfeel.
- Don’t skip chilling the base—it improves texture and flavor.
- Add a pinch of salt to the mix—it enhances sweetness.
- Use pure vanilla extract or real fruit for better taste.
- Avoid overfilling the machine; air is important for creamy texture.
A less-known trick: Add a tablespoon of corn syrup or honey to your base. It helps prevent large ice crystals, making your ice cream smoother.
Credit: hamiltonbeach.com
Storing And Serving Homemade Ice Cream
After your ice cream is ready, storage matters. Use a shallow, airtight container to freeze ice cream quickly and evenly. Place a layer of plastic wrap directly on the surface before closing the lid. This reduces ice crystal formation.
For serving, let the ice cream sit at room temperature for 5–10 minutes. This softens it just enough for easy scooping. Use a warm, wet scoop for clean, round servings.
If you want more tips and background about ice cream science, the Wikipedia page on ice cream gives a deep dive into the history and chemistry.
Frequently Asked Questions
How Long Does It Take To Make Ice Cream In A Machine?
Most machines take 15–40 minutes to churn ice cream, depending on the model and recipe. Firmer texture needs an extra 2–4 hours in the freezer after churning.
Can I Use Non-dairy Milk In My Ice Cream Maker?
Yes, you can use coconut milk, almond milk, or other non-dairy alternatives. The texture may be less creamy, so add a bit of cornstarch or a tablespoon of oil for better results.
Why Is My Homemade Ice Cream Icy And Not Creamy?
Common causes are using low-fat milk, not chilling the base, or not churning long enough. Adding a small amount of corn syrup or alcohol can help reduce iciness.
How Do I Clean An Ice Cream Maker?
Unplug the machine, let the bowl warm up, and wash all parts by hand with mild soap. Make sure everything is dry before storing. Avoid dishwashers unless the manufacturer allows it.
Can I Make Sorbet Or Gelato With My Ice Cream Maker?
Most machines can make sorbet (fruit-based) and gelato (Italian-style, less cream). Use recipes designed for your machine’s size and follow the same chilling and churning steps.
Making ice cream at home is rewarding and fun. With the right machine and a few smart techniques, you can enjoy fresh, delicious treats anytime. Try different flavors, experiment with new mix-ins, and soon you’ll be making ice cream that rivals your favorite shop.