An immersion blender—also called a hand blender or stick blender—is one of the most versatile tools you can own. It lets you purée soup directly in the pot, whip up a smoothie in the same cup you'll drink from, and emulsify sauces in seconds. No transferring hot liquids into a heavy countertop jar. No extra bowl to wash.
But here's the catch: an immersion blender only performs well when you use it correctly. Angle the blade wrong in hot soup and you risk burns. Press too hard against a frozen ingredient and you can stall the motor. Run it nonstop and you may trigger the thermal overload switch. You can also read our guide on best cordless immersion blender.
This guide takes you through everything—from picking the right model to cleaning it properly—so you get consistently smooth results every time.
What to Look for When Choosing an Immersion Blender
A great immersion blender starts with the right model. Here's what actually matters, not what the marketing says.
Power and Speed Settings
For most home tasks, 200 to 300 watts is plenty for soups, sauces, and smoothies. If you plan to crush ice or blend frozen fruit regularly, step up to 400 watts or more. That extra power handles fibrous vegetables and frozen chunks without straining. You can also read our guide on how to sharpen blender blades.
Speed settings matter more than you might think. A two-speed model with a dedicated turbo button covers most needs, but variable-speed dials give you finer control. Low speed is ideal for incorporating ingredients gently; high speed delivers silky-smooth purées.
In practice, you'll use low speed far more often than high. Starting slow keeps splashes down and lets the blade grab ingredients before you speed up.
Corded vs. Cordless
Corded models offer consistent power and don't need charging, but you're limited by outlet reach. Cordless versions offer freedom—you can blend directly in a pot on the stove—but they add weight and require charging discipline. Battery life has improved significantly in recent years, yet a corded stick blender still delivers more torque for heavy jobs like nut butters or frozen smoothies. If you buy cordless, keep the charging base accessible.
Attachments That Earn Their Place
Most immersion blenders come with at least a blending shaft and a beaker. Look beyond those:
- Whisk attachment – whips cream, beats eggs, and emulsifies vinaigrettes.
- Chopper bowl – minces onions, herbs, and nuts without pulling out a food processor.
- Tall beaker – reduces splashing and acts as the perfect blending container.
Skip models with too many attachments you'll never use. A quality blade shaft and a whisk cover most daily tasks. If you want a deeper look at how different attachments perform, our budget-friendly immersion blender review breaks down what actually comes in the box.
Ergonomic Grip
You'll hold this tool for several minutes at a time. A soft-touch handle with a comfortable grip reduces hand fatigue. Models with the motor housed at the top tend to balance better than bottom-heavy designs. The overall weight matters too—around 2 pounds is comfortable for extended blending sessions.
How to Prepare Ingredients: Techniques That Make Blending Easier
Great texture starts before you even press the button.
Cut Ingredients to the Right Size
Cut firm foods like carrots, apples, or raw potatoes into 1-inch (2.5 cm) pieces. Smaller pieces let the blade capture ingredients quickly and reduce strain on the motor. Soft cooked ingredients—boiled potatoes, steamed cauliflower, roasted tomatoes—can be larger, roughly 2 inches.
This is especially important for raw vegetables. Large chunks can jam between the blades and the blade guard, stalling the motor entirely. Give your blender an easier job and it'll last longer.
Choose the Right Container
For best results, use a tall, narrow container. The blade needs to be fully submerged to avoid splashing, and a narrow vessel keeps ingredients close to the blade. A dedicated blending beaker works well, as do deep saucepans, large measuring cups, and quart-sized deli containers.
Avoid shallow bowls and wide sauté pans. They encourage splatter and make it harder to achieve a consistent texture.
Secure Your Container
Place your blending container on a damp kitchen towel or a non-slip mat. This keeps it from dancing across the counter as the blade creates suction. Never blend while holding the container in one hand and the blender in the other—that's a recipe for spills.
Add Liquid Strategically
For soups and sauces, start with about one-third of the liquid at the bottom. This creates suction that pulls solid ingredients toward the blade. Add more liquid gradually as you blend, stopping to stir with a spatula to redistribute the mixture. For thicker results, add less liquid overall.

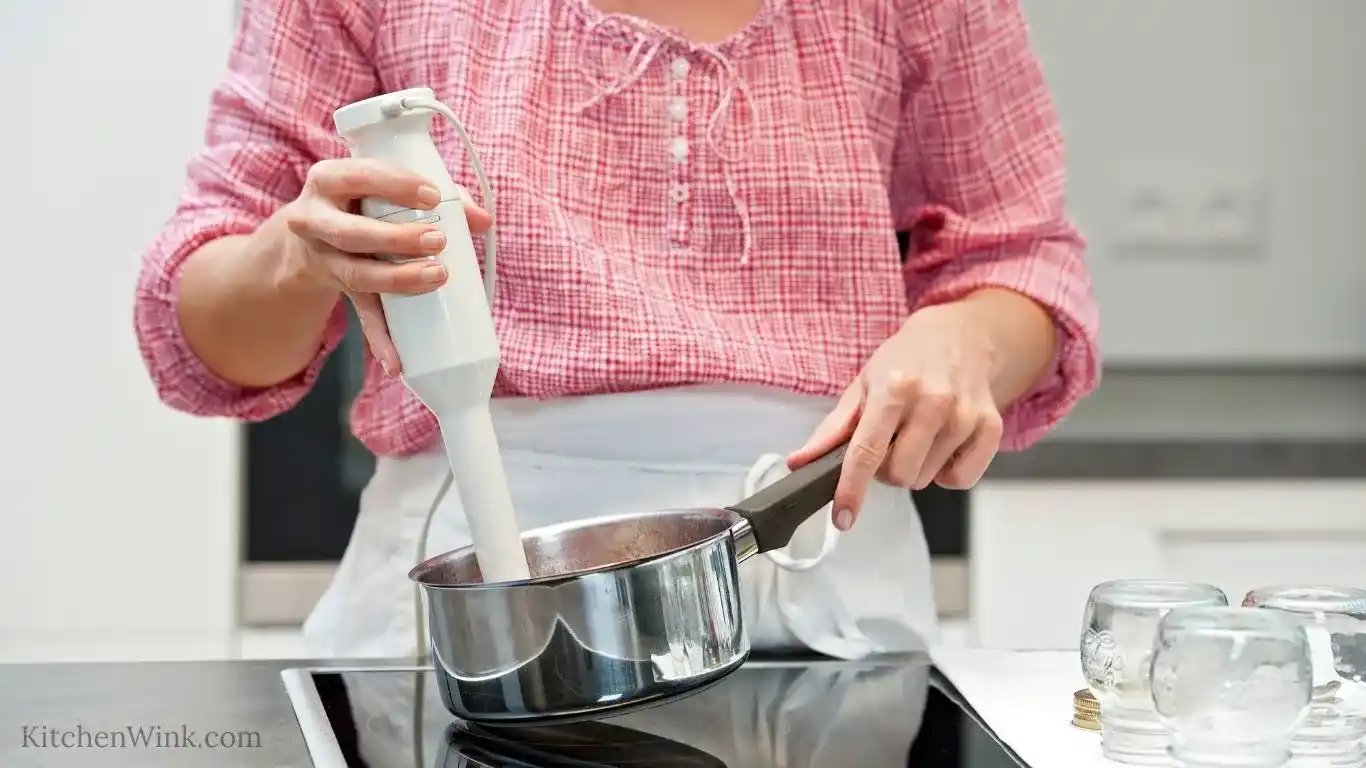
Soup puréed directly in the cooking pot—no transferring required.
Credit: www.tasteofhome.com
How to Use an Immersion Blender Correctly: Step-by-Step Technique
Master these fundamentals and you'll get perfect results on the first try.
Grip and Stance
Hold the immersion blender like you'd hold a computer mouse—firm but relaxed. Place your dominant hand on the handle. Rest your other hand on the top or side of the motor unit to steady it. Keep your wrist neutral and straight; don't bend it at awkward angles.
Keep your free hand and fingers well away from the blending zone. The blade is exposed at the bottom, and it moves fast.
The Up-and-Down Motion
Start with the blade fully submerged. Begin blending at low speed, then move the blender in slow, deliberate up-and-down strokes. This motion pulls ingredients down from the surface and forces them through the blade repeatedly. It's far more effective than holding the blender in one fixed position.
Don't raise the blade above the surface while it's running. This creates a spray of fine droplets across your kitchen. Turn off the motor before lifting.
Tilting for Even Coverage
Once the mixture begins to smooth out, tilt the blender to about a 30-degree angle and move it in slow circles across the pot. This covers a wider area and catches ingredients that collect in corners. For larger batches, work in sections—one quarter of the pot at a time—rather than trying to cover everything at once.

The correct upright grip prevents hand fatigue and helps you control the blade's angle.
Credit: www.industrykitchens.com.au
Speed Control for Desired Texture
Start low, then increase speed gradually. If you want a chunky soup—like a rustic vegetable potage—use short pulses on low speed. For completely smooth purées, blend on high for 30 to 45 seconds total.
Check your texture frequently. Stop the blender, lift it out, and stir with a spoon. You'll see exactly what needs more blending.
Use Pulses for Tough Ingredients
For fibrous greens, raw nuts, or frozen fruit, use short bursts of 2 to 3 seconds rather than continuous running. Pulsing prevents the blades from whipping ingredients into a paste and keeps the motor cool. Continuously running the motor for more than 30 seconds can trigger the thermal overload protection and temporarily shut it down.
How to Blend Hot Liquids Safely
This is the most important safety section in this entire guide.
When blending hot liquids, tilt the immersion blender so the blade guard is fully submerged before turning it on. Start at the lowest speed. Hot liquid splashing at high speed can cause serious burns.
Never fill a container more than two-thirds full with hot liquid. The blade creates suction that draws liquid down, and a full container can overflow. Work in batches if needed—it's worth the extra minute.
Also be careful with pots on the stove. If the heat is still on, the liquid will continue to circulate and can splash. If you're blending while the pot sits on the stovetop, turn the heat off first. In practice, most people find it easiest to move the pot to a cool burner or trivet before blending.
For additional food-handling guidance on heating and blending soups safely, the U.S. Food and Drug Administration's food safety resources are a solid reference.
Blending Different Foods with an Immersion Blender
Each type of food requires slightly different handling. Here's what works in the kitchen.
Soups and Sauces
Blend directly in the pot. This is the immersion blender's greatest strength. For chunky vegetable soups, pulse a few times on low to break up the largest pieces, then increase speed for a smoother finish. For creamy sauces like béchamel or tomato bisque, blend at a tilted angle to incorporate everything evenly.
Smoothies and Shakes
A tall glass or the included beaker is perfect for single-serving smoothies. Start with your liquid and soft ingredients at the bottom, then add frozen fruit or ice on top. Begin at low speed and work the blender upward in slow strokes as the mixture thickens. If you're looking for a dedicated machine for larger batches, our pick of the best mini blenders for smoothies covers compact alternatives that handle bigger volumes.
Mayonnaise and Emulsions
The immersion blender makes perfect mayonnaise in under a minute. Put an egg yolk, a teaspoon of Dijon mustard, a teaspoon of vinegar or lemon juice, and a pinch of salt in a tall beaker. Add oil almost to the top—about ¾ cup. Place the blender at the bottom over the yolk, turn it on low, and let it run untouched for 15 seconds. Then slowly lift the blender as the emulsion forms. It works like magic and tastes far better than store-bought.
Purees and Baby Food
Steam vegetables until fork-tender, then blend them directly in the cooking pot with a splash of cooking water or breast milk. You control the consistency completely—smooth enough for starting solids, or slightly textured for older babies. There's no need for expensive store-bought jars. Freshly made purees taste better and contain no preservatives. Just ensure the food is thoroughly cooked and cooled to a safe temperature.
Whipped Cream and Eggs
Use the whisk attachment, not the blending shaft. Cold heavy cream whips to stiff peaks in 30 to 45 seconds. Egg whites whip faster than you'd expect—watch them carefully to avoid over-whipping.
Cleaning and Maintenance Tips for a Long-Lasting Blender
Proper care keeps your immersion blender working smoothly for years.
Quick Cleaning After Every Use
Unplug the blender immediately after use—the blades may take a moment to stop spinning. Unscrew the blending shaft from the motor unit. Rinse the shaft under warm running water to remove food residue. For stubborn bits, blend warm water with a drop of dish soap for 10 seconds—this gets into every crevice including the blade seals.
Wipe the motor unit with a damp cloth only. Never submerge it in water.
Quick tip: cleaning immediately after use takes 30 seconds. Letting food dry on the blades turns that into a 10-minute task.
Deep Cleaning Methods
For tough stains or lingering food odors, fill a tall container with warm water and a tablespoon of baking soda. Blend for 30 seconds, then rinse thoroughly. For stuck-on food inside the blade guard, use a soft brush—an old toothbrush works perfectly. If your model allows, remove the blade assembly entirely for a thorough soak.
Avoid the dishwasher for most models. The high heat and harsh detergents degrade the plastic and blade seals over time. Check your manual; some newer models are dishwasher-safe, but many aren't.
For more detail on cleaning every type of blender, our complete blender cleaning guide walks through the process step by step.
Proper Storage
Store the blending shaft detached from the motor. This prevents moisture from seeping into the motor housing and stops the blades from getting chipped. Wrap the power cord loosely—never tightly—around the handle. Keep everything in a dedicated drawer or container to prevent accidental drops.
Troubleshooting Common Immersion Blender Problems
Even the best blenders run into issues. Here's how to fix the most common ones.
The Blender Won't Turn On
First, check the obvious: is it plugged in and switched on? Many models have a two-step safety feature requiring both the power switch and the thumb trigger to be pressed simultaneously. If your blender uses this system, make sure you're pressing both. If the motor doesn't respond, check the steps to reset an overheated blender—the thermal protection may have tripped.
The Motor Stops Mid-Blend
This is usually overheating. Run the blender for short bursts of 30 seconds or less, and allow it to cool for 10–15 minutes if it stops. Continuous high-speed use is the main trigger. This is also worth checking if you're blending something extra thick—the motor may draw too much current. Thin the mixture with liquid to reduce the load.
The Blades Seem Dull
Over time, blades lose their sharpness, especially if you regularly blend nuts or frozen ingredients. Many manufacturers sell replacement shafts with new blades, which is safer than attempting to sharpen them at home. If the blades are visibly nicked or rusted, replace them immediately—metal fragments in food are dangerous. Most models let you replace the blade assembly without replacing the entire unit.
The Motor Housing Gets Hot
Some warmth is normal—you're running an electric motor. But if the housing becomes uncomfortable to touch, that's a warning sign. Turn it off, unplug, and allow it to cool completely before continuing. Clean the vents on the housing to ensure proper airflow.
A Burning Smell
This indicates the motor is overheating or the brushes are worn. Stop using the blender immediately. In most cases, the motor is failing and the unit should be replaced. It's rarely worth repairing an inexpensive immersion blender.
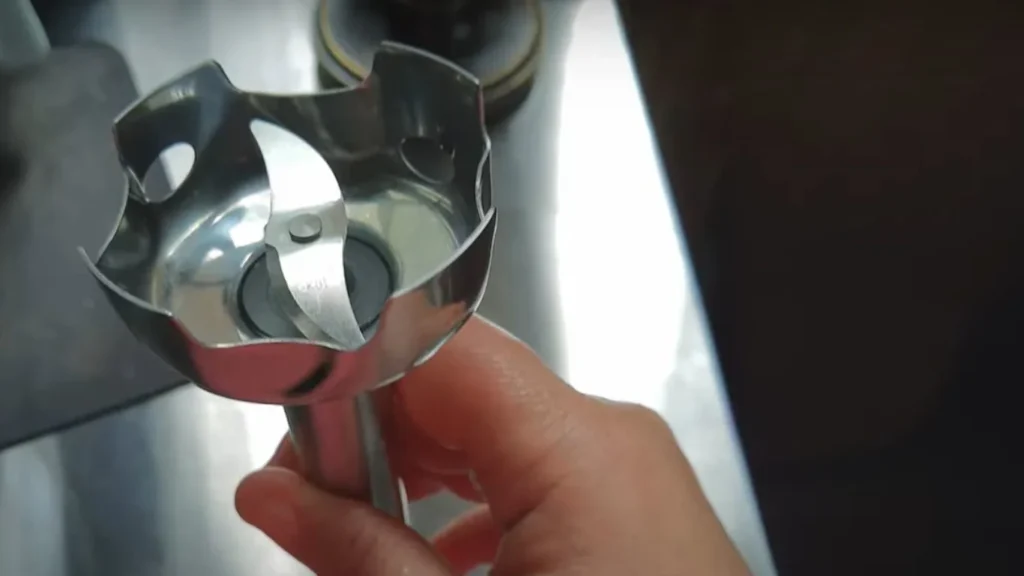
Rinse the shaft immediately after use for the easiest clean-up.
Common Mistakes to Avoid
Beyond the basics, here are the errors most people make with their immersion blender:
- Blending with the blade at the surface – causes splashing and aerates your food, creating a frothy mess.
- Using shallow bowls – leads to splatter and uneven blending.
- Overfilling the container – hot liquids expand and overflow when the blade starts moving.
- Running the motor continuously – overheats the motor and triggers safety shut-offs.
- Blending bones – some recipes call for it in stock, but hard bones can damage the blade. Use a regular blender for that.
- Plunging the blender into thick ingredients at full speed – starts a vortex that stalls the motor. Always start slow.

A stick blender making a smooth purée with minimal equipment.
Credit: www.industrykitchens.com.au
Why an Immersion Blender Beats a Countertop Blender
There are times when a countertop blender is the right tool—large batches, heavy ice crushing, smooth nut butters. For everyday blending tasks, the immersion blender wins on convenience.
- Less mess – blend directly in the cooking pot or serving cup. No transfer, no drip.
- Easier cleanup – the detachable shaft rinses in seconds.
- Handles hot liquids safely – you don't need to cool soup down before blending.
- Takes up minimal space – one drawer in your kitchen holds it all.
For heavier-duty tasks like crushing ice for frozen drinks, a countertop blender with high wattage is still worth having. Our ice crushing guide covers which techniques work best and the kind of power you need.
Frequently Asked Questions
What is an immersion blender best for?
Soups, sauces, smoothies, purées, and emulsions like mayonnaise. It works anywhere you need quick blending directly in the cooking vessel.
Can an immersion blender crush ice?
Some higher-powered models can handle ice cubes, especially with the chopper attachment. Always check your model's specifications first. If it's rated under 300 watts, use crushed ice instead of whole cubes.
Is an immersion blender safe for hot liquids?
Yes, as long as you keep the blade fully submerged and start at low speed. Never fill the pot more than two-thirds full. Tilt the blender so the blade is completely covered before turning it on.
Do I need to buy a separate blender if I own an immersion blender?
It depends on what you make. For single-serving smoothies and soups, the immersion blender suffices. For large batches or heavy ice crushing, a countertop blender is still useful.
How long should I run an immersion blender continuously?
No more than 30 seconds at a stretch for most models. Use short pulses and rest intervals. Give the motor a few minutes to cool between extended blending sessions.
Can I blend raw vegetables with an immersion blender?
Yes, but cut them into small pieces and add enough liquid. Very fibrous raw vegetables like celery or tough greens may require a more powerful model or longer blending.
Final Thoughts: Making the Most of Your Immersion Blender
An immersion blender is one of the few kitchen tools that genuinely saves both time and cleanup effort. Use it directly in the pot for silky soups, whip up frothy smoothies in the glass, and emulsify a perfect vinaigrette in under a minute. With proper technique—submerged blades, slow starts, short bursts, and up-and-down strokes—you'll achieve consistent results without the mess.
Take care of the blades and motor housing, and this compact tool will serve you for years. Add it to your daily rotation and you'll wonder how you ever managed without it.