Your range hood sounds like a small jet engine every time you flip it on. You’re not imagining it, and you’re not stuck with it. If you’ve been asking “why is my range hood so loud,” the odds are strong that a specific, fixable cause is behind it.
Independent testing from the Home Ventilating Institute (HVI) measures hood noise in sones, not just decibels. A 1-sone hood is about as loud as a quiet refrigerator, while a 6-sone hood already forces you to raise your voice. As of 2026, many residential hoods ship in the 4 to 6 sone range.
If yours is far beyond that, something is forcing the motor to overwork. Let’s walk through the diagnosis in order, starting with the easiest fix and working toward the bigger repairs.
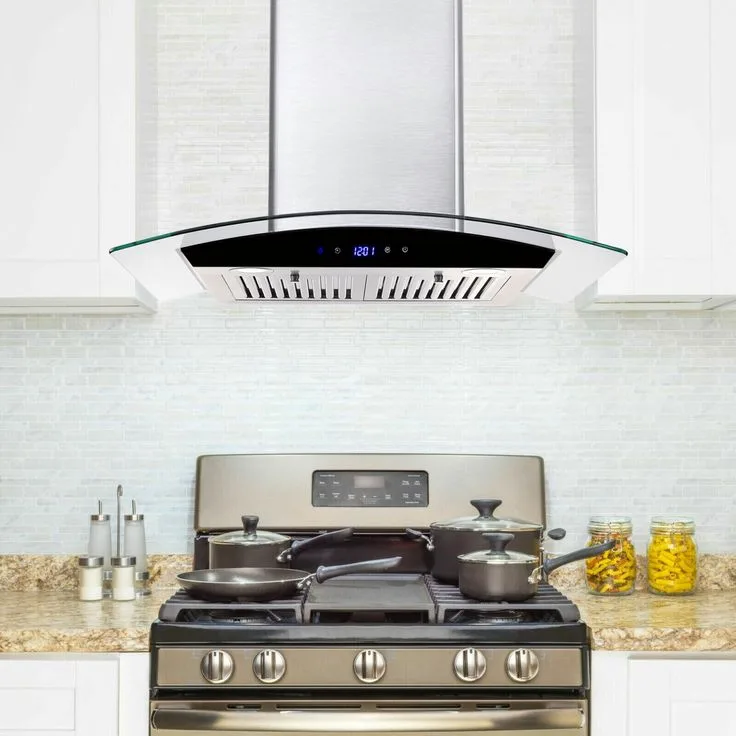
Image source: Bing (Web (fair-use with source credit))
Quick Answer: What You’ll Probably Find First
Why is my range hood so loud? Usually a clogged grease filter, a dirty blower wheel, or a loose mounting screw. Restricted airflow makes the motor work harder and sound worse.
Grinding or scraping means worn bearings. Work through these checks in order.
How a Range Hood Actually Makes Sound (The Basics You Need)
Range hood noise comes from three places: the motor, the air rushing through the duct, and the parts vibrating against each other. They all mix together into that loud drone you hear over the stove.
Think of the blower wheel like a fan blade inside the hood. It spins at thousands of RPM, pulling cooking air up and pushing it outdoors. When anything gets in the way, the motor works harder, the air gets turbulent, and the whole unit gets noisier.
Here’s what normally changes the sound level, from most common to least common:
- A dirty grease filter or blower wheel
- A duct that’s too small, too long, or full of bends
- A loose backdraft damper or flapping vent cap
- Worn motor bearings
- An unbalanced or warped blower wheel
A hood’s sone rating matters too. HVI publishes certified ratings for both airflow and sound. That’s why you’ll see “4.5 sones” listed right next to “600 CFM” on spec sheets.
If your hood’s actual noise is way above what the label claims, it’s not performing as designed.
Step 1: Listen to the Noise and What Each Sound Means
Before you unscrew anything, listen for a few seconds. The type of noise tells you which part to inspect first.
Rattling or Vibrating
If it sounds like a loose panel or a shaky cabinet door, the problem is usually vibration. The blower wheel can be out of balance, or the hood itself isn’t mounted rigidly to the cabinet. Tighten all the mounting screws you can reach, then press on the metal surfaces to see which one flexes.
That spot will probably need a rubber gasket or an extra screw.
Whistling or Screeching
A high-pitched whistle means air is being squeezed through a narrow gap. That points to a clogged filter, a partially blocked duct, or a vent cap that can’t fully open. Before you move to the duct, clean the filter and see if the whistle softens.
If it doesn’t, check the roof cap or wall cap next.
Grinding or Scraping
This is the most serious one. A grinding sound means metal is touching metal, usually the blower wheel rubbing against its housing or a worn motor bearing. Turn off the power and inspect the blower wheel for wobble or damage.
If the motor is grinding, plan on replacing the motor or the entire hood.
Humming or Buzzing
A low electrical hum often comes from the motor’s capacitor, a dimmer switch, or the speed control board. Sometimes it’s just the fan motor’s normal hum amplified by the metal hood. If the hum is new, check the speed switch.
A failing switch can send the wrong voltage to the motor.
Here’s a quick reference table:
| Sound | Most Likely Cause | Quick Check |
|---|---|---|
| Rattling | Loose mounting, unbalanced wheel | Tighten screws, press panels |
| Whistling | Clogged filter or duct blockage | Clean filter, check vent cap |
| Grinding | Worn bearing, wheel rubbing | Inspect wheel, replace motor if needed |
| Humming | Speed switch, capacitor, control board | Test different speeds, replace switch |
Step 2: Check the Grease Filter (The #1 Easiest Fix)
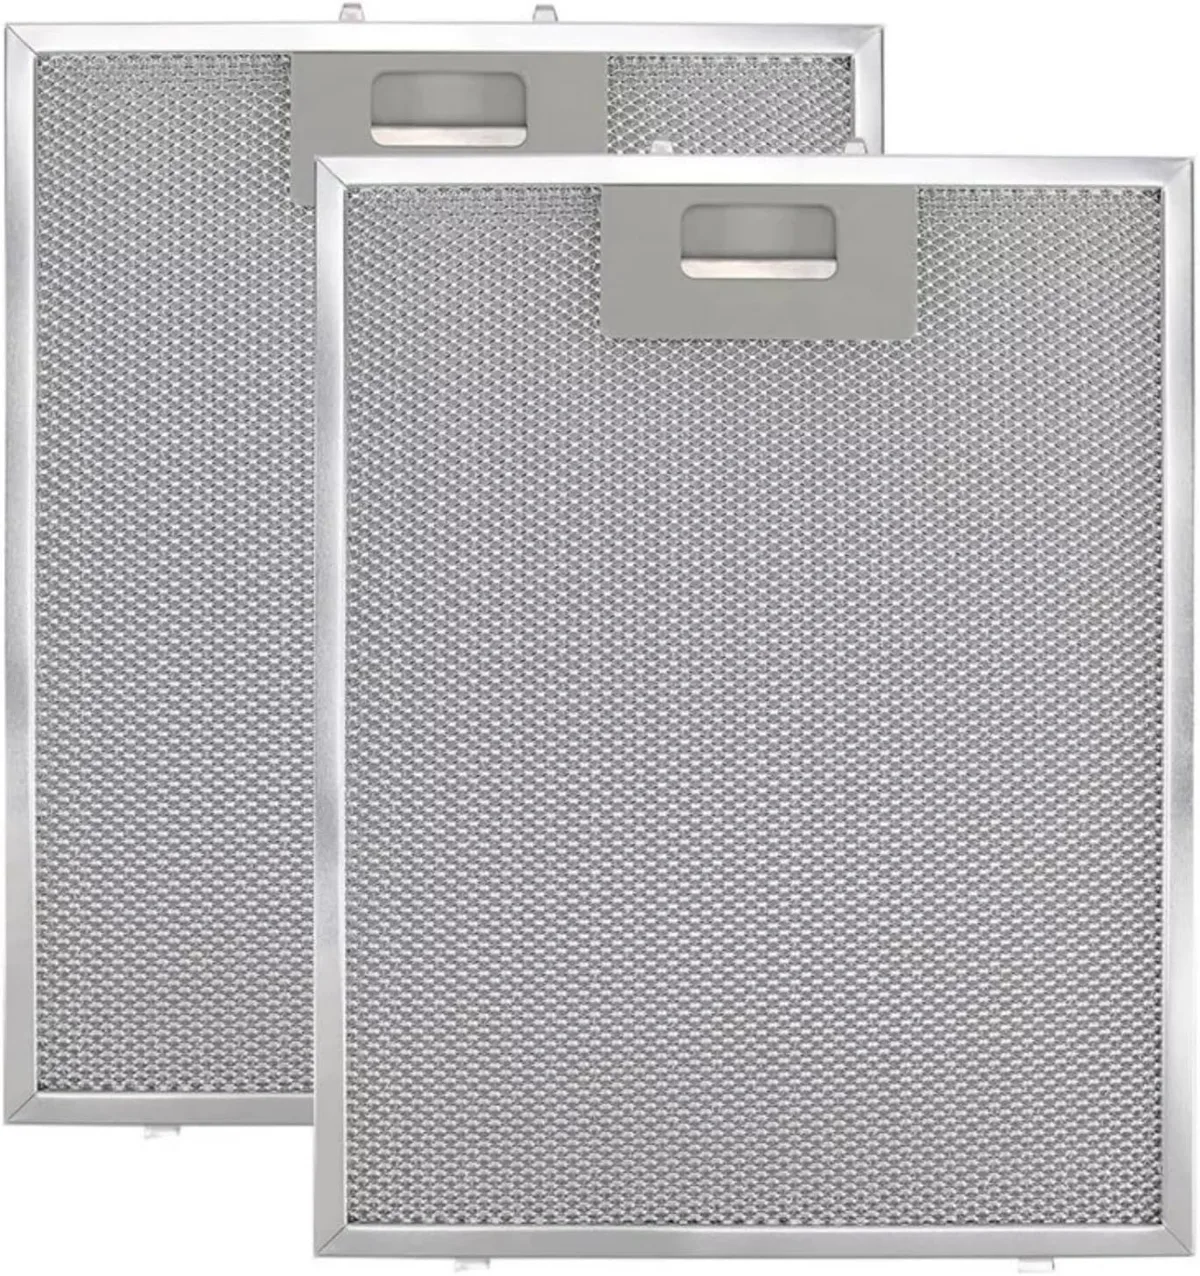
Image source: Web (Bing) / amazon.com (Web image (fair-use with source credit))
The grease filter is the metal mesh or baffle panel you see when you look up inside the hood. Its job is to catch oil before it reaches the blower wheel and duct. When it’s coated in grease, the filter blocks airflow, and the motor compensates by pulling harder.
That extra strain is exactly what makes a range hood loud.
Here’s how to check and clean it:
- Turn off the hood and unplug it, or cut power at the breaker.
- Remove the filter. Most slide out or unlock with a latch on the underside.
- Hold it up to the light. If you can’t see through the mesh, it’s clogged.
- Soak it in hot water with degreasing dish soap for about 15 minutes.
- Scrub with a soft nylon brush, rinse, and let it dry fully.
- Snap it back in and run the hood on high.
Got a baffle filter? Same deal. It has a few layers of stainless steel that trap grease in channels.
Soak, scrub, and dry.
If your hood uses a charcoal filter, usually because it recirculates air back into the kitchen, that filter is not washable. It should be replaced every 3 to 6 months. A saturated charcoal filter absolutely makes the motor noisy.
We have a full breakdown of how ductless systems work if you’re not sure which filter you have.
While the filter is out, look at the housing and fan area. If they’re greasy, that’s a sign you should deep-clean the whole unit. Regular cleaning keeps the motor from overworking.
Step 3: Inspect the Blower Wheel (Where 90% of Buildup Hides)
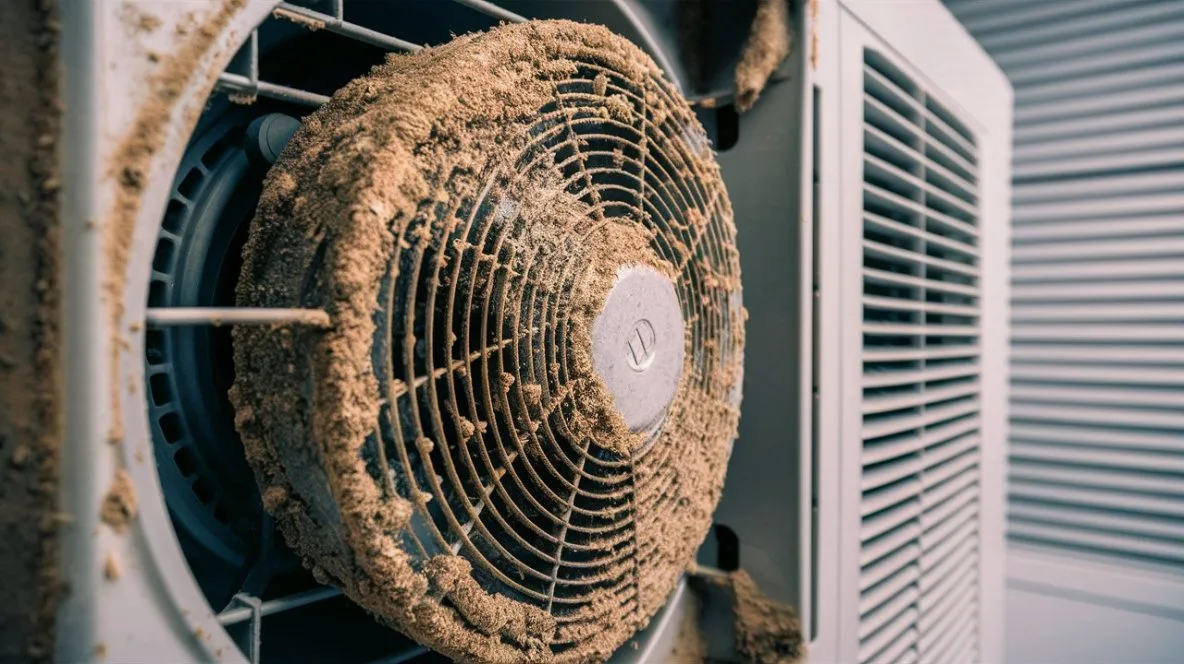
Image source: Bing (Web (fair-use with source credit))
With the filter removed, you can usually see the blower wheel directly behind it. That spinning cylinder or round fan is the heart of the hood, and it picks up a surprising amount of grease over time.
A thin layer of oil on the blades might not seem like a big deal, but even a few grams of buildup are enough to cause vibration. Grease also catches dust and turns into a gritty coating that throws the wheel off balance. The result is a humming, rattling, or whooshing noise that gets worse with each use.
Here’s what to do:
- Make sure power is off at the breaker. That’s non-negotiable.
- Remove the filter and any removable access panel.
- Look at the blower wheel. If you see visible gunk, take a phone photo before you start cleaning so you remember how to reassemble it.
- Spray a degreaser onto a soft brush, not directly into the motor housing. Scrub each blade gently.
- Wipe everything dry and spin the wheel by hand. It should spin freely without scraping.
If the wheel wobbles when you spin it, the shaft bearing is likely worn out. Cleaning won’t fix that. At that point, you’re looking at replacing the blower wheel or the whole motor assembly.
The model number on the hood’s label will tell you which replacement part fits.
If you find yourself shopping for a replacement and are wondering whether a different style might be quieter, consider checking out some properly sized vent hoods while you’re at it. But first, finish the rest of the diagnosis. Sometimes the motor is fine and the ductwork is the real problem.
Step 4: Look at Your Ductwork (Bends, Blockages, and Bad Sizing)
The duct is the pipe that carries cooking air from the hood to the outside. If it’s undersized, kinked, or packed with grease, it chokes the airflow. The motor has to spin faster to push air through, and the turbulence gets loud.
Start with the visible stuff. Flex duct that sags or has a sharp bend is a classic culprit. Every 90-degree turn adds resistance.
A long run with three or four elbows can easily turn a 600 CFM hood into a wheezing, noisy mess.
Check these things in order:
- Feel the airflow at the exterior vent. If it’s weak, the path is blocked.
- Shine a flashlight into the duct from inside the kitchen. Look for grease buildup or debris.
- Straighten any kinks in flex duct.
- Count the bends. If you have more than two, that’s a design problem.
Duct diameter matters more than people expect. A 6-inch round duct handles roughly 400 CFM comfortably. A hood rated at 600 CFM really wants an 8-inch duct.
Forcing more air through a smaller pipe is a sure way to raise the noise level.
If the duct itself is badly sized or full of hardened grease, cleaning it isn’t practical. That usually means replacing the flexible duct run. It’s a manageable job for someone handy, and it can drop the noise level dramatically.
If you’re dealing with a ductless hood, the problem is different, but you’ll find the details in our guide on recirculating hoods and how they work.
Step 5: The Backdraft Damper, a Flapping Flap You Can Fix in Minutes
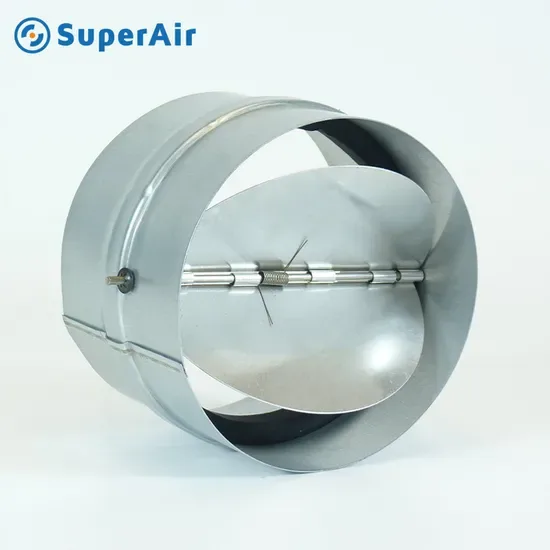
Image source: Web (Bing) / superaircool.en.made-in-china.com (Web image (fair-use with source credit))
The backdraft damper is a small flap inside the duct or vent cap that opens when the fan runs and closes when it stops. It stops outside air, bugs, and cold drafts from coming into your kitchen.
When it gets stuck, it rattles. When it doesn’t open fully, it whistles. Both sounds travel right down the ductwork into your kitchen.
Here’s a simple test:
- Remove the filter so you can see into the hood.
- Have someone turn the hood on high.
- Look up inside the duct. The damper should swing fully open.
- Turn the hood off and watch it close. It should settle quietly.
If it flaps, bangs, or half-moon slams, it needs attention. Sometimes the flap’s hinge pin is just loose or missing. Sometimes grease is holding it half open.
A quick cleanup with degreaser and a cotton swab around the hinge usually solves it.
If the damper is damaged, replacement is cheap. You can find a universal 6-inch or 8-inch duct damper at most hardware stores, and swapping it in takes about 20 minutes if you can reach the duct.
The same logic applies to the roof cap or wall cap outside. A loose cover flapping in the wind will drive you crazy even when the hood is off. That’s not a range hood problem, but it’s an easy fix that removes a lot of kitchen noise.
Step 6: Check Mounting and Cabinet Resonance (Structure Can Amplify Noise)
A range hood bolted to a hollow cabinet can act like a speaker box. The motor vibrates, the vibration transfers to the wood, and the whole cabinet hums. Sometimes what feels like a motor problem is really a mounting problem.
Run your hand along the hood while the fan is on. Feel the edges, the corners, and the section where the motor mounts. If the hood itself vibrates, the screws are probably loose or the rubber grommets are worn out.
Tighten every screw you can access, including the ones holding the hood to the underside of the cabinet. If the vibration persists, add vibration-dampening pads, also called anti-vibration rubber washers, between the hood and the cabinet.
Do not pump the screws down like you’re building a deck. The goal is firm and snug, not crushed. A little bit of flex is okay, but rattling panels mean something is not torqued evenly.
Also check the electrical box and the wiring cover. A loose wire nut or a vibrating metal junction box can add a metallic rattle that sounds far more serious than it is.
When the Motor Itself Is the Problem (And What to Do About It)
If you’ve cleaned the filter, freed the blower wheel, inspected the duct, and tightened everything in sight, the motor is the remaining suspect.
Worn motor bearings cause a grinding or growling sound that only gets worse with time. An unbalanced blower wheel, often from grease buildup or a bent blade, causes a rhythmic hum that changes with fan speed. A failing capacitor can make the hood run slow and noisy, or refuse to start at all.
Deciding whether to repair or replace comes down to math. A new motor usually costs $60 to $150, and a blower wheel runs $30 to $80. Labor, if you hire someone, adds another $100 to $200.
Compare that to the cost of a brand-new hood, which typically runs $150 to $600.
If your hood is over eight years old and the motor is grinding, replacement is usually the smarter move. Newer models are significantly quieter, and the better-performing vent hoods also come with better sound insulation.
If it’s under warranty, don’t open anything beyond the filter. Call the manufacturer and let them handle it. Opening the motor housing usually voids the warranty.
Common Mistakes People Make Before Calling for Help
Hands down, the biggest mistake is skipping the grease filter and expecting a new hood to fix everything. A heavily soiled filter makes a brand-new hood sound just as bad as an old one.
Other mistakes we see all the time:
- Using degreaser spray directly on the motor. That causes electrical shorts and bearing damage.
- Running the hood without a filter for weeks. It collects grease directly on the blower wheel and duct.
- Replacing the motor when the real issue is a collapsed flex duct.
- Assuming all noise is normal. A hood rated at 4 sones should not sound like 9 sones. Per ASHRAE 62.2, ventilation equipment should be sized and installed to perform as rated.
Decision Guide: Should You Repair It, Replace It, or Live With It?
Run through this before you commit to anything.
| Situation | Best Move | Cost |
|---|---|---|
| Clogged filter or dirty blower wheel | Clean it | $0 to $15 |
| Loose damper or loose mounting | Tighten or re-align it | $0 to $25 |
| Damaged damper or small duct run | Replace the part or straighten duct | $25 to $80 |
| Worn motor bearings, hood under 8 years old | Replace the motor or blower wheel | $90 to $250 |
| Old motor, high repair cost, or hood over 8 years | Replace the whole hood | $150 to $600 |
If the repair cost is more than half the price of a new hood, buy the new hood. Every time. You’ll also gain modern features like variable speeds, delayed shut-off, and better sound ratings.
One more thing. As of 2026, some local codes require makeup air for high-CFM hoods. That’s a separate system that lets fresh air into the house when the hood is pulling heavily.
If you’re installing a hood rated above 400 CFM, check with your local building department first.
How to Keep a Range Hood Quiet Long-Term, Simple Maintenance Habits
Noise prevention is just maintenance. Clean the filters monthly if you cook a lot, and wipe the blower wheel every couple of months. That alone prevents most noise problems.
Change charcoal filters on ductless models every 3 to 6 months. Grease buildup in the duct, which is harder to clean, becomes a real issue after a few years of heavy cooking. If your duct is accessible, give it a visual check during spring cleaning.
Since you’re already in the kitchen, it’s also a good moment to look at the best way to keep your cooking gear low-maintenance, but honestly, clean filters are 80% of the battle.
A Quick Note on Make-Up Air and Local Codes (Worth Knowing)
Make-up air is the fresh air that replaces the air your hood pulls out. A powerful range hood can depressurize your house, causing drafty fireplaces, backdrafting water heaters, and noisy whooshing sounds around doors.
Here’s the rule of thumb for as of 2026. If your hood is rated above 400 CFM, most US building codes require a make-up air system. That’s not a suggestion; it’s a code requirement in many jurisdictions.
If you’re only dealing with noise, a make-up air vent is probably overkill. But if you’re replacing a loud 600 CFM hood with an even more powerful one, budget for it. Your ears, and your furnace, will thank you.
Final Checklist: Your Noise-Diagnosis Cheat Sheet
Run through this exact order and you’ll find the problem without wasting time.
- Turn off power at the breaker before opening anything
- Listen to the sound: rattle, whistle, grind, or hum
- Clean or replace the grease filter
- Inspect and clean the blower wheel
- Check the backdraft damper opens fully and closes quietly
- Tighten all mounting screws and cabinet fasteners
- Check the duct for kinks, bends, and blockages
- Test the motor on all speeds
- Decide: repair, replace, or call a pro
- If replacing, check local makeup-air requirements
Frequently Asked Questions
Why does my range hood get louder when I turn it on high speed?
Higher fan speeds push more air through the same duct. That’s expected. But if high speed sounds like a jet engine, your duct is probably undersized or you have a clogged filter forcing the motor into overdrive.
Clean the filter first, then feel the airflow at the exterior vent. Weak airflow with loud noise means restricted ductwork.
Can I quiet my range hood with soundproofing material?
Yes, but only the duct and the mounting points. You can wrap flex duct in insulation and add anti-vibration pads between the hood and cabinet. Do not put soundproofing foam inside the hood around the motor.
It traps grease and creates a fire hazard.
Why does my range hood rattle when it’s off?
That’s almost never the motor. It’s the backdraft damper or the exterior vent cap flapping in the wind. Go outside and check the wall cap or roof cap.
If it’s loose, tighten the screws or replace the flapper. You can also confirm by pushing on the flapper gently to see if the rattle stops.
How much does it cost to fix a loud range hood?
Most self-fixes cost $0 to $25 if you only need degreaser and a few screws. Replacing a damper or a short duct run runs $25 to $80. A motor replacement with labor runs $200 to $400.
If your hood is old, replacing the whole unit is often cheaper and gets you a significantly quieter appliance.
When should I call a professional for a noisy range hood?
Call a pro if you’ve cleaned the filter, checked the duct, and still hear a grinding noise. Worn motor bearings need replacement, and opening the motor housing yourself can void your warranty or cause electrical injury. Also call if you suspect ductwork problems inside a wall or ceiling, since those are harder to inspect safely on your own.