Skip to content
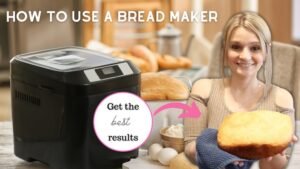
Bread makers are a wonderful kitchen tool. They can turn simple ingredients into fresh, warm bread with almost no effort. But using a bread maker is not always easy. Many people face common problems that ruin their loaf or leave them confused.
If you are new to bread makers, or even if you have some experience, understanding these mistakes can save you time and frustration. This article will guide you through the most frequent errors, explain why they happen, and show you how to avoid them.
With the right tips, you can enjoy perfect homemade bread every time.
Choosing The Wrong Flour
Flour is the main ingredient in bread. But not all flours work well in a bread maker. Most recipes need bread flour because it has more protein than regular all-purpose flour. This protein creates strong gluten, which gives bread its structure and helps it rise. If you use all-purpose flour, your bread may turn out flat, dense, or crumbly.
Some people also try whole wheat or gluten-free flours without checking the recipe. These flours need special recipes or extra ingredients like vital wheat gluten. If you use them without adjustments, your bread may not rise or bake properly.
One beginner mistake is mixing up “bleached” and “unbleached” flour. Unbleached flour is better for bread because it is less processed and holds gluten better.
| Flour Type | Protein (%) | Best For Bread Maker? |
|---|---|---|
| Bread Flour | 12-14 | Yes |
| All-Purpose Flour | 8-11 | Sometimes |
| Whole Wheat Flour | 13-14 | With Adjustments |
| Gluten-Free Flour | 0 | Special Recipes |
Tip: Always check your recipe and use the recommended flour. If you want to experiment, start with small batches.
Incorrect Measuring Of Ingredients
Small mistakes in measuring ingredients can make a big difference in bread baking. Bread makers are sensitive to the balance between flour, water, and yeast. If you add too much flour, the loaf will be hard and dry. Too much water, and it will be soggy and collapse.
Many beginners scoop flour with the measuring cup, which packs the flour and gives too much. It’s better to spoon flour into the cup and level it with a knife. For liquids, use a glass measuring cup and check at eye level.
Salt and sugar also matter. Salt controls yeast and helps flavor, while sugar feeds yeast. Too much salt stops the rise; too much sugar makes bread sticky.
Non-obvious insight: Measuring by weight (using a kitchen scale) is the most accurate. Even small errors in measurement can affect the bread’s texture.
Adding Ingredients In The Wrong Order
Bread makers have a specific order for adding ingredients. Usually, liquids go first, then flour, then salt, sugar, and finally yeast. This order keeps yeast separate from salt and liquids until mixing starts. If yeast touches salt or water too early, it can lose its power and your bread won’t rise.
Some machines have special instructions for ingredient order. Always check your bread maker’s manual and follow the recipe steps exactly.
Common mistake: Pouring yeast directly onto salt or warm liquids. Yeast needs to stay dry until mixing begins.
Using Expired Or Poor-quality Yeast
Yeast is what makes bread rise. If your yeast is old or low quality, your bread won’t rise and will be dense and heavy. Yeast expires quickly, especially after opening. Store it in the fridge and check the date before baking.
There are two main types of yeast for bread makers: active dry yeast and instant yeast. Instant yeast is best for bread makers because it works quickly and doesn’t need to be activated in water. Mixing up the two can affect your results.
Non-obvious insight: Even if yeast is not expired, it can lose strength if exposed to moisture or heat. Always store yeast tightly sealed.
Ignoring Water Temperature
Water temperature is crucial for yeast. If water is too hot, it kills the yeast; too cold, and the yeast won’t activate. The ideal temperature is between 100°F and 110°F (38°C–43°C). Use a thermometer to check.
Some bread makers mix and heat ingredients, but most rely on you to add water at the right temperature. Adding cold water is a common mistake that stops bread from rising.
| Water Temperature | Effect on Yeast |
|---|---|
| Below 95°F (35°C) | Slow or No Rise |
| 100–110°F (38–43°C) | Optimal Rise |
| Above 115°F (46°C) | Yeast Dies |
Tip: If you don’t have a thermometer, water should feel warm but not hot to the touch.
Overfilling The Bread Maker
Each bread maker has a maximum capacity. Overfilling leads to spilled dough, uneven baking, or burned crust. Most machines can handle up to 2 pounds of dough. Check your manual before making large recipes.
If you use too much flour or liquid, dough can overflow and stick to the lid or heating element. This creates a mess and can damage your machine.
Non-obvious insight: Bread makers work best when filled below maximum capacity. A slightly smaller loaf often bakes better.
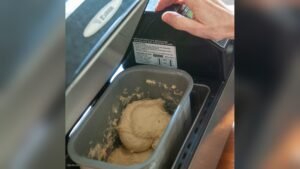
Not Checking Dough Consistency
Bread makers mix the dough, but you should still check the consistency during the first kneading cycle. Dough should be smooth and elastic, not dry or sticky. If it looks wrong, add a tablespoon of water or flour as needed.
Many beginners trust the machine completely and never check the dough. But room temperature, humidity, and ingredient quality can affect dough. Sometimes the machine needs help.
Tip: Open the lid during the first 10 minutes. Touch the dough lightly—if it sticks, add flour; if it crumbles, add water.
Ignoring The Crust Settings
Bread makers allow you to choose crust color—light, medium, or dark. If you ignore this setting, your bread can be too pale or burned. Some machines default to “medium,” but if your recipe has extra sugar or fat, you may want “light.
”
Common mistake: Setting “dark” crust for sweet breads. Sugar burns easily, so a light crust is safer.
Tip: Experiment with crust settings for different recipes. Write down results to remember your favorite.
Using Cold Or Unmixed Ingredients
Cold ingredients, especially butter, eggs, or milk, can affect how bread rises. If you use items straight from the fridge, dough may not mix well or rise slowly. Always bring ingredients to room temperature before starting.
Another mistake is adding unmixed ingredients, like chunks of butter or unblended eggs. These can leave uneven spots in your bread.
Tip: For best results, mix eggs and melt butter before adding them to the bread maker.
Not Cleaning The Bread Maker Properly
A dirty bread maker can affect the taste and texture of your bread. Old crumbs, oil, or stuck dough can burn and create off flavors. After every use, remove the pan and paddle, wash them, and wipe the inside of the machine.
Some people forget to clean the paddle, which can leave dough stuck and hard to remove. If you bake with sweet or sticky ingredients, clean extra carefully.
Non-obvious insight: Always check the corners and under the paddle. Mold can grow if crumbs are left behind.

Opening The Lid During Baking
Bread makers need steady heat and humidity. Opening the lid during baking lets out steam and heat, which can cause the bread to collapse or dry out. It’s safe to open during the first kneading cycle, but not during rising or baking.
Some people want to check the loaf or add ingredients late. Only add extras (nuts, fruit, seeds) at the right time—most machines beep for this.
Tip: Wait until the bread is finished baking to check the result.
Using The Wrong Bread Maker Program
Bread makers have many programs—basic, whole wheat, French, gluten-free, and more. Using the wrong program can ruin the bread. Each setting controls kneading, rising, and baking times for different recipes.
For example, whole wheat bread needs longer kneading and rising. If you use the basic program, it may be dense and dry.
Always choose the program that matches your recipe and ingredients. If you are unsure, check the manual or recipe book.
| Program | Best For | Common Mistake |
|---|---|---|
| Basic | White, simple breads | Used for whole wheat |
| Whole Wheat | Whole grain breads | Ignored for whole wheat |
| French | Crisp crust, airy crumb | Used for soft breads |
| Gluten-Free | Gluten-free flours | Used for regular flour |
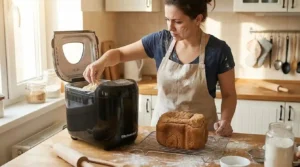
Not Letting Bread Cool Properly
Fresh bread smells amazing, but cutting too soon can ruin the texture. Bread needs to cool for at least 30 minutes after baking. If you cut right away, the inside is gummy and sticky.
Some people take the bread out of the pan and wrap it tightly. This traps steam and makes the crust soggy. Let bread cool on a wire rack, uncovered.
Tip: If the paddle is stuck in the bread, wait until it cools to remove it.
Ignoring Altitude And Weather
Weather and altitude affect bread baking more than many realize. High altitude (above 3,000 feet) needs less yeast and liquid. Humid weather means flour absorbs less water; dry weather means flour needs more.
Most bread maker recipes are for sea level and average humidity. If you live in a different climate, adjust ingredients. Start by reducing yeast and water by 10% at high altitude.
Non-obvious insight: Keep a baking journal. Write down changes for your location to find what works best.
Credit: www.youtube.com
Not Reading The Manual Or Recipe
Bread makers come with manuals and recipes for a reason. Skipping these leads to mistakes. Each machine is different—paddle shape, pan size, heating element. Read instructions carefully, especially for ingredient order and program settings.
If you use recipes from the internet, make sure they match your bread maker’s size and features.
Tip: Save your manual and favorite recipes in a safe place. Refer to them often.
Using Old Or Stale Ingredients
Fresh ingredients matter for bread. Old flour, stale milk, or expired eggs can ruin taste and texture. Even old oil or butter can make bread taste bad.
Check expiration dates before baking. If ingredients smell strange or look off, replace them.
Non-obvious insight: Buy small amounts of specialty flour or yeast. They lose power quickly if not used often.
Skipping Pre-heating When Needed
Some bread makers pre-heat ingredients before kneading. If your machine has this feature and you skip it, dough may not mix well or rise properly. Pre-heating helps bring ingredients to the right temperature.
Check your manual to see if pre-heating is recommended. If it’s optional, use it for cold weather or dense recipes.
Tip: Pre-heating is especially important for recipes with butter or eggs.
Not Adjusting Recipes For Bread Makers
Many bread recipes are for hand baking. Bread makers need specific recipes because they mix, knead, and bake differently. If you use a regular recipe, it may not rise or bake correctly.
Look for recipes labeled “bread maker” or adjust them by reducing kneading and increasing rising time. If you are unsure, start with the machine’s recipe book.
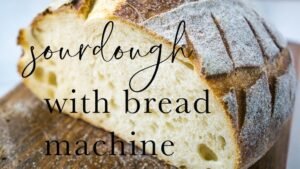
Common mistake: Using sourdough or artisan recipes in a bread maker. These need special attention.
Using Too Much Or Too Little Yeast
Yeast needs balance. Too much yeast makes bread rise quickly and collapse. Too little yeast, and bread is dense and flat.
Most recipes use 1–2 teaspoons for a 1. 5–2 pound loaf. Measure carefully and adjust for climate and flour type.
Tip: If your bread smells strongly of yeast or tastes sour, reduce the amount next time.
Not Adding Mix-ins At The Right Time
If you add nuts, seeds, fruit, or chocolate chips, timing matters. Bread makers often beep for “add-ins. ” If you add them too soon, they get crushed or mixed unevenly. Too late, and they don’t blend.
Common mistake: Pouring mix-ins at the start. Wait for the beep or add during the last kneading cycle.
Not Using The Delay Timer Correctly
Bread makers have a delay timer so you can wake up to fresh bread. But the timer only works for recipes without perishable ingredients like eggs or milk. If you use the timer with these, they can spoil and make you sick.
Tip: Use the delay timer for basic bread with water, flour, salt, yeast, and sugar.
Not Replacing The Kneading Paddle
The kneading paddle can wear out or get lost. If it is damaged, dough won’t mix well and bread will be uneven. Some people forget to insert the paddle or use a broken one.
Check the paddle before every use. Replace it if it is bent, broken, or missing.
Non-obvious insight: Keep a spare paddle if you bake often. Some brands sell replacements online.
Credit: www.youtube.com
Ignoring Machine Maintenance
Bread makers need regular maintenance. Check the power cord, heating element, and control panel. If you notice strange noises, uneven baking, or error codes, clean and inspect the machine.
Some people use the bread maker for years without checking parts. This can lead to breakdowns or unsafe baking.
Tip: Once a month, check all parts and clean carefully.
Not Troubleshooting Problems
If your bread turns out wrong, don’t give up. Troubleshoot common issues—dense loaf, uneven crust, sunken top, etc. Many problems can be solved by adjusting ingredients, checking yeast, or changing programs.
Keep notes on each batch and learn from mistakes. Try small changes instead of big ones.
Common mistake: Blaming the bread maker for every problem. Most issues are ingredient or process related.
Frequently Asked Questions
Why Does My Bread Maker Bread Turn Out Dense?
Dense bread is usually caused by too much flour, old yeast, or incorrect water temperature. Try measuring ingredients carefully, using fresh yeast, and checking water warmth. Also, make sure you use bread flour.
Can I Use Regular All-purpose Flour In My Bread Maker?
Yes, but bread flour is better. All-purpose flour has less protein, so your bread may be softer and not rise as much. If you use all-purpose, add a tablespoon of vital wheat gluten for better results.
Why Does My Bread Collapse In The Middle?
Bread collapsing can be caused by too much yeast, overfilling the bread maker, or opening the lid during baking. Check yeast amounts, ingredient levels, and don’t disturb the machine while baking.
Is It Safe To Use The Delay Timer For Milk Or Egg Breads?
No, it’s not safe. Milk and eggs can spoil if left unrefrigerated. Use the delay timer only for recipes with water, flour, salt, sugar, and yeast.
How Do I Clean My Bread Maker After Baking?
Remove the pan and paddle, wash them with warm soapy water, and wipe the inside of the machine. Check for crumbs or stuck dough under the paddle and in corners. Clean after every use to prevent mold and odors.
With careful attention and the right tips, you can avoid these common bread maker mistakes. Practice, patience, and learning from each loaf will help you become a confident bread maker user. If you want more details on bread baking science, you can check this Wikipedia Bread article for deeper understanding. Enjoy your fresh, homemade bread and happy baking!