Skip to content
Making kefir at home is becoming more popular as people look for healthier fermented foods. If you already own a yogurt maker, you might wonder, “Can I make kefir in a yogurt maker?” The answer isn’t as simple as yes or no. Kefir and yogurt seem similar, but their cultures, fermentation times, and temperatures are different. Still, many people successfully use their yogurt makers for kefir—if they follow the right steps.
Let’s explore how kefir and yogurt differ, what you need to make kefir in a yogurt maker, and how to avoid common mistakes. You’ll also find practical advice, comparisons, and a FAQ section to help you get started with confidence.
What Makes Kefir Different From Yogurt?
Kefir and yogurt are both fermented dairy products, but they have unique qualities.
Kefir is made using kefir grains—clusters of bacteria and yeast. These grains ferment milk, producing a tangy drink with a thinner consistency than yogurt. Kefir contains more types of probiotics and is often considered more beneficial for gut health.
Yogurt uses only specific bacteria (like Lactobacillus bulgaricus and Streptococcus thermophilus) and tends to be thicker. It has fewer strains of bacteria compared to kefir.
Here’s a quick comparison:
| Feature | Kefir | Yogurt |
|---|---|---|
| Starter | Kefir grains | Yogurt culture |
| Probiotic variety | 10-40 strains | 2-5 strains |
| Texture | Thin, drinkable | Thick, spoonable |
| Fermentation time | 12-24 hours | 4-8 hours |
| Fermentation temp | Room temp (68-86°F) | Warm (110-115°F) |
Many beginners miss that kefir grains are living cultures needing gentle handling. Using the wrong temperature or starter can kill the grains or produce poor kefir. Some yogurt makers are adjustable, but others only heat to yogurt temperatures, which may be too high for kefir.
Can A Yogurt Maker Be Used For Kefir?
The simple answer is: sometimes. Most yogurt makers are designed for higher temperatures than kefir needs. Kefir grains prefer room temperature or slightly warm conditions, not the 110°F or higher used for yogurt.
Types Of Yogurt Makers
There are two main types:
- Electric Yogurt Makers: Most heat milk to a set temperature, usually around 110°F. Some models allow temperature control.
- Non-Electric Yogurt Makers: Often insulated containers that rely on ambient heat, not electricity.
Here’s a quick comparison:
| Type | Temp Control | Good for Kefir? | Notes |
|---|---|---|---|
| Electric (fixed temp) | No | No | Too hot for kefir grains |
| Electric (adjustable) | Yes | Yes | Set to 70-80°F for kefir |
| Non-electric | No | Yes | Works if room temp is right |
If your yogurt maker has adjustable temperature settings, you can set it to the ideal range for kefir (68–86°F). If not, you might damage the grains or end up with poor results.
Many people successfully use non-electric yogurt makers (such as insulated jars) for kefir, especially in climates where room temperature is between 68°F and 80°F.

Credit: www.luvele.co.uk
Step-by-step: Making Kefir In A Yogurt Maker
If you have an adjustable yogurt maker or a non-electric model, you can make kefir. Here’s how:
Ingredients
- 2 cups whole milk (cow, goat, or sheep)
- 1 tablespoon kefir grains
- Optional: Fruit, honey, or flavoring after fermentation
Equipment
- Yogurt maker (adjustable or non-electric)
- Clean glass jar or container
- Plastic or wooden spoon (avoid metal)
- Fine mesh strainer
Instructions
- Prepare the Milk: Pour milk into the jar. If using raw milk, boil and cool it to room temperature.
- Add Kefir Grains: Gently stir in kefir grains using a plastic spoon.
- Place in Yogurt Maker: Set the temperature to 68–80°F. If using a non-electric maker, simply place the jar inside.
- Ferment: Leave for 12–24 hours. Check after 12 hours—kefir should thicken slightly and smell tangy.
- Strain: Pour the mixture through a fine mesh strainer to separate grains from kefir. Save grains for your next batch.
- Flavor and Chill: Add fruit or sweeteners if desired. Refrigerate before drinking.
Serving Size: This recipe makes about 2 cups, serving 2 people.
Fermentation Time: Around 12–24 hours, depending on temperature and desired tanginess.
Practical Tips
- If your yogurt maker cannot adjust below 100°F, don’t use it for kefir. High heat kills kefir grains.
- Metal utensils can harm kefir grains. Use plastic or wood.
- Kefir will ferment faster at warmer temperatures, but too hot causes separation and sour taste.
- If your room is cool, wrap the jar in a towel or use a warm spot (top of the fridge or near a radiator).
Common Mistakes And How To Avoid Them
- Using the wrong temperature: Most yogurt makers are set too high for kefir. Always check your model’s settings.
- Adding too many grains: This can cause over-fermentation and odd flavors. Stick to 1 tablespoon per 2 cups of milk.
- Leaving grains in too long: If kefir tastes too sour or separates, reduce fermentation time.
- Metal contact: Metal can damage kefir grains. Use plastic or wooden tools and strainers.
- Not straining grains: If grains stay in kefir, they keep fermenting and can make the drink overly sour.
- Ignoring cleanliness: Dirty jars or utensils can introduce bad bacteria and ruin your batch.
Many beginners miss that kefir grains multiply. After several batches, you’ll notice more grains. You can use them to make larger quantities or share with friends.

Credit: www.luvele.com
Comparing Yogurt Makers For Kefir
Some yogurt makers are better suited for kefir than others. Here’s a comparison of popular models:
| Brand/Model | Temp Range | Suitable for Kefir? | Special Features |
|---|---|---|---|
| Euro Cuisine YM80 | 110°F only | No | Fixed temp, easy to use |
| Luvele Pure Plus | 77–122°F | Yes | Adjustable temp, timer |
| Dash Yogurt Maker | 110°F only | No | Compact, affordable |
| Thermos Insulated Jar | Room temp | Yes | No electricity needed |
If you plan to make kefir often, invest in a model with adjustable temperature settings. If you only want to try kefir occasionally, a simple insulated jar works well.
Key Differences: Kefir Vs Yogurt Fermentation
Understanding the fermentation process is important for success. Kefir grains contain yeast and bacteria that work together. They ferment lactose into lactic acid, carbon dioxide, and a small amount of alcohol. This is why kefir is fizzy and more tangy than yogurt.
Yogurt cultures only use bacteria, resulting in a smoother, thicker product. Kefir fermentation is more robust and can handle small temperature changes, but grains are sensitive to heat above 86°F.
Non-obvious insight: Kefir grains are not just bacteria—they include yeast. This allows kefir to have a slight fizz and more complex taste. Many beginners think kefir and yogurt are interchangeable, but the grains are unique and need careful handling.
Health Benefits Of Kefir
Kefir is known for its high probiotic content. Studies show it contains up to 40 strains of bacteria and yeast, while yogurt usually has 2–5.
Some key benefits:
- Supports digestion and gut health
- May reduce inflammation
- Helps lactose-intolerant people digest milk better
- Contains vitamins B12, K2, calcium, magnesium, and protein
A 2018 study found that kefir can improve gut microbiota diversity more than yogurt (PubMed). Regular consumption may also help boost immunity.
Storing And Reusing Kefir Grains
Kefir grains are reusable. After straining, rinse them gently (optional) and place them in fresh milk to start your next batch. If you need to pause, cover grains with milk and refrigerate for up to 2 weeks.
For long-term storage, rinse grains and freeze in a small amount of milk. They may take a few batches to recover after freezing.
Non-obvious insight: Grains grow and multiply, so you will have extras over time. Don’t throw them away—share with friends or use to make more kefir.
Troubleshooting: What If It Goes Wrong?
If your kefir turns out too sour, separated, or slimy, here’s what to check:
- Too sour: Reduce fermentation time or use fewer grains.
- Separated (whey on top): Mix gently or ferment at a lower temperature.
- Slimy texture: Usually caused by too many grains or high temperature.
- No fermentation: Check if grains are alive; they should float and look plump. Avoid using grains that have been exposed to metal or high heat.
If you notice a bad smell or mold, discard the batch and grains. Always use clean equipment to avoid contamination.
Frequently Asked Questions
Can I Use Powdered Kefir Starter Instead Of Grains In A Yogurt Maker?
Yes, but powdered starters are less robust than grains and usually contain fewer probiotic strains. Follow package instructions, as they often require higher temperatures, similar to yogurt.
How Long Does Homemade Kefir Last In The Fridge?
Homemade kefir can be kept in the fridge for 5–7 days. After this, it becomes more sour and may separate. Always store in a sealed container.
Can I Use Plant-based Milk For Kefir In A Yogurt Maker?
You can use coconut, soy, or almond milk, but kefir grains feed on lactose. For best results, add a teaspoon of sugar to plant milk to “feed” the grains. Some grains may not adapt well, so results can vary.
Is Kefir Safe For People With Lactose Intolerance?
Yes, most lactose is broken down during fermentation. Kefir is often tolerated by people with lactose intolerance, but start with small amounts and observe your reaction.
Why Should I Avoid Metal Utensils When Making Kefir?
Metal can react with the acids produced during fermentation and damage the grains. Always use plastic, wood, or glass utensils and strainers for kefir.
Making kefir in a yogurt maker is possible if you follow the right steps and understand the differences. With a bit of practice, you’ll enjoy homemade kefir—fresh, tangy, and packed with probiotics. If you’re ready to try, check your yogurt maker’s settings, handle grains gently, and don’t be afraid to experiment.
The process is simple and rewarding, leading to a healthier, delicious drink.
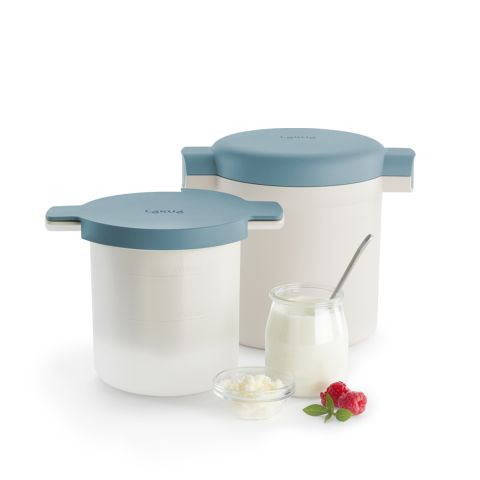
Credit: www.lekue.com