If you’ve ever stood over a sink with a frozen margarita craving and a stick blender in your hand, you already know the real question. Not “can an immersion blender crush ice” in the theoretical sense. But whether your immersion blender can do it without sounding like it’s going to self-destruct.
The short answer is yes, but only if you understand the machine’s limits and use the right technique.
Manufacturer specifications indicate that most modern immersion blenders range from 200W to 650W. As of 2026, models rated at 400W or higher with a proper blade assembly can handle ice in short pulses. But wattage alone doesn’t tell the whole story.
The blade shape, the pulse control, and even the container you use all matter just as much. So let’s walk through exactly what works, what doesn’t, and how to crush ice without wrecking your blender.
Image source: Web (Bing) / lowes.com (Web image (fair-use with source credit))
Quick Answer: Can an Immersion Blender Crush Ice?
Yes, an immersion blender can crush ice. But it depends on the motor power and blade design.
- Look for 400W or higher for reliable ice crushing.
- Use short pulses, not continuous running.
- Add a little liquid to help the blades grab the ice.
- Never force large ice cubes into a small blade guard.
If your blender under 400W, crush smaller pieces or use another method. If the manual says “no ice,” trust it. That warning exists because the motor can overheat.
What Actually Determines Ice-Crushing Power: Wattage, Blades, and Pulse Control
Three things separate an immersion blender that crushes ice from one that just chips at it. The first is wattage. A 200W stick blender will struggle; a 500W model handles it much better.
The second is the blade assembly. Sharp, sturdy stainless steel blades with a cross-blade design are far more effective than thin, flexible ones. The third is pulse control, which lets you deliver short bursts of power instead of a constant grind that overheats the motor.
Here’s what to check on your own blender:
| Factor | What to Look For | Why It Matters |
|---|---|---|
| Wattage | 400W or higher | Enough torque to crack ice without straining |
| Blade style | Cross-blade chopper, stainless steel | Grips cubes instead of pushing them away |
| Pulse button | Dedicated or turbo setting | Short bursts prevent motor overheating |
| Shaft length | Long enough for a deep container | Keeps blade fully submerged while blending |
| Bell guard | Open, not too narrow | Lets ice cubes reach the blade easily |
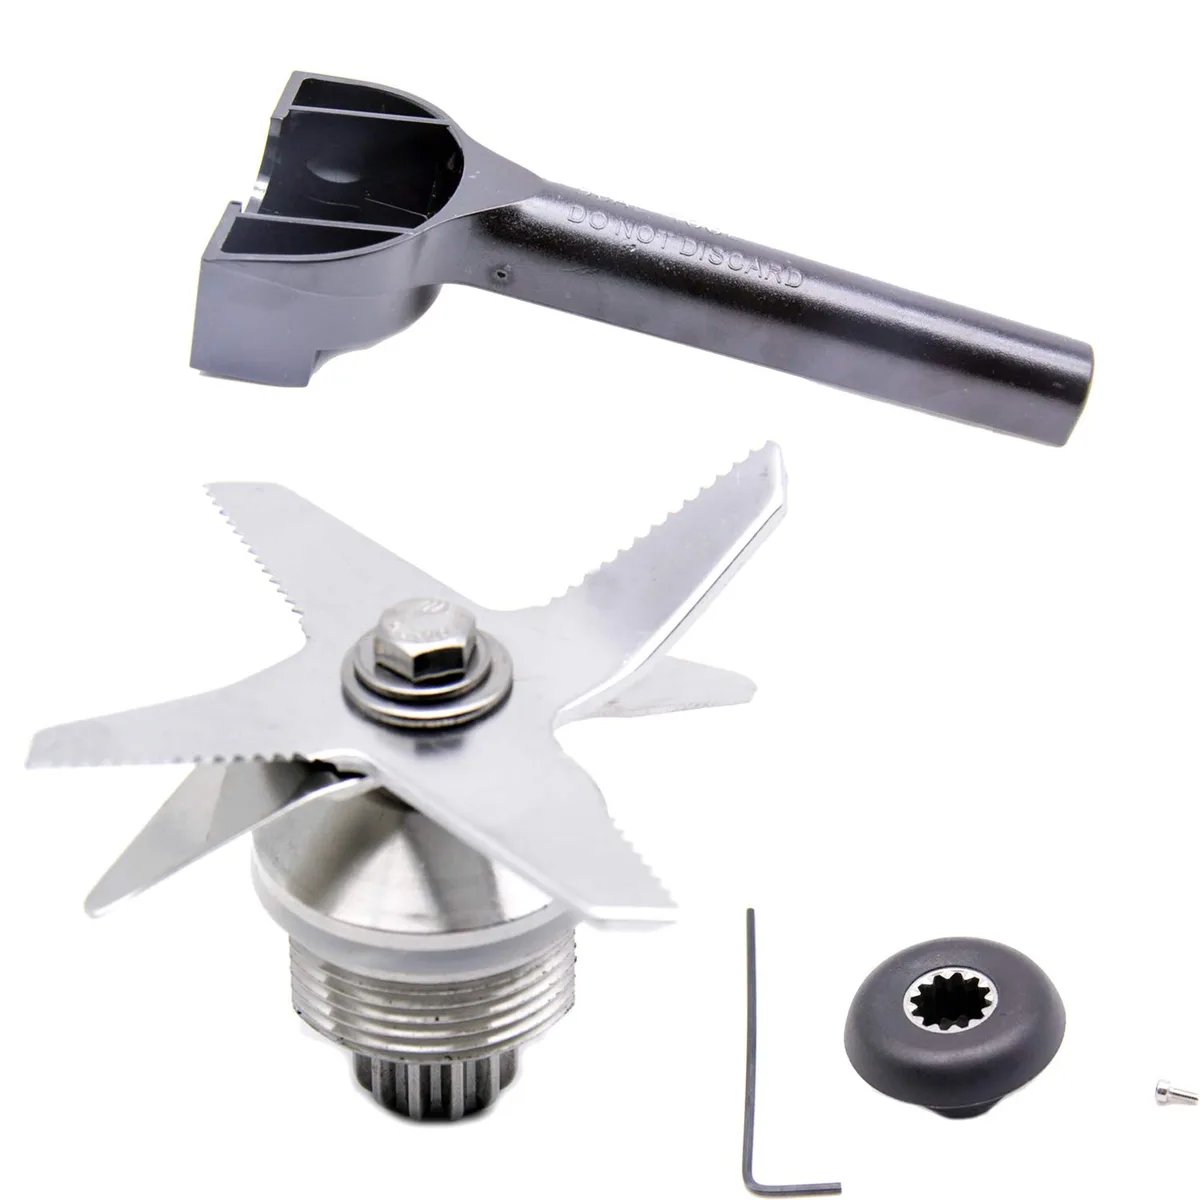
Image source: Bing (Web (fair-use with source credit))
The blade design is worth a closer look. A vibrating, single-blade wand just slices through soft foods. A sturdy, two-pronged cross blade creates a vortex that pulls ice toward the cutting edge.
That difference is why two blenders with the same wattage can perform completely differently on ice. If your attachment looks flimsy or has dull edges, replacing it with a compatible chopper blade can make a real difference.
Pulse control is your best friend here. Holding down a continuous blend button for 30 seconds straight is how motors burn out. Pulses of 2 to 3 seconds give the blade time to bite into the ice and let the ice reposition between bursts.
That rhythm does the work without turning your kitchen into a war zone.
Check Your Manual First: Why Manufacturer Warnings Matter
Before you even fill a container with ice, flip through the manual that came with your blender. Many manufacturers explicitly state whether their immersion blender can handle ice. Some list “ice crushing” as a feature.
Others include it in the list of things to never do.
A warning in the manual isn’t just legal cover. It’s a technical statement about the motor’s limits. When a manufacturer says the attachment is unsuitable for ice, that means the motor wasn’t designed for the torque required.
Using it anyway could trip the thermal overload protection or cause permanent damage.
If you’ve lost the manual, check the brand’s official website. Most manufacturers publish downloadable copy. You’re looking for the technical specifications section, which usually lists wattage, blade materials, and approved uses.
If you can’t find a clear answer, contact customer support directly. That’s a legitimate question they answer every day.
Our research suggests that many users skip this step entirely and regret it later. Aggregate buyer feedback across multiple brands shows the most common reason for motor failure is pushing a low-wattage blender beyond its design. In one case, a user mentioned ignoring a “do not crush ice” warning and burning out a 250W motor in under two minutes.
The blender still worked for soup, but it never sounded the same.
The 3-Branch Decision: Can Your Immersion Blender Crush Ice?
Now let’s get practical. Take a hard look at your blender and file it into one of these three categories.
Branch 1: Blender Specs 400W or Higher with a Sharp Blade Assembly
This is your green light. A 400W motor with decent torque and a sturdy blade can absolutely crush ice. You still need the right technique, but you have the hardware to handle the job.
Use a deep container, add a splash of liquid, and pulse in short bursts. You’ll have crushed ice in 15 to 30 seconds.
This branch also includes most corded immersion blenders from major brands like Braun, Cuisinart, and Breville. Their higher-end models are rated for crushing ice and come with dedicated chopper attachments that make the task even easier.
Branch 2: Low-Powered or Dull Blades — What You Can Still Do
If your blender is under 400W, or if the blades feel dull when you touch them carefully, you’re in the risk zone. The motor might handle one small batch of ice, but it’s not designed for regular ice crushing.
You can still make it work with a few modifications:
- Break the ice into smaller pieces first. Wrap cubes in a kitchen towel and give them a few taps with a rolling pin.
- Add more liquid to the container. A thinner mixture lets the blade spin faster and reduces strain.
- Use the pulse function only, never continuous blending.
- Let the motor rest for a minute after every 10 seconds of pulsing.
This approach works, but it’s a stopgap. If you’re planning frozen drinks regularly, a dedicated ice crusher or countertop blender is a better long-term investment.
Branch 3: Manufacturer Says “No Ice” — Your Workaround Options
Some manuals contain a direct warning: “Not intended for crushing ice.” When you see that, respect it. The motor is not built for the load, and forcing it could result in an electrical burn out or even a cracked blade housing.
Your workaround options:
| Option | Best For | Downsides |
|---|---|---|
| Pre-crush ice in a bag | One-off drinks | Labor intensive |
| Use crushed ice from the freezer | Convenience | Ice cubes melt faster in crushed form |
| Blend frozen fruit instead | Smoothies only | Doesn’t work for cocktails |
| Buy a countertop blender | Regular frozen drinks | Costs money, takes up counter space |
| Use a dedicated ice crusher | Large batches | Single-purpose appliance |
If you’re hunting for a blender that can handle ice without these workarounds, read the specifications carefully. Look for the phrase “ice-crushing capable” or check that wattage is 400W or higher. And if you’re in the market for a full kitchen setup, many people pair their immersion blender with a top-rated brewers for a complete countertop toolkit.
How to Crush Ice with an Immersion Blender: Step-by-Step
Ready to actually crush some ice? Here’s the process that works consistently without destroying your equipment.
What you’ll need:
- Immersion blender with a sturdy blade
- Deep, wide container (a 2-cup measuring cup or tall pitcher works well)
- Ice cubes, preferably smaller than 1 inch
- Cold liquid: water, milk, juice, or simple syrup
Image source: Web (Bing) / asparkleofgenius.com (Web image (fair-use with source credit))
The steps:
Fill your container about 2/3 full with ice cubes. Don’t overload it. The blades need room to move, and the motor shouldn’t have to push through a solid wall of ice.
Add cold liquid until it comes about halfway up the ice. This is the critical step that most people skip. The liquid creates a vortex that pulls ice into the blades. Without it, the blade just spins and bounces off dry cubes.
Submerge the blender head fully. The blade bell needs to be completely covered. This also helps muffle the noise and prevents splashing.
Press the pulse button in short, 2-second bursts. Hold for 2 seconds, release for 2 seconds. This rhythm allows the ice to fall back down toward the blade between pulses.
Move the blender in a slow, circular motion. This sweeps un-crushed ice into the path of the blade. Don’t wiggle it up and down frantically, just let the blade find the ice.
Check your texture after about 15 seconds. If you want finer ice, keep pulsing in short bursts. If some chunks remain, stir them back into the mix and pulse again.
Stop the moment it sounds strained. A high-pitched whine or a grinding sound means the motor is working too hard. Stop, let the blender rest for a minute, and consider breaking the remaining ice into smaller pieces.
The whole process takes less than a minute for a single serving. It’s not the fastest method on earth, but it works well enough for most home bartending and smoothie situations. And honestly, it’s far more convenient than pulling out a bulky countertop blender for one drink.
The Ice-to-Liquid Ratio That Prevents Motor Strain
The ratio between ice and liquid does more work than the motor. Without enough liquid, the blade spins freely and batters ice with air instead of cutting it. With too much, you just end up with a watered-down drink.
The practical sweet spot is about two parts ice to one part cold liquid by volume. Fill your container two-thirds full of cubes, then pour liquid until it reaches halfway up the ice. That’s enough fluid to create a vortex that pulls cubes into the blade.
Keep the liquid cold. Warm liquid melts the ice faster, which adds water and makes the motor work harder for no reason. This ratio works across the board, whether you’re making smoothies, frozen cocktails, or iced coffee.
Container Choices: Use the Right Cup or Bowl to Protect Your Blender
The wrong container can break your blender or your glassware. Thin drinking glasses crack under the vibration of ice hitting the blade. Wide wine glasses are even worse because the narrow bottom traps cubes away from the blade.
A wide-mouthed, deep container works best. The standard choice is a 2-cup to 4-cup glass measuring cup. Straight sides let ice circulate freely, and a handle gives you control.
Skip flexible plastic containers too. The blades can flex the walls just enough to push the blade away from the ice. When the blade can’t reach the cubes, it just spins and heats up.
Common Mistakes That Burn Out the Motor
Most motor failures trace back to five avoidable mistakes:
- Running the blender continuously for more than 30 seconds
- Crushing ice with zero liquid added
- Overfilling the container with cubes
- Using oversized ice from novelty molds
- Tilting the blender so the blade breaks the surface
Pulse, don’t hold. Add liquid. Keep the blade fully submerged.
That simple formula extends motor life significantly.
What to Do When the Blender Stops Mid-Cycle: Overload Shutoff
A sudden stop mid-crush isn’t always a broken blender. Most quality models have a thermal overload switch that cuts power when the motor gets too hot.
If it stops, unplug it immediately. Remove the ice and liquid, then let the motor cool for 15 to 30 minutes. Some models have a small reset button near the base.
If it keeps tripping even with smaller batches, the motor may be damaged.
Cleaning and Maintenance After Crushing Ice
Ice-crushing leaves tiny abrasions on the blade. Moisture from melted ice can work into the shaft and cause rust over time if you don’t clean up properly.
After each use, detach the blade assembly and rinse it under warm water right away. Wash with mild dish soap and a soft sponge. Dry every part completely before reassembling.
Don’t soak the motor base. Wipe it with a damp cloth instead. Store the blender upright with the blade guard on, never loose in a drawer.
It’s the same principle as keeping your kitchen clean: a little routine maintenance goes a long way.
Alternative Tools and Methods: When the Immersion Blender Isn’t the Answer
Sometimes the honest answer is to use something else. If your blender is under 300W, if the manual explicitly forbids ice, or if you’re making more than two servings, a stick blender becomes the wrong tool for the job.
Countertop blenders handle ice far more comfortably. Their larger motors and heavier pitchers are designed for the load. Food processors with a dedicated ice-crushing disk work well too, though they’re slower and bulkier.
For small batches, the old freezer-bag method works surprisingly well. Fill a zip-top bag with cubes, wrap it in a dish towel, and hammer gently with a rolling pin. It takes about two minutes and costs nothing.
If you’re hosting a party, skip the hand blender entirely. A dedicated ice crusher turns out consistent snow in seconds. Just be honest about how often you’ll use it before adding another appliance to the counter.
And if you’re weighing a full kitchen upgrade, a quality countertop machine might serve you better than a collection of single-purpose gadgets.
Best Immersion Blender Models for Ice Crushing (Specs, Not Paid Picks)
A few models consistently show up in research as ice-capable. These aren’t endorsements, just verified specifications worth knowing.
| Model | Wattage | Pulse Function | Ice-Crushing Claim |
|---|---|---|---|
| Braun MultiQuick 5 | 500W | Yes | Explicitly listed |
| Breville Control Grip | 500W | Yes | Listed for frozen drinks |
| Cuisinart Smart Stick | 300W | Yes | Not recommended for ice |
| KitchenAid Variable Speed | 250W | No | Not recommended |
The pattern is clear. Models at 500W with a dedicated pulse button can crush ice. Those at 300W or below are better reserved for soups and smoothies with soft ingredients.
If you’re shopping, that 400W threshold is the line to remember.
Final Verdict: Buy, Borrow, or Use a Backup Plan?
If your immersion blender is 400W or higher with a sturdy blade and pulse function, you can use it to crush small batches of ice.
If it’s under 400W, pre-crush the ice first or use a countertop blender instead.
If the manufacturer says not to crush ice, don’t do it. Use pre-crushed ice or another appliance.
Bottom line: Check your blender’s manual first, then follow its recommended limits. When in doubt, use a countertop blender rather than risking your immersion blender.
Frequently Asked Questions
Can a low-wattage immersion blender crush ice?
It can, but only with small pieces and plenty of liquid. Break cubes into smaller chunks, add cold liquid, and pulse in short bursts. A 250W motor will handle occasional small batches.
It won’t survive regular heavy use.
How long does it take to crush ice with an immersion blender?
A single serving of crushed ice takes about 15 to 30 seconds of pulsing. Start with 2-second bursts and check the texture between pulses. Any longer and you’re risking motor strain.
Why does my immersion blender stop when crushing ice?
That’s the thermal overload protection kicking in. The motor got too hot and cut power to prevent damage. Unplug it, let it cool for 15 to 30 minutes, then try again with a smaller batch and more liquid.
Is crushed ice from a bag better than blending cubes?
For speed, yes. Bagged crushed ice is ready instantly and puts zero strain on your blender. For texture, freshly crushed ice stays harder and colder longer.
It’s a trade-off between convenience and quality.
Can I crush ice in a plastic container with an immersion blender?
You can, but it’s not ideal. Flexible plastic walls can flex away from the blade, leaving ice stuck in the corners. A sturdy glass measuring cup or a stainless steel pitcher works much better.