Skip to content
Cooking pork chops in an electric skillet is a smart way to get delicious results with less guesswork. Many people find that pork can be tricky—too little time and it’s undercooked, too much and it’s dry. But with the right timing and temperature, your electric skillet can help you make juicy, flavorful pork chops every time.
In this guide, you’ll discover exactly how long to cook pork chops in an electric skillet, plus tips that make the process even easier. Whether you’re new to electric skillets or looking to perfect your technique, you’ll find practical advice, clear times, and a few secrets that most beginners miss.
Why Use An Electric Skillet For Pork Chops?
Electric skillets offer a level of control that regular stovetops can’t always match. They keep a steady temperature, which is key for getting pork chops cooked just right. With a flat, non-stick surface and even heat, you won’t need to worry about hot spots or burning one side while the other stays raw.
Unlike an oven, an electric skillet lets you see and adjust your cooking in real time. You can easily flip, add seasonings, or check doneness without losing heat. This is especially helpful for bone-in or thicker pork chops, which need a bit more attention than thin, boneless cuts.
Choosing The Right Pork Chops
The cut and thickness of your pork chops will affect cooking time more than almost anything else. Here’s what you need to know:
- Bone-in vs. Boneless: Bone-in pork chops tend to be juicier but take a bit longer to cook. Boneless are faster, but they can dry out if you’re not careful.
- Thickness: Thicker chops (over 1 inch) need more time and lower heat. Thin chops (½ inch or less) cook quickly but can become tough if overcooked.
- Marbling: Look for a little fat throughout the meat. This helps keep the pork moist and adds flavor.
How Long To Cook Pork Chops In An Electric Skillet
The cooking time depends mostly on thickness and whether your chops are bone-in or boneless. Below is a quick reference:
| Pork Chop Type | Thickness | Cooking Time (per side) | Total Cooking Time |
|---|---|---|---|
| Boneless | 1/2 inch | 3–4 minutes | 6–8 minutes |
| Bone-in | 1/2 inch | 4–5 minutes | 8–10 minutes |
| Boneless | 1 inch | 4–5 minutes | 8–10 minutes |
| Bone-in | 1 inch | 5–6 minutes | 10–12 minutes |
These times are for cooking over medium-high heat (about 350°F), which is the standard setting for most electric skillets. Always check the pork’s internal temperature to be sure—more on that below.
How To Cook Pork Chops In An Electric Skillet: Step-by-step
1. Prepare The Pork Chops
Take your pork chops out of the fridge about 20 minutes before cooking. This helps them cook evenly. Pat them dry with paper towels. Season both sides with salt, pepper, and any other spices you like—garlic powder, paprika, or dried herbs work well.
2. Preheat The Electric Skillet
Set your electric skillet to 350°F (medium-high). Let it heat for at least 5 minutes before adding anything. Add a thin layer of oil (such as canola, vegetable, or olive oil) to prevent sticking and help get a nice sear.
3. Sear The Pork Chops
Place the pork chops in the skillet, leaving space between each piece. Don’t crowd the pan—if you have many chops, cook in batches. Let them sear without moving for the time listed in the table above. This step locks in juices and creates a golden-brown crust.
4. Flip And Finish Cooking
Turn the chops over using tongs, not a fork (to avoid losing juices). Cook the second side for the same amount of time. If your pork chops are especially thick (over 1 inch), you can lower the heat to 325°F after flipping.
This prevents the outside from burning before the inside cooks through.
5. Check Doneness
The best way to check is with a meat thermometer. Pork should reach 145°F in the thickest part, according to the USDA. If you don’t have a thermometer, cut into the center—it should be a light blush pink, not red or bloody.
6. Rest Before Serving
Let the pork chops rest on a plate for 3–5 minutes before serving. This step lets the juices spread back through the meat, making each bite more tender and flavorful.
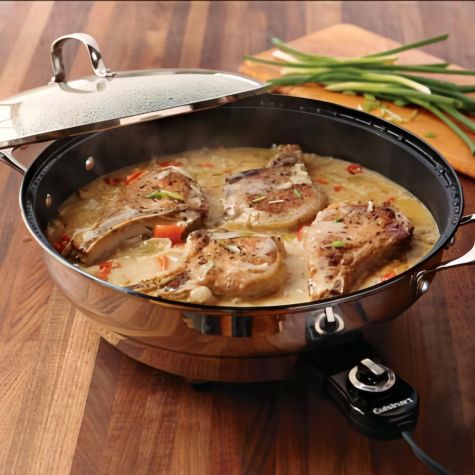
Credit: www.williams-sonoma.com
Tips For The Juiciest Pork Chops
Many home cooks end up with dry pork because they miss a few easy tricks. Here are some secrets for making your electric skillet pork chops the best they can be:
- Don’t overcook: Pork dries out fast past 145°F. Remove them just as they reach the right temperature.
- Brine your pork chops: Soaking chops in a simple brine (water and salt) for 30 minutes before cooking can make a huge difference in moisture. Use about ¼ cup salt per quart of water.
- Pat dry before searing: If the pork is wet, it will steam, not sear. Dry meat means better browning.
- Let them rest: Even a short resting period makes the texture much better.
- Use a thermometer: It’s the only way to guarantee perfect doneness.
Common Mistakes And How To Avoid Them
Cooking Straight From The Fridge
Cold pork chops cook unevenly. Always let them sit at room temperature for at least 20 minutes before cooking.
Overcrowding The Skillet
If you crowd the pan, your chops will steam instead of sear. Give each chop space for a proper crust. If cooking for a group, keep finished chops warm under foil while the rest cook.
Skipping The Resting Step
Cutting into the chops right away makes juices run out. Letting them rest for a few minutes before serving helps keep them juicy.
Using Only Color To Judge Doneness
Pork can sometimes look white before it’s fully cooked, or slightly pink when it’s safe to eat. Always check with a thermometer for best results.

Credit: inthekitch.net
Comparing Electric Skillet To Other Cooking Methods
You might wonder how electric skillet pork chops compare to those made in a regular skillet, oven, or grill. Here’s a quick side-by-side:
| Method | Control | Juiciness | Ease | Typical Cook Time |
|---|---|---|---|---|
| Electric Skillet | High | Very Good | Easy | 8–12 min |
| Stovetop Skillet | Medium | Good | Medium | 8–12 min |
| Oven | High | Excellent | Easy | 20–30 min |
| Grill | Medium | Excellent | Medium | 10–15 min |
Electric skillets stand out for their even heat and control, making them one of the easiest ways to get consistently good pork chops.
Adding Flavor: Simple Marinades And Seasonings
While salt and pepper are enough for a classic taste, you can boost flavor with simple marinades. Here are a few ideas:
- Garlic and Herb: Mix olive oil, minced garlic, dried thyme, and rosemary. Marinate the chops for 30–60 minutes before cooking.
- Soy and Honey: Combine soy sauce, honey, a bit of grated ginger, and black pepper. Adds a sweet-savory glaze.
- Spicy Mustard: Mix Dijon mustard, a splash of vinegar, and crushed red pepper.
Marinades can help keep pork moist and add a punch of flavor, especially if you’re using boneless chops.
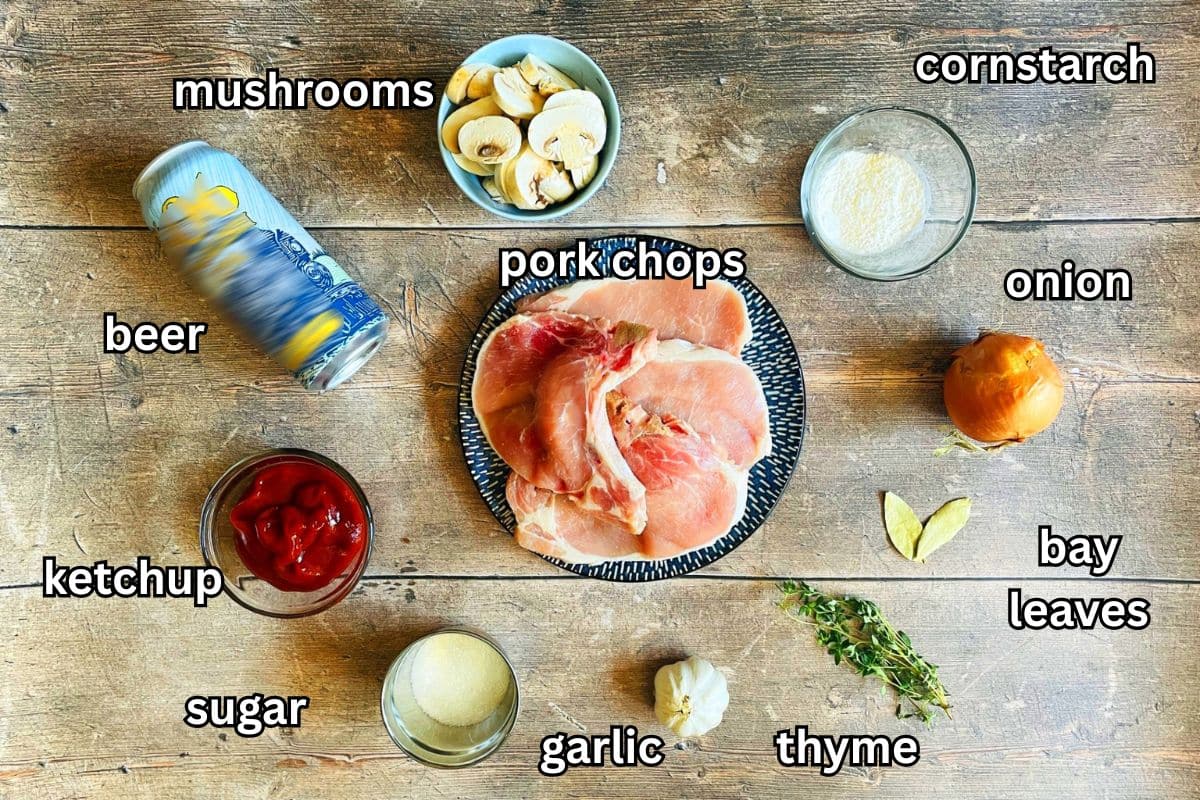
Credit: inthekitch.net
Internal Temperature And Food Safety
The USDA recommends cooking all pork to an internal temperature of 145°F, followed by a 3-minute rest. This temperature is safe and keeps pork juicy. Older guides suggested 160°F, but research now shows lower temperatures are safe if you let the meat rest.
For more details on pork safety, see the official recommendations at USDA Food Safety.
Cooking Times For Different Pork Chop Recipes
Not all pork chop recipes are the same. Here’s how different preparations can change your timing:
| Recipe Style | Preparation | Cooking Time (Total) |
|---|---|---|
| Plain Sear | Simple seasoning, seared both sides | 8–12 min |
| Breaded | Coated in crumbs, seared, then finished at lower temp | 12–15 min |
| Marinated | Soaked in marinade, patted dry, seared | 8–12 min |
| Sauced | Sear, then simmer in sauce | 15–18 min |
Adding breading or a sauce usually means you’ll need a few extra minutes, especially at a lower finishing temperature.
Signs Your Pork Chops Are Perfectly Cooked
You know your pork chops are done when:
- The surface is golden brown with a bit of crispness.
- They feel firm but not hard when pressed with tongs.
- The juices run clear or just slightly pink when pierced.
- The internal temperature is 145°F.
It’s normal for pork to be slightly pink inside when fully cooked and safe to eat.
How To Store And Reheat Leftover Pork Chops
Leftovers can be just as tasty if you store and reheat them the right way.
- Cool quickly: Place leftovers in the fridge within 2 hours.
- Use airtight containers to keep moisture in.
- Eat within 3–4 days for best flavor and safety.
To reheat, place the pork chop in a skillet with a splash of water or broth. Cover and heat gently over low-medium heat until warm—usually 3–5 minutes per side. Avoid microwaving, which can dry out the meat.
Frequently Asked Questions
How Do I Keep Pork Chops From Drying Out In The Electric Skillet?
The two keys are not overcooking (stop at 145°F internal temperature) and letting them rest before serving. Using a quick brine or marinade also helps keep them moist.
Can I Cook Frozen Pork Chops In An Electric Skillet?
It’s best to thaw pork chops first for even cooking. If cooking from frozen, add 50% more time and keep the heat slightly lower to prevent burning the outside. However, the texture may not be as good as with thawed meat.
What Oil Is Best For Cooking Pork Chops In An Electric Skillet?
Choose an oil with a high smoke point, such as canola, vegetable, or light olive oil. Avoid butter alone, as it can burn at the high temperatures used for searing.
How Do I Know When Pork Chops Are Done Without A Thermometer?
Check for a slight blush of pink in the center, clear juices, and a firm texture. However, a thermometer gives the most reliable results and is highly recommended for safety.
Can I Add Vegetables To The Skillet While Cooking Pork Chops?
Yes, you can add quick-cooking vegetables like sliced onions, bell peppers, or mushrooms to the skillet. Add them after flipping the pork chops, so both finish at the same time.
Cooking pork chops in an electric skillet is simple once you know the right timing and temperature. With these tips, you’ll be able to serve juicy, flavorful pork chops every time. Experiment with different seasonings and sides, and enjoy the consistency and convenience that an electric skillet brings to your kitchen.