
Cleaning a mandoline slicer can feel intimidating. After all, these kitchen tools have sharp blades and many parts. But keeping your mandoline slicer clean isn’t just about looks—it’s about safety and food hygiene. If you don’t wash it well, bacteria can grow, food can stick, and the tool can dull over time.
With the right steps, you can clean your mandoline quickly and safely, so it’s ready for your next cooking session.
Many people worry about slicing their fingers or damaging the tool while cleaning. Others simply rinse it and leave food stuck in corners. In this guide, you’ll learn the best way to clean your mandoline slicer without risk. You’ll also get practical tips, see comparisons, and find out common mistakes most beginners make.
Let’s get started.
Understanding Your Mandoline Slicer
A mandoline slicer is a kitchen tool for slicing vegetables, fruits, and sometimes cheese. It usually has a flat board, adjustable blades, and sometimes extra attachments for different cuts. Some models are simple; others have multiple removable parts. Knowing your slicer’s structure makes cleaning much easier.
Most mandoline slicers have:
- A main frame (the body)
- An adjustable blade (for different thicknesses)
- Food holder or guard (protects your hand)
- Extra blades or attachments (for julienne, crinkle cuts, etc.)
If you have a newer mandoline, it might be dishwasher-safe, but many older or professional models are not. Blades are usually stainless steel, and frames are plastic or metal. Some slicers have tight corners where food gets stuck easily.
Common Types Of Mandoline Slicers
Here’s a quick comparison of popular mandoline slicer types:
| Type | Main Material | Blade Adjustability | Ease of Cleaning |
|---|---|---|---|
| Basic plastic | Plastic | Limited | Easy |
| Professional metal | Stainless steel | Wide range | Moderate |
| Multi-blade | Plastic/metal | Multiple options | Challenging |
Knowing your slicer’s type helps you choose the right cleaning steps. For example, plastic models often go in the dishwasher, while metal ones need hand washing.
Preparing To Clean Your Mandoline Slicer
Before you start cleaning, always protect your hands. The blades are extremely sharp—one of the top causes of kitchen injuries. According to the Consumer Product Safety Commission, kitchen mandoline slicers cause over 4,000 ER visits every year in the US.
To prepare:
- Unplug the slicer if it’s electric.
- Disassemble all removable parts (blades, guards, attachments).
- Wear cut-resistant gloves if possible. These are a smart investment for anyone who cooks often.
- Place parts on a towel or soft surface to avoid scratching.
Make sure you read your slicer’s manual. Some models require special care, especially for blade removal.
Tools And Supplies Needed
You will need:
- Mild dish soap
- Soft sponge or brush
- Toothbrush (for corners)
- Cut-resistant gloves
- Clean towel
- Warm water
Avoid abrasive pads or harsh cleaners—they can dull the blade and scratch plastic.
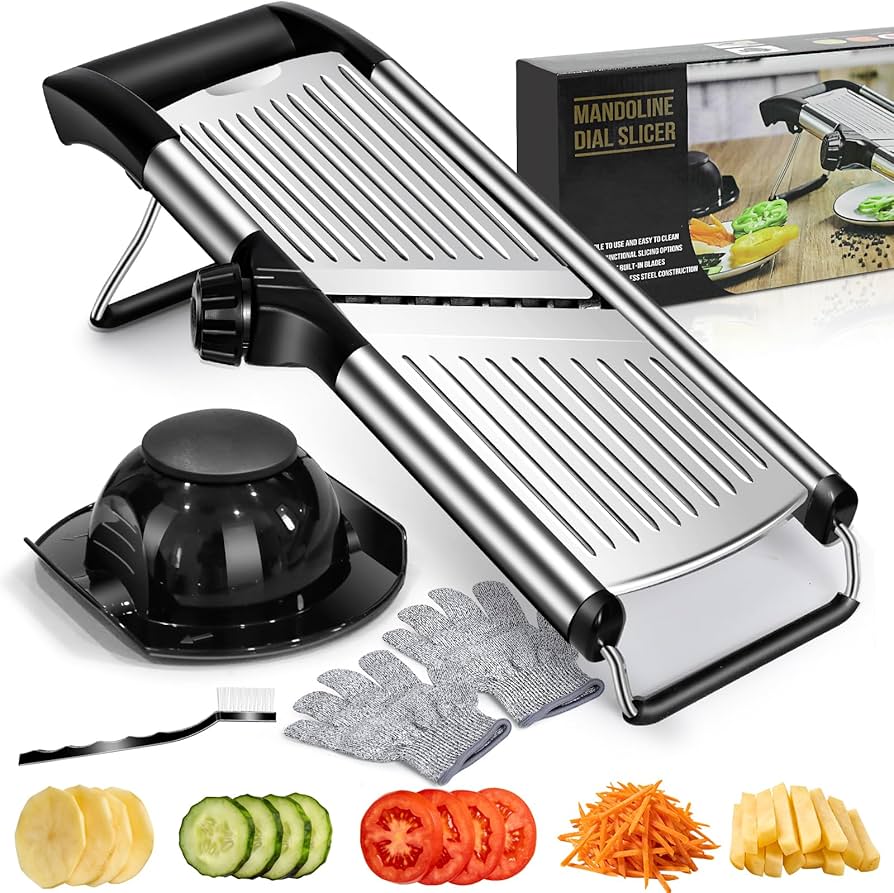
Credit: www.amazon.com
Step-by-step Cleaning Process
Cleaning your mandoline slicer properly takes just a few minutes. Follow these steps for safe, thorough cleaning.
1. Rinse Immediately After Use
Right after slicing, rinse the slicer with warm water. This prevents food from hardening and sticking. If you let the food dry, it’s much harder to remove later.
2. Disassemble All Parts
Remove the blade, food holder, and any attachments. Most mandolines are designed for easy disassembly. If parts are stuck, check the manual—never force them.
3. Wash Each Part Separately
Use mild dish soap and a soft sponge. Scrub gently, especially around the blade. For tight corners and grooves, use a toothbrush. Don’t forget to clean the food holder—it often collects residue.
Example: Cleaning The Blade
Hold the blade by the dull side, never the sharp edge. Scrub with the sponge, moving away from your body. Rinse well. If you see stubborn stains or stuck-on food, soak the blade in warm soapy water for 5-10 minutes.
4. Clean The Main Frame
Wipe the frame with the sponge. Pay attention to joints and edges where food can hide. For plastic frames, avoid hot water—it can warp the material.
5. Rinse And Inspect
After washing, rinse each part under running water. Look for any remaining food bits or stains. If you find any, repeat the cleaning process.
6. Dry Completely
Dry all parts with a clean towel. Leave them out to air dry for 10-15 minutes. Moisture can cause rust on metal blades and mold on plastic.
7. Reassemble And Store Safely
Once dry, reassemble the slicer. Store it with the blade covered or locked in the “safe” position. If your slicer has a protective cover, use it.
Cleaning Comparison: Manual Vs. Dishwasher
Some mandoline slicers claim to be dishwasher-safe. However, not all parts should go in the dishwasher. Here’s a quick comparison:
| Cleaning Method | Advantages | Disadvantages | Recommended For |
|---|---|---|---|
| Hand washing | Thorough, protects blade | Takes more time | All slicers |
| Dishwasher | Convenient | May dull blade, warp plastic | Plastic models |
Pro tip: If you use the dishwasher, place parts away from the heating element and avoid washing the blade with other utensils.
Deep Cleaning And Maintenance
If you use your mandoline slicer often, deep cleaning once a month is smart. This prevents buildup and keeps the tool sharp.
Deep Cleaning Steps
- Soak all parts in warm, soapy water for 15–30 minutes.
- Scrub every surface with a toothbrush.
- Use a cotton swab for tight corners.
- Check blade for rust or dullness—sharpen if needed.
- Dry completely before reassembling.
If you notice discoloration or odor, wipe parts with a solution of vinegar and water (1:1 ratio). This removes stains and kills bacteria.
Blade Maintenance
Blades dull over time, especially if you slice hard vegetables. You can sharpen mandoline blades with a ceramic sharpening rod. Always follow the angle recommended in your manual—usually 15–20 degrees.
Common Cleaning Mistakes To Avoid
Beginners often make these mistakes:
- Not disassembling all parts: Food and bacteria hide in joints and attachments.
- Using abrasive cleaners: They scratch surfaces and dull blades.
- Rushing the drying step: Moisture leads to rust and mold.
- Ignoring the food holder: This part touches food directly—always clean it.
- Storing slicer without blade cover: Exposed blades can injure hands or damage the slicer.
One less obvious mistake: Many people soak only the blade, leaving the main frame dirty. Always soak all parts if you see stuck-on food.
Safety Tips For Cleaning Mandoline Slicers
Mandoline slicers are sharp tools, and cleaning can be risky. Here’s how to stay safe:
- Wear cut-resistant gloves while cleaning.
- Hold blades by the dull side only.
- Clean one part at a time—never rush.
- Keep slicer away from children during cleaning.
- Dry blades and frame thoroughly before storing.
Most accidents happen when people try to clean quickly. Take your time, and don’t work when tired or distracted.

Credit: chefsupplyco.com.au
How To Remove Stubborn Stains And Odors
Sometimes, food leaves stains or smells on your slicer. Potato, beet, or onion can be tricky. Here’s what to do:
- Vinegar solution: Mix equal parts white vinegar and water. Wipe stained areas and rinse well.
- Baking soda paste: Mix baking soda with water. Apply to stains, let sit for 10 minutes, then scrub and rinse.
- Lemon juice: Rub with lemon, especially for onion or garlic smells.
If stains persist, repeat the steps or soak parts longer. Avoid bleach—it’s too harsh for kitchen tools.
Storing Your Mandoline Slicer After Cleaning
Proper storage keeps your mandoline slicer safe and clean. Always store with the blade covered or locked. If your model has a storage box, use it. Keep slicer away from moisture and heat.
Storage Comparison
Here’s how different storage methods protect your slicer:
| Storage Method | Blade Protection | Ease of Access | Risk of Damage |
|---|---|---|---|
| Box with cover | Excellent | Moderate | Low |
| Drawer (no cover) | Poor | High | High |
| Blade locked on slicer | Good | Easy | Medium |
Pro tip: Never store your mandoline slicer loose in a drawer. This can dull the blade and cause accidents.
When To Replace Your Mandoline Slicer
Mandoline slicers last for years, but they do wear out. Signs you need a new slicer:
- Blade is dull or chipped
- Frame is warped or cracked
- Attachments no longer fit
- Rust that cannot be removed
If you use your slicer daily, expect to replace blades every 1–2 years. If the frame or parts break, it’s safer to buy a new slicer.
Frequently Asked Questions
How Often Should I Clean My Mandoline Slicer?
Clean your mandoline slicer after every use. If you use it daily, deep clean once a month. This prevents food buildup, bacteria, and keeps the blade sharp.
Can I Put My Mandoline Slicer In The Dishwasher?
Some mandoline slicers are dishwasher-safe, especially plastic models. Always check the manual first. Blades and metal frames are best washed by hand to prevent dulling and rust.
What Should I Do If The Blade Is Dull?
Sharpen the blade with a ceramic rod or replace it if sharpening is not possible. Dull blades are dangerous—they require more force and can slip. Never use a slicer with a chipped or rusty blade.
How Do I Remove Stuck Food From Tight Corners?
Use a toothbrush or cotton swab to reach tight spots. Soak the parts in warm, soapy water for 10–15 minutes before scrubbing. For stubborn bits, use a baking soda paste.
Is It Safe To Clean A Mandoline Slicer Without Gloves?
It’s possible, but not recommended. Mandoline blades are extremely sharp. Wearing cut-resistant gloves reduces the risk of injury. Always clean slowly and carefully.
Keeping your mandoline slicer clean and safe is simple with the right habits. Don’t wait until food is stuck or the blade is dull—regular cleaning keeps your slicer ready and your kitchen safer. For more kitchen safety tips, visit Consumer Product Safety Commission. Take care, and happy slicing!

Credit: www.amazon.com