Skip to content
Drying a mop the right way is more important than most people realize. A wet mop can quickly become a breeding ground for bacteria, mold, and unpleasant smells. After cleaning, if you leave your mop damp or toss it in a corner, you risk making your next cleaning session less effective—and possibly spreading germs across your floors.
Proper drying doesn’t just keep your mop fresh; it also extends its life and saves you money over time. Many people miss key steps, like using airflow or separating mop types, that can make drying faster and safer. Let’s explore the practical steps, tips, and data that help you dry your mop properly, whether you use string mops, sponge mops, or microfiber flat mops.
Why Proper Mop Drying Matters
Most cleaning routines end with rinsing the mop, but stopping there can cause problems. A wet mop left in a bucket or closed space stays moist for hours. According to a 2022 study from the American Cleaning Institute, a mop head left damp can grow over 200,000 bacteria per square inch in just 24 hours. These bacteria include E. coli and Staphylococcus, which can cause illness, especially in homes with children or pets.
Mold is another concern. Mold spores thrive on moisture and organic material, making dirty mop fibers a perfect environment. Mold can trigger allergies and asthma. The smell from a moldy mop is also hard to ignore and can ruin the freshness of your home.
Drying your mop correctly helps prevent:
- Bacterial growth
- Mold and mildew
- Bad odors
- Fiber damage
- Shorter mop lifespan
Steps To Dry A Mop Properly
Drying a mop isn’t just about hanging it up. Each step matters for cleanliness and durability. Here’s a simple but effective process:
1. Rinse Thoroughly
Always rinse the mop head with clean water after use. If you used a cleaning agent, rinse until the water runs clear. This removes dirt and chemicals that cause odors.
2. Wring Out Excess Water
Use your hands, a mop wringer, or the mop bucket’s squeezing mechanism. The more water you remove, the faster your mop will dry.
3. Separate Mop Head (if Possible)
Some mops, like microfiber and sponge types, have removable heads. Take them off for better drying. Leaving the head attached to the handle can trap moisture inside.
4. Choose The Right Location
Hang the mop in a well-ventilated area. Outdoors is best, but indoors near a window or fan works too. Avoid closed closets or bathrooms with poor airflow.
5. Hang Vertically
Hang the mop upside down so the head is at the bottom. This lets water drip away and air circulate around the fibers.
6. Avoid Direct Sunlight For Some Materials
Sun dries fast, but can damage synthetic fibers or cause colors to fade. Cotton mops tolerate sunlight, but microfiber and sponge heads should dry in shade.
7. Allow Complete Drying Time
Depending on the environment and mop type, drying can take from 2 to 8 hours. Don’t store the mop until it feels dry to the touch.
8. Clean The Drying Area
Make sure your drying rack or hooks are clean. Dirty surfaces can re-contaminate your mop.

Credit: www.reddit.com
Comparing Mop Drying Methods
Different methods work for different mop types and environments. Here’s a comparison of common drying approaches:
| Drying Method | Best For | Drying Time | Risks |
|---|---|---|---|
| Hanging Outdoors | All mop types | 2–4 hours | Sun damage (synthetics) |
| Hanging Indoors (Ventilated) | Microfiber, sponge | 4–8 hours | Slower drying |
| Drying Rack | String, flat mops | 3–6 hours | Limited space |
| Machine Drying | Removable heads | 1–2 hours | Heat damage (some materials) |
| Bucket Storage | None | Does not dry | Mold, bacteria |
Mop Types And Drying Differences
Not all mops dry the same way. Here are the most common types and special considerations:
String Mop
String mops are classic and absorbent. Their thick fibers take longer to dry and can trap dirt. Hang vertically and use airflow for best results.
Microfiber Flat Mop
Microfiber mops are popular for their cleaning power and quick drying. Remove the head if possible and lay flat or hang in shade. Microfiber dries faster but is sensitive to heat.
Sponge Mop
Sponge heads hold a lot of water and dry slowly. Remove the sponge and stand it upright in a dry, airy spot. Avoid sunlight, which can break down sponge material.
Steam Mop
Steam mop pads need to be cleaned and dried separately. Wash the pad, wring out excess water, and hang it in a ventilated area.
| Mop Type | Drying Time | Best Drying Method | Material Sensitivities |
|---|---|---|---|
| String Mop | 4–8 hours | Vertical hanging | Can mildew easily |
| Microfiber Mop | 2–4 hours | Air drying, shade | Heat damage |
| Sponge Mop | 6–12 hours | Upright standing | Sunlight damage |
| Steam Mop Pad | 2–6 hours | Hanging or flat | Heat and sunlight |
Practical Tips For Faster And Safer Mop Drying
Drying faster doesn’t mean skipping steps. These tips help you avoid mistakes and get the best results:
- Use a fan: Pointing a fan at your mop speeds up drying, especially indoors.
- Rotate the mop: Flip or turn the mop every hour for even drying.
- Don’t leave mops in buckets: Even for a few minutes, moisture collects at the base and causes bacteria.
- Check for lingering smells: If the mop smells after drying, wash it with vinegar or disinfectant and dry again.
- Avoid overcrowding: Don’t hang multiple mops too close together. Air must flow around each one.
- Clean mop handles: Germs can grow on the handle, so wipe it down when drying the head.
- Store only when fully dry: Storing a damp mop is a common mistake. Wait until it’s completely dry.
- Replace old mop heads: If drying takes longer than usual or the mop stays smelly, the fibers may be worn out. Replace the head to avoid spreading germs.
Mistakes People Make When Drying Mops
Many people unknowingly make errors when drying their mop. Avoid these mistakes:
- Leaving the mop in the cleaning bucket overnight: Moisture stays trapped.
- Storing in a closed closet: No airflow means slow drying and bacteria growth.
- Not wringing out enough water: More moisture means longer drying time.
- Hanging horizontally: Water pools instead of dripping out.
- Ignoring material sensitivities: Sunlight and heat can ruin some mop heads.
- Skipping periodic deep cleaning: Old dirt can stay even after drying.
- Using the mop before fully dry: Damp mops spread germs and leave streaks.
:max_bytes(150000):strip_icc()/how-to-mop-a-floor-1901114-12-0fae9d8c83ff402686beac2d33e69aeb.jpg)
Credit: www.thespruce.com
How Often Should You Dry And Clean Your Mop?
Dry your mop after every use—never skip. Deep clean the mop head at least once a week if used regularly. For high-traffic areas, clean more often. Studies show that cleaning and drying after each use can increase mop lifespan by up to 40% and cut down bacteria by over 90%.
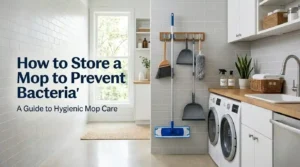
Storing A Mop After Drying
Once your mop is fully dry, store it in a clean, dry place. Hang it vertically or lay it flat on a shelf with airflow. Avoid plastic bags, which trap moisture. Some mop heads can be stored in a dedicated container with holes for ventilation.
Keep mop heads and handles away from direct contact with floor surfaces.
Here’s a quick comparison of storage options:
| Storage Option | Airflow | Moisture Risk | Recommended For |
|---|---|---|---|
| Vertical Hanging | Excellent | Low | All mop types |
| Flat Shelf | Good | Moderate | Microfiber |
| Plastic Bag | Poor | High | None |
| Closed Closet | Poor | High | None |
| Ventilated Container | Good | Low | Removable heads |

Credit: www.jesun.com
How Professional Cleaners Dry Mops
Commercial cleaners follow strict drying routines. They often use:
- Wall-mounted racks for vertical hanging
- Industrial fans to boost airflow
- Separate drying rooms with temperature control
- Scheduled cleaning and drying cycles
- Disinfectant rinses before drying
These practices keep mops sanitary and extend their lifespan. Professional cleaning services report that proper drying reduces mop replacement costs by up to 30% per year.
For more professional cleaning tips, see this guide from the American Cleaning Institute.
Frequently Asked Questions
How Long Does It Take To Dry A Mop?
Drying time depends on the mop type and environment. String mops can take 4–8 hours, while microfiber heads dry in 2–4 hours. Sponge mops may need 6–12 hours. Using a fan or drying outdoors speeds up the process.
Is It Safe To Dry A Mop In The Sun?
Sunlight dries mops quickly, but it can damage synthetic fibers and fade colors. Cotton mops are safe in the sun, but microfiber and sponge heads should dry in shade or indoors.
Can I Use A Dryer For Mop Heads?
Some removable mop heads are safe for machine drying, but always check the label. Microfiber and sponge heads can melt or break down in high heat. Use low heat and avoid over-drying.
What If My Mop Still Smells After Drying?
If your mop has an odor after drying, wash it with vinegar or a disinfectant. Persistent smells often mean bacteria or mold are present. Replace the mop head if cleaning doesn’t help.
Should I Dry The Mop Handle Too?
Yes. Wipe down the handle with a disinfectant after rinsing the head. Handles can collect germs and dirt during cleaning. Drying the handle prevents bacteria growth and keeps your mop fully sanitary.
Drying your mop properly is a small step that makes a big difference. It keeps your floors cleaner, protects your health, and saves money. With the right drying method and a few practical tips, your mop will stay fresh and last longer.
Avoid common mistakes, understand your mop type, and always choose airflow and cleanliness first.