Skip to content
Every home baker knows the joy of using a Kitchenaid stand mixer. It makes bread, cookies, and cakes easier and more fun. But did you know that your mixer needs regular care to keep working well? One important job is greasing the internal gears. If you skip this, your mixer can become noisy, wear out faster, or even break.
Many people feel nervous about opening their mixer, but with the right steps, it’s easier than you might think. This guide will show you how to grease a Kitchenaid stand mixer safely, helping you protect your investment and enjoy smooth mixing for years.
Why Greasing Your Kitchenaid Mixer Matters
The gears inside a Kitchenaid mixer do hard work. They turn thick doughs and mix heavy batters. Over time, the grease inside dries out or leaks. When this happens, the gears rub against each other with less protection. This can cause:
- Louder operation
- Slower speeds
- Metal shavings in the bowl
- Gear failure
Kitchenaid recommends greasing your stand mixer every 1-2 years if you use it often, or after about 50 hours of use. For heavy users (like if you bake bread weekly), once a year is wise. If you notice odd noises, leaking grease under the head, or rough mixing, it may be time to regrease.
Tools And Supplies You Need
Before you start, gather the right items. Not having the right tool can slow you down or even damage your mixer.
| Item | Purpose |
|---|---|
| Food-grade grease | Lubricates gears safely for food use |
| Phillips screwdriver | Removes/attaches screws on the mixer housing |
| Flat-head screwdriver | Helps pry off stubborn parts |
| Plastic scraper or spatula | Removes old grease |
| Clean rags or paper towels | Cleans surfaces and old grease |
| Small brush/toothbrush | Cleans tight spots and gears |
| Rubber gloves (optional) | Keeps hands clean from grease |
Food-grade grease is crucial—never use automotive grease. The official Kitchenaid grease (like “Kitchenaid Stand Mixer Gear Grease”) is safe, but you can also use any NSF H1 certified food-grade grease.
Credit: www.reddit.com
Step-by-step: How To Grease A Kitchenaid Stand Mixer
Let’s walk through the process. Allow at least an hour the first time, especially if you’re new to this kind of task.
1. Prepare Your Work Area
Unplug your mixer. Never work on electrical appliances while plugged in. Place the mixer on a sturdy table with good lighting. Lay down old towels or newspapers to catch grease drips.
2. Remove The Accessories And Bowl
Take off the mixing bowl and any beater or whisk. Set them aside. This makes the mixer lighter and easier to handle.
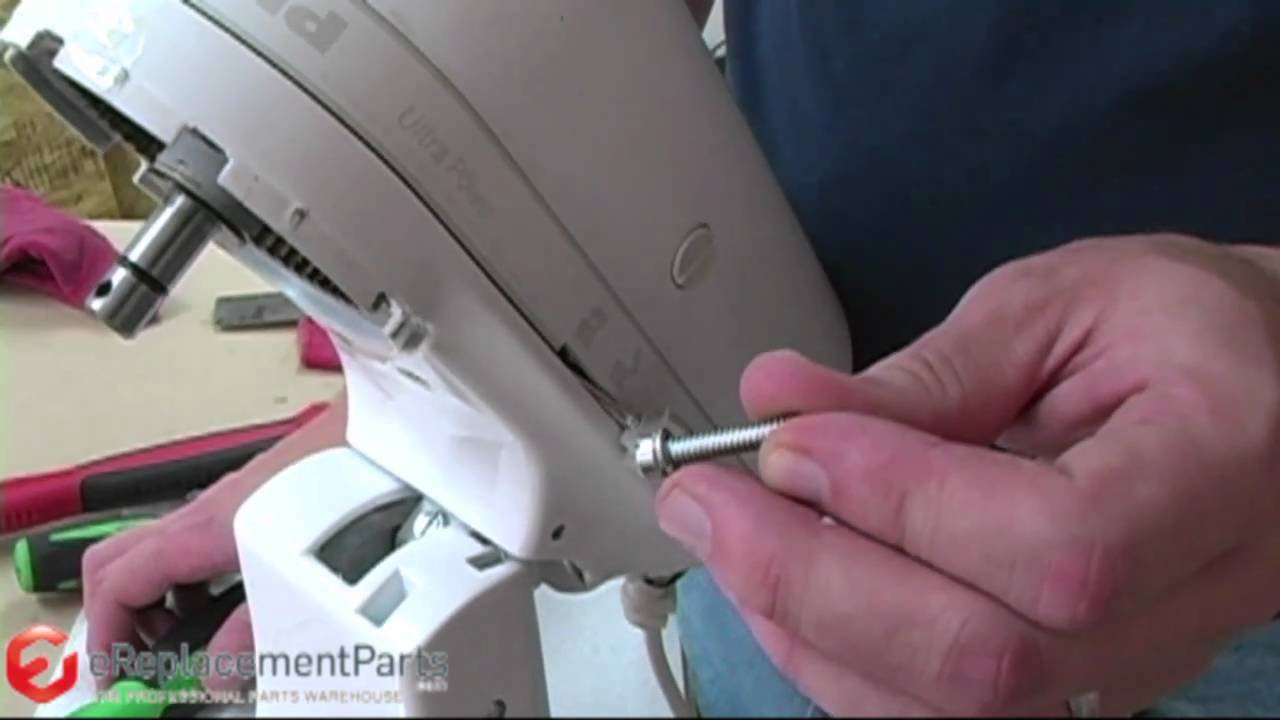
3. Open The Mixer Housing
Most Kitchenaid mixers have four screws on the back or sides holding the top cover. Use your Phillips screwdriver to remove them. Keep the screws in a small cup, so they don’t roll away.
Lift the top housing carefully. If it feels stuck, gently pry with a flat-head screwdriver at the seam. Do not force it—check for hidden screws.
4. Inspect The Old Grease
Look at the gears inside. You might see thick, yellowish or gray grease. If it’s dark, gritty, or low, it’s time to clean and replace it. If you see metal shavings, your gears may need professional help.
5. Remove The Old Grease
Use your plastic scraper or spatula to scoop out as much old grease as possible. Wipe the area with rags or paper towels. For tight spots, use a toothbrush or small brush. Try to remove all traces of old, dirty grease, but don’t worry if a thin film remains.
6. Apply New Grease
Scoop a generous amount of food-grade grease onto a spatula or clean finger (wear gloves if you like). Spread it evenly on all gear teeth and moving parts. Don’t over-pack—too much can cause leaks. Most mixers need about 2 ounces (60 grams) of grease. Focus on the main drive gear and any visible gear wheels.
A beginner’s mistake is missing hidden gears or using too little grease. Make sure the grease covers all metal-to-metal contact points.
7. Reassemble The Mixer
Carefully place the top housing back. Align it so all seams are even. Insert and tighten the screws. Don’t overtighten—just snug is enough. Reattach the bowl and accessories.
8. Test Your Mixer
Plug in your mixer. Run it on low for a minute. Listen for smooth, quiet operation. If you hear grinding or see leaks, unplug and check for misplaced parts or too much grease.
| Step | Common Mistake | How to Avoid |
|---|---|---|
| Opening housing | Forcing cover, breaking clips | Check for all screws; use gentle prying |
| Cleaning gears | Leaving old grease or debris | Use a brush and good lighting |
| Greasing | Packing too much or too little | Spread even layer, 2 ounces max |
| Reassembly | Cross-threading screws | Start screws by hand, tighten gently |
How Often Should You Grease Your Mixer?
Most home bakers only need to grease their Kitchenaid stand mixer every 1-2 years. However, if you use it for heavy doughs often, you may need to do it every 6-12 months. Some clear signs you need to regrease sooner:
- Mixer sounds louder or rough
- You see yellow or brown grease leaking from the head
- The mixer slows down or struggles with heavy dough
Professional kitchens may grease their mixers every few months. For home use, mark your calendar or set a phone reminder. It’s easy to forget, and skipping can shorten your mixer’s life.

Credit: www.youtube.com
Choosing The Right Grease
Not all greases are safe for food appliances. Always pick a food-grade grease marked NSF H1 or with clear food safety labeling. The official Kitchenaid grease is reliable, but there are other good brands too.
| Brand | Food-Grade | Price Range (per 4oz) | Notes |
|---|---|---|---|
| Kitchenaid OEM Grease | Yes (NSF H1) | $12–$15 | Trusted, widely used |
| Super Lube 93003 | Yes (NSF H1) | $8–$12 | Popular alternative |
| Haynes Lubri-Film Plus | Yes (NSF H1) | $10–$14 | Used in bakeries |
| Automotive Grease | No | $3–$5 | NEVER use (toxic!) |
Never use automotive or industrial grease. These can be toxic and are not made for food contact. If you want more detail about food-grade lubricants, you can visit the Wikipedia page on food-grade lubricants.
What If You See Leaking Grease?
Sometimes, you might notice yellow or brown grease dripping from the mixer’s head. This is a sign that the grease inside has broken down or is overfilled. If you see this:
- Stop using the mixer.
- Open the housing and clean out all old grease.
- Reapply a moderate amount of fresh, food-grade grease.
Leaking can also happen if the mixer is stored in a hot place, as grease becomes runnier with heat. Try to store your mixer in a cool, dry place.
Credit: www.youtube.com
Extra Tips For A Smooth Greasing Experience
- Take photos at each step. This helps you remember how to put everything back.
- Use a magnetic tray for screws to avoid losing small parts.
- If your mixer is under warranty, check if self-servicing will void it.
- Some older Kitchenaid models have a small gasket or seal—replace this if it’s cracked.
- If you’re not comfortable opening the mixer, a local appliance repair shop can usually grease it for $30–$60.
A common error is using too much force when opening or closing the mixer. Patience and gentle handling prevent cracked parts or stripped screws.
Signs Your Mixer Needs More Than Grease
Greasing fixes most common mixer problems, but sometimes, you may find deeper issues. If you notice:
- Grinding or clanking sounds even after greasing
- Mixer will not turn on
- Large metal shavings inside
- Electrical burning smell
These mean a gear or motor may be damaged. In these cases, it’s best to contact Kitchenaid support or a qualified repair technician. Continuing to use the mixer can cause more serious—and expensive—damage.
Benefits Of Regular Greasing
Taking time to grease your stand mixer pays off in several ways:
- Longer life: Proper lubrication means gears last years longer.
- Quieter mixing: Fresh grease makes the mixer much quieter.
- Consistent performance: Heavy doughs and thick batters mix easily.
- Prevents leaks: Old or too much grease can leak into your food.
- Saves money: Avoids costly repairs or buying a new mixer.
Many users notice a big difference in how their mixer sounds and feels after greasing. This simple task can add years to your machine’s life.
Frequently Asked Questions
How Do I Know If My Kitchenaid Mixer Needs Greasing?
Listen for unusual noises or grinding sounds during use. If you see leaking grease under the head or notice the mixer struggling with thick dough, it’s probably time to regrease. For most, this is every 1-2 years.
What Kind Of Grease Should I Use For My Kitchenaid Stand Mixer?
Always use food-grade grease labeled NSF H1. The official Kitchenaid grease or brands like Super Lube and Haynes Lubri-Film Plus are safe. Never use automotive or machine shop greases.
Can I Grease My Mixer Myself, Or Should I Hire A Professional?
Most people can grease their mixer at home with basic tools and care. If you’re not comfortable opening appliances or see major damage, a professional can help. It usually costs less than $60.
How Long Does It Take To Grease A Kitchenaid Mixer?
The first time may take about 60 minutes. With practice, it can be done in 30–45 minutes. Cleaning out old grease usually takes the most time.
Will Greasing My Mixer Void The Warranty?
Opening the mixer may void the warranty if not done by an authorized service center. Check your warranty terms. If the mixer is out of warranty, home greasing is safe and common.
Taking care of your Kitchenaid stand mixer with regular greasing is a smart way to keep it running smoothly. With a little time, the right grease, and careful work, you’ll enjoy quiet, powerful mixing for years. Don’t wait for a problem—make greasing part of your routine mixer care.