Skip to content
Keeping your vacuum cleaner in good shape can save money, reduce frustration, and help you clean better. Many people use their vacuum weekly but rarely think about maintenance. Over time, dust, hair, and debris can clog parts and make your vacuum work harder. Simple habits can keep your machine running longer. Whether you have a basic stick vacuum or a powerful upright, a few smart steps can help your vacuum last for years.
Why Vacuum Cleaner Maintenance Matters
A vacuum is more than a cleaning tool—it’s an investment. Regular care can prevent expensive repairs and boost performance. According to the International Housewares Association, the average vacuum lasts about 8 years, but neglect can cut that time in half. If you notice your vacuum losing suction, making strange noises, or leaving dirt behind, it’s often a sign of poor maintenance.
Many people overlook routine cleaning, thinking their vacuum is “fine” as long as it turns on. But ignoring simple maintenance can cause:
- Reduced suction power
- Motor overheating
- Unpleasant odors
- Shorter lifespan
Taking care of your vacuum isn’t difficult. It just requires a little attention every month.
Cleaning And Replacing Filters
Filters are the lungs of your vacuum. They keep dust and dirt from entering the motor and help protect your home’s air quality. Most vacuums have at least one filter—often a HEPA or foam filter.
How Often To Clean Filters
Check your filter every 1–3 months, depending on use. If you have pets or allergies, inspect it monthly. Dirty filters can reduce suction by up to 30%.
How To Clean Filters
- Turn off and unplug the vacuum.
- Remove the filter (check your manual for location).
- Tap gently to remove loose debris.
- Wash reusable filters in warm water (do not use soap unless recommended).
- Let the filter dry fully—at least 24 hours.
- Replace disposable filters as needed.
When To Replace Filters
Most filters last 6–12 months. If you notice persistent odors or visible damage, replace sooner. Using an old filter can let dust escape back into your home.
Emptying The Dustbin Or Bag
Vacuum dustbins and bags fill up quickly. A full bag or bin puts strain on the motor and reduces suction.
Bagged Vs Bagless Vacuums
Bagged models need regular bag replacement. Bagless models have dustbins you can empty and clean.
| Type | Maintenance | Pros | Cons |
|---|---|---|---|
| Bagged | Replace bags when 2/3 full | Easy disposal, less mess | Ongoing cost, harder to find bags |
| Bagless | Empty bin after every use | No extra cost, see dirt level | Can be messy, must clean bin |
Best Practices
- For bagged vacuums, change bags before they are completely full—about 2/3 is ideal.
- For bagless vacuums, empty the bin after each use.
- Clean bins with mild soap and water every month to prevent odor.
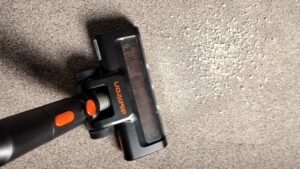
Cleaning The Brush Roll
The brush roll pulls dirt from carpets. Over time, hair, string, and debris can wrap around it, making it less effective.
How To Clean The Brush Roll
- Unplug the vacuum.
- Remove the brush roll (most pop out easily).
- Cut away hair and string with scissors.
- Wipe with a damp cloth.
If your vacuum has a self-cleaning brush, check for jams anyway—sometimes long hair escapes the cleaning mechanism.
Signs Your Brush Needs Attention
- Loud noises when vacuuming
- Poor carpet cleaning
- Visible debris wrapped around the roll
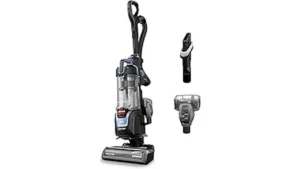
Cleaning the brush roll monthly prevents wear and tear. Some vacuums have removable covers for easy access.

Credit: www.amazon.com
Checking And Unclogging Hoses
Vacuum hoses can get clogged with socks, toys, or large debris. A blocked hose can stop your vacuum from working.
How To Unclog A Hose
- Remove the hose from the vacuum.
- Look through the hose; use a flashlight if needed.
- Push a broom handle gently through to clear blockages.
- Wash the hose with warm water and let it dry completely.
Never use sharp objects to clear a clog—this can puncture the hose.
Inspecting Power Cord And Connections
A vacuum’s power cord is often overlooked. Damaged cords can cause shorts, shocks, or fire risks.
Safety Checks
- Examine cord for cuts or frayed spots.
- Make sure the plug is secure and not loose.
- Avoid wrapping the cord too tightly, which can cause internal breaks.
If you see damage, stop using the vacuum and have it repaired. Never tape over a broken cord as a fix.
Maintaining Wheels And Moving Parts
Wheels and moving parts help your vacuum glide smoothly. Dirt and hair can jam wheels, making it harder to push.
Easy Steps
- Wipe wheels with a damp cloth every few weeks.
- Remove any tangled hair or debris.
- Lubricate moving parts if recommended by the manufacturer.
Smooth wheels prevent extra strain on the motor and your arms.
Storing Your Vacuum Properly
Where you keep your vacuum matters. Proper storage can prevent damage and keep your vacuum ready for use.
Tips For Storage
- Store in a cool, dry place.
- Keep away from direct sunlight (heat can warp plastic).
- Coil the cord loosely.
- Empty the bin or bag before storing.
Avoid leaving your vacuum in damp basements or garages.
Using The Right Settings And Attachments
Most vacuums have different settings for carpet, hardwood, or tile. Using the wrong setting can damage the vacuum or your floors.
Common Mistakes
- Using high suction on delicate rugs
- Forgetting to switch to “hard floor” mode
- Not using the correct attachment for pet hair or upholstery
Check your manual for guidance and experiment to find the best settings.
Deep Cleaning Your Vacuum Every Six Months
Even with regular care, a deep clean is helpful twice a year. This keeps all parts working well and can extend the life of your vacuum.
How To Deep Clean
- Unplug the vacuum and disassemble parts.
- Clean filters, hoses, bins, brush rolls, and wheels.
- Wipe the exterior with a damp cloth.
- Let all parts dry fully before reassembling.
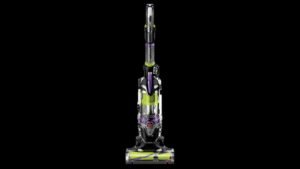
A deep clean removes hidden dust and helps prevent motor problems.
Credit: vacuumpartscanada.ca
Comparing Maintenance Frequency
Different types of vacuums require different maintenance schedules. Here’s a quick comparison to help you plan.
| Vacuum Type | Filter Cleaning | Bin/Bag Emptying | Brush Roll Cleaning | Deep Clean |
|---|---|---|---|---|
| Upright | Monthly | Weekly | Monthly | Twice a year |
| Canister | Monthly | Weekly | Monthly | Twice a year |
| Stick/Handheld | Monthly | After each use | Monthly | Twice a year |
| Robot | Monthly | Weekly | Monthly | Twice a year |
Practical Tips Most People Miss
Many vacuum owners don’t realize these tricks:
- Check for air leaks. If you hear a hissing sound, the vacuum may have a cracked hose or loose seal. Fixing leaks improves suction.
- Don’t ignore minor smells. Even a faint odor can mean a dirty filter or hidden mold. Clean or replace filters if you notice this.
- Clean attachments. Crevice tools and brushes collect dust. Wash or wipe them every month.
These steps can make a big difference, especially in homes with pets or allergy sufferers.
Common Maintenance Mistakes
Avoid these errors for a longer vacuum life:
- Forgetting to let filters dry fully before reinstalling (wet filters can damage the motor)
- Using harsh chemicals to clean parts (stick to mild soap and water)
- Ignoring small blockages or noises (these can lead to bigger problems)
- Overfilling bags or bins
- Wrapping cords too tightly
Signs Your Vacuum Needs Professional Service
Sometimes, home maintenance isn’t enough. Call a professional if:
- The motor smells like burning or makes loud noises
- Suction drops sharply even after cleaning
- The vacuum won’t turn on
- You see sparks or smoke
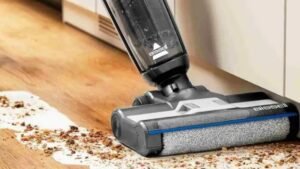
Trying to fix complex issues yourself can be risky. Professionals have the tools and expertise to diagnose problems safely.

Credit: www.amazon.com
How Maintenance Extends Vacuum Life
Regular care can double your vacuum’s lifespan. A well-maintained vacuum will:
- Save money on repairs and replacements
- Keep your home cleaner
- Use less energy (a clogged vacuum uses more power)
- Prevent allergens from spreading
According to Consumer Reports, a vacuum cleaned monthly can last up to 10 years, compared to only 5–6 years for neglected models.
Frequently Asked Questions
How Often Should I Clean My Vacuum Filter?
Clean your filter every 1–3 months. If you have pets or allergies, check monthly. Replace the filter every 6–12 months for best results.
Can I Wash All Vacuum Filters?
Not all filters are washable. Check your vacuum’s manual. HEPA filters are usually replaced, while foam filters can be washed. Always let filters dry completely before reinstalling.
What Should I Do If My Vacuum Smells Bad?
Bad smells usually mean a dirty filter, full bin, or hidden mold. Clean the bin, wash or replace the filter, and wipe attachments. If the smell remains, check for clogs in the hose or brush roll.
Is It Safe To Clean The Vacuum’s Motor?
No, cleaning the motor yourself can be dangerous. If you suspect motor problems, contact a professional repair service. Never open the motor housing unless you are trained.
Where Can I Find Replacement Parts For My Vacuum?
Check your vacuum brand’s official website or trusted retailers. For more tips, visit the Consumer Reports Vacuum Guide.
Taking care of your vacuum cleaner doesn’t have to be complicated. With a little effort each month, you can keep your machine running strong and your home cleaner. Smart maintenance helps you avoid costly repairs and extends the life of your vacuum, making every cleaning job easier and faster.