Skip to content
Making homemade pizza dough can feel difficult, especially if you’re new to baking. But with a bread maker, the process becomes much easier and faster. You get consistent results, less mess, and a dough that’s ready to use within an hour or two.
Whether you’re a pizza lover, a busy parent, or someone who enjoys cooking, learning to make pizza dough in a bread maker is a skill worth mastering. It’s not just about convenience—homemade dough tastes fresher, is healthier, and lets you control every ingredient.
In this guide, you’ll discover step-by-step instructions, ingredient tips, common mistakes, and advanced tricks to make the best pizza dough using a bread machine. You’ll also see how this method compares to traditional hand-kneading, so you can choose what fits your style.
By the end, you’ll be ready to make pizzas that rival your favorite pizzeria.
Why Use A Bread Maker For Pizza Dough?
Most home bakers struggle with dough consistency. Sometimes it’s too dry, sometimes too sticky. Kneading by hand can be tiring and takes time. Bread makers solve these problems by mixing, kneading, and rising the dough automatically.
Consistency And Convenience
A bread maker controls the mixing speed and kneading time. This gives you a smooth, elastic dough every time. You just add the ingredients, select the dough cycle, and let the machine do the work. No need to worry about over-mixing or under-kneading.
Saves Time And Energy
Making dough by hand can take 15-20 minutes of kneading plus 1-2 hours of rising. With a bread maker, you spend only 5 minutes measuring ingredients. The machine handles the rest. Most dough cycles finish in 90 minutes or less.
Less Mess
Bread makers are self-contained. You don’t have flour, water, and dough sticking to your countertops or hands. Cleanup is easier—just wash the bread pan.
Ideal For Beginners
If you’re new to baking, a bread maker helps you avoid common mistakes. The results are reliable, and you learn the basics of dough making without stress.
Essential Ingredients For Pizza Dough
The quality of your pizza dough depends on the ingredients you choose. Each has a specific role in texture, flavor, and rise.
Basic Ingredients
- Flour: The most important ingredient. Bread flour is best because it has more gluten, giving dough a chewy texture. All-purpose flour works, but the crust will be softer.
- Water: Hydrates the flour. Use lukewarm water (about 110°F/43°C) for best yeast activity.
- Yeast: Makes the dough rise. Instant yeast works best for bread makers. Active dry yeast is also fine; just dissolve it in water first.
- Salt: Adds flavor and controls yeast growth.
- Sugar: Feeds the yeast and helps dough brown in the oven. You can use honey or omit it for a less sweet crust.
- Olive oil: Makes the crust tender and adds flavor.
Optional Ingredients
- Herbs: Dried oregano or basil can be mixed into the dough for extra flavor.
- Garlic powder: Adds a savory note.
- Milk powder: Makes the dough softer.
Ingredient Quantities (for A Standard 1.5 Lb Bread Maker)
Here’s a classic pizza dough recipe:
- Bread flour: 3 cups (360g)
- Water: 1 cup (240ml), lukewarm
- Instant yeast: 2¼ teaspoons (7g)
- Salt: 1 teaspoon (6g)
- Sugar: 1 tablespoon (12g)
- Olive oil: 2 tablespoons (28g)
Credit: letthebakingbegin.com
Step-by-step Guide: Making Pizza Dough In A Bread Maker
Follow these steps for perfect dough every time.
1. Prepare Your Bread Maker
Check that your bread pan and kneading blade are clean and in place. Plug in the machine.
2. Add Ingredients In The Right Order
Most bread makers recommend this order:
- Water
- Olive oil
- Sugar
- Salt
- Flour
- Yeast
Pour liquids first, then dry ingredients. Place the yeast last, on top of the flour. This keeps yeast away from salt and liquids until mixing starts.
3. Select The Dough Cycle
Find the “Dough” setting on your bread maker. This cycle usually takes 1 to 1.5 hours. It mixes, kneads, and lets the dough rise.
4. Start The Machine
Press the start button. The bread maker will begin mixing and kneading.
5. Check The Dough During Kneading
After 5-10 minutes, open the lid and check the dough. It should form a soft, smooth ball. If it’s too dry, add 1 tablespoon of water. If it’s too sticky, add 1 tablespoon of flour. This step is important—many beginners skip it and end up with poor dough.
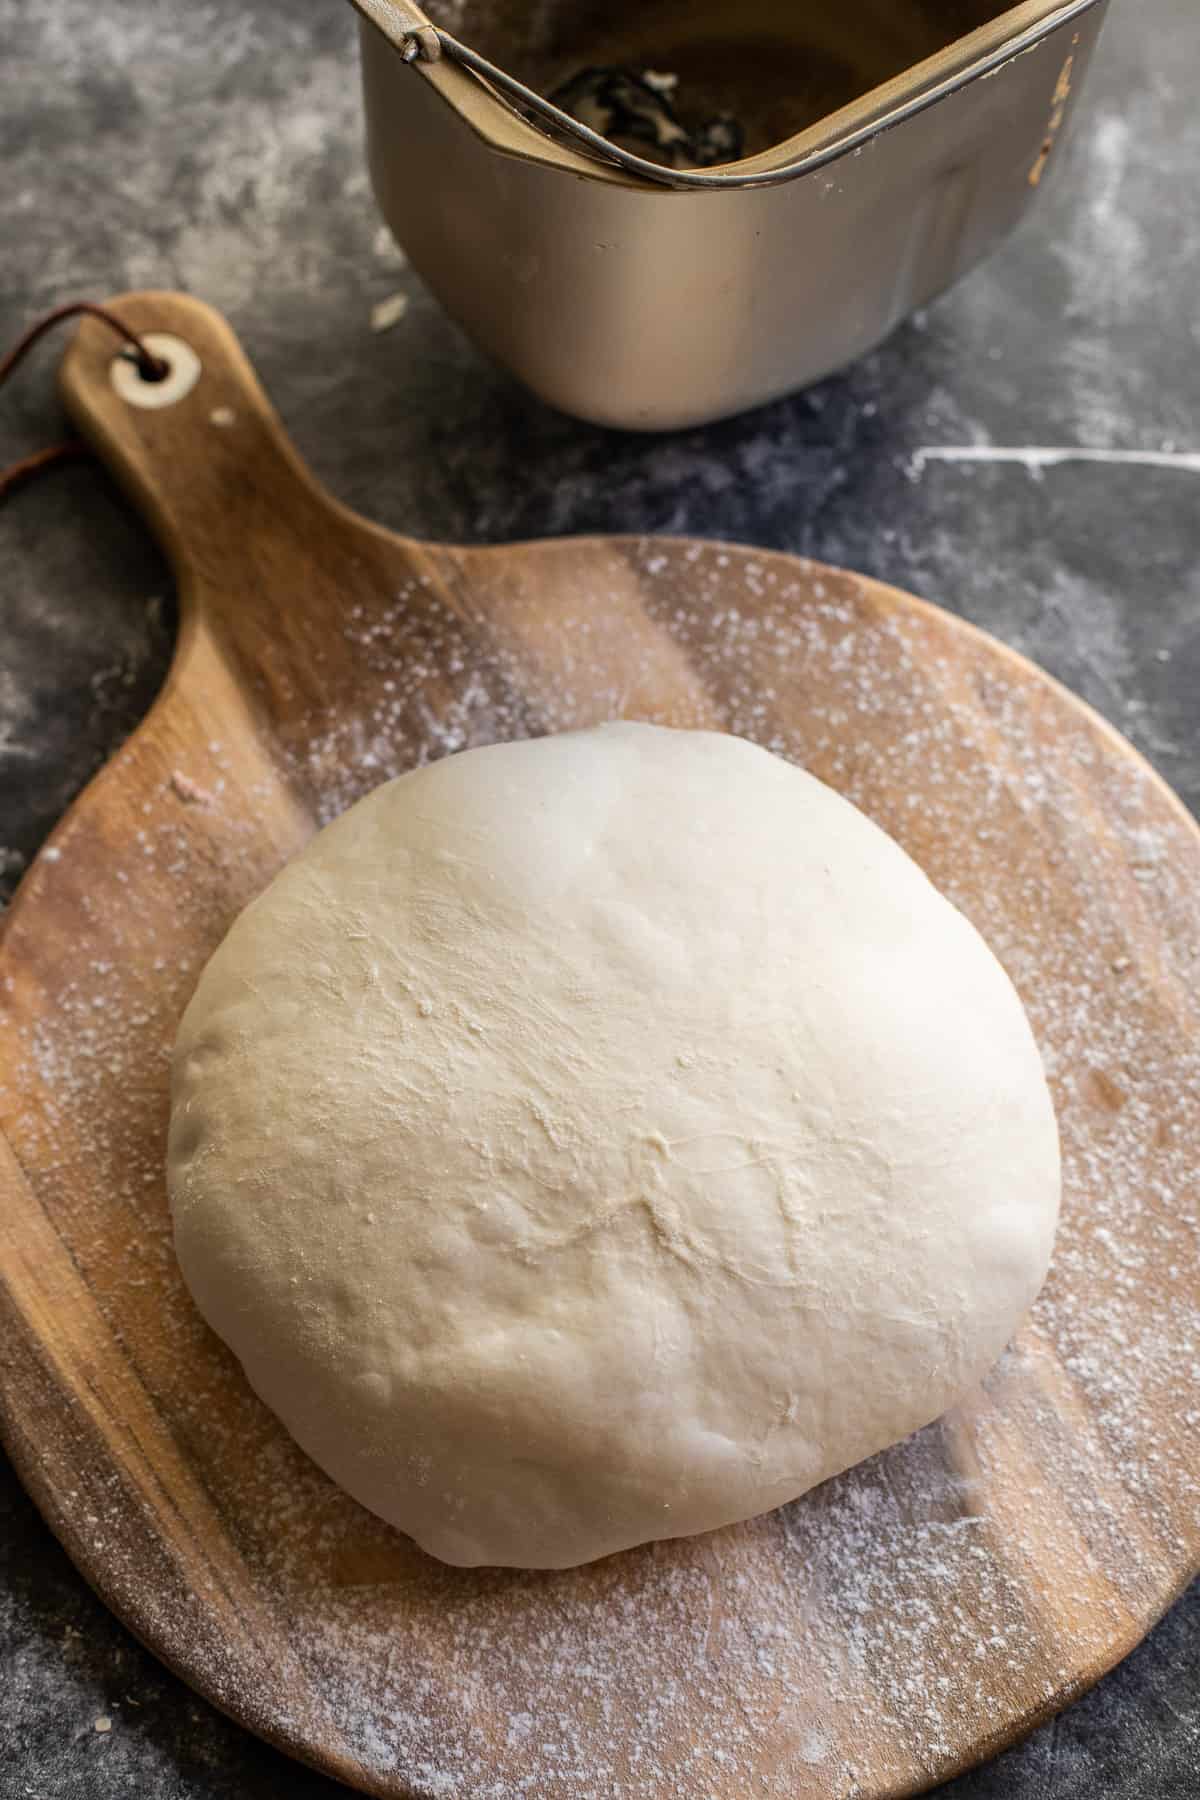
6. Let The Dough Rise
The bread maker will automatically let the dough rise after kneading. When the cycle ends, the dough should be doubled in size.
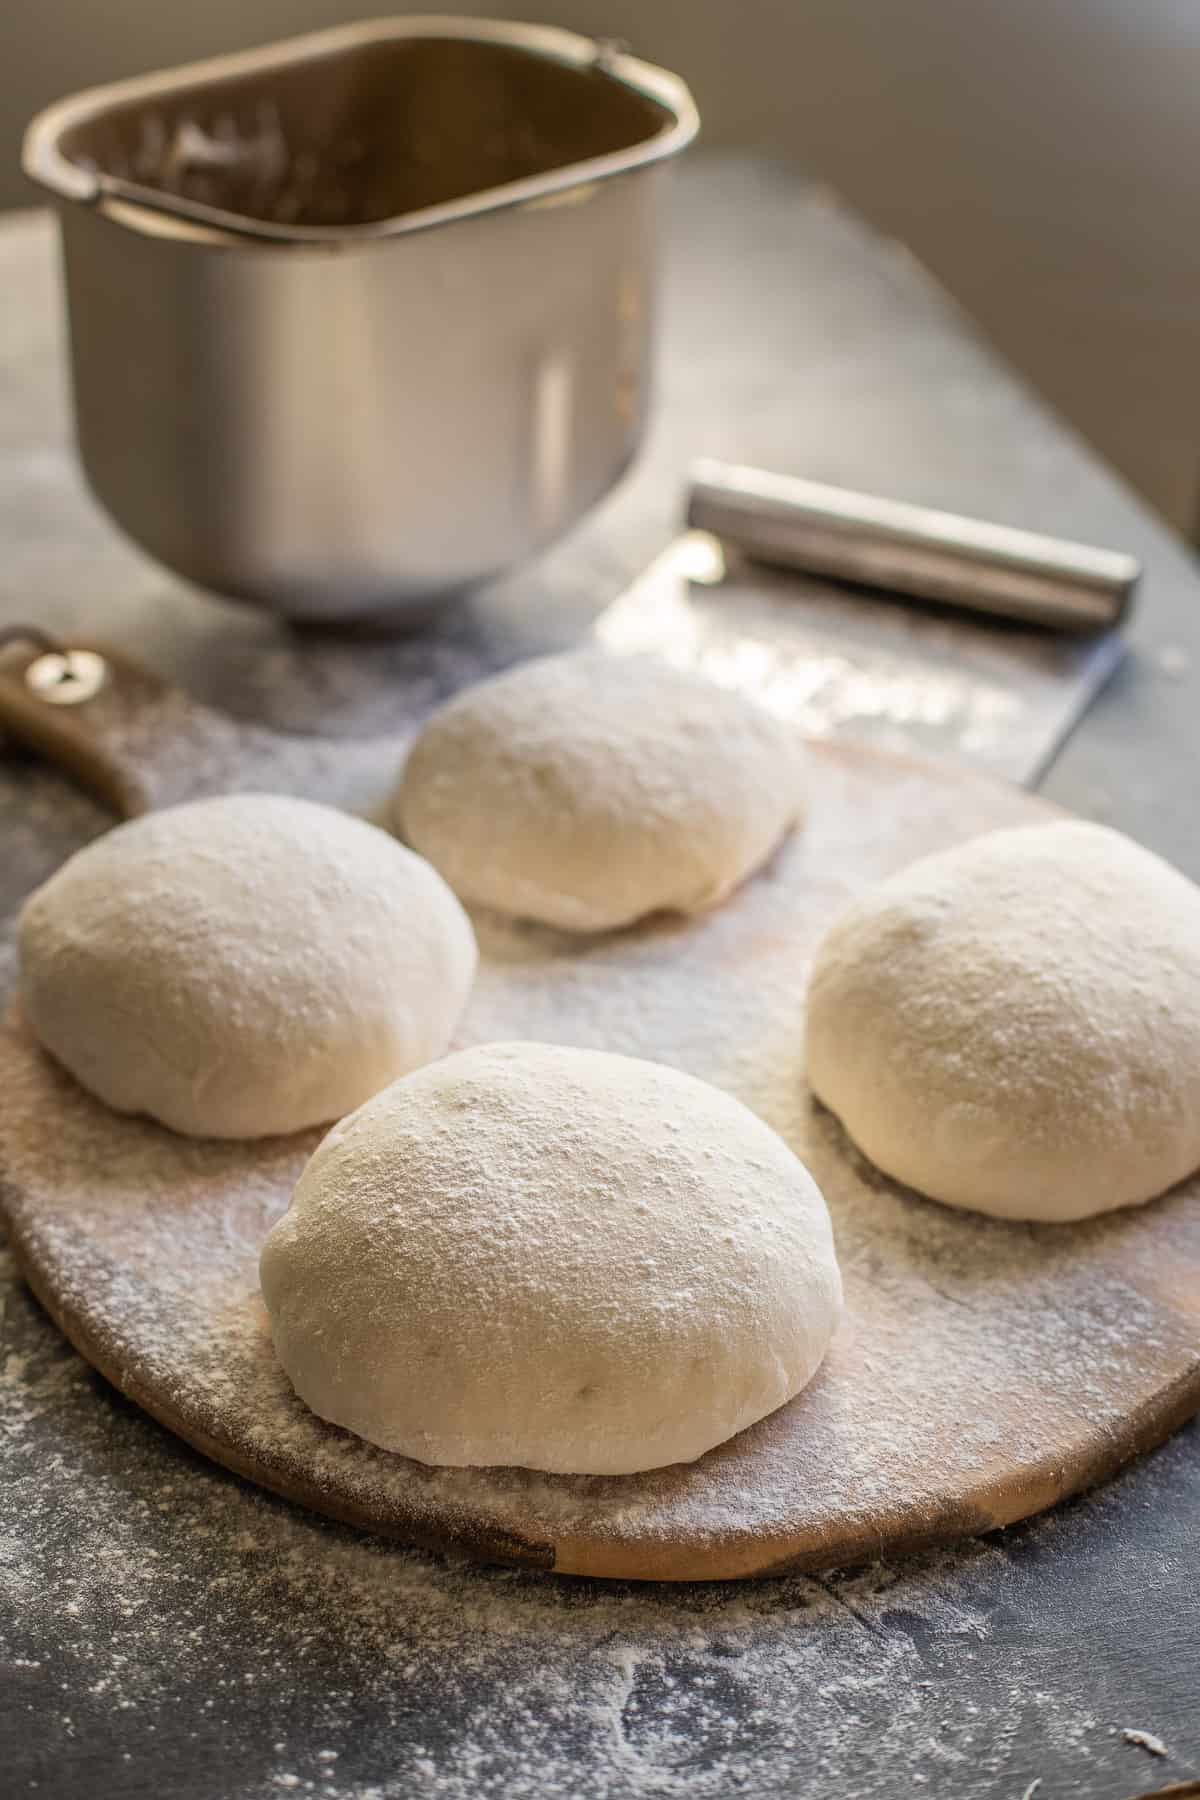
7. Remove And Shape The Dough
Take the dough out of the pan. Dust your hands and work surface with flour. Press the dough gently to remove air bubbles. Shape it into a ball or divide it for multiple pizzas.
8. Rest Before Using
Let the dough rest for 10-15 minutes before rolling. This relaxes the gluten and makes it easier to stretch.
Pizza Dough Bread Maker Vs. Traditional Hand-kneading
How does bread maker dough compare to hand-kneaded dough? Here’s a quick look:
| Method | Time | Consistency | Effort | Mess |
|---|---|---|---|---|
| Bread Maker | 90 min | Very consistent | Low | Minimal |
| Hand-Kneading | 120 min | Varies | High | High |
A bread maker gives you reliable dough with less work and mess. Hand-kneading offers more control and is good for bakers who want to adjust texture and flavor. Both methods can produce great pizza, but a bread maker is ideal for convenience and consistency.
Tips For Better Pizza Dough
Even with a bread maker, you can improve your dough with small adjustments.
Use Bread Flour
Bread flour has more protein, which creates strong gluten. Gluten makes pizza dough chewy and stretchy. If you use all-purpose flour, your crust will be softer and less elastic.
Measure Ingredients Carefully
Use a kitchen scale for flour and water. Small errors can change dough texture. If you don’t have a scale, level flour with a spoon and avoid packing it down.
Adjust Water For Humidity
On humid days, flour absorbs less water. If dough feels sticky, add extra flour 1 tablespoon at a time. In dry weather, dough may be stiff—add a bit more water.
Let Dough Rest
After removing dough from the bread maker, let it rest before rolling. This makes the dough easier to stretch and prevents shrinking.
Add Flavor
Mix in herbs, garlic powder, or cheese for unique dough. Try adding 1 teaspoon dried oregano or 2 tablespoons grated parmesan.
Cold Fermentation
For more flavor, refrigerate dough overnight after the bread maker cycle. Cold fermentation lets yeast create complex aromas.
Common Mistakes And How To Avoid Them
New bakers often make simple errors. Here are the most frequent mistakes and how to fix them:
- Wrong yeast type: Use instant yeast or bread machine yeast. Regular active dry yeast may need dissolving first.
- Incorrect ingredient order: Always add yeast last, away from salt and liquids.
- Too much flour or water: Adjust dough texture during kneading, not after rising.
- Skipping dough check: Always check after 5-10 minutes. Fix sticky or dry dough early.
- Overproofing: Don’t let dough sit too long after rising. It can collapse and lose structure.
- Using cold water: Cold water slows yeast. Use lukewarm water for best results.
- Not resting dough: Dough that’s not rested will resist stretching.
Credit: letthebakingbegin.com
Advanced Tricks For Perfect Pizza Dough
Once you master basic dough, you can try advanced methods to improve texture and flavor.
Poolish Starter
A poolish is a wet starter made from flour, water, and yeast. It adds flavor and helps dough rise. Mix equal parts flour and water with a pinch of yeast. Let it sit overnight, then add to your bread maker ingredients.
Double Hydration
For softer, airier crust, use more water (up to 65% of flour weight). This makes dough sticky, but bread makers handle it well.
Olive Oil Upgrade
Try using extra-virgin olive oil. It adds richer flavor and aroma.
Semolina Flour
Replace ¼ cup of bread flour with semolina flour. It makes the crust crispier and golden.
Whole Wheat Variation
For healthier dough, replace up to 1 cup of bread flour with whole wheat flour. The crust will be denser and more flavorful.
Shaping And Baking Your Pizza
After your bread maker finishes, shaping and baking are just as important.
Shaping Tips
- Divide dough: For thin crust, divide dough into two balls.
- Stretch by hand: Use your fingertips to gently stretch dough. Avoid rolling pins—they press out air bubbles.
- Form a rim: Pinch the edges to create a thicker crust.
Baking Tips
- Preheat oven: Heat to at least 475°F (245°C). A hot oven gives you crispy crust.
- Use a pizza stone or steel: These tools absorb heat and cook the crust evenly.
- Don’t overload toppings: Too many toppings make the crust soggy.
- Bake time: 10-14 minutes for thin crust, 15-18 minutes for thick.
Example: Classic Margherita Pizza
After shaping, top your dough with:
- Tomato sauce: ½ cup
- Mozzarella cheese: 1 cup, shredded
- Fresh basil leaves
- Olive oil: Drizzle
Bake at 475°F for 12 minutes. The crust should be golden and cheese melted.
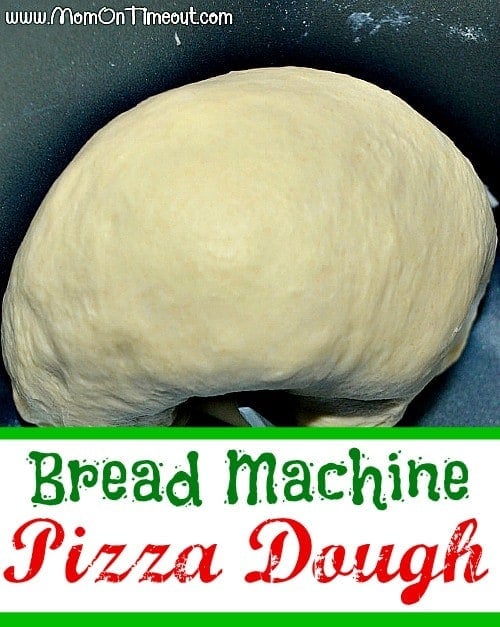
Credit: www.momontimeout.com
Gluten-free Pizza Dough In Bread Maker
If you need gluten-free dough, use special flour and adjust ingredients.
Gluten-free Ingredients
- Gluten-free bread flour: 3 cups (use brands with xanthan gum)
- Water: 1 cup
- Instant yeast: 2¼ teaspoons
- Salt: 1 teaspoon
- Sugar: 1 tablespoon
- Olive oil: 2 tablespoons
Gluten-free Tips
- Gluten-free dough is sticky and less elastic.
- Use parchment paper for shaping.
- Rest dough longer for better texture.
- Bake at 400°F (205°C) for 15-18 minutes.
Comparing Bread Maker Models For Pizza Dough
Not all bread makers are equal. Here’s a quick comparison of popular models:
| Model | Dough Capacity | Dough Cycle Time | Special Features |
|---|---|---|---|
| Panasonic SD-YD250 | 2 lbs | 90 min | Yeast dispenser, multiple cycles |
| Zojirushi BB-PDC20 | 2 lbs | 60 min | Double kneading blades, quick dough |
| Oster Expressbake | 1.5 lbs | 80 min | Fast cycle, easy cleanup |
If you bake often, choose a model with a quick dough cycle and easy-to-clean pan. For large families, buy a bread maker with higher capacity.
Storing And Freezing Pizza Dough
You may want to make extra dough for later. Here’s how to store and freeze it:
Refrigeration
Wrap dough in plastic wrap and refrigerate for up to 3 days. Let it sit at room temperature for 30 minutes before shaping.
Freezing
Divide dough into balls and wrap tightly. Place in freezer bags. Dough keeps for 3 months. Thaw overnight in the fridge, then let it warm up before baking.
Practical Insight
Frozen dough often tastes better because slow thawing improves flavor and texture. Many beginners miss this trick—always plan ahead if you want top-quality pizza.
Nutrition Facts For Homemade Pizza Dough
Homemade pizza dough is usually healthier than store-bought. Here are average nutrition values for one slice (⅛ of a 12-inch pizza):
| Nutrient | Amount |
|---|---|
| Calories | 120 |
| Protein | 3g |
| Carbs | 24g |
| Fat | 2g |
| Sodium | 220mg |
You can reduce calories by using less oil and sugar, or boost fiber with whole wheat flour.
How Pizza Dough Differs From Bread Dough
Many people think pizza and bread dough are the same. In reality, there are key differences:
- Oil: Pizza dough uses more olive oil for tenderness.
- Sugar: Pizza dough often uses less sugar.
- Kneading: Pizza dough is kneaded less for a chewier texture.
- Baking temperature: Pizza is baked hotter for crisp crust.
If you use bread dough for pizza, the crust will be softer and less chewy.
Troubleshooting Pizza Dough Problems
Here are solutions for common issues:
- Dough didn’t rise: Check yeast freshness and water temperature. Old yeast or cold water slows rise.
- Dough too sticky: Add flour 1 tablespoon at a time during kneading.
- Dough too dry: Add water slowly during kneading.
- Crust too thick: Roll dough thinner or divide into two balls.
- Crust not crisp: Bake at higher temperature and use a pizza stone.
Frequently Asked Questions
How Long Does Pizza Dough Take In A Bread Maker?
Most bread makers finish the dough cycle in 60–90 minutes. This includes mixing, kneading, and rising. Some models have a rapid cycle that takes 45 minutes.
Can I Freeze Bread Maker Pizza Dough?
Yes. Divide dough into balls, wrap in plastic, and freeze in bags. Dough keeps for up to 3 months. Thaw in the fridge and let warm up before shaping.
What’s The Best Flour For Pizza Dough?
Bread flour is best because it has high protein for strong gluten. All-purpose flour works but gives a softer crust. For chewy and crispy pizza, use bread flour.
Do I Need To Pre-bake The Crust?
Pre-baking isn’t required for thin crust. For thick or loaded pizzas, bake the crust for 5 minutes before adding toppings. This prevents soggy pizza.
How Do I Add Herbs Or Cheese To The Dough?
Mix dried herbs or grated cheese directly with the flour before starting the bread maker. For strong flavor, use 1-2 teaspoons herbs or 2 tablespoons cheese.
Making pizza dough in a bread maker is simple, reliable, and fun. You save time, control ingredients, and enjoy homemade pizza with family and friends. With practice, your dough will be as good—or better—than your favorite pizzeria. For more pizza baking tips, check out King Arthur Baking for expert advice and recipes.