Cooking meat can feel stressful. You want juicy, tender results, but ending up with dry or tough pieces is easy if you’re not careful. Using a meat thermometer is one of the best ways to stop overcooking. This simple tool helps you cook meat perfectly every time. But many people still struggle, even with a thermometer in hand.
Let’s explore how to use a meat thermometer to prevent overcooking, discover common mistakes, and learn some practical tips for every home cook.
Why Overcooking Happens
Overcooking meat is a common problem, especially for beginners. When meat cooks past its ideal temperature, it loses moisture. The result is dry, chewy, or flavorless meals. Here are a few reasons overcooking happens:
- Guessing the doneness: Many people rely on sight, touch, or cooking time.
- Lack of proper tools: Not using a thermometer leaves room for error.
- Wrong thermometer use: Even with a thermometer, mistakes can happen.
Knowing why overcooking happens is the first step to solving it.
How Meat Thermometers Work
A meat thermometer measures the internal temperature of meat. It gives you a quick, accurate reading so you know when to stop cooking. There are two main types:
- Instant-read thermometers: These show the temperature in a few seconds. You use them when the meat is nearly done.
- Leave-in thermometers: These stay in the meat during cooking. They let you monitor temperature as it rises.
Both types are useful, but instant-read models are more common for home kitchens.
Digital Vs. Analog Meat Thermometers
Let’s compare these two main types:
| Type | Speed | Accuracy | Ease of Use | Cost |
|---|---|---|---|---|
| Digital | Fast (2-5 seconds) | Very accurate | Simple display | Medium to High |
| Analog | Slower (20-30 seconds) | Good accuracy | Harder to read | Low |
Digital thermometers are best for most people because they’re faster and easier to use.
The Right Way To Use A Meat Thermometer
To prevent overcooking, you need more than just the thermometer. You need to use it correctly. Here’s how:
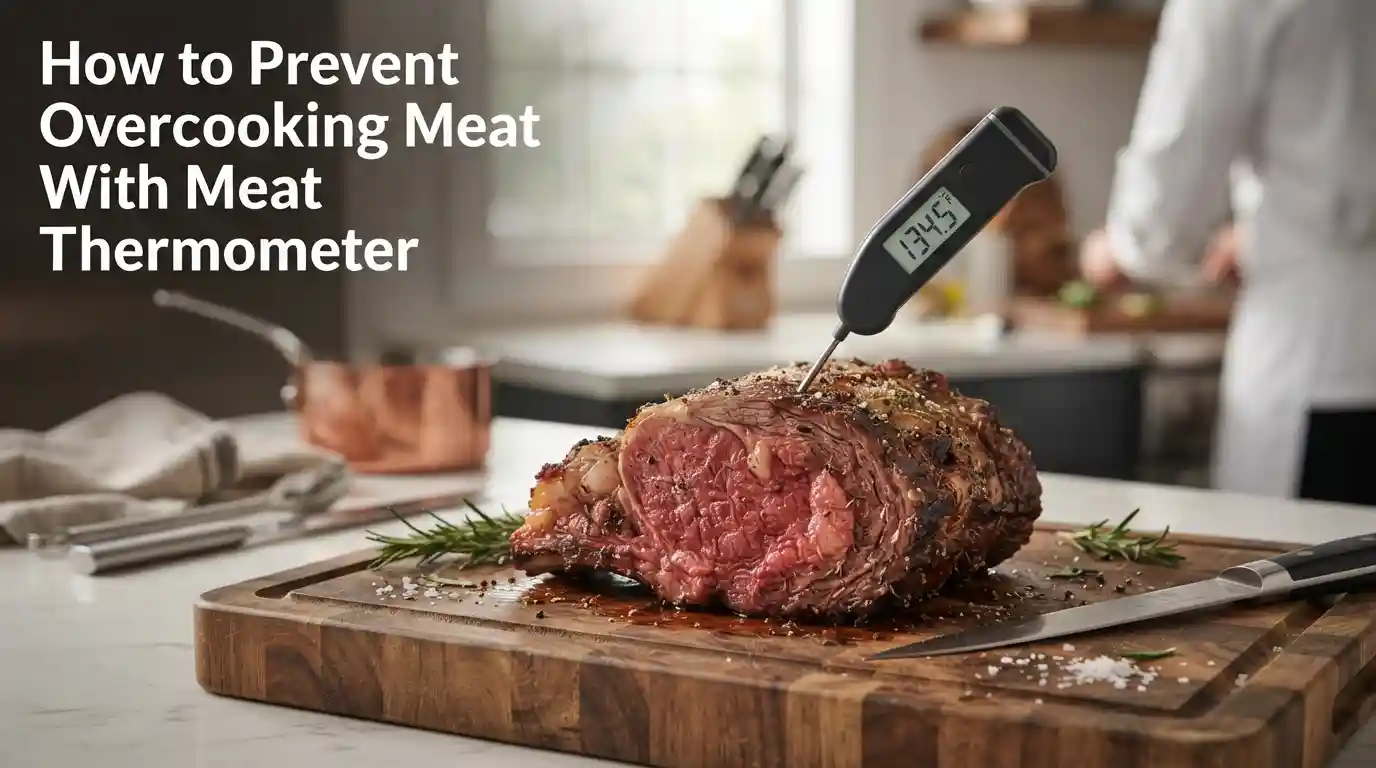
- Insert the thermometer into the thickest part of the meat, away from bone or fat. This gives the most accurate reading.
- Wait for the reading to stabilize. Don’t remove too soon.
- Check early and often. Start checking before the meat’s estimated finish time. Meat can cook faster than expected.
- Compare with recommended temperatures. Each meat has its ideal temperature for safety and taste.
Safe Internal Temperatures
Here are recommended temperatures for common meats:
| Meat | Minimum Internal Temperature (°F) | Result |
|---|---|---|
| Chicken (whole) | 165 | Juicy, safe |
| Beef (steak, medium rare) | 135 | Tender, pink center |
| Pork (chops) | 145 | Moist, slightly pink |
| Lamb (medium) | 145 | Juicy, pink |
| Ground beef | 160 | Fully cooked, no pink |
These numbers are from the USDA and help you cook safely while keeping meat juicy.
Resting Meat
A non-obvious tip is to let meat rest after cooking. When you pull meat from the heat, its temperature can rise by 5-10°F. This is called carryover cooking. If you remove meat at the exact target temperature, it may go higher and end up overcooked.
For best results:
- Take meat off the heat when it’s 5°F below the final temperature.
- Cover loosely with foil and let it rest for 5-15 minutes.
This ensures the meat finishes cooking gently and stays moist.
Common Mistakes When Using Meat Thermometers
Many people use thermometers incorrectly. Here are mistakes to avoid:
- Wrong placement: If you touch bone or fat, readings can be too high or low.
- Only checking once: Temperatures can change quickly, especially with thick cuts.
- Not calibrating: Some thermometers lose accuracy over time.
- Ignoring carryover cooking: Not accounting for rise in temperature after removing from heat.
Avoiding these mistakes makes your thermometer much more effective.
Practical Tips For Perfect Meat
Here’s how you can use a meat thermometer to prevent overcooking every time:
- Know your target temperature for each meat type before you start.
- Check at the right time. Begin checking a few minutes before the meat is supposed to be done.
- Use a timer to remind yourself when to check.
- Calibrate your thermometer once a month. Put it in ice water (should read 32°F) or boiling water (should read 212°F).
- Use a leave-in thermometer for large cuts like roasts. This lets you monitor without opening the oven too often.
- Practice with smaller cuts first. Get comfortable before trying expensive or large meats.
- Avoid piercing repeatedly. Each poke releases juices, so check only as much as needed.
- Record your results. Write down times and temperatures for future meals.
These tips help you build skill and confidence with your thermometer.
You might find this helpful: Best Meat Thermometers for Grilling
Special Considerations For Different Cooking Methods
How you cook affects how you use a thermometer. Here’s what to know for three common methods:
Oven Roasting
- Use a leave-in thermometer for roasts.
- Check temperature in the center, avoiding bones.
- Start checking when the roast is 10–15 minutes from expected finish.
Grilling
- Instant-read thermometers work best.
- Flip meat, then check temperature in the center.
- Be quick—grilled meats cook fast.
Pan Cooking
- Insert thermometer from the side for steaks.
- For thin cuts, check temperature in the middle.
- Timing is key—pan heat is direct and intense.
Credit: www.allenbrothers.com
Comparing Meat Thermometers
With many types on the market, choosing the right one can make a difference. Here’s a comparison of popular models:
| Brand/Model | Type | Accuracy | Features | Price Range |
|---|---|---|---|---|
| ThermoWorks Thermapen | Digital Instant-read | ±0.7°F | Fast, waterproof | $70–$100 |
| CDN ProAccurate | Analog Instant-read | ±2°F | Simple, durable | $15–$25 |
| Meater Plus | Wireless Leave-in | ±1°F | Bluetooth, app-connected | $90–$120 |
For most home cooks, a digital instant-read thermometer gives the best balance of speed, accuracy, and ease.
Non-obvious Insights: What Beginners Often Miss
Many new cooks overlook these details:
- Temperature isn’t uniform. Meat may be hotter near the surface. Always check the thickest part.
- Different meats need different thermometers. Thin steaks may need fast instant-read models, while big roasts work best with leave-in types.
- Thermometer batteries matter. Dead batteries or low charge can give false readings. Check before cooking.
These details can make the difference between a dry meal and a perfect one.
Benefits Of Using A Meat Thermometer
Using a thermometer brings several advantages:
- Consistent results. You get the same doneness every time.
- Safer cooking. You avoid undercooking, which can cause illness.
- Less guesswork. Cooking feels less stressful.
- Saves money. No more wasted meat due to overcooking.
In professional kitchens, thermometers are standard tools for these reasons.
When Not To Use A Meat Thermometer
Some situations don’t require a thermometer:
- Very thin cuts (like bacon or thin chicken cutlets) cook so fast, they’re hard to measure.
- Ground meat in sauces is usually cooked well through.
- Pre-cooked meats (like deli ham) only need reheating.
For most meats, though, a thermometer is your best friend.
Real-world Example
Imagine you’re cooking a beef roast. The recipe says 2 hours at 350°F. You insert a leave-in thermometer and watch the temperature. At 1 hour 45 minutes, it reads 135°F. You remove the roast, let it rest, and after 10 minutes, the temperature rises to 145°F. The result: juicy, tender beef—not overcooked.
This approach works for any meat if you follow the key steps.
Additional Resources
If you want to read more about safe cooking temperatures and best practices, visit the USDA’s official food safety guide: USDA Food Safety.
Frequently Asked Questions
What Is The Best Type Of Meat Thermometer?
For most home cooks, a digital instant-read thermometer is best. It’s fast, accurate, and easy to use.
How Often Should I Check The Meat Temperature?
Start checking when the meat is almost done. For thick cuts, check every 5–10 minutes near the end. For thin pieces, check once or twice.
How Do I Calibrate My Meat Thermometer?
To calibrate, place the thermometer in ice water (should read 32°F) or boiling water (should read 212°F). Adjust if needed, using the manufacturer’s instructions.
Should I Leave The Thermometer In While Cooking?
Use a leave-in thermometer for large cuts like roasts or whole poultry. For steaks or small pieces, use an instant-read thermometer and remove after each check.
Can I Use A Meat Thermometer For Other Foods?
Yes, you can use it for fish, egg dishes, and even baked goods like bread, to check internal temperature.
Cooking meat perfectly can seem difficult. But with a meat thermometer and the right habits, you can stop overcooking for good. Practice these steps, avoid common mistakes, and soon you’ll serve juicy, flavorful meat every time.