Skip to content
Cooking meat perfectly isn’t just about great flavor—it’s also about keeping your food safe to eat. Undercooked meat can carry harmful bacteria, while overcooked meat often turns dry and tough. That’s why using a meat thermometer is one of the easiest ways to cook meat with confidence and get consistent results every time.
If you’ve ever wondered how to properly use a meat thermometer, you’re in the right place. In this guide, you’ll learn how to use a meat thermometer correctly, avoid common mistakes, and discover simple tips for juicy, flavorful meals. Whether you’re grilling, roasting, smoking, or pan-frying, these practical techniques will help you cook meat safely and achieve superbly tender results.
Why Use A Meat Thermometer?
A meat thermometer is a simple tool, but its impact is huge. It ensures your food reaches the right internal temperature for safety and quality. According to the Centers for Disease Control and Prevention (CDC), foodborne illnesses affect 48 million people in the US every year. Most cases happen because of undercooked meat, especially poultry and ground beef. The thermometer helps you avoid these risks.
Besides safety, a thermometer helps you achieve the perfect doneness. Guessing by color or touch often fails, especially with thick cuts or when grilling. A thermometer takes out the guesswork, so you can serve juicy steak, tender chicken, and flavorful pork every time.
Types Of Meat Thermometers
Choosing the right thermometer is the first step. There are several types, each with unique strengths:
| Type | Best For | Speed | Accuracy |
|---|---|---|---|
| Digital Instant-Read | Steaks, chicken, fish | 5-10 seconds | High |
| Dial (Analog) Thermometer | Roasts, larger cuts | 30-60 seconds | Medium |
| Probe (Leave-in) Thermometer | Oven-roasted meats | Real-time | High |
| Infrared Thermometer | Surface temperature | Instant | Low (not for internal temp) |
- Digital instant-read thermometers are the most popular for home cooks. They provide fast, accurate readings and are easy to use.
- Dial thermometers are slower and less precise but can be left in thick meats while cooking.
- Probe thermometers are great for monitoring temperature during roasting or smoking, with a cable connecting to an outside display.
- Infrared thermometers measure surface heat only—not suitable for checking internal meat temperature.
How To Properly Use A Meat Thermometer
Learning how to use a meat thermometer isn’t difficult, but correct probe placement makes all the difference. Whether you’re grilling steaks, roasting chicken, or smoking brisket, using a meat thermometer correctly ensures accurate readings every time.
1. Insert The Thermometer Properly
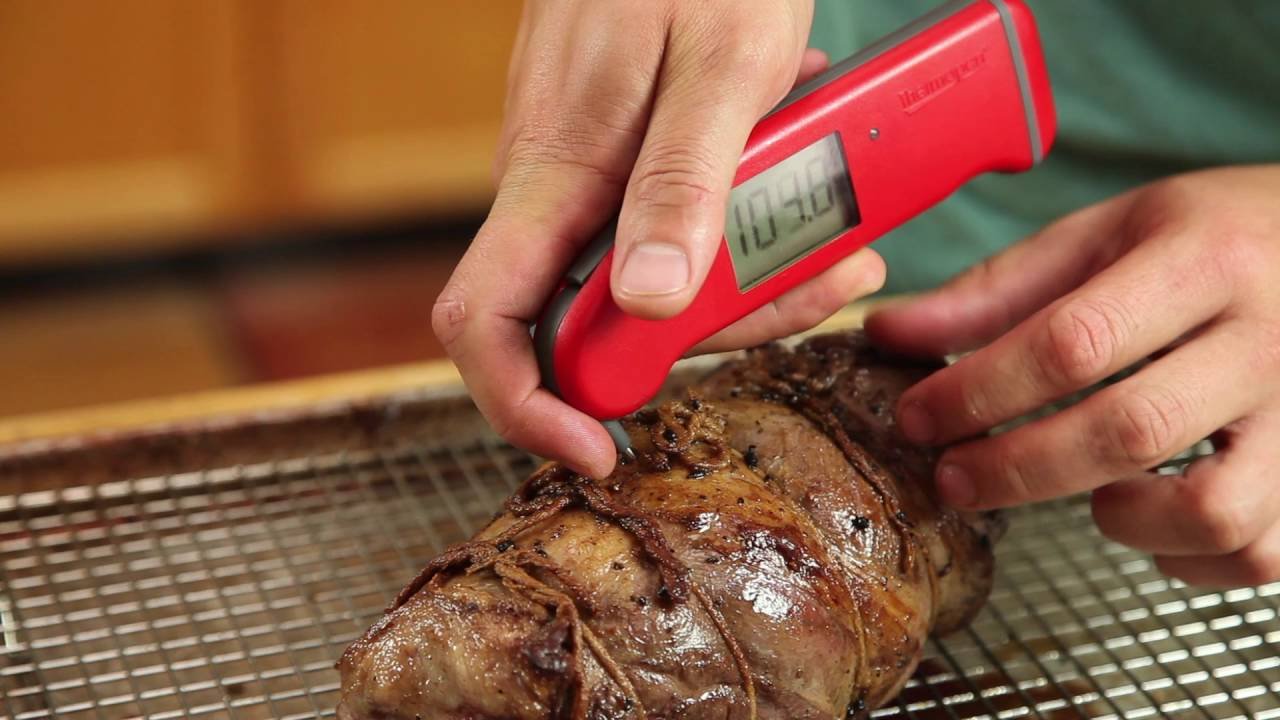
- Push the probe into the thickest part of the meat, avoiding bone, fat, or gristle. These can give false readings.
- For poultry, aim for the inner thigh, close to the breast but not touching bone.
- For steaks or chops, insert from the side to reach the center.
2. Wait For The Reading
- With digital instant-read thermometers, wait 5–10 seconds until the display stabilizes.
- Dial thermometers may take up to 60 seconds.
- For probe thermometers, check the display while cooking.
3. Check Multiple Spots
Sometimes, heat isn’t distributed evenly. For larger roasts or turkey, check 2–3 areas to confirm uniform doneness.
4. Know The Right Temperatures
Use official guidelines for safe cooking temperatures:
| Meat | Minimum Safe Temp (°F) | Notes |
|---|---|---|
| Poultry (chicken, turkey) | 165 | Check inner thigh and breast |
| Ground Beef | 160 | Check center of patty or loaf |
| Beef, Pork, Lamb (steaks, chops) | 145 | Rest for 3 minutes |
| Fish | 145 | Check thickest part |
| Ham (precooked) | 140 | Reheat thoroughly |
These numbers come from USDA guidelines. For more details, see the official food safety chart.
5. Rest The Meat
After reaching the desired temperature, let the meat rest for a few minutes. This allows juices to redistribute and the temperature to rise slightly (carryover cooking). For example, a roast may rise 5–10°F during resting.
6. Clean After Each Use
Always wash the probe with hot, soapy water after every use. This prevents cross-contamination and keeps your kitchen safe.
If you’re still choosing a thermometer, check out our guide to the Best Meat Thermometers for Oven to find a model that’s accurate, fast, and easy to use.
Common Mistakes And How To Avoid Them
Many cooks make simple errors with their meat thermometers. Avoid these for best results:
- Not calibrating the thermometer: Even digital models need calibration. To check, insert the probe in ice water (should read 32°F) or boiling water (should read 212°F at sea level).
- Touching bone or fat: Always aim for the center of the meat, avoiding bone or fat which heat faster.
- Forgetting to clean the probe: Germs can transfer from one food to another.
- Removing meat too early: Some meats need to reach a safe minimum temperature for a few minutes—especially poultry and ground meat.
- Only checking the outer layer: Always check the thickest part; the surface cooks faster than the inside.
Advanced Tips For Perfect Results
Even experienced cooks can improve their thermometer skills. Here are a few non-obvious insights:
- Don’t rely on color: The color of meat is not a reliable sign of doneness. For example, chicken can look pink even when fully cooked, and beef can be brown before reaching safe temperatures.
- Use the thermometer for leftovers: Reheating leftovers to 165°F ensures safety, especially for foods like casseroles or stews.
- Preheat the probe for thick cuts: For large roasts, warm the probe in hot water first. This prevents chilling the meat and gives faster readings.
- Track carryover cooking: Some cuts, especially thick steaks and roasts, continue to cook after removing from heat. Subtract 5°F from target temperature if you plan to rest the meat.
- Record your results: Keep a cooking log. Write down temperatures, times, and outcomes. Over time, you’ll learn how your oven, grill, or stove performs.
Meat Thermometer Vs. Other Cooking Methods
Many people still use traditional methods—color, texture, or timing—to judge doneness. But these can fail, especially with unpredictable ovens or grills. Let’s compare:
| Method | Accuracy | Consistency | Safety |
|---|---|---|---|
| Meat Thermometer | High | High | High |
| Color Judging | Low | Low | Medium |
| Touch/Feel | Medium | Low | Medium |
| Cooking Time | Low | Medium | Low |
Using a thermometer is the most reliable way to ensure both safety and quality.
Credit: www.youtube.com
Buying The Right Meat Thermometer
When choosing a meat thermometer, consider these factors:
- Speed: Digital instant-read models are fastest.
- Accuracy: Look for thermometers with a margin of error less than ±2°F.
- Ease of use: Clear displays, comfortable grips, and easy-to-clean probes matter.
- Price: Good digital models range from $15–$40. Avoid very cheap ones; they may be unreliable.
- Extra features: Some thermometers offer alarms, timers, or wireless monitoring.
Common buyer mistakes include:
- Buying a thermometer with slow response time (frustrating and less useful)
- Choosing a model without a waterproof probe (harder to clean)
- Ignoring calibration ability (can’t check accuracy)
A good thermometer lasts years and improves every meal.
Using A Meat Thermometer For Different Cooking Methods
Each cooking style has its own challenges. Here’s how to use your thermometer in various situations:
Grilling
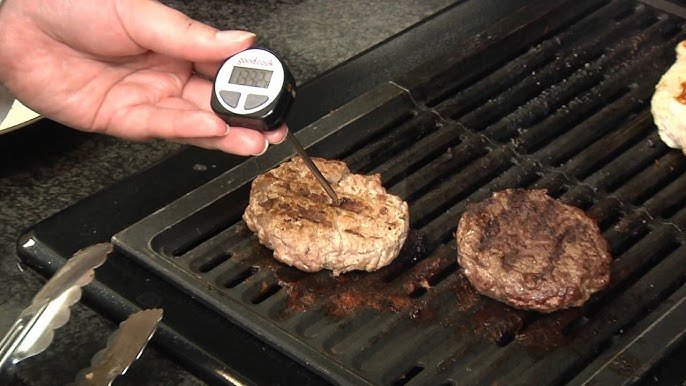
Insert the thermometer from the side of the steak or burger to reach the center. For thin cuts, take care not to poke all the way through.
Roasting
Use a probe thermometer for large cuts like turkey or beef roast. Check several points, especially the deepest parts.
Pan Frying
Quickly test the center of the meat after removing from heat. Be careful—hot oil can cause burns.
Sous Vide
Insert the thermometer after cooking, before searing. This ensures the internal temperature matches your target.
Smoking
Leave the probe in throughout the smoking process. Track rising temperatures slowly and adjust smoke levels as needed.
:max_bytes(150000):strip_icc()/how-to-use-meat-thermometer-GettyImages-1330139635-91da8d92d7ab4711aa195e6f674ed7ac.jpg)
Credit: www.realsimple.com
Troubleshooting: What If Your Thermometer Gives Odd Readings?
Sometimes, you get a number that doesn’t seem right. Here are solutions:
- Thermometer reads too low: Check calibration, battery, and probe placement.
- Reading jumps around: This can mean you’re near bone or fat, or the probe is damaged.
- Reads high but meat is undercooked: Double-check placement and try a different spot.
Always keep a backup thermometer if possible. Digital models can fail unexpectedly.
Frequently Asked Questions
How Do I Calibrate A Meat Thermometer?
Fill a glass with ice and water. Insert the thermometer and wait until the reading stabilizes. It should show 32°F (0°C). For boiling water, the reading should be 212°F (100°C) at sea level. If not, adjust the thermometer according to the manufacturer’s instructions.
Can I Use A Meat Thermometer For Baked Goods?
Yes, you can. Many bakers use instant-read thermometers to check the internal temperature of bread and cakes. For example, bread is done at 190–210°F. Always clean the probe before switching between foods.
What’s The Difference Between A Meat Thermometer And A Candy Thermometer?
A meat thermometer measures temperatures up to 220°F and is designed for thick foods. A candy thermometer often goes up to 400°F and is made for liquids and sugar syrups. Using the wrong type can give inaccurate results.
Do You Use A Meat Thermometer After Cooking?
Yes, you can use a meat thermometer after cooking to confirm that the thickest part of the meat has reached a safe internal temperature. This is especially helpful for grilled meats, roasted chicken, and large cuts of beef or pork. However, checking the temperature shortly before removing the meat from the heat gives you the best control over doneness.
How Often Should I Replace My Meat Thermometer?
Replace your thermometer if it’s inaccurate, difficult to clean, or has a damaged probe. Digital models usually last 2–5 years. Dial thermometers last longer but need regular calibration.
Is It Safe To Leave The Thermometer In The Oven?
Only leave-in probe thermometers are designed to stay in the oven during cooking. Instant-read and dial thermometers are not heat-safe and may melt or break. Always check the manufacturer’s instructions.
Now that you know how to use a meat thermometer correctly, you’ll be able to cook safer, juicier, and more flavorful meals every time. With a little practice, using a meat thermometer will become one of the easiest habits in your kitchen.
Over time, you’ll see how this simple tool makes a big difference in your kitchen.
Credit: www.youtube.com