Canning food at home is a skill that can bring both convenience and safety to your kitchen. Using a pressure cooker for canning is one of the best ways to preserve low-acid foods like vegetables, meats, and soups. Many people worry about safety, but with the right steps and knowledge, pressure canning can be straightforward. If you’re new to canning, learning the basics will help you store food that lasts for months or even years without losing flavor or nutrition.
This guide will walk you through every step, highlight common mistakes, and help you get started with confidence.
Why Use A Pressure Cooker For Canning?
Home canning has become more popular as people want to eat healthier and reduce food waste. Pressure canning is the safest method for foods with low acid, such as beans, corn, and meat. The reason is simple: botulism bacteria can survive in low-acid environments, and only the high heat of a pressure canner can kill these bacteria.
A pressure cooker creates temperatures above boiling (usually 240–250°F/116–121°C). Water bath canning, by comparison, only reaches 212°F (100°C), which is not hot enough for low-acid foods. So, if you plan to can green beans, chicken, or soups, using a pressure cooker is not just better—it’s required for safety.
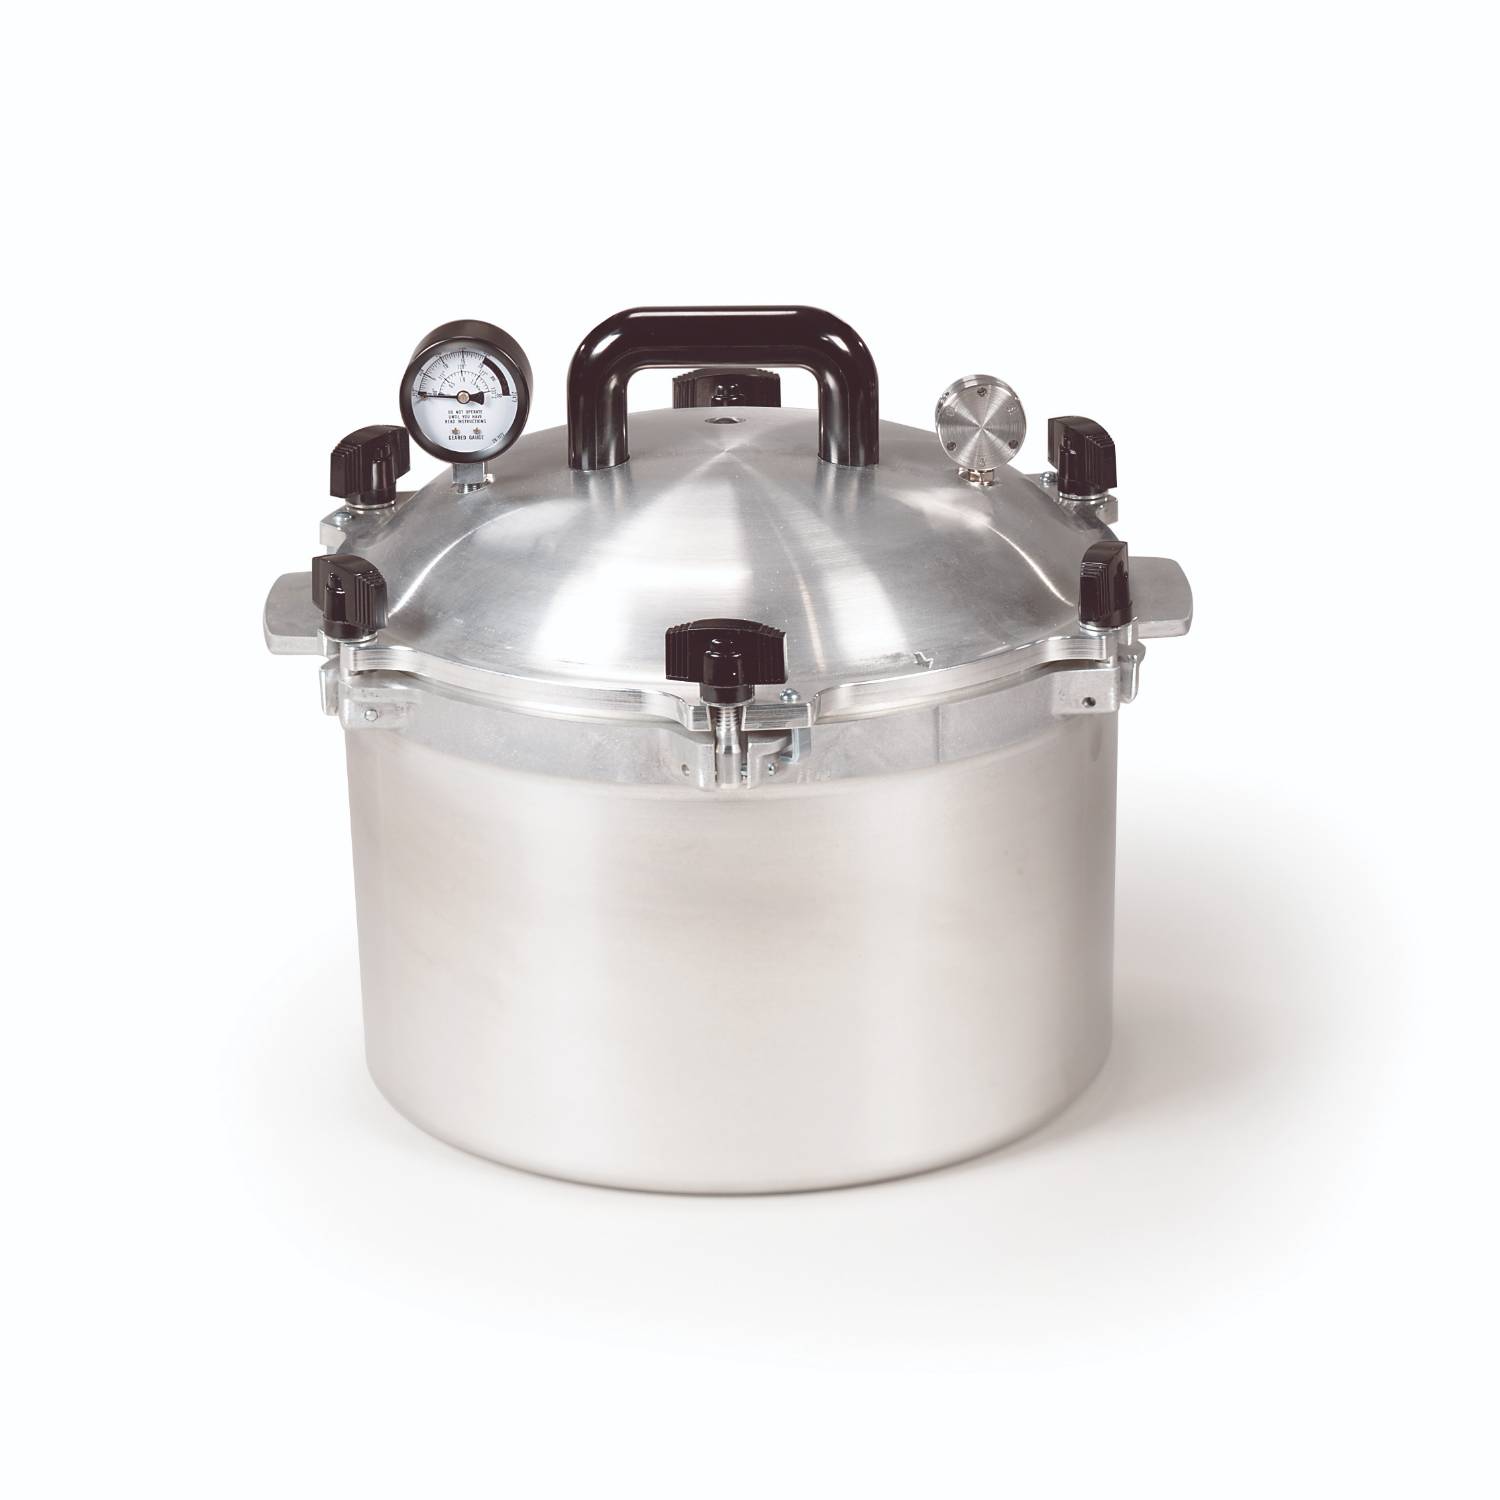
Pressure Cooker Vs. Pressure Canner: Know The Difference
Many beginners confuse a pressure cooker with a pressure canner. While both look similar and use steam under pressure, they have key differences.
| Feature | Pressure Cooker | Pressure Canner |
|---|---|---|
| Main Use | Cooking meals quickly | Preserving food (canning) |
| Size | Usually 4–10 quarts | Typically 16 quarts or larger |
| Pressure Gauge | Often absent | Always present (dial or weighted) |
| USDA Approved for Canning | No | Yes |
Many modern pressure cookers (like instant pots) are not approved for canning. They may not hold enough jars or reach and maintain the correct pressure. Always check your equipment. A true pressure canner is best for safe, reliable results.
Essential Equipment For Pressure Canning
Before you start, gather the right tools. Using the wrong equipment can lead to spoiled food or unsafe results.
- Pressure canner: Preferably with a dial or weighted gauge.
- Glass canning jars: Mason jars, free from cracks or chips.
- New lids and bands: Reuse bands, but always use new lids for a proper seal.
- Jar lifter: For safe handling of hot jars.
- Canning funnel: To fill jars neatly.
- Bubble remover/headspace tool: Ensures the right space and removes trapped air.
- Towels and labels: For drying and dating your jars.
Some people skip the bubble remover or funnel, but these small tools can prevent spills and sealing issues. Investing in a complete canning kit can save time and trouble.
Preparing Food And Jars
Success in canning starts with clean jars and high-quality food. Wash jars, lids, and bands in hot soapy water. Rinse well. Keep jars hot until you fill them—either by placing them in simmering water or a warm oven. This helps prevent cracking when hot food is added.
Choose fresh, ripe produce. Remove damaged spots or bruises. For meats, trim off excess fat and cut to size. Most vegetables need peeling and cutting before canning. Always follow a trusted recipe for the type of food you want to can.
Step-by-step: How To Use A Pressure Cooker For Canning
Following these steps will help you get safe, shelf-stable food.
1. Add Water To The Canner
Pour 2–3 inches of hot water into the bottom of the canner. Too much water can boil over; too little may cause burning. Check your canner’s manual for the exact amount.
2. Fill The Jars
Pack the prepared food into jars. Use the canning funnel to avoid spills. Leave the right headspace—usually 1 inch for meats, ½ inch for vegetables. This gap allows food to expand and ensures a vacuum seal.
3. Remove Air Bubbles
Slide a bubble remover or a plastic spatula along the inside of the jar to release trapped air. This step is easy to skip, but air bubbles can cause jars not to seal or food to spoil.
4. Wipe Rims And Apply Lids
Wipe the jar rims with a clean, damp cloth to remove any food or liquid. Place a new lid on each jar and screw the band on finger-tight. Over-tightening can prevent air from escaping, causing seal failure.
5. Load The Canner
Set jars on the rack inside the canner. Jars should not touch each other or the sides of the canner. Arrange them so steam can circulate.
6. Lock The Lid And Vent Steam
Close the lid securely. Heat the canner on high until steam flows steadily from the vent. Let it vent for 10 minutes—this pushes air out and helps reach the right temperature.
7. Bring To Pressure
Place the weight or close the vent as directed. Watch the gauge and adjust the stove to reach the recommended pressure (usually 10–15 psi). Start timing only when the target pressure is reached.
8. Process For The Correct Time
Each food needs a specific time and pressure. This depends on your recipe, jar size, and altitude. For example, quart jars of green beans need 25 minutes at 10 psi (at sea level). Processing too short or at the wrong pressure is unsafe.
9. Cool Down And Remove Jars
Turn off the heat and let the canner cool naturally. Do not force the lid open or cool the canner under water. Once pressure drops to zero, open the lid away from your face to avoid steam burns.
Lift jars out with the jar lifter and place them on a towel. Let them cool for 12–24 hours.
10. Check Seals And Store
After jars are cool, check seals by pressing the center of each lid. It should not pop up and down. Remove the bands, wipe jars, and label them with the date. Store in a cool, dark place.
Adjusting For Altitude
Pressure canning times and pressures are based on sea level. If you live above 1,000 feet, you must increase pressure to ensure safety.
Here’s a quick reference for altitude adjustments:
| Altitude | Recommended Pressure (Dial Gauge) | Recommended Pressure (Weighted Gauge) |
|---|---|---|
| 0–1,000 ft | 11 psi | 10 psi |
| 1,001–2,000 ft | 12 psi | 15 psi |
| 2,001–4,000 ft | 13 psi | 15 psi |
| 4,001–6,000 ft | 14 psi | 15 psi |
| 6,001–8,000 ft | 15 psi | 15 psi |
Using the wrong pressure is a common mistake that can lead to unsafe results. Always check your local altitude and adjust as needed.
Credit: www.lehmans.com
What Foods Should You Pressure Can?
Only low-acid foods require pressure canning. These include:
- Vegetables: Green beans, carrots, corn, peas
- Meats: Beef, chicken, pork, fish
- Mixed foods: Soups, stews, chili (without thickeners)
- Beans and legumes
High-acid foods (tomatoes, fruits, pickles, jams) can be canned with a water bath. But if you add low-acid ingredients to a tomato sauce, always use a pressure canner.
You might find this helpful: Best Pressure Cookers for Canning
Two Non-obvious Tips Most Beginners Miss
- Altitude can change over short distances. Even a small difference can impact your results. Use a GPS or local map to check your exact elevation.
- Don’t reuse old lids. Many people try to save money by reusing lids, but this greatly increases the risk of seal failure. Always use new lids, even if the old ones look fine.

Credit: www.amazon.com
Common Pressure Canning Mistakes And How To Avoid Them
Even careful canners sometimes make errors. Here are some of the most frequent and how to avoid them:
- Not venting the canner: Skipping the 10-minute venting step can trap air, causing lower temperature and unsafe food.
- Under-processing: Cutting processing time to save energy leads to bacteria surviving inside jars.
- Incorrect headspace: Too much or too little space can cause jars to leak or fail to seal.
- Forcing the canner to cool: Running cold water over a hot canner or opening the lid too soon can crack jars and prevent a proper seal.
- Skipping recipe guidelines: Not all foods can be safely canned at home (for example, thickened soups, dairy, or pureed pumpkin). Follow tested recipes from trusted sources.
Storing And Using Your Canned Food
After checking seals and labeling, store jars in a cool, dark place. Avoid direct sunlight, damp areas, or garages with extreme temperatures. A pantry or basement shelf works best. For best quality, use canned food within one year, although most remain safe for much longer if sealed.
When opening a jar, check for signs of spoilage: odd smells, cloudy liquid, or bulging lids. If in doubt, throw it out—safety comes first.
Table: Quick Comparison Of Water Bath Vs. Pressure Canning
Here’s a side-by-side look at when to use each method:
| Feature | Water Bath Canning | Pressure Canning |
|---|---|---|
| Food Type | High-acid foods | Low-acid foods |
| Temperature | 212°F (100°C) | 240–250°F (116–121°C) |
| Typical Use | Jams, fruits, pickles | Vegetables, meats, beans |
| Equipment Needed | Large pot with rack | Pressure canner |
Resources For Pressure Canning
If you want to explore further, the USDA’s Complete Guide to Home Canning is considered the gold standard. You can find more information and safe recipes from the National Center for Home Food Preservation.

Credit: creativecanning.com
Frequently Asked Questions
How Do I Know If My Pressure Canner Is Working Correctly?
Check the pressure gauge or weight regularly. If using a dial gauge, have it tested yearly by your local extension office. Make sure the lid seals well and steam escapes only from the vent.
Can I Use An Electric Pressure Cooker For Canning?
Most electric pressure cookers are not approved for canning. They may not reach or maintain the correct pressure for safe canning. Always use a stovetop pressure canner for low-acid foods.
How Long Do Home-canned Foods Last?
Properly canned foods can last for years. For best flavor and nutrition, use them within one year. Always check for spoilage before eating.
What Do I Do If A Jar Doesn’t Seal?
If a jar doesn’t seal within 24 hours, refrigerate it and use soon. Do not try to reprocess jars with certain foods, as quality may suffer.
Is It Safe To Can Dairy, Eggs, Or Thickened Soups?
No, these foods cannot be safely canned at home. They can support bacteria growth or prevent heat from reaching the center of the jar.
Pressure canning may seem complex at first, but with the right tools and knowledge, it becomes a reliable way to preserve your favorite foods. Always follow tested recipes, adjust for altitude, and never skip safety steps. With care and practice, you’ll enjoy safe, delicious home-canned food all year round.