Skip to content
Vacuum sealers have become an essential tool in many kitchens and homes. Whether you want to keep food fresh longer, store leftovers, or prepare meals in advance, a vacuum sealer can make life easier and save money. But using a vacuum sealer properly is more than just pressing a button.
There are key steps, tips, and mistakes to avoid for the best results. In this guide, you’ll learn how to use a vacuum sealer effectively, understand the main types, and discover practical uses beyond food. Let’s explore everything you need to know, step by step.
Understanding Vacuum Sealers
Vacuum sealers remove air from bags or containers and then seal them tightly. This process slows down spoilage, prevents freezer burn, and keeps contents fresh.
There are two main types of vacuum sealers:
| Type | Main Use | Typical Price | Best For |
|---|---|---|---|
| External (Edge) Sealer | Home kitchens | $50–$200 | Everyday food storage |
| Chamber Sealer | Restaurants, bulk storage | $300–$2000 | Liquids, high volume |
External sealers are most common for home use. They work by placing the open end of a special bag into the machine, which then removes the air and seals the bag. Chamber sealers can handle liquids and bigger batches but are more expensive and used mainly in professional settings.
Choosing The Right Vacuum Sealer
Before you buy, consider how you’ll use your vacuum sealer. Here’s what matters most:
- Type of food: If you often seal liquids (like soups or stews), a chamber sealer works better. For dry foods and leftovers, an external sealer is enough.
- Frequency of use: If you plan to use it daily, look for models with sturdy motors and easy controls.
- Bag compatibility: Some machines require special bags. Check if generic bags work or if you must buy brand-specific ones.
- Size and storage: Vacuum sealers can be bulky. Measure your counter space and storage area before buying.
| Feature | External Sealer | Chamber Sealer |
|---|---|---|
| Handles liquids | No | Yes |
| Price range | Low–Medium | High |
| Bag cost | Lower | Higher |
| Bulk sealing | Limited | Excellent |
Many beginners miss the importance of bag compatibility. Some sealers only work with their own branded bags, which can be expensive. Also, chamber sealers are ideal for liquids—if you try to seal soup with an external model, the liquid may get sucked into the machine and cause damage.
Preparing Food For Vacuum Sealing
Proper preparation is key for safe and effective vacuum sealing. Here are steps to follow:
- Clean and dry food: Remove dirt, moisture, and excess oil from food. Wet surfaces can make sealing difficult and lead to spoilage.
- Divide portions: Cut food into meal-sized pieces. This saves time later and keeps food fresher.
- Pre-freeze liquids: If using an external sealer, freeze liquids like soup or sauces before sealing. This prevents spills.
- Label bags: Write the date and contents on the bag before sealing. This helps avoid confusion in the freezer.
Some users forget to pre-freeze liquids, which can ruin the machine. Also, labeling is often skipped, but it makes organizing much easier.
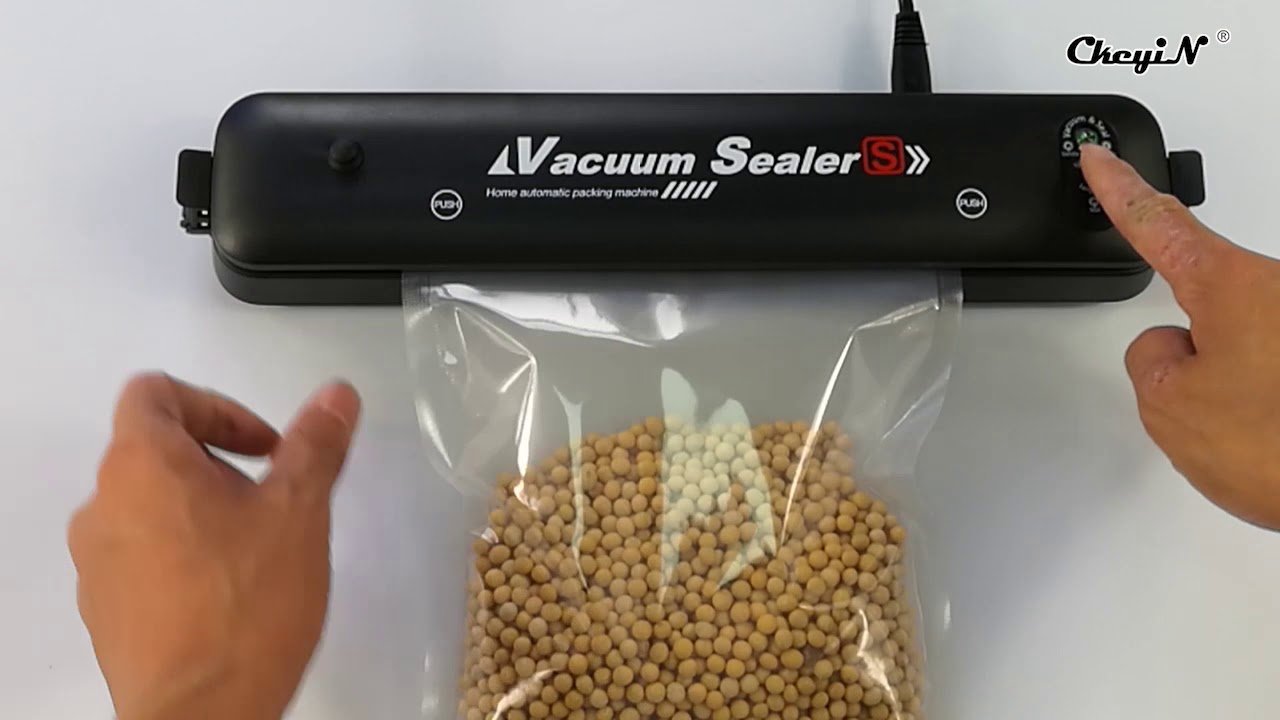
How To Use A Vacuum Sealer: Step-by-step Guide
Let’s walk through the basic process using a typical external vacuum sealer, which most people have at home.
Step 1: Prepare The Bag
- Cut a bag to the right size if using a roll.
- Place your food inside, leaving at least 2 inches between the food and the open edge.
- Make sure the bag is clean and dry.
Step 2: Place The Bag In The Sealer
- Put the open end of the bag into the sealing channel.
- Check that the bag is straight and flat.
Step 3: Set The Machine
- Choose the sealing mode: “Dry” for solid food, “Moist” for items with some liquid.
- Some models have settings for food type or bag thickness.
Step 4: Start Vacuum And Seal
- Press the “Vacuum & Seal” button.
- The machine removes air and seals the bag.
- Wait until the process is finished (usually 10–20 seconds).
Step 5: Check The Seal
- Inspect the seal line. It should be even and tight, with no gaps.
- If the seal is weak, run the machine again.
Step 6: Store The Bag
- Place the sealed bag in the fridge or freezer.
- Keep bags flat for easier stacking.
Pro Tip: Don’t overfill bags. If food is too close to the edge, sealing may fail.
Advanced Uses Of Vacuum Sealers
Vacuum sealers are not just for storing food. Here are some creative ways to use them:
- Sous vide cooking: Seal food in a bag for precise, water-bath cooking.
- Marinating: Vacuum sealing speeds up marinating by forcing flavors into meat.
- Protecting valuables: Seal important papers or electronics to keep them dry.
- Camping and travel: Seal toiletries or clothes for compact packing and water protection.
- Bulk buying: Buy in large quantities and seal smaller portions for later.
Some people use vacuum sealers for prepping emergency kits—sealing batteries, matches, and snacks for long-term storage.
Common Mistakes And How To Avoid Them
Beginners often make these errors:
- Wet bags: Moisture on the sealing edge can cause weak seals. Always dry the bag before sealing.
- Overfilling: Too much food in one bag prevents proper sealing.
- Wrong bag type: Using regular plastic bags instead of vacuum sealer bags leads to leaks.
- Ignoring machine maintenance: Dust, crumbs, or liquid inside the sealer can block the seal and damage the device.
- Not cooling the sealer: After several uses in a row, let the machine cool down to avoid overheating.
A common insight: Some foods, like bread, can get crushed during vacuum sealing. For delicate items, use the “gentle” mode or seal without full vacuum.
Credit: www.webstaurantstore.com
Cleaning And Maintenance
Proper care extends the life of your vacuum sealer and ensures reliable performance.
- Wipe the sealing bar: After each use, clean the sealing bar with a dry cloth.
- Empty drip tray: Some models have a tray for liquids. Empty and clean it regularly.
- Check for wear: Inspect the gasket (rubber seal) for cracks or damage.
- Avoid water: Never wash the machine under running water or submerge it.
- Store in a dry place: Keep the sealer away from moisture and heat.
A neglected vacuum sealer can break down quickly. Regular cleaning prevents most issues.
Choosing The Best Vacuum Sealer Bags
Bag quality matters. Here’s a comparison of popular bag types:
| Bag Type | Thickness | Reusable | Price (per 100) | Best For |
|---|---|---|---|---|
| Channel bags | 3–5 mil | No | $15–$30 | Home use |
| Chamber bags | 3–4 mil | Yes | $20–$50 | Liquids, bulk |
| Rolls | 4–5 mil | No | $20–$40 | Custom sizes |
Channel bags are most common for external sealers. Chamber bags are used in commercial settings. Rolls let you cut custom bag sizes.
Credit: www.youtube.com
How Long Does Vacuum Sealed Food Last?
Vacuum sealing greatly extends food shelf life. Here are some examples:
- Fresh meat: Up to 2–3 years in freezer (vs. 6 months normally)
- Cheese: 6 months in fridge (vs. 2 weeks)
- Vegetables: 1–2 years in freezer (vs. 8 months)
- Coffee beans: 1 year (vs. 3–5 months)
These numbers depend on food quality, storage temperature, and seal strength. Always check for signs of spoilage before use.
Safety Tips For Vacuum Sealing Food
Safety is important. Follow these tips:
- Use food-safe bags: Only use bags made for vacuum sealing and food storage.
- Cool hot food first: Never seal food while hot. Let it cool to room temperature.
- Freeze first for liquids: Prevent spills and bacteria growth.
- Don’t seal spoiled food: Vacuum sealing does not make bad food safe.
- Keep bags airtight: If the seal breaks, use a new bag.
Food safety is critical. Vacuum sealing slows spoilage but does not sterilize food.
Practical Tips And Insights
- Batch sealing: Seal several bags at once to save time.
- Double sealing: For extra security, seal the bag twice at the open end.
- Reuse bags: Chamber bags can be washed and reused; channel bags usually cannot.
- Store flat: Flat bags stack better and freeze faster.
- Monitor humidity: High humidity can affect seal quality.
A useful insight: Vacuum sealing nuts, grains, and dry goods keeps them fresh much longer. Also, sealing food before storing in the freezer prevents freezer burn, which can ruin taste and texture.
Using Vacuum Sealers For Sous Vide Cooking
Sous vide is a popular cooking method where food is sealed and cooked in water at a precise temperature.
- Seal meat, fish, or vegetables in a vacuum bag.
- Heat water to the desired temperature (usually 130–160°F for meat).
- Place the sealed bag in the water bath for several hours.
- Food cooks evenly and stays moist.
Vacuum sealing is essential for sous vide because it keeps water out and flavors in. For best results, use high-quality, heat-safe bags.
Vacuum Sealing Non-food Items
Vacuum sealers are useful for more than just food:
- Documents: Protect paper from moisture and insects.
- Electronics: Seal devices during travel or storage.
- Clothes: Compress for packing or long-term storage.
- Medical supplies: Keep bandages and medicines dry.
A non-obvious insight: Sealing items for travel can reduce luggage space and prevent spills.
Environmental Impact And Reusable Bags
Vacuum sealing does produce waste from single-use bags. Some brands offer reusable bags or eco-friendly materials. Chamber bags can often be washed and reused.
Consider these steps to reduce waste:
- Use reusable bags when possible.
- Buy bags made from recycled materials.
- Seal only what you need; avoid excess packaging.

Credit: ciarragadgets.com
Troubleshooting Common Problems
If your vacuum sealer isn’t working right, try these solutions:
- Seal won’t hold: Check for moisture or crumbs on the sealing edge. Clean and try again.
- Machine won’t start: Make sure the bag is placed correctly and the lid is closed fully.
- Weak vacuum: Inspect the gasket for damage. Replace if needed.
- Liquid in the machine: Use the “moist” setting or pre-freeze liquids.
If problems continue, check the user manual or contact the manufacturer.
For more details on food storage and safety, visit FoodSafety.gov.
Frequently Asked Questions
How Do I Know If My Vacuum Sealer Bag Is Food-safe?
Look for FDA-approved or BPA-free labels on the packaging. Most bags made for vacuum sealers are food-safe, but generic plastic bags may not be. Always buy from trusted brands.
Can I Vacuum Seal Liquids With An External Sealer?
It’s possible, but risky. Liquids can get sucked into the machine. To avoid damage, pre-freeze liquids before sealing or use a chamber sealer, which handles liquids easily.
How Often Should I Clean My Vacuum Sealer?
After each use, wipe the sealing area and empty any drip tray. Deep clean once a month, checking for crumbs, dust, or residue. Regular cleaning keeps the machine working well.
What Foods Should Not Be Vacuum Sealed?
Don’t vacuum seal soft cheeses, raw mushrooms, or garlic cloves—these can grow bacteria even without air. Also, avoid sealing hot food or food with high moisture unless you pre-freeze.
Is Vacuum Sealing Worth The Investment?
For most homes, yes. Vacuum sealing saves money by reducing waste, extends shelf life, and helps with meal prep. The upfront cost is balanced by food savings over time.
Vacuum sealers offer many benefits, from keeping food fresh to protecting valuables. With proper use and care, you’ll get the most from your machine and enjoy easier storage, better meals, and less waste.