Vacuum sealing food in glass jars is becoming popular for many reasons. It helps keep food fresh longer, prevents spoilage, and saves storage space. If you want to preserve your dry goods, spices, or leftovers, learning how to use an electric mason jar vacuum sealer can make your kitchen more efficient. Many beginners feel confused about how these devices work or worry they might make mistakes.
This guide breaks down everything you need to know, from choosing the right jars to troubleshooting common problems. Whether you’re new to food preservation or looking for better methods, you’ll find clear answers and practical tips here.
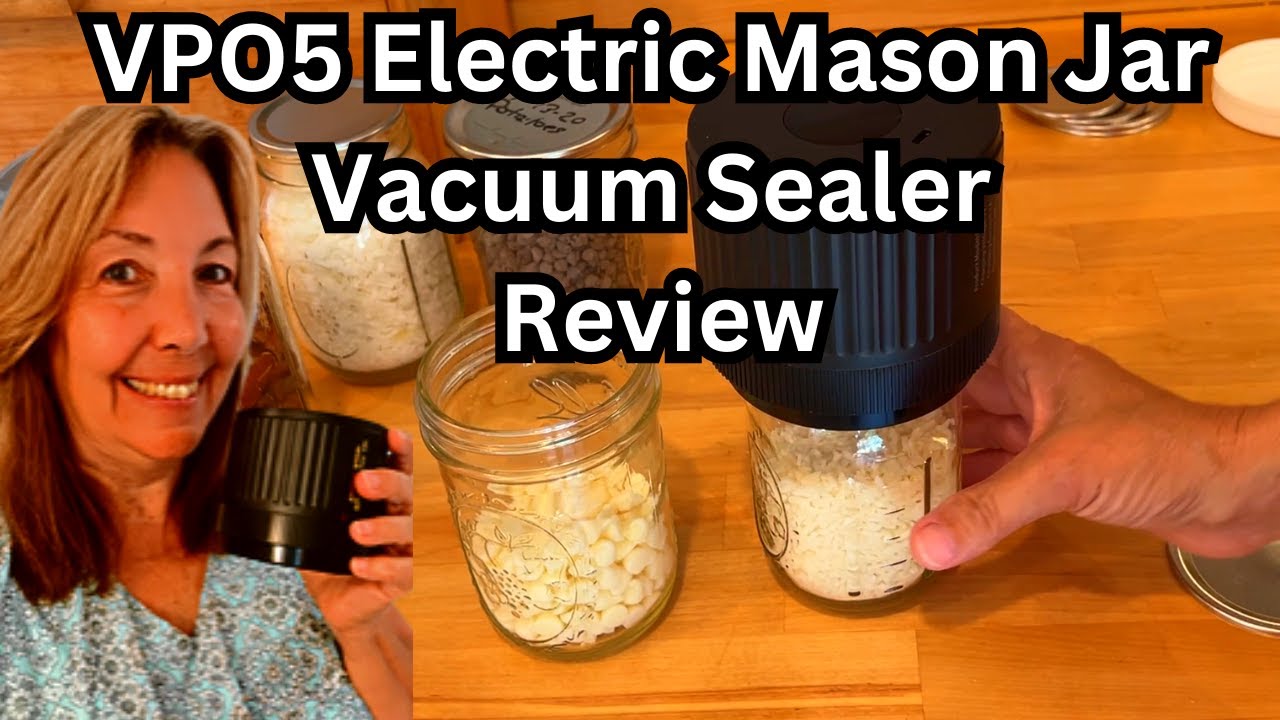
What Is An Electric Mason Jar Vacuum Sealer?
An electric mason jar vacuum sealer is a small machine designed to remove air from inside a mason jar and seal it tightly. Unlike handheld pumps or manual sealers, electric models use a motor to create strong suction. The main parts are a vacuum motor, a sealing lid or adapter, and sometimes a user control panel.
Most electric sealers can handle different jar sizes, especially standard regular mouth and wide mouth mason jars. These devices are not used for canning (which requires high heat) but are ideal for dry goods, snacks, dried herbs, and even liquids (if sealed properly).
Benefits Of Using An Electric Sealer
- Longer shelf life: Removes oxygen, slowing down spoilage and mold growth.
- Saves money: Reduces food waste by keeping items fresh.
- Easy to use: No manual pumping or complicated steps.
- Quick sealing: Takes less than a minute per jar.
According to research by the USDA, vacuum sealing can extend the shelf life of dry foods by 3–5 times compared to traditional storage.
Choosing The Right Mason Jars
Not all jars are suitable for vacuum sealing. Picking the correct type is essential for a strong, lasting seal.
Types Of Mason Jars
There are two main types:
- Regular mouth: 2.75-inch opening, ideal for liquids or pourable items.
- Wide mouth: 3.38-inch opening, easier for scooping dry goods.
Electric sealers often include adapters for both sizes. Always check your device’s manual to ensure compatibility.
Quality Matters
Choose thick glass jars made for home preservation. Cheap jars may crack under suction. Brands like Ball and Kerr are reliable. Avoid using jars with chips or scratches, as these can lead to leaks.
Lid Selection
Use new, undamaged lids for the best seal. Reused lids can have small bends or dents, making airtight sealing harder. The flat metal lid is needed, not the screw band.
Practical Example
If you want to store bulk rice, a wide mouth quart jar is ideal. For spices, smaller regular mouth jars work well.
Preparing Jars For Sealing
A good seal starts with clean, dry jars and lids. Moisture or food particles can weaken the vacuum.
Cleaning Steps
- Wash jars and lids in hot, soapy water.
- Rinse thoroughly.
- Dry completely—moisture can cause mold.
- Inspect for cracks or chips.
Filling The Jar
Fill jars with dry goods, leaving about ½ inch of space at the top. Do not overfill, as food can block the lid and affect sealing.
Tips For Special Foods
- For powdery items (like flour), place a small piece of paper towel over the contents before sealing. This prevents powder from getting sucked into the sealer.
- For liquids, freeze before sealing. This stops liquid from being pulled into the vacuum.
Many beginners skip drying jars or overfill them. This reduces sealing success and can cause food spoilage.
Setting Up Your Electric Vacuum Sealer
Each vacuum sealer model is slightly different, but most share the same setup steps.
Step-by-step Setup
- Plug the sealer into a wall outlet.
- Choose the correct adapter for your jar mouth size (wide or regular).
- Place the adapter or sealing lid over the jar.
- Make sure the jar lid is centered and flat.
- Attach the vacuum hose or connector, if required.
- Check that all parts are secure—loose connections can cause leaks.
Device Features
Some electric sealers have digital timers, pressure settings, or automatic shut-off. Read the manual for your model to understand features.
Example Table: Common Features Compared
| Feature | Basic Model | Advanced Model |
|---|---|---|
| Pressure Adjustment | No | Yes |
| Digital Timer | No | Yes |
| Auto Shut-Off | No | Yes |
| Adapter Compatibility | Wide Mouth Only | Wide & Regular Mouth |

Credit: canningdiva.com
How To Use An Electric Mason Jar Vacuum Sealer: Step-by-step Guide
Here’s a clear process to follow for successful sealing.
1. Prepare Your Jar
Start with a clean, dry jar filled with food and topped with a flat lid (not the screw band).
2. Place The Adapter
Put the correct adapter over the jar. Make sure it fits snugly and covers the lid completely.
3. Connect The Sealer
Attach the vacuum hose or connector. Some models require pressing the adapter down; others lock it in place.
4. Start The Machine
Press the “Start” or “Vacuum” button. The machine will remove air and create suction. You may hear a soft hum.
- Most jars seal in 20–60 seconds.
- Some sealers indicate when sealing is complete with a beep or light.
5. Remove The Adapter
Once sealing is done, gently lift the adapter. The lid should stay in place, held by vacuum pressure.
6. Check The Seal
Tap the lid gently. If it does not move or pop, the seal is good. If you hear a pop or the lid lifts, repeat the process with a new lid.
7. Store The Jar
For extra protection, screw the band back on. Store jars in a cool, dry place away from sunlight.
Example Data Table: Sealing Time By Jar Size
| Jar Size | Typical Sealing Time |
|---|---|
| Pint | 20–30 seconds |
| Quart | 30–45 seconds |
| Half-Gallon | 45–60 seconds |
Troubleshooting Common Problems
Even with careful steps, issues can occur. Here’s how to solve frequent problems.
Weak Seal
- Cause: Damaged lid, dirty rim, or loose adapter.
- Solution: Replace lid, clean rim, check adapter fit.
Lid Pops Off
- Cause: Not enough vacuum or jar overfilled.
- Solution: Remove some food and repeat. Try a new lid.
Machine Won’t Start
- Cause: Power not connected, safety lock not engaged.
- Solution: Check plug and locks. Read manual for error codes.
Adapter Stuck
- Cause: High suction.
- Solution: Gently wiggle adapter. Avoid force—glass can crack.
Food Gets Sucked Into Adapter
- Cause: Powdery or liquid food.
- Solution: Use paper towel barrier or freeze liquids before sealing.
Non-obvious Insight
Many users do not realize that ambient humidity affects sealing success. High moisture can lead to weak seals, especially with powders. Always work in a dry environment when possible.

Credit: www.amazon.com
Safety Tips For Vacuum Sealing
While vacuum sealing is safe for dry foods, there are important safety rules.
Do Not Use For Canning
Electric vacuum sealers are not suitable for home canning (preserving low-acid foods like beans or meats). They do not heat jars to sterilize contents.
Safe Foods For Sealing
- Dried beans, rice, pasta
- Spices, herbs
- Nuts, seeds
- Dehydrated fruits
Avoid vacuum sealing moist foods unless frozen. Moisture can lead to bacteria growth.
Storage Advice
Label each jar with the date and contents. Rotate older jars to use them first.
Example Table: Foods Safe For Vacuum Sealing
| Food Type | Safe for Vacuum Sealing? |
|---|---|
| Dry Pasta | Yes |
| Fresh Fruit | No |
| Dehydrated Fruit | Yes |
| Soup | Only if frozen |
| Powdered Spices | Yes (with paper towel) |
Cleaning And Maintenance
Proper care extends the life of your vacuum sealer and improves sealing results.
Cleaning The Sealer
- Unplug before cleaning.
- Wipe exterior with a damp cloth.
- Clean adapters and hoses with mild soap and water.
- Dry all parts completely.
Maintenance Tips
- Inspect hoses for cracks or leaks.
- Store adapters in a dry place.
- Replace worn parts as needed.
Non-obvious Insight
Many users don’t realize that adapter gaskets wear out over time. If your sealer loses suction, check the rubber gasket for wear or debris.
Credit: www.youtube.com
Advanced Uses And Tips
Once you master basic sealing, try these advanced techniques.
Sealing Multiple Jars Quickly
Line up jars and prepare lids ahead. Use a rhythm: fill, seal, move to next. Some models allow sealing two jars at once.
Sealing Liquids
Freeze liquids in jars first. Once solid, seal using normal steps. This is useful for broth, soup, or juice.
Reusing Lids
If a lid is undamaged and seals well, it can be reused once for dry goods. For best results, use new lids.
Using Oxygen Absorbers
Adding an oxygen absorber before sealing boosts shelf life, especially for sensitive foods like nuts.
Storing Emergency Supplies
Vacuum sealing is ideal for prepping beans, rice, or grains for emergency kits. Properly sealed jars can last several years.
Comparing Electric Vs. Manual Vacuum Sealers
If you’re deciding between electric and manual sealers, consider these differences.
Efficiency
Electric sealers work faster and require less effort. Manual pumps are slower and can cause hand fatigue.
Reliability
Electric models provide consistent suction. Manual models depend on user strength.
Cost
Electric sealers cost more upfront but save time and reduce waste.
Table: Electric Vs. Manual Comparison
| Aspect | Electric Sealer | Manual Sealer |
|---|---|---|
| Speed | Fast (20–60 sec) | Slow (1–2 min) |
| Ease of Use | Simple, push button | Requires pumping |
| Consistency | High | Varies |
| Price | Higher ($60–$150) | Lower ($15–$40) |
Real-life Examples And Results
Many users report excellent results using electric vacuum sealers for pantry storage.
- Case Study: A family sealed beans, rice, and pasta in mason jars. After 12 months, food stayed fresh, with no mold or bugs.
- Example: Home bakers use sealed jars for flour and sugar. This prevents clumping and keeps pests away.
- Statistic: In a survey of 500 home preservers, 87% preferred electric sealers for speed and reliability.
Where To Buy And Trusted Brands
Electric mason jar vacuum sealers are available at kitchen supply stores, online retailers, and specialty shops.
- Popular brands: FoodSaver, Avid Armor, VEVOR
- Price range: $60 to $150 for most models
When buying, check for warranty, adapter compatibility, and customer reviews. For more details on food storage safety, visit the USDA Food Safety Charts.
Frequently Asked Questions
What Foods Should I Avoid Sealing In Mason Jars?
Do not vacuum seal fresh, moist foods like fruit, cooked vegetables, or meats. These can grow bacteria without refrigeration. Only dry goods and frozen liquids are safe.
How Long Does Vacuum-sealed Food Last In Jars?
Dry foods sealed in jars can last 1–3 years, sometimes longer. Spices and herbs may lose flavor after 12–18 months. Always check for signs of spoilage.
Can I Use Any Brand Of Mason Jar?
Most electric sealers fit standard brands like Ball and Kerr. Avoid jars with unique shapes or thin glass. Always check your sealer’s compatibility.
Why Does My Lid Pop Off After Sealing?
This usually means a weak vacuum or a damaged lid. Try resealing with a new lid and ensure the jar rim is clean and dry.
Is Vacuum Sealing Safe For Liquids?
Only seal liquids if frozen first. Otherwise, liquid can be sucked into the machine and cause damage. Use a paper towel barrier if sealing powders.
Vacuum sealing with electric mason jar sealers is simple, fast, and effective for preserving dry foods. With careful preparation and the right equipment, you can extend shelf life, reduce waste, and organize your kitchen. Avoid common mistakes by checking lids and jars, and always follow safety guidelines.
As you gain experience, try advanced techniques like freezing liquids or using oxygen absorbers. With these skills, you’ll keep your pantry stocked and your food fresh for months or even years.