Few kitchen tools deliver as much function per square inch of drawer space as an immersion blender. This handheld wand—sometimes called a stick blender or hand blender—purees, blends, whips, and emulsifies food directly in the pot, bowl, or jar you are already using. No transferring hot soup to a countertop jar. No wrestling with a heavy glass pitcher. No lugging a bulky appliance out of the cabinet for a thirty-second job.
Instead, you lower the stainless steel shaft into your ingredients and blend them in place. The design removes most of the hassle, danger, and cleanup associated with traditional countertop blenders, which is why it has become a staple in many home kitchens. This guide covers the five main benefits, where the tool falls short, how it compares to a full-size blender, and what to look for before you buy. You can also read our guide on mini blenders for baby food.
The wand goes straight into the pot, so soup never needs to be poured into a separate blender jar.
What Is an Immersion Blender?
An immersion blender is a compact electric appliance consisting of three main parts: a motor housed in the handle, a long narrow shaft, and a blade guard at the base. You grip the handle above the liquid while the shaft and blades do the work below the surface. Most models are corded, though cordless versions have improved considerably in recent years, and they typically range from 200 to 600 watts of power.
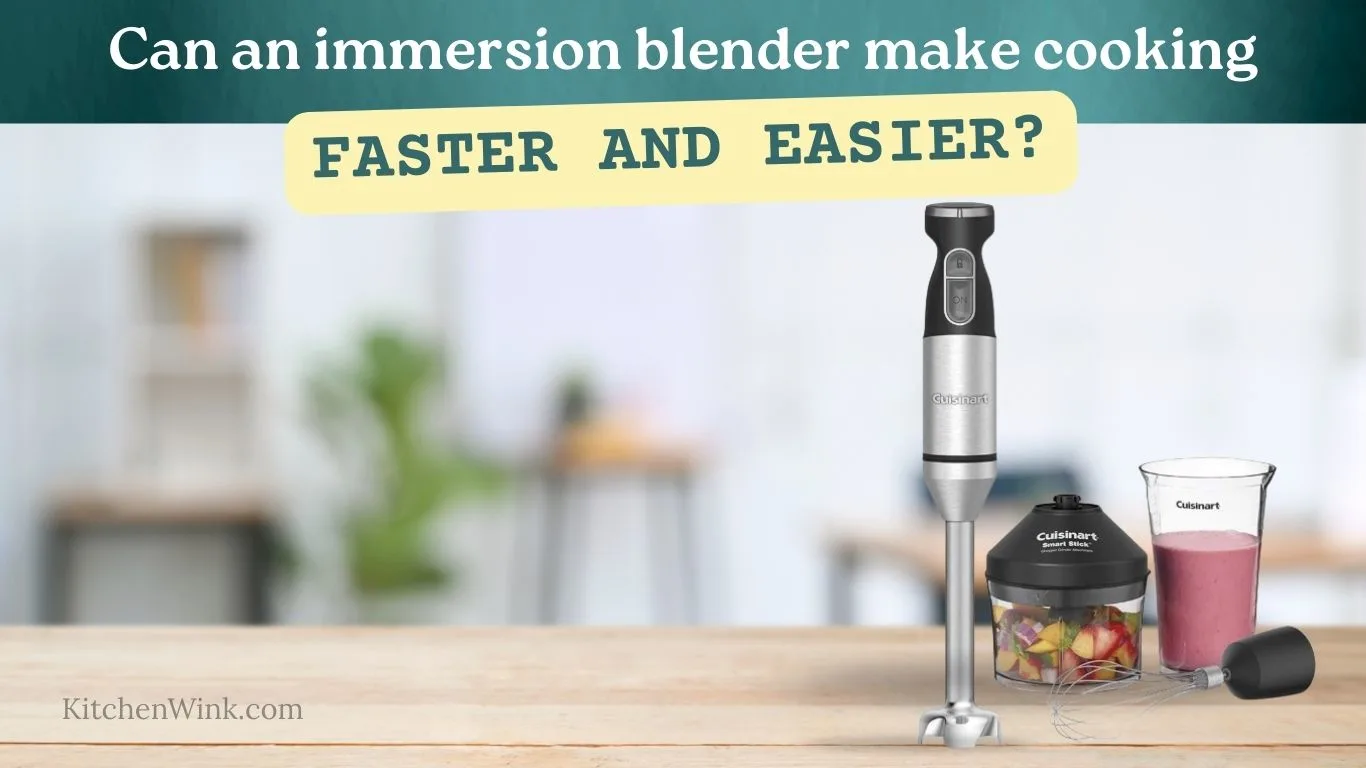
What makes the tool so versatile is its accessory system. Most units ship with:
- A whisk attachment for whipping cream, egg whites, and emulsifying dressings
- A small beaker for single-serving smoothies, sauces, and purees
- Sometimes a mini chopper bowl for small quantities of onions, herbs, or nuts
Because the motor never touches the food, cleanup is remarkably simple. You detach the shaft and blade assembly, rinse it under hot water, and you are done. The motor handle only needs a quick wipe with a damp cloth. You can also read our guide on benefits of rechargeable immersion blender.
The 5 Key Benefits of an Immersion Blender
These five benefits explain why so many home cooks reach for a stick blender several times a week.
1. It Blends Hot Soups and Sauces Right in the Pot
This is the signature use. Creamy vegetable soups, tomato bisque, butternut squash soup, and bean soups all benefit from being pureed directly in the pot in which they were cooked. With a countertop blender, you would need to let the soup cool to a safe temperature, pour it into the jar in batches, blend, and then pour it back into the pot. That process is slow, messy, and carries a real risk of hot liquid splashing out.
An immersion blender eliminates every bit of that transfer.
A common mistake: blending with the blade too close to the surface, which causes splatter. Instead, keep the blade fully submerged and move the wand in slow circles while lifting it gently. For a completely silky texture, give it a full minute of blending. For a chunkier rustic soup, use two or three quick pulses and stop. You can also read our guide on how to clean immersion blender.
The same technique works for pan sauces and gravies. After you have deglazed the pan and reduced your liquid, blend it right there to incorporate the fond and thicken the sauce without lumps. The food goes from stovetop to bowl without a single transfer, which means it also stays hotter.
2. It Makes Emulsions Like Mayonnaise and Vinaigrettes Effortlessly
Emulsions are the classic culinary challenge: combining oil and water-based liquids into a stable, creamy mixture. Traditional methods require a slow, steady stream of oil while whisking constantly—a skill that takes practice. An immersion blender simplifies the process because its fast-spinning blades mechanically break oil into tiny droplets that remain suspended in vinegar, lemon juice, or egg yolk. You can also read our guide on what does a sauce pan do.
The classic example is homemade mayonnaise. In a tall jar, combine one egg yolk, a teaspoon of Dijon mustard, a tablespoon of lemon juice, and a pinch of salt. Pour a cup of neutral oil (like grapeseed or avocado) on top. Place the blender at the bottom of the jar and pulse on low, keeping it stationary. As the emulsion forms at the base, you will see it turn pale and creamy. Lift the wand slowly to incorporate the remaining oil. In about thirty seconds, you have thick, stable mayonnaise.
The same technique produces:
- One-jar vinaigrettes that stay emulsified on the salad
- Hollandaise sauce for eggs Benedict
- Aioli and garlic sauces
- Chimichurri and other herb-based sauces
Because the blender sits directly in the jar, you never juggle a drizzle of oil and a whisk at the same time. This is a genuine skill-replacement tool: it makes a technically difficult task reliable for beginners. You can also read our guide on best immersion blenders for protein shakes.
3. It Whips Cream and Egg Whites in Under Two Minutes
A stand mixer is overkill for a single serving of whipped cream, and a hand whisk takes several minutes of steady effort. The whisk attachment on most immersion blenders solves this problem elegantly.
Pour one cup of cold heavy cream into the included beaker or any narrow jar, add a tablespoon of sugar and a splash of vanilla. The cream needs to cover the whisk head completely—this is critical for proper aeration. Start on low speed and move the wand up and down in a gentle motion. Soft peaks will appear in about a minute; stiff peaks follow within another thirty seconds. You can also read our guide on best stainless steel frying pans.
The same attachment whips egg whites for meringues, soufflés, and fluffy omelets. The key is ensuring your bowl and whisk are completely clean and free of any fat residue, which prevents the whites from aerating.
A practical trade-off: a hand mixer or stand mixer is still faster for a full carton of cream or a six-egg-white meringue. But for most home quantities—a dessert topping, a mug of hot chocolate, a weekend soufflé—the immersion blender is the most convenient option by far. You can also read our guide on best vegetable chopper.
4. It Purées Baby Food and Single-Serving Smoothies With Total Control
Homemade baby food is one of the best uses for an immersion blender, because you control texture exactly. Steam or boil vegetables like sweet potato, carrots, or peas, drain the excess water, and blend them right in the pot. You can achieve a completely smooth puree for a six-month-old, or a thicker, chunkier texture for an older baby who is learning to chew.
For practical food-safety details on storing homemade purees, USDA's food-safety resources are a reliable place to start. Proper storage and refrigeration prevent bacterial growth in freshly prepared baby food. You can also read our guide on best stainless steel spatula.
The blender also handles single-serving smoothies and protein shakes, especially when you use soft fruit, yogurt, or protein powder. It will not crush ice like a countertop blender, but for a quick berry blend or a rushed morning shake, the easy cleanup is worth it. The included beaker is exactly the right size, so you blend and drink from the same vessel.
5. It Saves Counter Space and Speeds Up Cleanup
A countertop blender is bulky and tends to live permanently on the counter, occupying valuable workspace. An immersion blender fits in a drawer and takes up almost no space—a major advantage in small kitchens where every inch counts. You can also read our guide on best julienne peeler.
Cleanup is equally simple. Most models have a detachable shaft that rinses under hot water in seconds. There is no heavy glass jar to scrub, no vented lid to disassemble, and no drying rack required. For an every-day-use tool, this convenience is the difference between using it and avoiding it.
Because you blend directly in the cooking pot, your food also stays hotter. The heat does not escape during a transfer, and you end up with one pot to wash instead of a pot, a blender jar, and a lid. When you add a stick blender to your routine, you will likely notice your after-dinner cleanup time drops.
Where an Immersion Blender Falls Short
Honest assessment matters. An immersion blender is not a full replacement for a countertop blender, and understanding the limitations helps you use each tool where it excels.
Power and containment: The tool has less power and no enclosed jar, so it cannot reliably crush ice or pulverize frozen fruit for thick smoothies. Frozen berries will spin around the blade without fully breaking down.
Wet ingredients preferred: Heavy mixtures like nut butter or thick dough will strain the motor and require constant manual movement of the wand. The tool works best when there is enough liquid to circulate freely around the blade.
Batch size: Large batches take longer because the blade only reaches the area immediately around the wand. You must move it continuously, which becomes tiring over time.
Scratching risk: The metal blade guard can scratch nonstick pots if you press it against the coating. Use a gentle lifting motion instead of scraping, and consider transferring to a stainless steel bowl for delicate pans. This same caution applies to enameled cast iron.
Immersion Blender vs. Countertop Blender: How to Choose
Both tools have a place in a well-equipped kitchen, but their strengths are distinct. If you are deciding which one to purchase first, this comparison clarifies the differences.
| Feature | Immersion Blender | Countertop Blender |
|---|---|---|
| Best for | Soups, sauces, dressings, small batches | Frozen drinks, thick smoothies, nut butters |
| Hot liquids | Blends safely in the pot | Must cool and transfer in batches |
| Space needed | Fits in a drawer | Needs permanent counter space |
| Cleanup time | Under a minute | Several parts, more work |
| Maximum batch | Limited by pot depth | Large, often 64 oz or more |
| Typical power | Around 200–600 watts | Around 500–1,500 watts |
The core difference is power and containment. A countertop blender uses a bigger motor and a fixed jar to crush ice, break down frozen fruit, and process large quantities. An immersion blender is better for wet, hot, and small-to-medium tasks.
Many cooks own both. The immersion blender handles the quick daily jobs—soup, dressing, sauce, single portions—while the countertop blender comes out for serious blending sessions like frozen margaritas or large-batch smoothies. If you have to start with one, consider what you cook most often. Soup makers and sauce enthusiasts will use the immersion blender almost daily.
What to Look For When Shopping in 2026
Modern immersion blenders are quieter, more efficient, and better built than older models. If you are shopping today, these features matter most.
Motor and Speed Control
Look for variable speed control rather than a single on-off trigger. A low-speed setting gives you precision and helps prevent splatter when blending in a shallow pot. Most home models in the 300–500 watt range handle everyday jobs without struggling. Cordless models have improved significantly in terms of battery life, but corded models still offer the most consistent power for heavy or hot blending. If you need maximum power for soups with root vegetables, a corded model is the safer choice.
Shaft, Blade, and Attachments
Several features make the tool far more useful. Prioritize these:
- Detachable shaft: Essential for thorough cleaning and long-term hygiene.
- Stainless steel shaft: Resists staining from turmeric, tomato, and beets better than plastic. Plastic shafts can warp from heat.
- Whisk attachment: Covers cream, eggs, and emulsions, expanding the tool's usefulness significantly.
- Narrow beaker: Ideal for small batches and whipped cream, since the wand needs a tall, narrow container to work efficiently.
- Mini chopper bowl: Handles small quantities of onions, herbs, and nuts that would be tedious to chop by hand.
A turbo button is a nice extra but not essential. For most cooking, a wide speed range matters more than a sudden burst of power.
Comfort and Build Quality
Weight and balance matter more than brand reputation. A heavy, awkwardly balanced blender will tire your hand before the soup is smooth. Look for a comfortable grip, a well-placed switch that your fingers can reach naturally, and a shaft long enough to reach the bottom of a standard stockpot without the motor housing getting close to the steam. A shaft of at least 10 inches is a good benchmark.
Cleaning and Storage Features
The best model is the one you are willing to clean. Choose a design with a removable shaft that can be rinsed immediately after use. Many modern models have dishwasher-safe shafts, which makes the cleaning habit even easier to maintain. Store the motor with the blade guard facing down or in a drawer organizer so the shaft does not get knocked.
How to Use an Immersion Blender Safely
The blade is sharp and fast, and hot liquid splatter is the main hazard. A few safety habits are worth building from the first use.
Safe Blending Habits
- Always unplug the blender before changing attachments or cleaning it.
- Keep the blade fully submerged while blending to avoid splattering hot liquid.
- Start on low speed and increase slowly. High speed on entry creates a vortex.
- Do not rest your hand over the pot where steam can escape during blending.
- Never scrape the moving blades with a spoon or spatula, even when the motor is off but the blade is still spinning down.
- Let the motor rest for a minute if you have been blending continuously, especially at high speed. This prevents overheating.
If you buy a used blender, it is smart to check CPSC recall notices before plugging it in. This is a quick, free check that can prevent electrical hazards.
Cleaning and Maintenance
Unplug the unit, detach the shaft, and rinse it under hot water immediately after use. Dried-on food is much harder to remove. Wash the shaft with warm, soapy water or place it on the top rack of the dishwasher if the manufacturer says it is safe.
Wipe the motor handle with a damp cloth. Never submerge the motor base in water. Pay attention to the air vents at the top of the handle—these can collect grease splatter over time and benefit from an occasional wipe. Dry the blade assembly completely before storing to keep the metal housing in good condition.
Three Quick Ways to Test Your Immersion Blender
The fastest way to understand a tool is to use it. These three recipes are simple, reliable, and show off what the blender does best.
Silky Tomato Soup
Sauté a chopped onion in olive oil in a heavy-bottomed pot until soft, then add two cloves of garlic, a can of whole tomatoes, and a cup of vegetable stock. Simmer for fifteen minutes, then blend directly in the pot until completely smooth. Finish with a splash of cream and a pinch of salt. This recipe teaches you the lifting motion and the difference between a quick pulse and a full blend. For a smooth texture with no seeds, use whole peeled tomatoes rather than crushed.
One-Jar Vinaigrette
Combine a tablespoon of Dijon mustard, a tablespoon of red wine vinegar, a pinch of salt, and a cup of olive oil in a tall jar. Place the blender at the bottom, pulse, and lift slowly as the emulsion forms. The dressing thickens and clings to salad leaves rather than separating. Scrape down the sides if needed. This recipe demonstrates the emulsifying power in under a minute.
Fresh Whipped Cream
Pour one cup of cold heavy cream into the included beaker or a narrow jar. Add a tablespoon of sugar and a splash of vanilla. Attach the whisk, then blend on low, moving the wand up and down until soft peaks form. The transformation takes about a minute and shows why the whisk attachment is worth having.
Final Thoughts
The immersion blender solves everyday cooking problems without taking over the kitchen. It blends hot soup safely, makes emulsions in seconds, whips cream quickly, and leaves you with very little cleanup. It will not replace a full-size blender for ice and frozen drinks, but it covers the jobs most home cooks do on a regular basis.
If you want a compact tool that encourages more homemade cooking, start with a pot of soup and blend it right where it sits. That one experience will show you why the immersion blender is one of the most-used tools in the kitchen.
Once your blending setup is sorted, the next step is making sure the rest of your kitchen runs efficiently. Keeping your cooking space well maintained is part of that routine, as is upgrading your everyday cookware over time. For more practical equipment advice, browse our kitchen guides.
Frequently Asked Questions
Can an immersion blender crush ice?
Not well. Most stick blenders lack the power and enclosed jar needed to crush ice into snow. They can handle a few small cubes in a liquid base, but for frozen drinks, thick smoothies, or large batches, a countertop blender works better.
Can you use an immersion blender in a nonstick pot?
Technically yes, but keep the blade guard off the bottom and sides. The metal guard can scratch nonstick coating if you press down or scrape while blending. Use a lifting and stirring motion, or transfer to a stainless steel bowl if you are worried about the coating.
Is an immersion blender worth it if I already have a countertop blender?
Yes, for most kitchens. It does not replace a full-size blender, but it covers the daily small jobs: hot soup, salad dressing, single-serving purees, and whipped cream. You will use the countertop blender less often and wash fewer parts.
How do I clean an immersion blender?
Unplug it first. Most models have a detachable shaft, so rinse it under hot water immediately, wash it with soap and a sponge, and dry it. If it is dishwasher-safe, place it on the top rack. Wipe the motor handle with a damp cloth and never submerge it.
Why does food splatter out of the pot when I blend?
Splatter usually happens when the blades are too close to the surface or the speed is too high. Keep the blade guard fully submerged, start on low, and use a taller, narrower pot or the included beaker. Tilting the wand at a slight angle also helps direct the flow downward instead of upward.